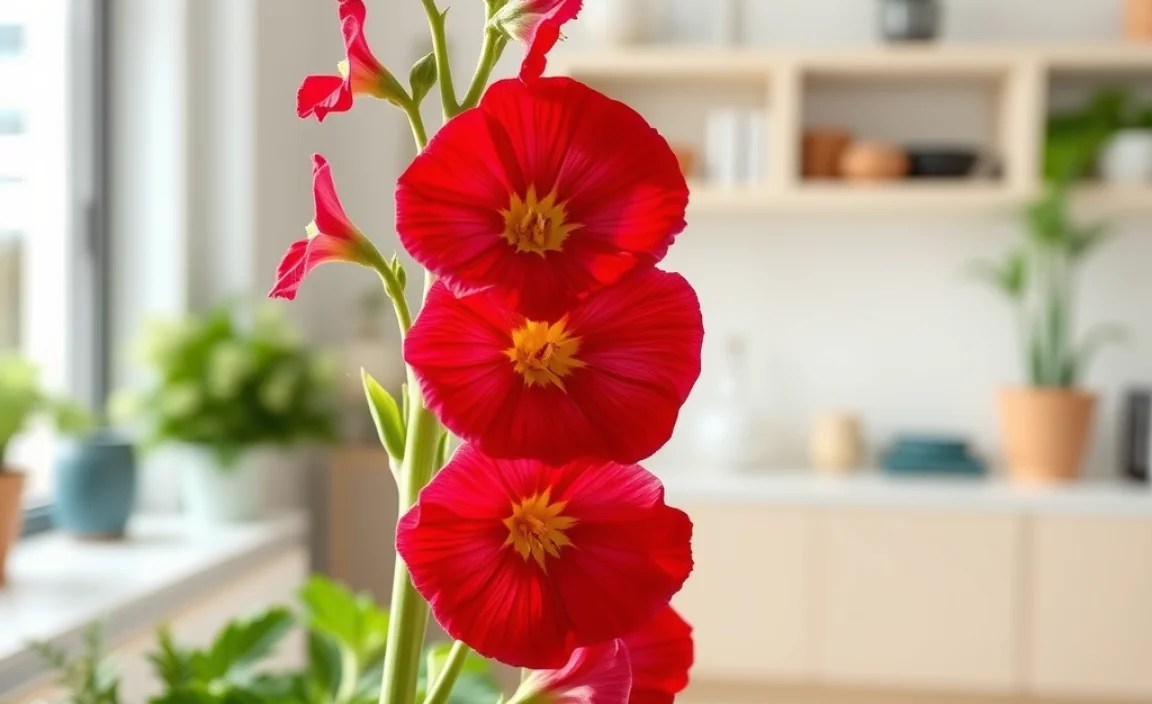
Have you ever seen a flower so tall it seems to touch the sky? That might be a hollyhock! These amazing plants can grow hollyhocks up to eight feet tall. They come in many pretty colors. It is fun to watch them sway in the breeze.
Do you want to know how to grow hollyhocks in your own garden? It is easier than you think! Hollyhocks are great for attracting bees and butterflies. Let’s learn how to make these beauties thrive.
Hollyhocks are not just pretty. They are also tough plants. They can handle different kinds of weather. With a little care, you can have a garden full of these stunning flowers. Are you ready to start?
Key Takeaways
- Growing hollyhocks adds vibrant colors and impressive height to any garden.
- Hollyhocks need full sun and well-drained soil to grow best.
- Water hollyhocks regularly, especially during dry spells, to help them thrive.
- Protect tall hollyhocks from strong winds by staking them for support.
- Deadheading spent flowers encourages more blooms and a longer flowering season.

Best Time to Grow Hollyhocks
Knowing when to plant is key to grow hollyhocks successfully. Hollyhocks are often planted in the spring or fall. Spring planting allows them to establish before the heat of summer. Fall planting gives them a head start for the next growing season. Consider your local climate when deciding the best time. In warmer areas, fall planting is often preferred. This avoids the intense summer heat that can stress young plants. In colder regions, spring planting is safer. It ensures the plants have enough time to mature before winter. No matter when you plant, make sure the soil is ready. Proper soil preparation is vital for healthy growth. This includes adding compost or other organic matter to improve drainage and fertility. Choosing the right time and preparing the soil will set your hollyhocks up for success. It will lead to a beautiful display of colorful blooms.
- Plant in spring or fall.
- Consider your local climate.
- Prepare the soil well.
- Add compost for nutrients.
- Ensure good drainage.
Timing truly is everything. Imagine planting your hollyhocks too late in the spring. The summer heat might arrive before they get strong. Or picture planting in the fall, only for a harsh winter to hit. The young plants might not survive. By paying attention to the seasons and your local weather, you give your hollyhocks the best chance. They will grow strong and tall. They will fill your garden with stunning color. Remember to check your area’s specific planting guidelines. Local nurseries and gardening resources are great for advice. They can tell you the ideal time to grow hollyhocks in your region. Happy planting!
Fun Fact or Stat: Hollyhocks are biennials, meaning they typically grow leaves the first year and flower the second year.
Spring Planting for Hollyhocks
Spring is a popular time to plant many flowers. Spring can be a great time to plant hollyhocks too. When you grow hollyhocks in the spring, they have the whole summer to grow. They can develop strong roots. This will help them survive the next winter. Pick a spot that gets lots of sunlight. Hollyhocks love the sun. Make sure the soil drains well. Wet soil can hurt their roots. Prepare the soil by adding compost. This gives them extra nutrients. Water them regularly after planting. This helps them get settled in their new home. Keep an eye on the weather. Protect them from late frosts. A little care in the spring will lead to beautiful flowers later on.
Fall Planting for Hollyhocks
Fall is another good time to plant hollyhocks. Did you know that fall planting lets the plants get a head start? When you grow hollyhocks in the fall, they can start growing roots before winter. This means they will be stronger in the spring. Choose a sunny spot for planting. Make sure the soil is well-drained. Add some compost to enrich the soil. Water the plants regularly. Mulch around the base of the plants. This helps protect them from the cold. Fall planting can lead to earlier blooms next year. It gives your hollyhocks an advantage. They will be ready to grow as soon as the weather warms up.
Ideal Weather Conditions
Hollyhocks love certain kinds of weather. What kind of weather is best to grow hollyhocks? They like sunny days and mild temperatures. They can handle some heat, but they do not like very hot weather. They also need enough water. Dry weather can make them wilt. Cold weather can hurt young plants. If you live in a place with very hot summers, give your hollyhocks some shade in the afternoon. If you live in a place with cold winters, protect the plants with mulch. Pay attention to the weather forecast. Adjust your watering schedule as needed. With the right weather conditions, your hollyhocks will thrive. They will reward you with beautiful, tall flowers.
Choosing the Right Location
Where you plant your hollyhocks is very important. The right location can make all the difference. Hollyhocks need plenty of sunlight to grow hollyhocks. Choose a spot in your garden that gets at least six hours of sun each day. Also, consider the soil. Hollyhocks like well-drained soil. This means the water should not sit on top of the soil. It should soak in easily. If your soil is heavy clay, add some compost or other organic matter. This will help improve drainage. Think about the height of hollyhocks. They can grow very tall, so plant them where they will not block sunlight from other plants. Also, consider wind protection. Strong winds can damage tall hollyhocks. A spot near a fence or wall can provide some shelter. With the right location, your hollyhocks will thrive.
- Choose a sunny spot.
- Ensure well-drained soil.
- Consider plant height.
- Provide wind protection.
- Add organic matter.
Imagine planting your hollyhocks in a shady spot. They might not get enough sunlight. They might grow weak and spindly. Or picture planting them in heavy, clay soil. The roots might sit in water. This can cause them to rot. By carefully choosing the right location, you can avoid these problems. You can create the perfect environment for your hollyhocks to thrive. Remember to observe your garden throughout the day. Note where the sun shines and where the soil stays wet. This will help you find the best spot to grow hollyhocks. A little planning can make a big difference in the health and beauty of your plants.
Fun Fact or Stat: Hollyhocks can grow up to 8 feet tall, making them a dramatic addition to any garden.
Sunlight Requirements
Sunlight is super important for hollyhocks. Do you know how much sun they need to grow hollyhocks? They need at least six hours of sunlight every day. Sunlight helps them make their own food. This food helps them grow tall and strong. If they do not get enough sun, they might not bloom well. They might also be more likely to get sick. Choose a spot in your garden that gets lots of sun. Watch the area throughout the day. Make sure it stays sunny for at least six hours. If you do not have a very sunny spot, you can try using grow lights. These lights can help give your hollyhocks the extra sunlight they need. Sunlight is the key to healthy, happy hollyhocks.
Soil Drainage
Good soil drainage is also really important. Why does soil drainage matter when you grow hollyhocks? If the soil stays too wet, the roots can rot. Root rot is a big problem for hollyhocks. It can kill the plants. Make sure your soil drains well. You can test the drainage by digging a hole and filling it with water. If the water takes a long time to drain, your soil might not drain well. You can improve drainage by adding compost or other organic matter to the soil. You can also plant your hollyhocks in raised beds. Raised beds help the water drain away from the roots. Good drainage is essential for healthy hollyhocks.
Wind Protection
Wind can be tough on hollyhocks. How do you protect them when you grow hollyhocks? Because they grow so tall, they can be easily damaged by strong winds. The wind can break their stems. It can also knock them over. Plant your hollyhocks in a spot that is sheltered from the wind. A fence or wall can help block the wind. You can also use stakes to support the plants. Drive a stake into the ground near each plant. Tie the plant to the stake with soft twine. This will help keep the plant from falling over. Wind protection is important for keeping your hollyhocks healthy and strong.
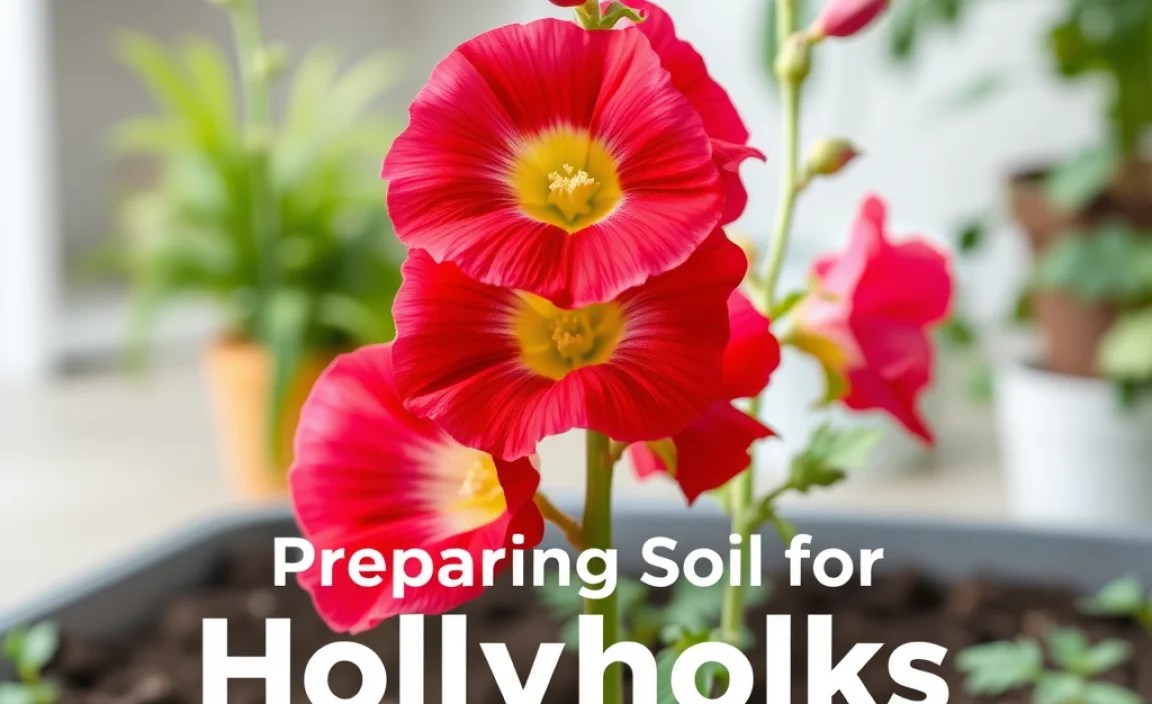
Preparing the Soil for Hollyhocks
Good soil is the foundation for healthy hollyhocks. How do you get the soil ready to grow hollyhocks? Start by clearing the area. Remove any weeds, rocks, or debris. Then, dig the soil. Loosen it up to a depth of about 12 inches. This helps the roots grow easily. Next, add compost or other organic matter. Compost improves the soil’s drainage and fertility. Mix the compost into the soil well. You can also add a slow-release fertilizer. This gives the plants a steady supply of nutrients. Smooth out the soil surface. Rake it to create a level planting bed. Water the soil before planting. This helps settle it and provides moisture for the new plants. With well-prepared soil, your hollyhocks will have a great start.
- Clear the planting area.
- Dig and loosen the soil.
- Add compost for nutrients.
- Mix in slow-release fertilizer.
- Rake the soil smooth.
Imagine planting your hollyhocks in hard, compacted soil. The roots would struggle to grow. They might not be able to get the nutrients they need. Or picture planting them in soil that is full of weeds. The weeds would compete with the hollyhocks for water and sunlight. By taking the time to prepare the soil properly, you can avoid these problems. You can create a perfect environment for your hollyhocks to thrive. Remember to test your soil’s pH. Hollyhocks prefer slightly acidic to neutral soil. You can buy a soil testing kit at most garden centers. A little extra effort in soil preparation will pay off in healthy, beautiful plants when you grow hollyhocks.
Fun Fact or Stat: Adding coffee grounds to the soil can help improve its acidity, which hollyhocks love.
Removing Weeds and Debris
Weeds can be a big problem for hollyhocks. How do you keep them away when you grow hollyhocks? Weeds steal water and nutrients from your plants. They can also spread diseases. Before you plant, make sure to remove all weeds from the area. Pull them out by the roots. You can also use a hoe to chop them up. Remove any rocks, sticks, or other debris from the soil. These things can get in the way of the roots. After planting, keep an eye out for new weeds. Pull them as soon as you see them. You can also use mulch to help prevent weeds. Mulch blocks sunlight, which weeds need to grow. Keeping your garden weed-free will help your hollyhocks thrive.
Adding Compost and Nutrients
Compost is like a superfood for plants. Why is it so important when you grow hollyhocks? It adds lots of good stuff to the soil. Compost helps the soil hold water. It also provides nutrients that the plants need to grow. You can make your own compost at home. Or you can buy it at a garden center. Spread a layer of compost over the soil before planting. Mix it in well with a shovel or garden fork. You can also add other nutrients, like fertilizer. Choose a fertilizer that is made for flowering plants. Follow the instructions on the package. Adding compost and nutrients will help your hollyhocks grow strong and healthy.
Testing Soil pH
Soil pH is a measure of how acidic or alkaline the soil is. Why should you care about pH when you grow hollyhocks? Hollyhocks like soil that is slightly acidic to neutral. If the soil is too acidic or too alkaline, the plants might not grow well. You can test the soil pH with a soil testing kit. These kits are available at most garden centers. Follow the instructions on the kit to test your soil. If the soil is too acidic, you can add lime to raise the pH. If the soil is too alkaline, you can add sulfur to lower the pH. Adjusting the soil pH can help your hollyhocks thrive.

Planting Hollyhocks from Seeds or Seedlings
You can start hollyhocks in two main ways. You can plant seeds directly in the ground. Or you can start them indoors as seedlings. Planting seeds is easy. Just sprinkle them on the soil and cover them lightly. Keep the soil moist until the seeds germinate. Starting seedlings indoors gives you a head start. Sow the seeds in pots or trays several weeks before the last frost. Keep them warm and moist. Once the seedlings are big enough, transplant them into the garden. Whether you start from seeds or seedlings, choose healthy, strong plants. Plant them at the right spacing. Give them plenty of water. With a little care, you will grow hollyhocks successfully.
| Method | Pros | Cons |
|---|---|---|
| Seeds | Easy, less expensive | Takes longer, less control |
| Seedlings | Faster, more reliable | More expensive, requires transplanting |
| Bare Root | Can be cheaper than seedlings | More vulnerable, requires immediate planting |
| Established Plants | Instant impact, well-developed | Most expensive, may need more space |
- Choose seeds or seedlings.
- Plant at the right spacing.
- Keep the soil moist.
- Transplant carefully.
- Provide plenty of water.
Imagine sowing your hollyhock seeds and waiting patiently for them to sprout. Each tiny seed holds the potential for a tall, beautiful plant. Or picture carefully transplanting your seedlings into the garden. You give them a new home where they can grow and flourish. Whether you choose seeds or seedlings, the process of planting hollyhocks is rewarding. It is a chance to connect with nature. You are nurturing something beautiful. Remember to label your plants so you know what colors to expect. Take photos of your garden as it grows. This can be a fun way to track your progress and share your success. With a little effort, you can grow hollyhocks that will bring joy to your garden for years to come.
Fun Fact or Stat: Soaking hollyhock seeds in water overnight can improve their germination rate.
Direct Sowing Seeds
Direct sowing means planting seeds right in the ground. Is this the best way to grow hollyhocks? It can be a simple and easy way to start your hollyhocks. Wait until the weather is warm and the danger of frost has passed. Prepare the soil by loosening it and adding compost. Sprinkle the seeds on the soil surface. Cover them lightly with soil. Keep the soil moist until the seeds germinate. This usually takes about one to two weeks. Thin the seedlings when they are a few inches tall. Give them enough space to grow. Direct sowing is a good option if you want a natural, low-maintenance approach to gardening.
Starting Seeds Indoors
Starting seeds indoors lets you get a head start on the growing season. Should you start seeds indoors if you grow hollyhocks? Sow the seeds in pots or trays filled with seed-starting mix. Keep the soil moist and warm. Place the trays in a sunny window or under grow lights. Once the seedlings are big enough, transplant them into the garden. This gives them a longer growing season. Starting seeds indoors is a good option if you live in a cold climate. It allows you to enjoy your hollyhocks sooner.
Transplanting Seedlings
Transplanting seedlings is a delicate process. How do you do it carefully when you grow hollyhocks? Dig a hole that is big enough to hold the seedling’s roots. Gently remove the seedling from its pot. Loosen the roots slightly. Place the seedling in the hole. Fill the hole with soil. Water the seedling well. Protect it from strong sunlight for a few days. Transplanting seedlings carefully will help them get off to a good start in your garden.
Caring for Your Hollyhocks
Once your hollyhocks are planted, they need regular care. Watering is very important. Water them deeply and regularly, especially during dry spells. Fertilize them every few weeks with a balanced fertilizer. This provides them with the nutrients they need to grow. Deadhead spent flowers to encourage more blooms. This means removing the faded flowers. Watch out for pests and diseases. Common pests include aphids and spider mites. Diseases include rust and leaf spot. Treat these problems promptly to prevent them from spreading. Stake tall plants to prevent them from falling over. With proper care, your hollyhocks will thrive. They will reward you with a beautiful display of flowers when you grow hollyhocks.
- Water regularly.
- Fertilize every few weeks.
- Deadhead spent flowers.
- Watch for pests and diseases.
- Stake tall plants.
Imagine watching your hollyhocks grow taller and taller each day. You see the buds forming and the flowers starting to open. It is a rewarding experience to see your hard work pay off. But remember, even with the best care, problems can sometimes arise. Pests and diseases can attack your plants. A sudden storm can damage them. Do not be discouraged. With a little patience and persistence, you can overcome these challenges. You can keep your hollyhocks healthy and beautiful. Remember to check your plants regularly. Look for signs of trouble. Take action quickly to address any problems you find. Caring for your hollyhocks is an ongoing process. It is a chance to learn and grow as a gardener. The rewards are well worth the effort when you grow hollyhocks.
Fun Fact or Stat: Hollyhocks attract hummingbirds, adding extra beauty to your garden.
Watering Techniques
Watering is essential for healthy hollyhocks. How do you water them properly when you grow hollyhocks? Water deeply and regularly. This means soaking the soil thoroughly. Water at the base of the plants. Avoid getting the leaves wet. Wet leaves can lead to disease. Water early in the morning. This gives the leaves time to dry before nightfall. Check the soil moisture regularly. Water when the top inch of soil feels dry. Adjust your watering schedule based on the weather. Water more often during dry spells. Water less often when it is raining. Proper watering will help your hollyhocks thrive.
Fertilizing Schedule
Fertilizing provides hollyhocks with the nutrients they need. What is the best fertilizing schedule when you grow hollyhocks? Fertilize every few weeks during the growing season. Use a balanced fertilizer that is made for flowering plants. Follow the instructions on the package. Avoid over-fertilizing. Too much fertilizer can damage the plants. You can also add compost to the soil. Compost provides a slow-release source of nutrients. A good fertilizing schedule will help your hollyhocks grow strong and healthy.
Pest and Disease Control
Pests and diseases can harm hollyhocks. How do you protect them when you grow hollyhocks? Check your plants regularly for signs of trouble. Common pests include aphids, spider mites, and Japanese beetles. Common diseases include rust, leaf spot, and powdery mildew. Treat these problems promptly. You can use insecticidal soap to control pests. You can use a fungicide to control diseases. Remove any infected leaves or stems. Dispose of them properly. Keeping your garden clean and healthy will help prevent pests and diseases.
Dealing with Common Hollyhock Problems
Even with the best care, hollyhocks can sometimes have problems. Rust is a common fungal disease. It causes orange spots on the leaves. Leaf spot is another fungal disease. It causes dark spots on the leaves. Pests like aphids and spider mites can also attack hollyhocks. They suck the sap from the leaves. This can weaken the plants. Tall hollyhocks can be prone to falling over in strong winds. To deal with these problems, take action promptly. Treat fungal diseases with a fungicide. Control pests with insecticidal soap. Stake tall plants to provide support. With quick action, you can help your hollyhocks recover. You can continue to grow hollyhocks that are healthy and beautiful.
- Treat rust with fungicide.
- Control pests with insecticidal soap.
- Stake tall plants for support.
- Remove infected leaves.
- Provide good air circulation.
Imagine seeing orange spots on the leaves of your hollyhocks. You might worry that your plants are doomed. Or picture finding your tall hollyhocks knocked over by the wind. You might feel frustrated and discouraged. But remember, these problems are common. They can be overcome with a little effort. Do not give up on your hollyhocks. With the right treatment and care, they can recover. They can continue to thrive. Remember to identify the problem correctly before taking action. This will help you choose the most effective treatment. Also, be patient. It may take some time for your plants to recover. But with persistence, you can grow hollyhocks that are healthy and beautiful.
Fun Fact or Stat: Hollyhocks are known for attracting beneficial insects like ladybugs, which help control pests.
Rust Prevention and Treatment
Rust is a common disease that affects hollyhocks. How do you prevent and treat it when you grow hollyhocks? Rust causes orange spots on the leaves. It can weaken the plants. To prevent rust, provide good air circulation. Avoid overcrowding the plants. Water at the base of the plants. Avoid getting the leaves wet. If you see rust, remove the infected leaves. Dispose of them properly. Treat the plants with a fungicide. Follow the instructions on the package. Rust can be a persistent problem, so you may need to treat the plants several times.
Pest Control Methods
Pests can damage hollyhocks. What are the best ways to control them when you grow hollyhocks? Common pests include aphids, spider mites, and Japanese beetles. Check your plants regularly for signs of pests. You can use insecticidal soap to control aphids and spider mites. You can hand-pick Japanese beetles off the plants. You can also use traps to catch them. Encourage beneficial insects in your garden. Ladybugs and lacewings eat aphids. A healthy garden ecosystem will help keep pests under control.
Staking for Support
Tall hollyhocks can be prone to falling over. How do you support them when you grow hollyhocks? Use stakes to provide support. Drive a stake into the ground near each plant. Tie the plant to the stake with soft twine. Make sure the twine is not too tight. It should allow the plant to move slightly. Check the stakes regularly. Adjust them as the plant grows. Staking will help keep your hollyhocks upright. It will prevent them from being damaged by wind or rain.
Summary
Growing hollyhocks can be a rewarding experience. These tall, beautiful flowers add a touch of charm to any garden. To be successful, you need to choose the right location. Hollyhocks need plenty of sunlight and well-drained soil. Prepare the soil by adding compost and other organic matter. Plant the seeds or seedlings at the right spacing. Water them regularly, especially during dry spells. Fertilize them every few weeks with a balanced fertilizer. Watch out for pests and diseases. Treat any problems promptly. Stake tall plants to prevent them from falling over. With proper care, your hollyhocks will thrive. They will reward you with a stunning display of colorful blooms. They attract bees, butterflies, and hummingbirds, making your garden a lively and beautiful place.
Conclusion
Growing hollyhocks is a fun and easy way to add beauty to your garden. These tall, colorful flowers are a joy to watch. They bring life to any outdoor space. With a little care and attention, you can enjoy their beauty for years to come. Remember to choose the right location, prepare the soil well, and water them regularly. Watch out for pests and diseases. By following these simple tips, you can successfully grow hollyhocks. Your garden will be the envy of all your neighbors.
Frequently Asked Questions
Question No 1: How tall do hollyhocks grow?
Answer: Hollyhocks are known for their impressive height. They can grow quite tall. Typically, they reach heights of 5 to 8 feet. Some varieties may even grow taller under ideal conditions. The tall stems are covered in beautiful, colorful flowers. This makes them a striking addition to any garden. Make sure to provide enough space. Also, consider staking them if you live in a windy area. This will help support their height. Then you can ensure that they remain upright and healthy as they grow hollyhocks.
Question No 2: What kind of soil do hollyhocks need?
Answer: Hollyhocks thrive in well-drained soil. Good drainage is crucial for healthy growth. It prevents root rot. They prefer soil that is rich in organic matter. This provides the necessary nutrients. Before planting, amend the soil with compost or well-rotted manure. This improves drainage and fertility. The ideal soil pH for hollyhocks is slightly acidic to neutral. Aim for a pH between 6.0 and 7.0. You can test your soil’s pH with a simple soil testing kit. Adjust it if necessary to create the perfect environment. Well-prepared soil will help your hollyhocks flourish as they grow.
Question No 3: How much sun do hollyhocks need?
Answer: Hollyhocks need plenty of sunlight to thrive. They require at least six hours of direct sunlight per day. This helps them produce abundant blooms. Choose a location in your garden that receives full sun. If you live in a hot climate, some afternoon shade can be beneficial. This prevents the plants from getting scorched. Insufficient sunlight can result in leggy growth. It can also reduce flowering. So make sure your hollyhocks get enough sun. They need this to grow strong and produce lots of colorful flowers. Sunlight is essential when you grow hollyhocks.
Question No 4: How often should I water my hollyhocks?
Answer: Watering is a key part of hollyhock care. You should water them regularly, especially during dry spells. Water deeply, ensuring that the soil is thoroughly moistened. Avoid overhead watering. This can lead to fungal diseases. Instead, water at the base of the plants. Check the soil moisture regularly. Water when the top inch of soil feels dry. Adjust your watering schedule based on the weather. Water more often during hot, dry periods. Reduce watering during cooler, wetter times. Proper watering helps your hollyhocks grow strong and healthy.
Question No 5: How do I protect hollyhocks from pests?
Answer: Protecting hollyhocks from pests is important for their health. Common pests include aphids, spider mites, and Japanese beetles. Regularly inspect your plants for signs of infestation. Use insecticidal soap to control aphids and spider mites. Apply it according to the product instructions. Hand-pick Japanese beetles off the plants and dispose of them. Encourage beneficial insects in your garden. Ladybugs and lacewings eat aphids. They help keep pest populations down. Maintaining a healthy garden ecosystem is key. It will help your hollyhocks grow hollyhocks without pest problems.
Question No 6: How do I deadhead hollyhocks?
Answer: Deadheading is the process of removing spent flowers. Deadheading encourages more blooms. It also keeps the plants looking tidy. To deadhead hollyhocks, use sharp scissors or pruning shears. Cut the flower stem just below the spent bloom. Remove any yellowing or browning leaves. This helps prevent the spread of disease. Deadheading regularly throughout the blooming season promotes continuous flowering. It also prevents the plants from wasting energy on seed production. This energy helps them grow hollyhocks and produce even more beautiful flowers.
