Have you ever bitten into a pickle and loved the crunch? Do you want to make perfectly crunchy homemade dill pickles? It is easier than you think. Let’s learn how to make them at home.
Making pickles can be a fun activity. Imagine sharing them with your friends. They will be so impressed! These pickles taste better than store-bought ones. You control all the ingredients.
Let’s explore the secrets to perfectly crunchy homemade dill pickles. We will cover everything you need to know. From picking the right cucumbers to storing them safely. Get ready for a tasty adventure.
Key Takeaways
- Making perfectly crunchy homemade dill pickles is a fun and rewarding experience.
- Use fresh, small cucumbers for the best crunch and flavor.
- Brine ingredients matter: salt, vinegar, and spices create the perfect taste.
- Proper canning techniques ensure your pickles stay safe and delicious.
- Store your pickles in a cool, dark place to keep them crunchy.

Choosing Cucumbers for Crunchy Dill Pickles
The type of cucumber you choose is very important. It affects the crunch and taste. Smaller cucumbers are usually better. They have fewer seeds and firmer flesh. Look for cucumbers that are about 4–5 inches long. These are often called pickling cucumbers. Avoid large cucumbers. They can be too soft and watery. Freshness matters a lot. The fresher the cucumbers, the crunchier the pickles. Try to use cucumbers within 24 hours of picking them. If you buy them at a store, choose ones that feel firm. Make sure they don’t have any soft spots or bruises. You should also consider the variety of cucumber. Some varieties are specifically bred for pickling. These will give you the best results. Experiment with different types to find your favorite.
- Use small pickling cucumbers.
- Choose cucumbers that are 4–5 inches long.
- Make sure the cucumbers are very fresh.
- Avoid cucumbers with soft spots.
- Consider cucumber varieties made for pickling.
Preparing your cucumbers is just as important as picking the right ones. Wash them very well to remove any dirt. You can use a vegetable brush to scrub them gently. After washing, trim the blossom end of each cucumber. This end contains enzymes that can make pickles soft. Some people like to soak their cucumbers in ice water before pickling. This can help them stay extra crunchy. Cut the cucumbers into spears, slices, or leave them whole. It depends on your preference. Make sure all the pieces are roughly the same size. This helps them pickle evenly. Don’t skip this step! It is key to getting perfectly crunchy homemade dill pickles.
Fun Fact or Stat: Cucumbers are over 90% water, which is why freshness is so important for crunchiness!
Why Size Matters in Cucumber Selection?
Have you ever wondered why small cucumbers are better for pickling? It all comes down to their structure. Smaller cucumbers have a denser cell structure. This means they hold their shape better during the pickling process. Larger cucumbers tend to have more water. This can make them mushy when pickled. Think of it like this: a small, firm apple stays crisp longer than a large, soft apple. The same is true for cucumbers. When you choose smaller cucumbers, you’re choosing cucumbers that are naturally crunchier. This gives you a head start on making perfectly crunchy homemade dill pickles. Also, smaller cucumbers absorb the pickling brine more evenly. This results in a more flavorful pickle.
The Importance of Freshness
Imagine picking a cucumber straight from the garden. It is crisp, cool, and full of life. That is the kind of cucumber you want for pickling. Freshness is key to a crunchy pickle. As cucumbers sit, they lose moisture. This makes them softer. The longer they sit, the softer they become. Try to pickle your cucumbers as soon as possible after picking or buying them. If you can’t pickle them right away, store them in the refrigerator. Keep them in a plastic bag to help retain moisture. But remember, even in the fridge, they will slowly lose their crunch. So, aim to use them within a day or two for the best results. Remember, fresh cucumbers equal crunchy pickles!
Cucumber Varieties for Pickling
Did you know there are different types of cucumbers? Some are better for salads, and some are better for pickling. Pickling cucumber varieties are bred to be firm and have a good shape. Common pickling varieties include Kirby, National Pickling, and Boston Pickling. Kirby cucumbers are popular because they have thin skin and a bumpy texture. This helps them absorb the pickling brine well. National Pickling cucumbers are known for their uniform shape and size. Boston Pickling cucumbers are an older variety that is still popular for its flavor. Ask your local farmer or grocery store about pickling cucumber varieties. They can help you choose the best ones for perfectly crunchy homemade dill pickles. Trying different varieties can be part of the fun!

Brine Basics: Vinegar, Salt, and Spices
The brine is what turns cucumbers into pickles. It is a mixture of vinegar, salt, and spices. The right balance is important for flavor and preservation. Vinegar provides the acidity needed to preserve the cucumbers. It also gives pickles their tangy taste. White vinegar and apple cider vinegar are common choices. White vinegar has a strong, clean flavor. Apple cider vinegar adds a slightly sweeter, more complex flavor. Salt helps to draw out moisture from the cucumbers. This makes them firmer and crunchier. It also helps to preserve them. Use pickling salt or kosher salt. Avoid iodized salt, which can make the brine cloudy. Spices add flavor and aroma. Dill is a classic choice for dill pickles. Other popular spices include garlic, peppercorns, mustard seeds, and red pepper flakes. Experiment with different spices to create your own unique flavor.
- Vinegar preserves and flavors the pickles.
- Salt firms the cucumbers and preserves them.
- Spices add flavor and aroma to the brine.
- Use pickling salt or kosher salt.
- Experiment with different spice combinations.
Making the brine is simple. Combine the vinegar, water, salt, and spices in a pot. Bring the mixture to a boil, stirring until the salt dissolves. Once boiling, remove from heat and let it cool slightly. While the brine is cooling, prepare your jars and cucumbers. Pack the cucumbers into the jars, leaving about ½ inch of headspace. Headspace is the space between the top of the cucumbers and the lid of the jar. Pour the warm brine over the cucumbers, making sure to cover them completely. Tap the jars gently to remove any air bubbles. Wipe the rims of the jars clean with a damp cloth. Place the lids and rings on the jars, tightening them fingertip tight. Now your pickles are ready for canning or refrigeration.
Fun Fact or Stat: The word “pickle” comes from the Dutch word “pekel,” meaning brine!
The Role of Vinegar in Pickling
Vinegar is the key ingredient that makes pickling possible. It has high acidity. This acidity prevents harmful bacteria from growing. It also helps to preserve the cucumbers. Without vinegar, your pickles would spoil quickly. The type of vinegar you use affects the flavor of your pickles. White vinegar is a common choice. It has a strong, clean flavor. Apple cider vinegar is another option. It gives pickles a slightly sweeter, more complex taste. You can even use other types of vinegar, like white wine vinegar or rice vinegar. Each type will give your pickles a different flavor profile. Just make sure the vinegar has at least 5% acidity. This is important for safety and preservation. Remember, vinegar is your friend when making perfectly crunchy homemade dill pickles.
Salt’s Impact on Crunchiness
Salt does more than just add flavor to your pickles. It also plays a crucial role in their texture. Salt helps to draw out moisture from the cucumbers. This makes them firmer and crunchier. When cucumbers are soaked in a salty brine, the salt pulls water out of their cells. This process is called osmosis. As the water leaves the cells, the cucumbers become more compact. This results in a crispier texture. The type of salt you use also matters. Pickling salt and kosher salt are the best choices. They don’t contain iodine or anti-caking agents. These additives can make the brine cloudy and affect the flavor. So, use the right salt and don’t skimp on it! It’s essential for achieving perfectly crunchy homemade dill pickles.
Spice Up Your Pickles: Flavor Combinations
Spices are what give your pickles their unique flavor. Dill is the classic choice for dill pickles. But don’t be afraid to experiment with other spices. Garlic is a popular addition. It adds a pungent, savory note. Peppercorns give a little heat and spice. Mustard seeds add a tangy, slightly bitter flavor. Red pepper flakes bring a fiery kick. You can also use other herbs like bay leaves, coriander seeds, or even a pinch of turmeric. The possibilities are endless! Try different combinations to find your favorite flavor profile. Start with a base of dill, garlic, and peppercorns. Then add other spices to taste. Remember, making perfectly crunchy homemade dill pickles is all about having fun and experimenting!
The Canning Process: Ensuring Safety
Canning is a way to preserve food in jars. It involves heating the jars to kill any harmful bacteria. This allows the pickles to be stored at room temperature for a long time. There are two main methods of canning: water bath canning and pressure canning. Water bath canning is used for high-acid foods like pickles, jams, and jellies. Pressure canning is used for low-acid foods like vegetables and meats. For perfectly crunchy homemade dill pickles, you will use water bath canning. This method involves submerging the jars in boiling water for a specific amount of time. The heat kills any bacteria and creates a vacuum seal. This seal prevents new bacteria from entering the jar. Before you start canning, make sure you have the right equipment. You will need a large pot with a rack, canning jars, lids, and rings. You will also need a jar lifter to safely remove the hot jars from the pot.
- Canning preserves food in jars by killing bacteria.
- Water bath canning is used for high-acid foods.
- Pressure canning is used for low-acid foods.
- Use the right equipment for safe canning.
- Follow canning instructions carefully.
To start the canning process, wash your jars, lids, and rings in hot, soapy water. Rinse them well and keep them hot. Place the jars on the rack in the canning pot and fill the pot with water. The water should cover the jars by at least 1 inch. Bring the water to a boil. Once the water is boiling, carefully lower the jars of pickles into the pot. Make sure the water covers the jars by at least 1 inch. Return the water to a boil and process the jars for the recommended time. The processing time depends on the size of the jars and your altitude. After processing, turn off the heat and let the jars sit in the hot water for 5 minutes. This helps to prevent siphoning. Remove the jars from the pot using a jar lifter and place them on a towel-lined surface. Let the jars cool completely. As they cool, you should hear a popping sound. This means the lids have sealed properly. Check the seals by pressing down on the center of each lid. If the lid doesn’t flex, it is sealed. If the lid flexes, it is not sealed and should be reprocessed or refrigerated.
Fun Fact or Stat: Properly canned pickles can last for up to two years!
Preparing Jars for Canning
Before you can start canning, you need to get your jars ready. This is an important step. It helps to ensure that your pickles are safe to eat. First, wash the jars in hot, soapy water. Rinse them very well to remove any soap residue. You can also wash them in the dishwasher. Just make sure they are clean. Next, you need to sterilize the jars. This kills any bacteria that might be lurking inside. There are a few ways to sterilize jars. One way is to boil them in water for 10 minutes. Another way is to heat them in the oven at 200°F for 10 minutes. You can also run them through a sterilizing cycle in your dishwasher. Make sure the jars are hot when you fill them with pickles. This helps to create a good seal. Don’t skip this step! It’s essential for making perfectly crunchy homemade dill pickles that are safe and delicious.
Water Bath Canning: Step-by-Step
Water bath canning is a simple and effective way to preserve pickles. Here is a step-by-step guide: First, fill your canning pot with water. Place a rack in the bottom of the pot. This prevents the jars from touching the bottom. Bring the water to a boil. While the water is heating up, prepare your jars and pickles. Pack the pickles into the jars, leaving ½ inch of headspace. Pour the warm brine over the pickles, covering them completely. Wipe the rims of the jars clean. Place the lids and rings on the jars, tightening them fingertip tight. Carefully lower the jars into the boiling water. Make sure the water covers the jars by at least 1 inch. Boil the jars for the recommended time, based on their size and your altitude. After processing, turn off the heat and let the jars sit in the hot water for 5 minutes. Remove the jars and let them cool completely. Check the seals and store your pickles in a cool, dark place. Follow these steps for safe and delicious perfectly crunchy homemade dill pickles.
Troubleshooting Canning Problems
Sometimes, things don’t go as planned during the canning process. Here are some common problems and how to fix them: If the lids don’t seal, it could be because the rims of the jars weren’t clean. Make sure to wipe the rims clean before putting on the lids. It could also be because the jars weren’t processed long enough. Reprocess the jars for the full recommended time. If the brine is cloudy, it could be because you used iodized salt. Use pickling salt or kosher salt instead. If the pickles are soft, it could be because the cucumbers weren’t fresh enough. Use fresh, firm cucumbers. It could also be because the brine was too weak. Make sure to use the correct amount of vinegar and salt. Don’t give up! With a little practice, you’ll be making perfectly crunchy homemade dill pickles like a pro.
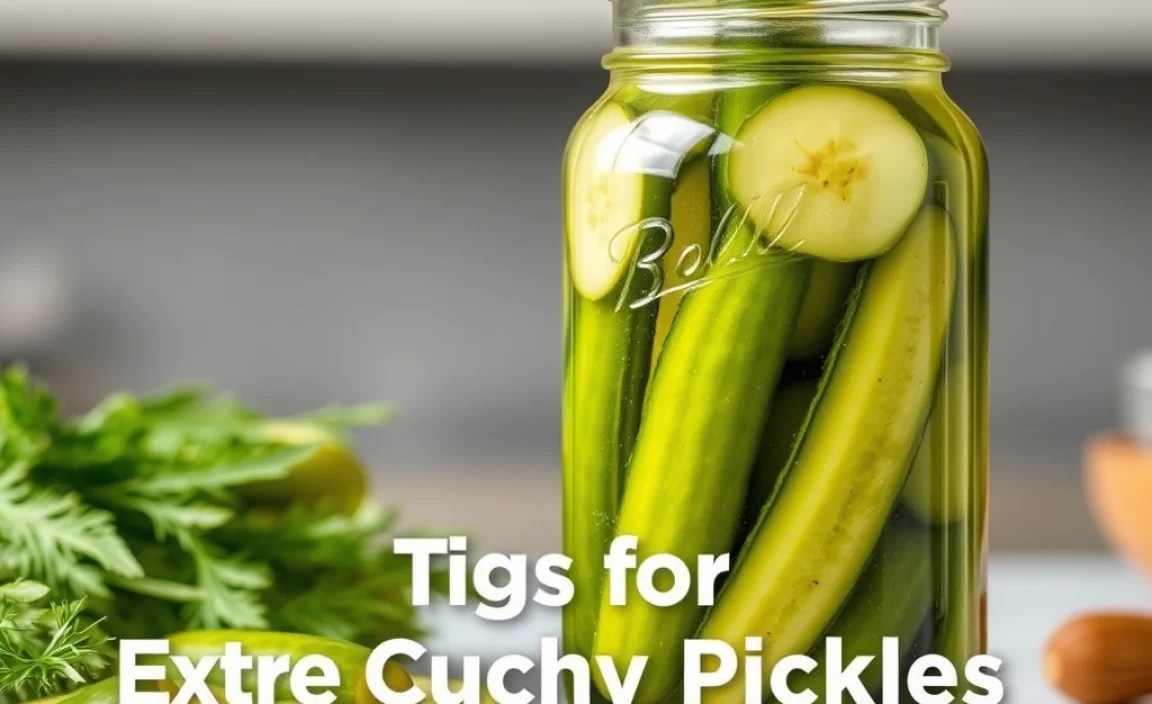
Tips for Extra-Crunchy Pickles
Want to make your pickles even crunchier? Here are some tips and tricks. Use grape leaves. Grape leaves contain tannins. Tannins help to inhibit enzymes that can soften pickles. Add one or two grape leaves to each jar before adding the brine. Use calcium chloride. Calcium chloride is a food-grade salt that helps to firm up pickles. Add a small amount of calcium chloride to the brine. Follow the instructions on the package. Soak cucumbers in ice water. Soaking cucumbers in ice water for a few hours before pickling can help them stay crisp. Trim the blossom end. The blossom end of the cucumber contains enzymes that can soften pickles. Trim this end off before pickling. Use a strong brine. A strong brine helps to draw out moisture from the cucumbers. This makes them firmer. Store pickles in a cool, dark place. Heat can soften pickles, so store them in a cool, dark place.
- Add grape leaves for tannins.
- Use calcium chloride to firm pickles.
- Soak cucumbers in ice water.
- Trim the blossom end of cucumbers.
- Use a strong brine.
Another trick is to use pickling lime. Pickling lime is calcium hydroxide. It helps to firm up the cell walls of the cucumbers. Soak the cucumbers in a pickling lime solution for 12 to 24 hours before pickling. Rinse them very well before adding them to the jars. Be careful when using pickling lime. It is a strong alkali and can be irritating to the skin. Wear gloves when handling it. You can also try adding a pinch of alum to the brine. Alum is a mineral salt that helps to firm up pickles. However, some people don’t like the taste of alum. So, use it sparingly. Remember, the key to perfectly crunchy homemade dill pickles is to experiment and find what works best for you. Don’t be afraid to try different techniques and ingredients.
Fun Fact or Stat: Adding horseradish to your pickles can help keep them crunchy!
The Magic of Grape Leaves
Have you ever heard of using grape leaves to make pickles crunchier? It sounds a little strange, but it really works! Grape leaves contain something called tannins. Tannins are natural compounds that help to prevent enzymes from breaking down the cell walls of the cucumbers. This helps the cucumbers stay firm and crunchy, even after they’ve been pickled. To use grape leaves, simply add one or two leaves to each jar before you add the cucumbers and brine. Make sure the leaves are clean and free of any pesticides. You can find grape leaves at some farmers’ markets or even in your own backyard if you have a grape vine. Using grape leaves is a simple and natural way to boost the crunch factor of your perfectly crunchy homemade dill pickles. Give it a try and see the difference!
Calcium Chloride: A Crunch Booster
Calcium chloride is a food-grade salt that is often used to make pickles crunchier. It works by strengthening the cell walls of the cucumbers. This helps them to resist softening during the pickling process. To use calcium chloride, add a small amount to the brine. Follow the instructions on the package carefully. Too much calcium chloride can make the pickles taste bitter. You can find calcium chloride at some grocery stores or online. It is a safe and effective way to improve the texture of your pickles. Just remember to use it sparingly and follow the instructions. With the help of calcium chloride, you’ll be enjoying perfectly crunchy homemade dill pickles in no time!
Ice Water Soak for Ultimate Crispness
One of the simplest ways to make your pickles extra crunchy is to soak the cucumbers in ice water before pickling them. This helps to draw out excess water from the cucumbers, which makes them firmer. To soak the cucumbers, simply place them in a large bowl of ice water and let them sit for a few hours. You can even let them soak overnight in the refrigerator. Just make sure the water is cold and icy. The longer they soak, the crunchier they will be. After soaking, drain the cucumbers and pat them dry before adding them to the jars. This simple step can make a big difference in the texture of your perfectly crunchy homemade dill pickles. So, don’t skip the ice water soak!
Troubleshooting Soft or Mushy Pickles
Sometimes, despite your best efforts, your pickles might turn out soft or mushy. Don’t worry! There are several reasons why this might happen. And there are things you can do to prevent it in the future. One common cause is using old or overripe cucumbers. As cucumbers age, they lose moisture and their cell walls weaken. This makes them more likely to soften during pickling. Another cause is using a weak brine. The brine needs to be strong enough to draw out moisture from the cucumbers and preserve them properly. If the brine is too weak, the cucumbers will absorb too much water and become mushy. Improper canning can also lead to soft pickles. If the jars aren’t processed correctly, bacteria can grow and cause the pickles to soften. Finally, storing pickles in a warm place can also make them mushy. Heat can break down the cell walls of the cucumbers, making them softer. Always store your pickles in a cool, dark place.
- Use fresh, firm cucumbers.
- Make sure your brine is strong enough.
- Process jars correctly during canning.
- Store pickles in a cool, dark place.
- Avoid overripe cucumbers.
To prevent soft pickles, start with the freshest, firmest cucumbers you can find. Use a strong brine with the correct ratio of vinegar, salt, and water. Follow canning instructions carefully to ensure proper processing. Store your pickles in a cool, dark place to maintain their crunch. If you have a batch of soft pickles, don’t throw them away! You can still use them in other recipes. Soft pickles can be chopped up and added to potato salad, tuna salad, or tartar sauce. They can also be pureed and used as a base for a creamy dip. Just because they’re not crunchy doesn’t mean they’re not delicious. But with a little care and attention, you can make perfectly crunchy homemade dill pickles every time.
Fun Fact or Stat: Adding a bay leaf to each jar can help prevent pickles from becoming mushy!
Why Fresh Cucumbers Matter
Imagine you’re building a house. Would you use old, rotten wood? Of course not! You’d want fresh, strong materials. The same is true for making pickles. Fresh cucumbers are the foundation for perfectly crunchy homemade dill pickles. As cucumbers sit, they lose moisture and their cell walls weaken. This makes them more likely to soften during pickling. The fresher the cucumbers, the crunchier the pickles will be. Try to use cucumbers within 24 hours of picking or buying them. If you can’t pickle them right away, store them in the refrigerator. Keep them in a plastic bag to help retain moisture. But remember, even in the fridge, they will slowly lose their crunch. So, aim to use them as soon as possible for the best results.
Brine Strength: Getting it Right
The brine is like the marinade for your pickles. It’s what gives them their flavor and helps to preserve them. But the brine also plays a crucial role in the texture of your pickles. A strong brine helps to draw out moisture from the cucumbers. This makes them firmer and crunchier. If the brine is too weak, the cucumbers will absorb too much water and become mushy. To make a strong brine, use the correct ratio of vinegar, salt, and water. A general guideline is to use a 50/50 mixture of vinegar and water. Add about ¼ cup of pickling salt per quart of liquid. You can adjust the amount of salt to taste. Just make sure the brine is salty enough to preserve the cucumbers. A strong brine is essential for achieving perfectly crunchy homemade dill pickles.
Cool Storage: Preserving the Crunch
You’ve made your pickles, canned them properly, and now it’s time to store them. Where you store your pickles can affect their texture. Heat can break down the cell walls of the cucumbers, making them softer. To keep your pickles crunchy, store them in a cool, dark place. A pantry, basement, or even a refrigerator are good options. Avoid storing pickles in direct sunlight or near heat sources. This can cause them to soften and spoil more quickly. Properly stored pickles can last for up to two years. But they will taste best if you eat them within the first year. So, find a cool, dark place to store your perfectly crunchy homemade dill pickles and enjoy them for months to come!
Serving and Storing Your Pickles
Once your pickles are ready, it’s time to enjoy them. Perfectly crunchy homemade dill pickles are a delicious addition to many meals. They can be served as a side dish, a snack, or an ingredient in other recipes. Pickles are great with sandwiches, burgers, and hot dogs. They can also be added to salads, potato salad, and coleslaw. Some people even enjoy eating pickles straight from the jar. However you choose to eat them, make sure to store them properly. Once opened, pickles should be stored in the refrigerator. This will help them stay fresh and crunchy. Make sure the pickles are submerged in the brine. If necessary, add a little extra vinegar or water to cover them. Properly stored, opened pickles can last for several weeks in the refrigerator.
- Serve pickles as a side dish or snack.
- Add pickles to sandwiches and salads.
- Store opened pickles in the refrigerator.
- Make sure pickles are submerged in brine.
- Opened pickles last for weeks in the fridge.
If you canned your pickles, they can be stored at room temperature until opened. Store canned pickles in a cool, dark place. This will help to maintain their quality and prevent spoilage. Avoid storing canned pickles in direct sunlight or near heat sources. Once opened, canned pickles should be refrigerated. Always use a clean utensil when removing pickles from the jar. This will help to prevent contamination. If you notice any signs of spoilage, such as mold or a bad smell, discard the pickles. With proper storage, you can enjoy your perfectly crunchy homemade dill pickles for months to come. Share them with your friends and family and enjoy the fruits of your labor.
Fun Fact or Stat: Pickles were a favorite food of Julius Caesar, who believed they gave his soldiers strength!
Creative Ways to Serve Pickles
Pickles are more than just a side dish. They can be a versatile ingredient in many recipes. Chop them up and add them to potato salad for a tangy twist. Use them to make a delicious tartar sauce for fish. Add them to deviled eggs for a burst of flavor. You can even use pickle juice to marinate chicken or pork. The acidity of the pickle juice helps to tenderize the meat and adds a unique flavor. For a fun snack, try wrapping pickles in cream cheese and ham. Slice them into bite-sized pieces and serve them as appetizers. The possibilities are endless! Get creative and experiment with different ways to use your perfectly crunchy homemade dill pickles. You might be surprised at how many ways you can enjoy them.
Refrigerator Storage Tips
Once you’ve opened a jar of pickles, it’s important to store them properly in the refrigerator. This will help them stay fresh and crunchy for as long as possible. Make sure the pickles are submerged in the brine. If necessary, add a little extra vinegar or water to cover them. This will prevent them from drying out. Use a clean utensil when removing pickles from the jar. This will help to prevent contamination. Avoid leaving the jar open for extended periods of time. This can expose the pickles to air and bacteria. If you notice any signs of spoilage, such as mold or a bad smell, discard the pickles. With proper refrigerator storage, you can enjoy your perfectly crunchy homemade dill pickles for several weeks.
Recognizing Spoilage Signs
Even with proper storage, pickles can sometimes spoil. It’s important to recognize the signs of spoilage so you can avoid eating them. One of the most obvious signs is mold. If you see any mold growing on the pickles or in the brine, discard the entire jar. Another sign is a bad smell. If the pickles smell sour, rotten, or otherwise unpleasant, don’t eat them. The brine should have a tangy, slightly sour smell, but it shouldn’t be offensive. The texture of the pickles can also be a sign of spoilage. If the pickles are slimy, mushy, or discolored, they are likely spoiled. Finally, if the lid of the jar is bulging or the jar is leaking, it could be a sign that the pickles have spoiled. In general, if you have any doubts about the safety of your pickles, it’s best to discard them. It’s better to be safe than sorry. Enjoy your perfectly crunchy homemade dill pickles and always be mindful of spoilage signs.
Dill Pickle Recipe Variations
Want to try something different? There are many variations of dill pickle recipes. You can adjust the spices to create different flavor profiles. Add some red pepper flakes for a spicy kick. Include some mustard seeds for a tangy flavor. Try adding garlic cloves for a savory taste. You can also experiment with different types of vinegar. Apple cider vinegar will give your pickles a slightly sweeter flavor. White wine vinegar will add a more delicate taste. You can also pickle other vegetables besides cucumbers. Carrots, green beans, and cauliflower are all great options. Simply follow the same pickling process, but adjust the cooking time as needed. For a sweeter pickle, add some sugar to the brine. This will create a bread and butter pickle. The possibilities are endless! Get creative and experiment with different ingredients to create your own unique pickle recipe.
- Add red pepper flakes for spice.
- Include mustard seeds for tang.
- Add garlic cloves for savory flavor.
- Try different types of vinegar.
- Pickle other vegetables besides cucumbers.
Another fun variation is to make fermented pickles. Fermented pickles are made using a different process than traditional pickles. Instead of using vinegar, they are fermented in a salt brine. This allows beneficial bacteria to grow, which gives the pickles a unique flavor and texture. Fermented pickles are also a good source of probiotics. To make fermented pickles, simply pack the cucumbers into a jar with a salt brine and spices. Weigh them down with a fermentation weight to keep them submerged in the brine. Let them ferment at room temperature for several days or weeks, depending on your taste. Check them regularly and remove any scum that forms on the surface. Once they are fermented to your liking, store them in the refrigerator. Making perfectly crunchy homemade dill pickles can be a fun and rewarding experience. Don’t be afraid to experiment and try new things.
Fun Fact or Stat: In the Middle Ages, pickles were used as medicine!
Spicy Dill Pickles: Adding Heat
Do you like your pickles with a little kick? Then try making spicy dill pickles! It’s easy to add heat to your favorite dill pickle recipe. Simply add some red pepper flakes to the brine. You can also add a few sliced jalapeños or serrano peppers. If you want a milder heat, remove the seeds from the peppers before adding them. For a more intense heat, leave the seeds in. Start with a small amount of spice and taste the brine before adding more. You can always add more spice, but you can’t take it away. You can also add a pinch of cayenne pepper to the brine for an extra boost of heat. Experiment with different types of peppers and spices to find your perfect level of heat. With a little spice, you can take your perfectly crunchy homemade dill pickles to the next level.
Sweet Dill Pickles: A Different Twist
If you prefer a sweeter pickle, try making sweet dill pickles. These pickles are a delicious combination of sweet and tangy. To make sweet dill pickles, simply add some sugar to the brine. You can use white sugar, brown sugar, or even honey. Start with a small amount of sugar and taste the brine before adding more. You can also add some other sweet ingredients, such as maple syrup or molasses. For a more complex flavor, try adding some spices like cinnamon, cloves, or allspice. These spices will complement the sweetness of the sugar and add a warm, comforting aroma. Sweet dill pickles are a delicious alternative to traditional dill pickles. They are perfect for those who like a little sweetness in their savory snacks. Enjoy your perfectly crunchy homemade dill pickles with a sweet twist!
Fermented Pickles: A Probiotic Boost
Fermented pickles are a healthy and delicious alternative to traditional pickles. They are made using a process called fermentation, which involves allowing beneficial bacteria to grow in a salt brine. These bacteria produce lactic acid, which preserves the pickles and gives them a unique flavor. Fermented pickles are also a good source of probiotics, which are beneficial bacteria that can improve your gut health. To make fermented pickles, simply pack the cucumbers into a jar with a salt brine and spices. Weigh them down with a fermentation weight to keep them submerged in the brine. Let them ferment at room temperature for several days or weeks, depending on your taste. Check them regularly and remove any scum that forms on the surface. Once they are fermented to your liking, store them in the refrigerator. Enjoy your perfectly crunchy homemade dill pickles with a probiotic boost!
| Pickle Type | Flavor Profile | Key Ingredients | Best Uses |
|---|---|---|---|
| Dill Pickles | Tangy, savory | Vinegar, dill, garlic | Sandwiches, snacks |
| Spicy Pickles | Hot, tangy | Red pepper flakes, jalapeños | Tacos, spicy dishes |
| Sweet Pickles | Sweet, tangy | Sugar, cinnamon | Salads, relishes |
| Fermented Pickles | Sour, complex | Salt, water, spices | Probiotic-rich snacks |
Summary
Making perfectly crunchy homemade dill pickles is a fun and rewarding project. It starts with choosing the right cucumbers. Fresh, small pickling cucumbers are best. The brine is key to flavor and preservation. Vinegar, salt, and spices create the perfect balance. Canning ensures your pickles are safe to store. Follow the steps carefully to avoid spoilage. There are also tricks for extra crunch. Grape leaves and calcium chloride can help. Storing your pickles properly is important. Keep them in a cool, dark place. Once you master the basics, experiment with variations. Spicy, sweet, or fermented pickles offer new flavors. Enjoy sharing your homemade pickles with friends and family.
Conclusion
Making pickles at home is easier than you think. You can make perfectly crunchy homemade dill pickles. Fresh cucumbers and the right brine are important. Canning keeps them safe for a long time. Now you know all the secrets. Go make your own delicious pickles. Enjoy the tasty crunch!
Frequently Asked Questions
Question No 1: Why are my pickles not crunchy?
Answer: There are several reasons why your pickles might not be crunchy. One common reason is using old or overripe cucumbers. As cucumbers age, they lose moisture and their cell walls weaken. This makes them more likely to soften during pickling. Another reason is using a weak brine. The brine needs to be strong enough to draw out moisture from the cucumbers and preserve them properly. Finally, improper canning can also lead to soft pickles. Make sure to use fresh, firm cucumbers, a strong brine, and follow canning instructions carefully to achieve perfectly crunchy homemade dill pickles.
Question No 2: Can I use regular table salt for pickling?
Answer: It is best to avoid using regular table salt for pickling. Regular table salt contains iodine and anti-caking agents. These additives can make the brine cloudy and affect the flavor of the pickles. Pickling salt or kosher salt are the best choices for pickling. These salts do not contain any additives and will result in a clear brine and better-tasting pickles. Using the right type of salt is important for achieving perfectly crunchy homemade dill pickles that look and taste great. So, stick to pickling salt or kosher salt for the best results.
Question No 3: How long do homemade pickles last?
Answer: The shelf life of homemade pickles depends on how they are stored. If you canned your pickles properly, they can be stored at
