Do you love yummy tomatoes from your garden? Have you ever wondered how to grow them again next year? You can save seeds from your garden! It is a fun way to keep your favorite plants growing.
Imagine you have the best watermelon ever. You can save its seeds and grow more! Saving seeds is like having a magic trick for your garden. It helps you keep growing yummy food every year.
Some seeds are easy to save. Others need a little more help. But, it is always a fun adventure! Let’s learn how to save seeds from your garden. Get ready to become a seed-saving superstar!
Key Takeaways
- Saving seeds from your garden helps you grow your favorite plants again and again.
- Dry seeds like beans and peas are the easiest to save at home.
- Wet seeds like tomatoes and cucumbers need a special cleaning process.
- Store your saved seeds in a cool, dry place to keep them safe.
- Always label your seeds with the plant name and date.
Why Save Seeds From Your Garden?

Saving seeds from your garden is like having a superpower. You can grow your favorite plants every year. It also saves you money. You don’t have to buy new seeds all the time. When you save seeds, you keep special plant traits going. If you have a tomato that tastes super good, you want more like it, right? Saving its seeds helps you grow more tasty tomatoes. Plus, it’s good for the planet. You are helping plants adapt to your local area. This makes them stronger and healthier. It’s a fun way to connect with nature and learn more about how plants grow. Think of it as a science experiment and a way to get free plants. What could be better than that? So, start saving those seeds and watch your garden grow year after year.
- It saves you money.
- You keep your favorite plants.
- It helps plants adapt to your area.
- It’s a fun science project.
- You get free plants.
Imagine your grandmother always grew the best pumpkins. She saved the seeds each year. Now, you can grow the same pumpkins in your garden. It’s like a family tradition. When you save seeds from your garden, you are keeping that tradition alive. Plants grown from saved seeds are often stronger in your area. They have already learned to grow there. This means they can handle the weather and soil better. You are helping them get even better each year. Saving seeds connects you to the past and the future of your garden. It is a simple way to make a big difference. Plus, you get to share your amazing plants with friends and family!
What are the Benefits of Saving Seeds?
Have you ever wondered why some plants grow better in one place than another? Saving seeds helps plants adapt to your local area. They get used to the weather and soil. This makes them stronger over time. It is like they are learning to be super plants for your garden. When you buy seeds from a store, they might not be used to your area. Plants grown from saved seeds often grow better. They are already home! Also, you get to choose the best plants to save seeds from. This means you can grow even better plants next year. It’s like you are training your plants to be the best they can be! What could be more fun than that?
How Does Saving Seeds Help the Environment?
Did you know that saving seeds can help the environment? It’s true! When you save seeds, you are helping to keep different types of plants alive. This is important because it keeps our food system strong. If we only grow a few types of plants, we could have problems if something bad happens. When you save seeds, you are keeping those old types of plants around. It’s like having a backup plan for our food. Plus, you are helping plants adapt to the changing climate. This means they can handle different weather conditions. It’s a small thing that makes a big difference for the planet. So, get out there and save those seeds!
Why is Seed Saving a Good Skill?
Learning to save seeds is a great skill to have. It makes you more independent. You don’t have to rely on stores for your seeds. You can grow your own food from your own seeds. How cool is that? It also helps you understand how plants grow. You learn about the plant life cycle. You see how seeds turn into plants. It’s like being a scientist in your own backyard. Plus, you can share your seeds with others. You can trade seeds with friends and neighbors. This helps everyone grow better gardens. It’s a skill that keeps on giving. So, start learning how to save seeds today!
Fun Fact or Stat: Did you know some seeds can stay alive for hundreds of years? Scientists have found seeds that are that old and still able to grow!
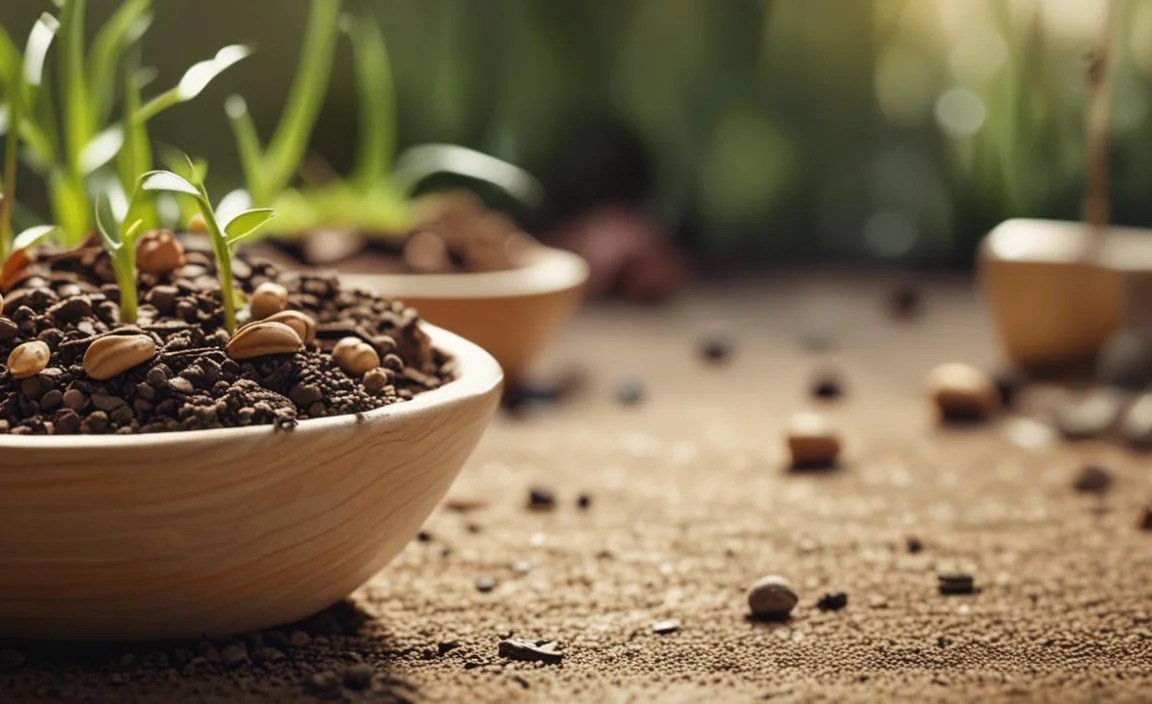
Easy Seeds to Save From Your Garden

Some seeds are super easy to save from your garden. These are great for beginners. Beans and peas are some of the easiest. Let the pods dry on the plant. Once they are dry and crispy, take them off. Open the pods and take out the seeds. Make sure the seeds are dry before you store them. Lettuce seeds are also easy. Let the lettuce plant grow tall and flower. The flowers will turn into seeds. Cut off the flower heads and let them dry. Then, shake out the seeds. Marigolds are flowers that also have easy-to-save seeds. Let the flowers dry on the plant. Then, pull them apart to get the seeds. These easy seeds are a great way to start your seed-saving adventure. You will be a pro in no time!
- Beans are easy to save.
- Peas are also a good choice.
- Lettuce seeds are simple to collect.
- Marigolds are a flower option.
- Dry seeds are usually the easiest.
- Make sure seeds are fully dry before storing.
Have you ever grown beans or peas? They are so much fun to watch grow. And, they are so easy to save seeds from! Just let the pods turn brown and dry on the plant. You can almost forget about them until they are ready. Then, it’s like a treasure hunt to open the pods and find the seeds inside. When you save seeds from your garden, you are keeping the best plants going. If you have a bean plant that makes lots of beans, you want to save those seeds. That way, you can grow lots of beans next year too! It’s a simple way to make sure you always have your favorite veggies.
How to Save Bean Seeds
Do you love eating beans? Saving bean seeds is easy. First, let the bean pods dry on the plant. They should be brown and crispy. Then, pick the pods off the plant. Open the pods and take out the beans. Lay the beans out on a tray to dry. Make sure they are in a cool, dry place. Let them dry for a week or two. This will help them last longer when you store them. Once they are dry, put them in a jar or bag. Label the jar with the type of bean and the date. Now you have your own bean seeds for next year!
How to Save Pea Seeds
Peas are another easy plant to save seeds from. Just like beans, let the pea pods dry on the plant. They should be yellow and crispy. Pick the pods and open them up. Take out the peas. Lay the peas on a tray to dry. Keep them in a cool, dry place. Let them dry for a week or two. Put the dry peas in a jar or bag. Label the jar with the type of pea and the date. Now you have your own pea seeds to plant next year. It’s so simple to save seeds from your garden!
How to Save Lettuce Seeds
Did you know you can save lettuce seeds? It’s a little different than saving bean or pea seeds. First, let your lettuce plant grow tall. It will start to flower. The flowers will turn into seeds. Once the flowers are dry, cut off the flower heads. Put them in a paper bag. Shake the bag to release the seeds. The seeds are small and dark. Collect the seeds and put them in a jar. Label the jar with the type of lettuce and the date. Now you have lettuce seeds to grow next year!
Fun Fact or Stat: Bean seeds can stay good for up to four years if stored correctly!
Saving Wet Seeds From Your Garden

Some seeds are inside juicy fruits and veggies. These are called “wet seeds.” Tomatoes and cucumbers are examples. Saving wet seeds from your garden needs extra steps. First, get the seeds out of the fruit. For tomatoes, squeeze the seeds and pulp into a jar. Add a little water. Let it sit for a few days. A white mold will grow on top. This is good! It helps get rid of a coating on the seeds. Then, rinse the seeds well. Lay them out to dry on a paper towel. For cucumbers, scoop out the seeds. Rinse them right away. Then, dry them on a paper towel. Make sure the seeds are fully dry before you store them. This will help them last longer.
- Tomatoes need a special soaking process.
- Cucumbers should be rinsed right away.
- Make sure wet seeds are fully dry.
- Use a paper towel to dry the seeds.
- Label the seeds with the plant name and date.
- Store the seeds in a cool, dry place.
Have you ever wondered how to save tomato seeds? It’s a bit messy, but it’s also fun! You get to squish tomatoes. It’s like a science experiment and a sensory experience all in one. When you save seeds from your garden, you get to keep growing your favorite kinds of tomatoes. If you have a tomato that is super sweet or extra juicy, you want to save those seeds, right? That way, you can grow more of those amazing tomatoes next year. Plus, you can share your seeds with friends and family. Everyone will love growing your special tomatoes!
How to Save Tomato Seeds
Want to save tomato seeds like a pro? First, pick ripe tomatoes from your garden. Squeeze the seeds and pulp into a jar. Add a little water. Let the jar sit for 3–4 days. A white mold will form on top. This is called fermentation. It helps remove a coating from the seeds. After a few days, rinse the seeds in a strainer. Get rid of all the pulp and mold. Spread the seeds on a paper towel to dry. Let them dry for a week or two. Make sure they are completely dry. Then, store them in a jar or bag. Label the jar with the type of tomato and the date.
How to Save Cucumber Seeds
Saving cucumber seeds is a bit easier than saving tomato seeds. First, pick a ripe cucumber from your garden. Cut it open and scoop out the seeds. Put the seeds in a bowl of water. Stir them around to remove any pulp. Let the seeds settle to the bottom. Pour off the water and pulp. Rinse the seeds again. Spread the seeds on a paper towel to dry. Let them dry for a week or two. Make sure they are completely dry. Then, store them in a jar or bag. Don’t forget to label the jar with the type of cucumber and the date. Saving seeds from your garden is so rewarding!
Tips for Drying Wet Seeds
Drying wet seeds properly is very important. If they are not fully dry, they can get moldy. This means they won’t grow. Always use a paper towel to dry your seeds. Spread the seeds out in a single layer. Don’t pile them on top of each other. Put the paper towel in a cool, dry place. A windowsill is a good spot. Let the seeds dry for at least a week. Turn them over every few days to make sure they dry evenly. Once they are dry, they should be hard and brittle. Now you can store them for next year!
Fun Fact or Stat: Tomato seeds can stay good for up to ten years if stored properly!
Cleaning Seeds Before Storage
Cleaning seeds is a very important step. It helps make sure your seeds stay healthy. It also helps them grow better next year. When you save seeds from your garden, you might get some extra stuff with them. This could be bits of leaves, stems, or pulp. You want to get rid of this extra stuff before you store your seeds. For dry seeds, you can use a screen or a sieve. Shake the seeds through the screen to get rid of the bigger pieces. You can also blow on the seeds gently to remove lighter pieces. For wet seeds, make sure you rinse them really well. Get rid of all the pulp and mold before you dry them. Clean seeds are happy seeds!
- Remove extra plant parts.
- Use a screen or sieve for dry seeds.
- Blow gently to remove light pieces.
- Rinse wet seeds very well.
- Clean seeds last longer.
- Clean seeds grow better.
Imagine you are getting ready to bake cookies. You would not want to mix in any dirt or leaves, right? It’s the same with seeds! You want to make sure they are nice and clean before you store them. When you save seeds from your garden, you are preparing them for their next big adventure. You want to give them the best chance to grow into strong, healthy plants. Cleaning the seeds is like giving them a fresh start. It helps them stay healthy and ready to grow when you plant them next year. So, take the time to clean your seeds. It will make a big difference in your garden!
Why is Cleaning Important?
Cleaning seeds is important for a few reasons. First, it helps prevent mold and disease. Extra plant parts can rot and cause problems. Clean seeds are less likely to get sick. Second, it makes it easier to store the seeds. You don’t want to store a bunch of extra stuff with your seeds. Clean seeds take up less space. Third, it makes it easier to plant the seeds. You don’t have to worry about planting extra stuff with your seeds. Clean seeds are ready to go!
How to Clean Dry Seeds
Cleaning dry seeds is pretty easy. You can use a screen or a sieve. A sieve is like a strainer you use in the kitchen. Put the seeds in the screen or sieve. Shake it gently. The seeds will fall through. The bigger pieces will stay behind. You can also blow on the seeds gently. This will remove lighter pieces like small leaves or stems. Do this outside so you don’t make a mess inside. Now your seeds are clean and ready to store!
How to Clean Wet Seeds
Cleaning wet seeds means rinsing them really well. After you ferment tomato seeds or scoop out cucumber seeds, you need to rinse them. Put the seeds in a strainer. Rinse them under running water. Rub the seeds gently to remove any pulp. Keep rinsing until the water is clear. Make sure you get rid of all the pulp. Then, spread the seeds on a paper towel to dry. Clean wet seeds are ready for their drying adventure!
Fun Fact or Stat: Clean seeds can have a 20% higher germination rate, which means more of them will sprout!
Storing Seeds Correctly
Storing seeds the right way is super important. It helps them stay alive until you are ready to plant them. When you save seeds from your garden, you want to make sure they last. The best place to store seeds is in a cool, dry, and dark place. A basement or a closet is a good choice. You can store seeds in glass jars, plastic bags, or paper envelopes. Make sure the container is airtight. This means no air can get in. Label each container with the type of seed and the date you saved it. This will help you keep track of your seeds. You can also put a small packet of silica gel in the container. Silica gel helps absorb moisture. This keeps the seeds dry and healthy.
- Store seeds in a cool place.
- Store seeds in a dry place.
- Store seeds in a dark place.
- Use airtight containers.
- Label each container clearly.
- Use silica gel to absorb moisture.
Imagine you are putting away your favorite toys. You want to keep them safe and sound, right? It’s the same with seeds! You want to protect them from heat, moisture, and light. These things can hurt the seeds and make them not grow. When you save seeds from your garden, you are saving a little piece of life. You want to take good care of it. Storing the seeds correctly is like giving them a cozy home until they are ready to grow. It’s a simple way to make sure your seeds stay healthy and ready to sprout when you plant them next year.
What Containers are Best for Seed Storage?
Choosing the right container is important for storing seeds. Glass jars are a great choice. They are airtight and keep out moisture. Plastic bags are also good, but make sure they are heavy-duty. Paper envelopes can work, but they are not as airtight. You can also buy special seed storage containers. These containers are designed to keep seeds safe and dry. No matter what container you choose, make sure it is clean and dry before you put the seeds in it. Saving seeds from your garden is an investment in your future garden!
How Does Temperature Affect Seed Storage?
Temperature is a big deal when it comes to storing seeds. Heat can damage seeds and make them not grow. The best temperature for storing seeds is below 50 degrees Fahrenheit. A refrigerator is a good place to store seeds, but make sure they are in an airtight container. This will protect them from moisture. A basement is also a good choice if it stays cool and dry. Avoid storing seeds in places that get hot, like attics or garages. Saving seeds from your garden means protecting them from the heat!
Why is Moisture Bad for Seed Storage?
Moisture is the enemy of seeds. It can cause them to rot or sprout too early. This means they won’t grow when you plant them. Always store seeds in a dry place. Use silica gel to absorb any extra moisture. You can also add a layer of rice to the bottom of your storage container. Rice helps absorb moisture too. Make sure your containers are airtight to keep out moisture. Saving seeds from your garden means keeping them dry!
Fun Fact or Stat: For every 10 degrees Fahrenheit you lower the storage temperature, you can double the life of your seeds!
Testing Seed Germination
Before you plant your saved seeds, it’s a good idea to test them. This is called a germination test. It helps you find out if your seeds are still alive. When you save seeds from your garden, you want to make sure they will grow. To do a germination test, take a few seeds from each batch. Put them on a damp paper towel. Roll up the paper towel and put it in a plastic bag. Keep the bag in a warm place. Check the paper towel every day. Keep it damp, but not too wet. After a week or two, check to see if the seeds have sprouted. If most of the seeds sprout, your seeds are good to go!
- Test seeds before planting.
- Use a damp paper towel.
- Roll up the paper towel in a bag.
- Keep the bag in a warm place.
- Check for sprouts after a week.
- If most sprout, the seeds are good.
Imagine you are getting ready to play a game. You want to make sure all the pieces are there before you start, right? It’s the same with seeds! You want to make sure they are still alive before you plant them. When you save seeds from your garden, you are hoping they will grow into beautiful plants. A germination test helps you check if your seeds are ready for the game. It’s a simple way to avoid wasting time and effort on seeds that won’t sprout. So, take a few minutes to test your seeds. It will make your garden even better!
How to Perform a Germination Test
Performing a germination test is easy. First, gather your supplies. You will need a paper towel, a plastic bag, and some water. Take a few seeds from the batch you want to test. Wet the paper towel and squeeze out the extra water. Place the seeds on the damp paper towel. Roll up the paper towel and put it in the plastic bag. Seal the bag and put it in a warm place. Check the paper towel every day. Keep it damp, but not soaking wet. After a week or two, check to see if the seeds have sprouted.
What to Do With Germination Test Results
So, you’ve done a germination test. Now what? If most of the seeds have sprouted, that’s great! Your seeds are good to go. You can plant them in your garden with confidence. If only a few seeds have sprouted, your seeds might not be as good. You can still plant them, but you might need to plant more seeds than usual. If none of the seeds have sprouted, your seeds are probably not alive. It’s best to get new seeds. Saving seeds from your garden is a learning process. Sometimes seeds don’t last, and that’s okay!
How to Improve Germination Rates
Want to improve your germination rates? Here are a few tips. First, make sure your seeds are stored correctly. Keep them in a cool, dry, and dark place. Second, use fresh seeds. Seeds lose their ability to sprout over time. Third, give your seeds the right conditions. They need warmth, moisture, and light to sprout. Fourth, scarify hard seeds. This means gently scratching the seed coat to help water get in. Saving seeds from your garden is a rewarding experience, and these tips can help you succeed!
Fun Fact or Stat: A good germination rate is 80% or higher, meaning at least 8 out of 10 seeds should sprout!
Planting Your Saved Seeds
Now comes the fun part! It’s time to plant your saved seeds. You’ve done all the hard work. You’ve saved seeds from your garden, cleaned them, stored them, and tested them. Now you get to watch them grow! Plant your seeds according to the instructions on the seed packet. Make sure they get enough sunlight and water. Be patient. It takes time for seeds to sprout and grow into plants. Enjoy the process! Saving seeds from your garden is a wonderful way to connect with nature.
- Follow planting instructions.
- Give seeds enough sunlight.
- Water seeds regularly.
- Be patient and wait for sprouts.
- Enjoy the growing process.
Imagine you are an artist. You have carefully collected your paints and brushes. Now you are ready to create a masterpiece! It’s the same with planting seeds. You have carefully saved seeds from your garden. You have prepared them for their new life. Now you get to watch them grow into beautiful plants. Planting seeds is like creating a work of art. You are bringing life and beauty into the world. So, take your time and enjoy the process. It’s a magical experience!
Tips for Planting Seeds
Here are some tips for planting seeds. First, choose the right time to plant. Some seeds need to be planted in the spring. Others need to be planted in the fall. Check the seed packet for instructions. Second, prepare the soil. Make sure it is loose and well-drained. Add compost or other organic matter to improve the soil. Third, plant the seeds at the right depth. Too deep or too shallow, and they might not sprout. Fourth, water the seeds gently. Don’t wash them away. Saving seeds from your garden is just the first step. Planting them correctly is the next!
Caring for Seedlings
Once your seeds have sprouted, you need to care for the seedlings. Seedlings are young, delicate plants. They need special attention. Make sure they get enough sunlight. Water them regularly, but don’t overwater them. Protect them from pests and diseases. Thin the seedlings if they are too crowded. This means removing some of the seedlings so the others have room to grow. Saving seeds from your garden is a rewarding process. Watching your seedlings grow is even more rewarding!
Troubleshooting Common Problems
Sometimes things go wrong when you are planting seeds. Here are some common problems and how to fix them. If your seeds don’t sprout, they might be too old or the soil might be too cold. Try planting new seeds or warming up the soil. If your seedlings get leggy, they need more sunlight. Move them to a sunnier location. If your seedlings get eaten by pests, protect them with netting or insecticidal soap. Saving seeds from your garden can be challenging, but don’t give up! Keep learning and trying new things.
Fun Fact or Stat: Seedlings need at least six hours of sunlight per day to grow strong and healthy!
Summary
Saving seeds from your garden is a fun and rewarding activity. It allows you to grow your favorite plants year after year. It saves you money and helps plants adapt to your local area. Easy seeds to save include beans, peas, lettuce, and marigolds. Wet seeds like tomatoes and cucumbers require extra steps. You need to clean the seeds before storing them. Store them in a cool, dry, and dark place. Test your seeds before planting them to make sure they are still alive. Then, plant your seeds and enjoy watching them grow. It is a great way to connect with nature and become a more self-sufficient gardener.
By following these steps, you can become a seed-saving expert. You will have a garden full of your favorite plants. Plus, you will be helping the environment. Saving seeds from your garden is a simple way to make a big difference. It’s a tradition that has been passed down for generations. Now it’s your turn to join in the fun. Start saving seeds today and enjoy the fruits (and vegetables) of your labor!
Conclusion
Saving seeds from your garden is a fantastic way to keep your favorite plants growing. It helps you save money and connect with nature. It is a simple process that anyone can learn. By following the steps in this article, you can become a seed-saving expert. Start with easy seeds like beans and peas. Then, try saving wet seeds like tomatoes and cucumbers. Always clean and store your seeds properly. With a little practice, you will be growing your own food from your own seeds in no time. So, get out there and start saving seeds from your garden today!
Frequently Asked Questions
Question No 1: What are the easiest seeds to save for beginners?
Answer: The easiest seeds to save are usually dry seeds like beans and peas. Simply allow the pods to dry completely on the plant. Once they are dry, remove the pods and take out the seeds. Make sure the seeds are fully dry before you store them in an airtight container. You can also save seeds from lettuce and marigolds easily. These are great choices for beginners who want to start saving seeds from your garden. They are a low-effort way to learn the basics of seed saving and see quick results.
Question No 2: How do I save tomato seeds properly?
Answer: Saving tomato seeds requires a special process called fermentation. First, squeeze the seeds and pulp from ripe tomatoes into a jar. Add a little water. Let the mixture sit for about 3–4 days. A white mold will form on top. This process removes a coating on the seeds that prevents them from sprouting too early. After fermentation, rinse the seeds thoroughly in a strainer. Spread them on a paper towel to dry completely. Store the dry seeds in an airtight container. This process ensures that your tomato seeds are healthy and ready to grow.
Question No 3: What is the best way to store seeds to keep them viable?
Answer: The best way to store seeds is in a cool, dry, and dark place. Use airtight containers like glass jars or plastic bags. Make sure the seeds are completely dry before storing them. You can also add a packet of silica gel to absorb any extra moisture. Label each container with the type of seed and the date you saved it. Avoid storing seeds in places with temperature changes. This will help keep your seeds viable for several years. Proper storage is key to successfully saving seeds from your garden.
Question No 4: How do I know if my saved seeds are still good to plant?
Answer: To check if your saved seeds are still good, perform a germination test. Take a small sample of seeds and place them on a damp paper towel. Roll up the towel and put it in a plastic bag. Keep the bag in a warm place. Check the seeds every few days to see if they sprout. If a good percentage of the seeds sprout (around 80%), then your seeds are still viable. If very few or none of the seeds sprout, it may be time to get new seeds. This simple test can save you time and effort in the garden.
Question No 5: Can I save seeds from hybrid plants?
Answer: You can save seeds from hybrid plants, but the resulting plants may not be exactly like the parent plant. Hybrid plants are created by crossing two different parent plants. The seeds from these plants may produce offspring with different traits. If you want to grow plants that are true to type, it’s best to save seeds from open-pollinated or heirloom varieties. However, saving seeds from hybrid plants can still be a fun experiment to see what you get!
Question No 6: How does saving seeds help the environment?
Answer: Saving seeds helps the environment in several ways. It promotes biodiversity by preserving different varieties of plants. It also helps plants adapt to local conditions over time. When you save seeds from plants that thrive in your area, you are selecting for traits that make them well-suited to your climate and soil. Additionally, saving seeds reduces reliance on commercial seed companies, which can have a large environmental footprint. It’s a sustainable practice that supports a healthier planet and helps you connect with nature.
