Sprouting seeds at home offers a remarkably easy and fast way to enjoy fresh, nutrient-rich greens year-round. This effortless method delivers delicious results in just days, bringing vibrant life and flavor directly to your kitchen counter with minimal effort. Discover the simple steps to successful sprouting and elevate your meals effortlessly.
Sprouting Seeds at Home: The Proven Effortless DIY Method
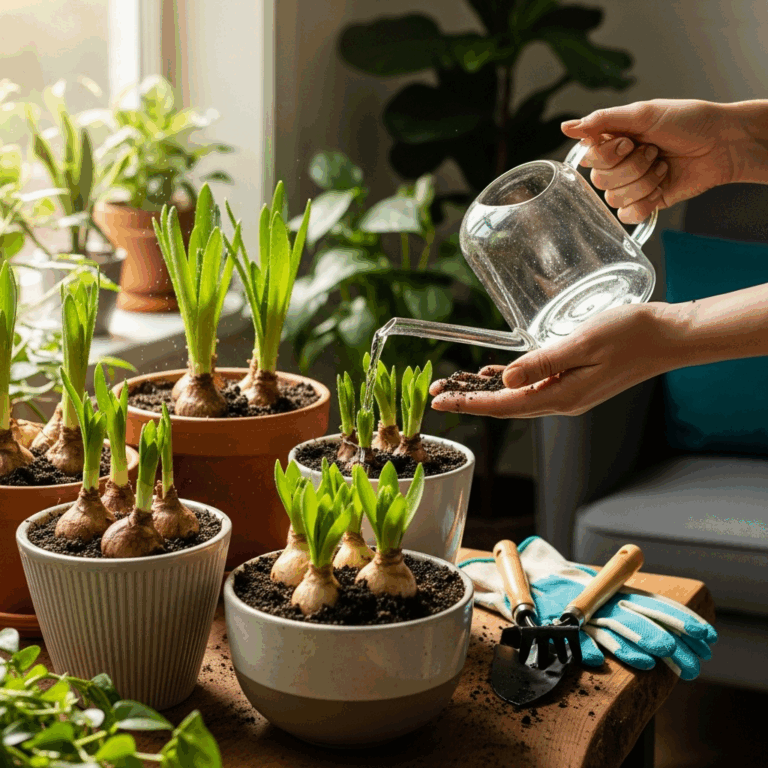
Ever wished you could add a burst of fresh, healthy greens to your meals, even when the garden is dormant or you don’t have much space? Many of us dream of having homegrown food, but the thought of starting a garden from scratch can feel overwhelming. You might have tried growing plants indoors, only to be met with frustration. But what if I told you there’s a way to harvest incredibly nutritious and delicious sprouts in as little as 3-7 days, right on your kitchen counter? It’s true! Sprouting seeds at home is one of the simplest, most rewarding gardening projects you can undertake, perfect for absolute beginners. It requires minimal space, very few tools, and virtually no prior gardening experience. Let’s transform those tiny seeds into a superfood powerhouse together!
Why Sprout Seeds at Home? The Amazing Benefits
Sprouting seeds at home isn’t just a novel kitchen trick; it’s a gateway to unparalleled freshness and nutrition. Think about it: you’re capturing a plant at its most vital stage, packed with nutrients that are easily digestible. It’s like unlocking a secret power from a tiny seed!
- Nutrient Density: Sprouts are nutritional powerhouses. As a seed begins to germinate, its vitamin and mineral content can increase dramatically. For example, vitamin C levels often surge during the sprouting process.
- Digestibility: The sprouting process starts to break down phytic acid, an “anti-nutrient” found in many seeds and grains. This reduction can make the nutrients in sprouts more bioavailable and easier for your body to absorb.
- Flavor and Texture: Fresh sprouts add a wonderful crunch and a mild, fresh flavor to salads, sandwiches, wraps, and countless other dishes. They are a culinary delight waiting to happen!
- Year-Round Growing: Unlike outdoor gardening, sprouting is an indoor activity unaffected by seasons or weather. You can enjoy fresh sprouts 365 days a year.
- Cost-Effectiveness: Buying sprouts from the grocery store can add up. Sprouting seeds at home is significantly cheaper, costing just pennies per serving.
- Minimal Space Required: All you need is a small jar or a sprouting tray, and a bit of counter space. It’s perfect for apartments, small kitchens, or anyone with limited gardening real estate.
- Quick Rewards: The satisfaction of growing your own food is immense, and with sprouts, you get to see the results of your efforts incredibly fast – often within a week!
The Effortless Sprouting Method: A Step-by-Step Guide
Forget complicated setups or fancy equipment. This method is designed for simplicity and success, even if you’ve never sprouted anything before. All you need are seeds, water, and a little patience.
What You’ll Need: Your Sprouting Starter Kit
Gathering your supplies is the first, and easiest, step. You can often use common kitchen items, making this project incredibly accessible.
- Sprouting Seeds: Choose seeds specifically sold for sprouting. These are typically untreated and high-quality. Good beginner options include:
- Alfalfa
- Broccoli
- Radish
- Mung Beans
- Lentils
- Fenugreek
- A Jar or Sprouting Tray: A glass mason jar (quart-sized is popular) with a mesh lid or cheesecloth secured by a band is perfect. Alternatively, you can use a dedicated sprouting tray system.
- Clean Water: Filtered or unchlorinated tap water is best, as chlorine can sometimes inhibit sprouting.
- A Bowl or Tray (for draining): To keep your jar at an angle for proper drainage.
Step 1: Rinsing and Soaking Your Seeds
This is where the magic begins! Rinsing prepares the seeds, and soaking kickstarts their germination.
- Measure Your Seeds: Start with a small amount. For a quart-sized jar, about 1-2 tablespoons of most seeds is a good starting point. For larger seeds like beans, use proportionally less.
- Rinse Well: Place the seeds in your jar or a fine-mesh sieve. Rinse them thoroughly under cool running water, ensuring they are clean.
- Soak: Cover the seeds with clean, cool water. Ensure there’s plenty of water to allow for expansion (seeds can swell up to 5-7 times their dry size). Let them soak for the recommended time, usually 8-12 hours, or overnight. Different seeds have slightly different soaking times; check your seed packet for specifics. For example, alfalfa typically needs 6-8 hours, while mung beans might need 8-12.
Step 2: Draining and Rinsing
After soaking, it’s time to drain off the water and begin the rinsing cycle. This is crucial for preventing mold and promoting healthy growth.
- Drain Completely: Empty the soaking water from the jar. If using a jar with a mesh lid, simply tip it upside down. If using a sieve, drain thoroughly.
- Rinse Again: Add fresh, cool water to the jar, swirl it around gently to rinse the seeds, and then drain completely. It’s important to get as much water out as possible after each rinse.
- Position for Drainage: Place your jar upside down at an angle in a bowl or on a drying rack. This allows any remaining water to drain away freely. Without proper drainage, your sprouts can become waterlogged, leading to mold or rotting.
Step 3: Regular Rinsing and Draining
This is the main “work” involved in sprouting, and it’s incredibly simple. You’ll repeat this process a couple of times a day for several days.
- Rinse, Rinse, Rinse: Twice a day (morning and evening is ideal), add fresh, cool water to your jar. Gently swirl to rinse the seeds and sprouts, then drain thoroughly. Ensure the jar is always positioned to allow complete drainage.
- Observe Growth: After the first day or two, you’ll start to see small sprouts emerging from the seeds. They will gradually get longer and greener (if they are leafy varieties).
- Continue Daily: Keep up this routine for 3-7 days. The exact time depends on the type of seed, temperature, and desired sprout size.
Step 4: Harvesting Your Sprouts
The moment of truth! Your sprouts are ready when they’ve reached the size you prefer and have a fresh, inviting appearance.
- Final Rinse: Give your sprouts one last thorough rinse.
- Drain Very Well: This is critical. Shake out as much water as possible. Any excess moisture can shorten their shelf life.
- Cool Down: For best results and to stop the growth process, transfer the harvested sprouts to an airtight container and keep them in the refrigerator for a few hours before using. This can help them crisp up and last longer.
- Enjoy! Your homegrown, nutritious sprouts are ready to be added to your favorite meals.
Tips for Sprouting Success
While this method is effortlessly simple, a few extra tips can ensure your sprouting journey is even more fruitful.
- Seed Quality Matters: Always use seeds specifically sold for sprouting. Garden seeds may be treated with chemicals that are not safe for consumption. Reputable sources for sprouting seeds include companies like Botanical Interests or dedicated sprouting suppliers.
- Water Temperature: Use cool or room-temperature water. Very cold water can slow germination, while hot water can kill the seeds.
- Air Circulation: Good air flow is essential. Ensure your jar/tray setup allows air to circulate around the sprouts during their draining periods.
- Warmth is Key: Sprouts grow best in a warm, well-lit spot (but not direct sunlight, which can overheat them). A kitchen counter away from drafts is usually ideal. Aim for room temperature (65-75°F or 18-24°C).
- Cleanliness is Crucial: Always rinse your hands before handling seeds and sprouts, and ensure your jars and equipment are clean to prevent bacterial contamination.
- Don’t Overcrowd: Avoid packing too many seeds into your sprouting container. They need space to grow and allow for proper air circulation and drainage.
- Know Your Seeds: Different seeds have different germination rates and growth times. Familiarize yourself with the specific needs of the seeds you are sprouting. For instance, larger beans like chickpeas might have a longer sprouting cycle than smaller seeds like alfalfa.
Popular Seeds for Sprouting and Their Characteristics
Choosing the right seeds can enhance your sprouting experience. Here’s a look at some favorites, perfect for beginners and experienced sprouters alike.
| Seed Type | Soak Time | Sprout Time | Flavor & Texture | Optimal Uses | Notes |
|---|---|---|---|---|---|
| Alfalfa | 6-8 hours | 4-6 days | Mild, slightly sweet, delicate. | Salads, sandwiches, wraps, garnishes. | Very popular, easy to grow, can be a bit fiddly to harvest due to small size. Ensure thorough rinsing. |
| Broccoli | 8-10 hours | 4-6 days | Slightly pungent, peppery, robust flavor. | Salads, smoothies, sandwiches. | Highly nutritious, great for a flavor boost. |
| Radish (Daikon, China Rose) | 8-10 hours | 4-5 days | Spicy, peppery, with a satisfying crunch. | Salads, stir-fries, garnishes, sandwiches. | Fastest to sprout, adds a zesty kick. |
| Mung Beans | 8-12 hours | 3-5 days | Mild, subtly sweet, crisp, and hearty. | Stir-fries, soups, salads, wraps. | Excellent staple sprout, forgiving for beginners, grows quickly into substantial sprouts. |
| Lentils (Green, Red, Brown) | 8-12 hours | 3-5 days | Mild, earthy, with a good crunch. | Salads, dals, soups, sandwich fillings. | Very easy and fast to sprout, great for adding protein and substance. Red lentils are the quickest. |
| Fenugreek | 8-10 hours | 4-6 days | Slightly bitter, maple-like aroma, unique flavor. | Indian dishes, curries, salads, teas. | Known for its health benefits. The flavor can be intense for some; start with small amounts. Rinse well as they can get slimy. |
| Wheat Berries (for Wheatgrass) | 8-12 hours | 7-14 days (for grass) | Grassy, slightly sweet (for wheatgrass). | Wheatgrass juice, garnishes. | Requires more time and specific setup for growing into grass, not typically used as sprouts in the same way as the others. Refer to specific wheatgrass growing guides. The USDA’s National Agricultural Library often has resources on growing various food crops. |
Troubleshooting Common Sprouting Issues
Even with an effortless method, sometimes things don’t go exactly as planned. Don’t worry, these are usually small hiccups easily fixed!
My sprouts smell bad or look slimy
This is almost always a sign of insufficient drainage or rinsing. Sprouts need to be rinsed thoroughly twice a day and drained completely. If they remain wet, they can develop harmful bacteria (like Salmonella or E. coli) or mold. If your sprouts are excessively slimy or have a foul odor, discard them immediately. Ensure good air circulation and that the jar is at an angle to let all water escape. For smaller seeds, sometimes rinsing them in a sieve and then in the jar works better to ensure all water is gone.
My seeds aren’t sprouting
Several factors can cause this:
- Old Seeds: Sprouting seeds have a shelf life. If your seeds are old, their germination rate might be low.
- Water Temperature: Water that was too hot during soaking or rinsing can kill the seed embryo. Always use cool or room-temperature water.
- Incorrect Soak Time: Soaking for too long or too short can affect germination.
- Chlorinated Water: Some seeds are sensitive to chlorine. If you’re on municipal water, letting it sit out for a few hours or using filtered water can help.
- Dormancy: Some seeds may still be dormant. Give them a little more time with consistent rinsing.
My sprouts are too small or thin
This can be due to insufficient watering (not rinsing enough), too little time, or not enough warmth for germination. Ensure you’re rinsing thoroughly twice a day and that the ambient temperature is around 65-75°F (18-24°C). Some beans, like mung beans, benefit from being kept in the dark for the last day or two of sprouting to encourage longer shoots before exposing them to light.
Mold is growing on my sprouts
Mold is a definite sign of a problem, usually related to poor drainage and stagnant water. It can also be an indicator of seeds that are no longer viable or have started to rot. If you see fuzzy mold growth, especially if it’s colored (green, black, or pink), it’s safest to discard the entire batch. Thorough rinsing, excellent drainage, and clean equipment are your best defenses against mold.
Beyond the Jar: Other Sprouting Methods
While the jar method is exceptionally popular for its simplicity and effectiveness, other techniques can also yield great results. Once you master the jar, you might want to explore:
- Sprouting Trays: These multi-tiered systems allow you to rinse and drain sprouts easily, and some are designed for growing microgreens as well. They offer excellent air circulation and drainage, making them ideal for larger batches.
- Colanders/Sieves: A simple fine-mesh colander works much like a sieve lid on a jar. You rinse the seeds in the colander and then leave it propped at an angle to drain.
- Plate and Dome: For sprouting very small seeds like alfalfa, you can use a shallow plate and cover it with another inverted plate or bowl to create a humid environment. Regular misting or brief rinses are needed.
Each method requires the same core principles: clean seeds, fresh water, thorough rinsing, and vital drainage. The National Center for Home Food Preservation offers valuable general advice on safe food handling, which is always relevant for home-grown foods: https://nchfp.uga.edu/.
Incorporating Sprouts into Your Diet
Now that you have a bounty of fresh sprouts, how do you enjoy them? The possibilities are endless, and they add a nutritional punch and delightful crunch to so many dishes!
- In Salads: Toss a handful of sprouts into any salad for added texture and nutrients. They are particularly good in Asian-inspired salads or coleslaws.
- On Sandwiches and Wraps: Layer sprouts generously on top of your favorite sandwich or wrap fillings. They provide a fresh, crisp contrast to cheeses, meats, or veggies.
- In Smoothies: Especially certain varieties like broccoli or alfalfa sprouts, can be added to green smoothies for an extra boost of vitamins and minerals without significantly altering the taste.
- As a Garnish: Sprinkle sprouts over the top of soups, stir-fries, curries, or even avocado toast for a fresh, appealing finish.
- In Stir-fries: Add beansprouts (like mung beans) towards the very end of cooking a stir-fry. They only need a quick toss to warm through, retaining their delightful crunch.
- In Egg Dishes: Mix sprouts into omelets, scrambles, or quiches just before cooking.
Remember to store your harvested sprouts in the refrigerator in an airtight container