To get the best results when starting weed seeds for outdoor growing, wait until after the last frost in your area and when soil temperatures are consistently above 55°F (13°C). This usually means starting in late spring. Timing is crucial for strong plant growth and a successful harvest, so understanding your local climate is key.
Are you dreaming of growing your own cannabis outdoors this year? It’s a wonderful way to connect with nature and enjoy fresh, homegrown buds. But a common question for new gardeners is, “When exactly should I start my weed seeds outside?” It can feel daunting, like you’re trying to catch a moving target! Get the timing wrong, and your tiny seedlings might face a rude shock from late frosts or struggle in chilly soil. Don’t worry, though! This guide is here to help you pinpoint the perfect moment to get your outdoor cannabis seeds started. We’ll break down everything you need to know, step-by-step, so you can plant with confidence and watch your garden thrive.
The Secret to Successful Outdoor Seed Starting
Starting cannabis seeds outdoors is all about timing and creating the right conditions for those delicate young plants. Unlike starting indoors under controlled lights, outdoor growing means relying on Mother Nature. This makes understanding your local climate and seasonal changes incredibly important. The goal is to give your seeds and young seedlings the longest possible growing season with favorable weather, minimizing risks like frost, extreme heat, or pests.
Understanding Your Local Climate is Key
Before you even think about popping seeds in the ground, you need to become a bit of a weather detective for your specific location. Every region has its own unique climate patterns, and this dictates the best time to start your outdoor cannabis plants.
- Frost Dates: The most critical piece of information is your area’s average last frost date in spring and first frost date in fall. Cannabis plants are sensitive to frost, and a sudden cold snap can easily kill young seedlings. You can usually find this information from local agricultural extensions or reliable gardening websites. For example, the University of New Hampshire Extension provides frost-free dates for their region, which is a great example of the kind of resource that can help you.
- Soil Temperature: Seeds need warmth to germinate and grow. Cold, damp soil can lead to seeds rotting instead of sprouting. Aim for soil temperatures that consistently stay above 55°F (13°C). You can measure this with a simple soil thermometer.
- Daylight Hours: Cannabis plants, especially photoperiod varieties, rely on changes in daylight hours to transition from vegetative growth to flowering. Starting them when they can get at least 14-16 hours of daylight is ideal for robust vegetative growth.
- Rainfall Patterns: Consider the typical rainfall in your area during the growing season. Too much rain can lead to mold and mildew issues, while too little might require frequent watering.
The “When” Factors: Frost, Soil, and Sunlight
So, when is the magic window for starting your outdoor weed seeds? It boils down to a few crucial factors:
- After the Last Frost: This is your absolute priority. Never plant outdoors before your last expected frost date has passed. It’s often wise to wait a week or two after this date to be extra safe.
- Warm Soil: Aim to plant when the soil temperature has warmed up. Even if the air is warm, cold soil can stunt germination and growth. Testing your soil temperature is a good practice.
- Sufficient Sunlight: Ensure your chosen planting spot receives plenty of direct sunlight, ideally 6-8 hours per day. This will fuel vigorous growth.
- Long Enough Growing Season: You want enough time for your plants to grow, mature, and develop their buds before the first frost of autumn. This means planting early enough in spring to take advantage of the longest possible daylight and warmest months.
Step-by-Step Guide to Starting Weed Seeds Outdoors
Now that you know the optimal timing, let’s get into the practical steps of actually starting your seeds outdoors. This process can be broken down into a few key stages, from preparing your site to caring for your new sprouts.
Step 1: Choose Your Seeds Wisely
Not all cannabis strains are created equal when it comes to outdoor growing. Some are more resilient and better suited to varied conditions. Look for strains described as:
- Hardy or resilient: These strains can handle fluctuating temperatures and humidity better.
- Fast-flowering or autoflowering: Autoflowering strains will automatically start flowering after a certain period, regardless of light cycles, and are often quicker to mature. This can be a great advantage in areas with shorter growing seasons.
- Mold/mildew resistant: Crucial if you live in a humid climate.
Step 2: Soil Preparation is Crucial
Your plants will live their entire lives in this soil, so making it hospitable is vital. Whether you’re planting directly in the ground or in containers, good soil is the foundation:
- In-Ground Planting:
- Select a Sunny Spot: Choose a location that receives at least 6-8 hours of direct sunlight daily.
- Test Drainage: Dig a hole about a foot deep and fill it with water. If it drains within a few hours, your drainage is good. If not, you’ll need to amend the soil or consider raised beds.
- Amend the Soil: Most garden soils benefit from improvements. Mix in compost, aged manure, and perlite or vermiculite to improve aeration and drainage. A good starting point is a 50/50 mix of your native soil and compost. For a more robust mix, consider adding coco coir and worm castings.
- pH Level: Cannabis prefers slightly acidic soil, with a pH range of 6.0 to 7.0. You can get a soil test kit from most garden centers to check this.
- Container Planting:
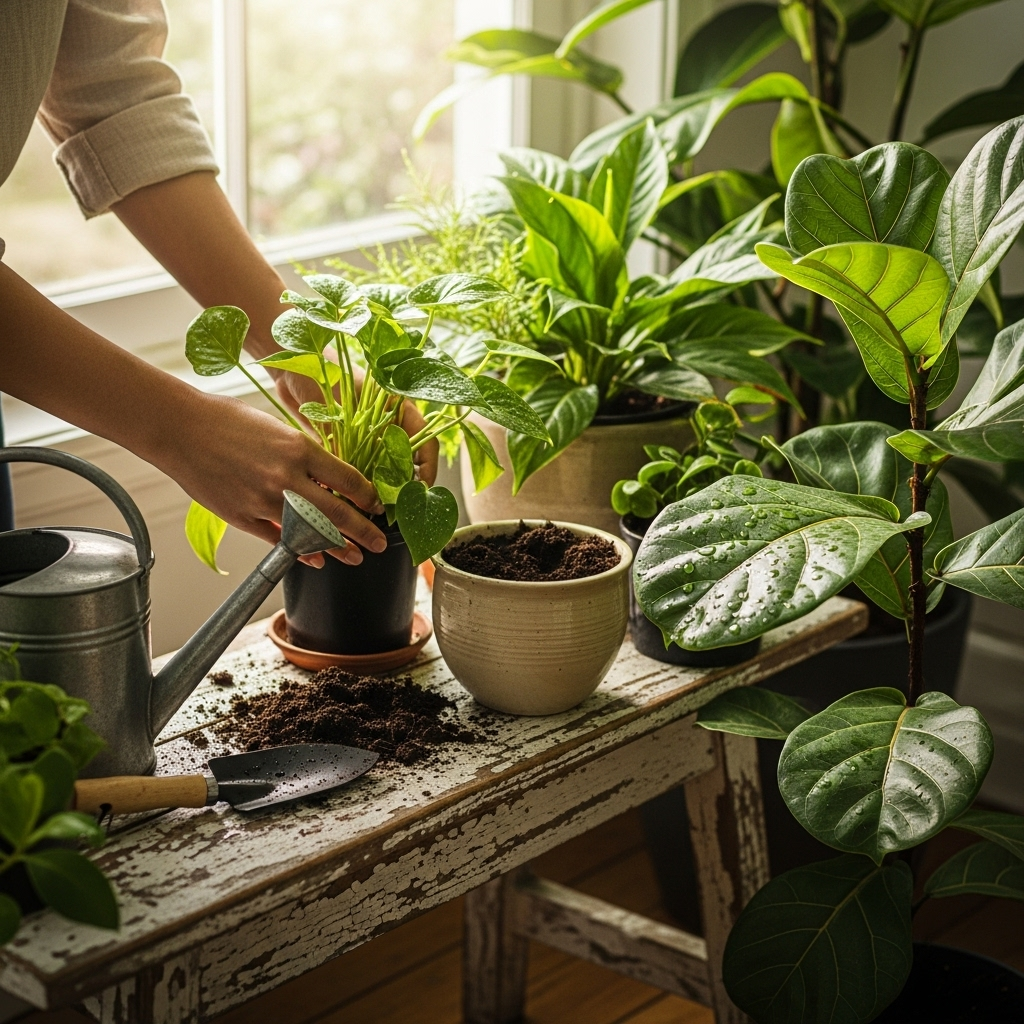
- Choose the Right Size Pots: Start small, but be prepared to transplant to larger pots as your plants grow. For seedlings, 1-gallon pots are a good start. For mature plants, you might need 5-10 gallon pots or larger.
- Use High-Quality Potting Mix: Don’t use garden soil in pots, as it compacts too much. Opt for a well-draining potting mix designed for containers. You can enhance it with compost and perlite.
- Ensure Drainage Holes: Your pots MUST have drainage holes.
Step 3: Germinating Your Seeds
Starting seeds directly in the ground can be risky as they are very vulnerable. Germinating them indoors or in a protected spot first gives them a head start and a better chance of survival.
The Paper Towel Method (Popular & Easy):
- Soak two paper towels in room-temperature water.
- Gently place your cannabis seeds on one damp paper towel, leaving space between them.
- Fold the other damp paper towel over the seeds.
- Place the damp paper towels inside a plastic bag or a sealed container.
- Keep the container in a warm, dark place (around 70-80°F or 21-27°C). A top of a refrigerator or a seedling heat mat can work well.
- Check daily for moisture and look for a taproot to emerge, which usually takes 24-72 hours.
Step 4: Planting Germinated Seeds
Once you see a healthy taproot (about ¼ to ½ inch long), it’s time to plant!
- If direct sowing into the ground (after last frost and warm soil):
- Dig a small hole about ½ inch deep.
- Gently place the germinated seed, taproot facing down, into the hole.
- Cover lightly with soil.
- Water gently around the spot.
- If transplanting seedlings to larger pots or into the ground:
- Fill your final pot or prepared ground hole with soil.
- Dig a small hole that’s just big enough to fit the sprouted seed and its emerging root.
- Carefully scoop the germinated seed with its taproot into the hole. Be extremely gentle; the taproot is fragile.
- Cover lightly with soil.
- Water gently.
Important Note: When transplanting, handle seedlings by their leaves, never by the stem, as the stem is easily damaged.
Step 5: Early Seedling Care
Your newly planted seeds, especially those just beginning to sprout, need tender loving care.
- Watering: Keep the soil consistently moist but not waterlogged. A spray bottle is excellent for gently watering young seedlings to avoid disturbing them.
- Protection: Seedlings are vulnerable to pests, wind, and harsh sun. Consider using a small cloche, a cut plastic bottle, or a portable mini greenhouse for protection.
- Sunlight: Once they sprout, they’ll need light. If starting in pots, you can move them to a location with bright, indirect sunlight. If direct sowing, ensure they are in a prepared sunny spot.
- Nutrients: Young seedlings get their initial nutrients from the seed. You usually won’t need to fertilize for the first couple of weeks.
When to Start Indoors vs. Outdoors
For beginners, understanding when to start seeds indoors and when to move them outdoors is a crucial decision. Each approach has its advantages.
Starting Indoors (Seedling Stage)
Many growers prefer to start their seeds indoors several weeks before the last frost. This gives them a significant head start and allows for better control over conditions during the most vulnerable phase.
- Benefits:
- Controlled Environment: Manage temperature, humidity, and light precisely.
- Protection from Elements: Shield young plants from frost, heavy rain, wind, and pests.
- Head Start: Gain several weeks of growth before moving outdoors, leading to larger plants sooner.
- Easier Germination: More consistent warmth and darkness can improve germination rates.
- When to do it: Start seeds indoors 2-4 weeks before your last expected frost date. This allows them to develop a root system and a few sets of true leaves before transplanting.
Starting Outdoors Directly
While less common for cannabis due to its specific needs, some people choose to plant seeds directly into their prepared outdoor garden or pots.
- Benefits:
- Simplicity: Less transplant shock for the plant.
- Natural Rhythms: Plants grow in their final environment from day one.
- Risks:
- Vulnerability: Seedlings are highly susceptible to pests, weather, and temperature fluctuations.
- Slower Start: Germination can be slower and less predictable in outdoor soil.
- Shorter Growing Season: If you start too late, you may not get a full harvest.
- When to do it: Only after the last frost date has passed, soil temperatures are consistently warm (above 55°F/13°C), and you have a long enough growing season ahead.
Key Timelines and Calendars
To make things clearer, let’s outline what a typical outdoor cannabis growing calendar might look like. Remember to adjust these based on your specific climate zone.
Example Outdoor Growing Calendar (Northern Hemisphere)
This is a general guide. Always consult local weather patterns and historical data for your precise region.
| Month | Key Activities for Outdoor Cannabis Growing | Notes |
|---|---|---|
| March | Research strains, gather supplies. If starting indoors, begin germinating seeds. | Focus on planning and preparing indoors. |
| April | Continue indoor seedling growth. Monitor your local last frost date. | Protect indoor seedlings from drafts and ensure adequate light. |
| May | Last frost date likely passed. Harden off indoor seedlings (gradually expose them to outdoor conditions). Transplant seedlings outdoors or directly sow germinated seeds. | This is a CRITICAL planting month for most regions. Soil temperature should be above 55°F. |
| June | Continue feeding and watering. Monitor for pests and deficiencies. Plants are in their vegetative growth phase. | Longest daylight hours. Expect rapid growth. |
| July | Continue vegetative growth. Some strains may start showing pre-flowers. | Maintain consistent care. Provide support if plants are getting large. |
| August | Most strains will begin transitioning into their flowering stage. | Daylight hours start to decrease. Plants develop buds. |
| September | Flowering continues. Most buds will be developing. Start flushing nutrients for some strains. | Watch for mold/mildew, especially in humid climates. Harvest may begin late in the month for fast strains. |
| October | Peak harvest time for many outdoor strains. Continue flushing if not already done. | Monitor trichomes for readiness. Harvest before the first hard frost. |
| November | Final harvests. Clean up garden beds. Prepare for winter. | Ensure all plants are harvested before significant cold or frost. |
Factors That Influence Your Timeline
Even within the same general region, subtle differences can impact your planting date:
- Microclimate: A sheltered spot with southern exposure will warm up faster than a shaded, north-facing area.
- Elevation: Higher elevations generally have later springs and earlier autumns.
- Specific Strain: Some strains are simply hardier and more forgiving of slightly cooler temperatures than others.
- Yearly Weather Variations: Always pay attention to the actual weather forecasts, not just historical averages. Some years, spring can be unusually cool or warm.
Choosing Your Planting Spot: Soil vs. Containers
Deciding whether to plant directly in the ground or use containers is an important step for outdoor growing. Each has pros and cons for beginners.
In-Ground Planting
This often feels like the most “natural” way to grow, giving plants access to a larger volume of soil.
- Pros:
- Max Root Space: Plants can grow larger and potentially yield more.
- Natural Moisture Retention: Good soil can retain moisture better than small pots.
- Lower Initial Cost: If you have suitable soil, it can be cheaper than buying many pots.
- Cons:
- Soil Quality Dependence: You are at the mercy of your native soil’s quality, drainage, and pH.
- Less Mobility: Once planted, you can’t easily move the plant if conditions change.
- Pest & Disease Risk: More direct exposure to soil-borne pests and diseases.
- Weed Competition: You’ll need to manage surrounding weeds.
Container Gardening
Growing in pots offers excellent control and flexibility, making it a popular choice for beginners and those with limited space or poor soil.
- Pros:
- Controlled Soil: You use a custom-made potting mix that’s optimized for drainage and aeration.
- Mobility: You can move pots to chase sunlight, shield from extreme weather, or protect from pests.
- Excellent Drainage: High-quality potting mixes paired with drainage holes prevent waterlogging.
- Less Weeding: You only manage weeds in the pot, which is much less work.
- Cons:
- Frequent Watering: Pots dry out faster than in-ground gardens, especially in hot weather.
- Nutrient Depletion: Nutrients can leach out faster, requiring more frequent feeding.
- Root Bound Issues: Plants can become “root-bound” if the pot is too small, hindering growth.
- Initial Cost: Pots, quality potting mix, and potentially a potting bench can add up.
Understanding Cannabis Seed Types
When you are ready to start, you’ll encounter different types of cannabis seeds, and knowing the difference helps in planning your outdoor grow:
1. Regular Seeds
- Produce both male and female plants.
- If you plan to breed or are not concerned about pollination for seed production, these are fine.
- For cannabis cultivation for buds, you ideally want only female plants. Male plants produce pollen and will pollinate females, leading to seeded buds instead of dense flowers.
2. Feminized Seeds
- Almost always produce female plants.
- Created by stressing a female plant to produce pollen.
- A great choice for beginners as it eliminates the need to identify and remove male plants, maximizing your yield of female flowers.
3. Autoflowering Seeds
- These seeds are derived from a cannabis strain called Ruderal