Succulent care and propagation are achievable for beginners with simple, straightforward methods. This guide offers essential tips for watering, light, soil, and easy propagation techniques to multiply your succulent collection successfully and beautifully.
Welcome to EcoPatchy! I’m Pearl Roach, and I absolutely love helping you bring a little more green into your life, no matter how much space you have. Succulents are fantastic plants because they’re tough, beautiful, and don’t demand a ton of fuss. But sometimes, they can seem a bit mysterious, and it’s easy to get confused about what they really need. Are you worried about overwatering them, or unsure how to make more of your favorite little drought-lovers? You’re not alone! Many of us start with a wilting or overwatered succulent and feel a little discouraged. But don’t worry, that’s where I come in. We’ll break down exactly what succulents need to thrive, and I’ll show you simple, proven ways to grow new plants from cuttings and leaves. Get ready to expand your succulent family with confidence – let’s dive in!
Why Are Succulents So Popular, and What Makes Them Unique?
Succulents have captured the hearts of gardeners everywhere, from apartment balconies to sprawling outdoor gardens. Their popularity stems from their stunning diversity in shape, color, and texture, and their ability to tolerate arid conditions. Unlike many other houseplants that require constant watering and attention, succulents are built to store water in their leaves, stems, or roots, making them incredibly resilient. This unique adaptation means they can survive long periods without rain, a trait that makes them ideal for busy individuals or beginner gardeners who are still learning the ropes. Their low-maintenance nature, combined with their striking visual appeal, makes them a go-to choice for adding a touch of natural beauty to any space.
The term “succulent” itself isn’t a scientific classification but rather a descriptive characteristic shared by plants from many different families. These characteristics include fleshy leaves, thick stems, or enlarged roots, all designed for water storage. This allows them to thrive in environments where water is scarce, such as deserts and semi-arid regions. This inherent hardiness is a huge part of their appeal, promising a rewarding gardening experience even for those with a less-than-green thumb.
Essential Succulent Care: The Golden Rules
Caring for succulents is about understanding their natural habitat and mimicking those conditions as closely as possible. They aren’t demanding plants, but they do have specific needs that, when met, will result in happy, healthy, and vibrant succulents. Think of it as giving them their favorite vacation spot right in your home or garden!
1. The Right Amount of Light
Light is crucial for succulents. Most varieties absolutely adore sunshine! Aim for bright, indirect light for at least six hours a day. A south- or east-facing window is often ideal for indoor succulents.
- Signs of Too Little Light: If your succulent starts stretching and becoming leggy (this is called etiolation), with more space between its leaves, it’s likely not getting enough light. The colors might also fade.
- Signs of Too Much Light: Some succulents can get “sunburned” if exposed to intense, direct midday sun, especially during hot summer months. This often appears as brown or white patches on the leaves. It’s a good idea to observe your plants and adjust their position if needed.
- Outdoor Succulents: If you move succulents outdoors for the summer, do so gradually. Start with shaded spots for a few days, then move them to areas with morning sun, and finally to spots with more direct light. This prevents shock and sunburn.
For outdoor gardening, choose a location that receives ample sunlight. In very hot climates, some afternoon shade might be beneficial for certain types of succulents during the peak of summer. Remember, even plants native to dry, sunny regions can sometimes get too much direct sun, especially if they’re accustomed to a shadier spot indoors.
2. Watering Wisely: The Number One Pitfall
Overwatering is the most common reason succulents don’t survive. These plants are adapted to dry conditions, so it’s far better to underwater than to overwater.
- The “Soak and Dry” Method: Water thoroughly until water drains from the bottom of the pot, then wait until the soil is completely dry before watering again. This mimics natural rainfall followed by dry spells.
- How to Check Soil Dryness: Stick your finger about an inch or two into the soil. If it feels dry, it’s time to water. You can also use a moisture meter. For terracotta pots, you’ll notice they dry out faster.
- Seasonal Adjustments: Succulents need less water in cooler months or when they are in their dormant period (which varies by type). Many go dormant in winter or summer.
- Watering Technique: Try to water the soil directly, avoiding getting water into the rosettes or between leaves, as this can encourage rot.
A general guideline is to water every 2-4 weeks, but this can vary greatly depending on light, temperature, humidity, and the type of succulent. Always feel the soil before watering!
3. The Perfect Potting Mix
Succulents HATE having “wet feet.” This means they need a potting mix that drains very well to prevent root rot. Regular potting soil holds too much moisture.
- DIY Mix: A good DIY mix is usually 2 parts potting soil to 1 part perlite or pumice. You can also use coarse sand.
- Commercial Mixes: Look for “cactus and succulent potting mix” at your local garden center. These are specifically formulated for good drainage.
- Adding Drainage Material: Avoid adding a layer of gravel at the bottom of pots; this actually hinders drainage. The key is the soil itself.
Good drainage is non-negotiable for succulent success. It allows excess water to escape quickly, keeping the roots healthy and preventing the dreaded root rot.
4. Choosing the Right Pot
The pot your succulent lives in plays a big role in its health, mainly through drainage.
- Drainage Holes are Essential: Always use pots with drainage holes at the bottom. This is the most critical feature.
- Terracotta vs. Ceramic/Plastic: Terracotta (unglazed clay) pots are porous and allow soil to dry out faster, which many succulents prefer. Glazed ceramic and plastic pots retain more moisture, so you’ll need to water less frequently and be extra careful about overwatering.
- Pot Size: It’s generally best to pot succulents in a pot that is only slightly larger than the root ball. Overly large pots can hold too much soil and moisture, increasing the risk of rot.
Choose a pot that complements your succulent’s beauty and, most importantly, provides a healthy environment for its roots.
5. Temperature and Airflow
Most succulents do well in average room temperatures. Many can also tolerate a wide range of outdoor temperatures, but extreme frost can be damaging.
- Indoor Temperature: Comfortable room temperatures are usually fine. Avoid placing them near drafty windows in winter or directly next to heating/cooling vents.
- Outdoor Temperature: Many succulents are surprisingly cold-hardy once established, but it’s wise to research your specific variety. Some succulents can be damaged by temperatures below freezing.
- Good Airflow: Adequate airflow helps to dry out the soil and prevent fungal issues. Avoid packing plants too tightly together, especially indoors.
Good air circulation is an often-overlooked aspect of plant care, but it contributes significantly to a healthy plant by helping to prevent pests and diseases.
Succulent Propagation: Growing Your Collection
One of the most rewarding aspects of growing succulents is how easy they are to propagate! You can turn a single plant into many with little effort. Propagation is essentially creating new plants from existing ones. The most common methods for succulents involve using leaves or stem cuttings.
Propagation by Leaf Cutting: The Magic of New Growth
This is a wonderfully simple way to get new succulent plants, and it’s fascinating to watch a tiny new plant emerge from just a leaf!
Steps:
- Select a Healthy Leaf: Gently twist or cut off a healthy, plump leaf from the mother plant. It’s best to get a clean detachment where the leaf meets the stem. A gentle twist is often preferred as it ensures you get the entire base of the leaf, which is where the new plant will grow.
- Let it Callus: Allow the leaf to dry and form a callus over the cut end for a few days (2-5 days is usually sufficient). This prevents rot when you place it on soil.
- Prepare Your Propagation Station: Use a shallow tray or small pots filled with a well-draining succulent or cactus mix.
- Place the Leaf: Lay the callused end of the leaf onto the surface of the soil. You don’t need to bury it. For best results, point the callused end downwards if possible, or at least ensure it has good contact with the air above the soil.
- Provide Indirect Light and Mist Lightly: Place the tray in bright, indirect light. Lightly mist the soil every few days, just enough to keep it slightly moist, but never wet.
- Be Patient: Roots will start to form from the callused end, and eventually, a tiny baby plant will emerge! This can take anywhere from a few weeks to a few months.
- Care for Your New Plant: Once the baby plant is a decent size and has developed its own roots, you can plant it in its own small pot with well-draining soil. At this point, you can start watering it slightly more regularly as you would a mature succulent (allowing soil to dry completely between waterings). The original mother leaf will eventually dry up and detach on its own.
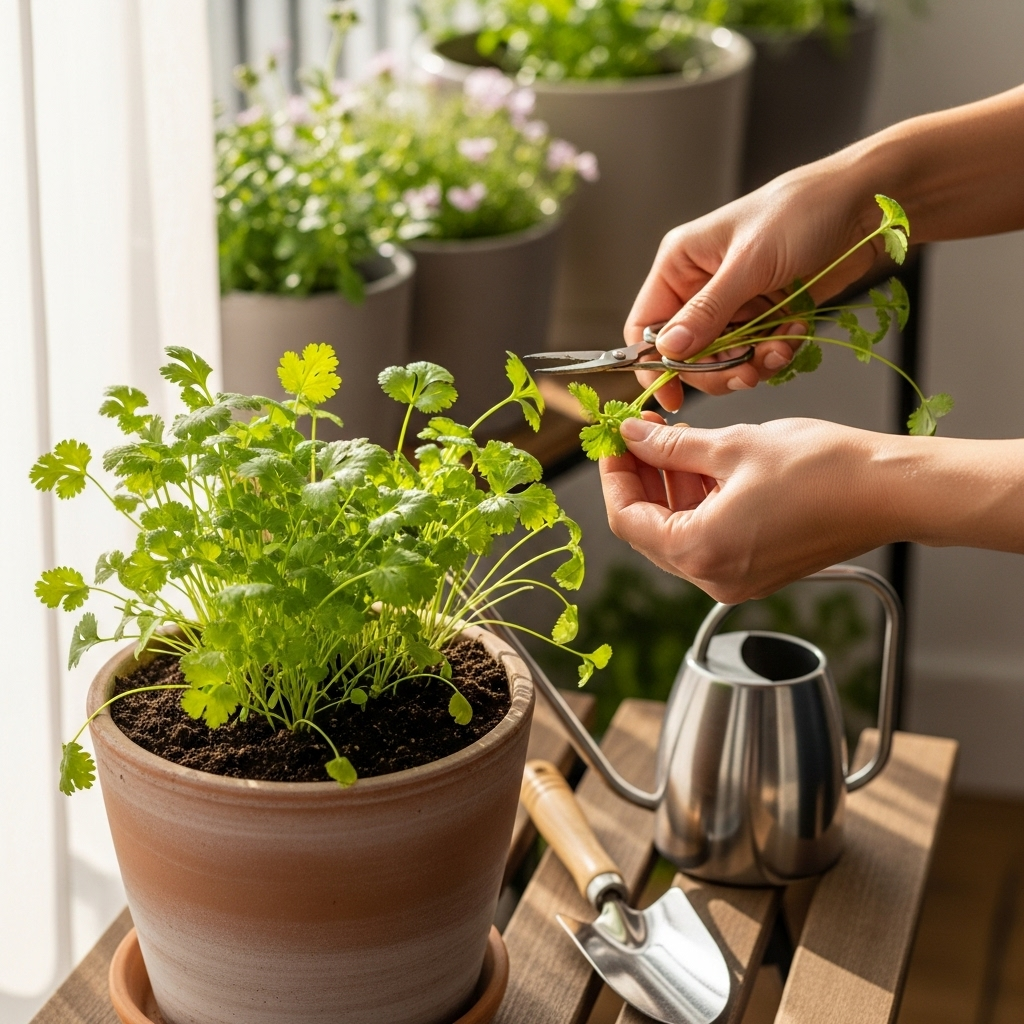
Propagation by Stem Cutting: Fast and Effective
This method is quicker than leaf propagation and is ideal for succulents that grow into larger, branching forms like Sedums or Echevarias that might have stretched or become too leggy.
Steps:
- Take the Cutting: Using a clean, sharp knife or scissors, cut a stem that is at least 2-3 inches long. Remove any lower leaves from the cutting, leaving a few at the top.
- Callus the Cutting: Just like with leaf cuttings, let the cut end of the stem dry out and form a callus. This can take anywhere from a few days to a week. Place it in a dry, well-ventilated spot out of direct sunlight.
- Prepare the Potting Mix: Fill shallow pots or trays with a well-draining succulent mix.
- Plant the Cutting: Once callused, insert the cut end of the stem about an inch deep into the soil. You can plant multiple cuttings in the same pot, ensuring they have a little space.
- Water Sparingly: After planting, wait about a week before watering lightly. This gives the cut end time to begin rooting. For the next few weeks, water sparingly, only when the soil feels dry.
- Provide Light: Place the pot in bright, indirect light.
- Check for Roots: After about 4-6 weeks, gently tug on the cutting to see if it has resistance. If it does, it has rooted! You can then transplant it into its own pot and care for it as a mature succulent.
Propagation by Offsets (Pups): Nature’s Little Helpers
Many succulents, especially Sempervivums (Hens and Chicks) and Aloe varieties, produce baby plants, called offsets or pups, around the base of the mother plant. These are very easy to propagate.
Steps:
- Wait for the Pup to Grow: Let the offset grow to a decent size, ideally with its own little roots.
- Carefully Separate: Using a clean knife or your fingers, gently separate the pup from the mother plant. Try to keep as many of its roots intact as possible.
- Allow to Callus: If you had to cut the pup away or if it doesn’t have many roots, let the cut end callous over for a day or two.
- Plant the Pup: Plant the offset in a small pot filled with well-draining succulent mix.
- Water and Light: Water lightly after planting and place in bright, indirect light. Treat it like a mature succulent once established.
Common Succulent Problems and Solutions
Even with the best intentions, you might encounter a few bumps in the road. Here’s how to tackle common succulent issues:
Problem: Mushy, Yellowing or Brown Leaves
Cause: Overwatering is the most likely culprit. The roots are drowning and starting to rot, which affects the leaves.
Solution:
Stop watering immediately.
If the soil is very wet, gently remove the plant from its pot and let the roots air dry for a day or two.
Repot in dry, well-draining succulent mix.
Discard any completely mushy leaves.
Water only when the soil is completely dry going forward.
Problem: Shrivelled, Wrinkled Leaves
Cause: Underwatering or sometimes heat stress.
Solution:
Thoroughly water the plant using the “soak and dry” method.
If the leaves remain shriveled after watering, the roots might be damaged and unable to absorb water. In this case, you might need to propagate healthy leaves or cuttings.
Ensure the plant isn’t in excessive heat without adequate watering.
Problem: Stretched, Leggy Plant (Etiolation)
Cause: Insufficient light. The plant is reaching for more light, causing it to grow long and thin with spaced-out leaves.
Solution:
Move the plant to a brighter location with more indirect sunlight.
You can propagate the upper, healthier parts of the stem by taking cuttings and letting them root in a new pot. The leggy stem can often be cut back, and the remaining base might sprout new growth.
Problem: White, Fuzzy Spots or Sticky Residue
Cause: Pests like mealybugs or spider mites.
Solution:
Isolate the infected plant immediately to prevent spread.
For mealybugs (look like white cottony masses), dab them with a cotton swab dipped in rubbing alcohol.
For spider mites (look like tiny dots and fine webbing), you can try spraying the plant with insecticidal soap or neem oil, following product instructions carefully.
Ensure good airflow and avoid overwatering, as these conditions can attract pests.
Dealing with pests is a common part of gardening. Early detection and prompt action are key to keeping your collection healthy. You can check out resources from organizations like the Oregon State University Extension for more in-depth integrated pest management strategies.
DIY Succulent Potting Mix Recipe
Creating your own succulent potting mix is simple, cost-effective, and ensures you have the perfect blend for optimal drainage. This recipe yields a light, airy mix that helps prevent waterlogging.
Ingredients:
- 2 parts Potting Soil (a good quality, peat-free mix is best)
- 1 part Perlite or Pumice (provides aeration and drainage)
- Optional: A small amount of coarse sand (horticultural grade, not play sand)
Instructions:
- Combine all ingredients in a large bin or bucket.
- Mix thoroughly until evenly distributed.
- Store in an airtight container or use immediately.
This mix is excellent for both potted succulents and for use in propagation trays. The key is the balance: enough organic matter from the potting soil to provide nutrients, and enough gritty material (perlite/pumice) to ensure excess water can drain away freely.
A Look at Different Succulent Types and Their Needs
While basic care principles apply to most succulents, a few varieties have slightly different preferences. Understanding these nuances can help you tailor your approach.
Echeveria
Known for their beautiful rosette shapes. They love bright light and infrequent watering. Overwatering is their enemy. They are generally not frost-tolerant and are best grown outdoors in warmer climates or indoors.
Sempervivum (Hens and Chicks)
These are incredibly cold-hardy and can often survive outdoors year-round in many climates. They produce many offsets (“chicks”) around the mother plant (“hen”). They require excellent drainage and prefer full sun to partial shade. An article from the Royal Horticultural Society provides further insights into succulent cultivation.
Sedum
A diverse group, from groundcovers to upright garden varieties. Many Sedums are very tolerant of drought and