
Pumpkin seeds, also known as pepitas, are a popular snack in the fall season. These small yet nutritious seeds are packed with essential nutrients and make a delicious and healthy addition to any diet.
However, before indulging in this tasty treat, it is important to properly clean and prepare the pumpkin seeds for roasting and snacking. Many people may hesitate to clean pumpkin seeds at home, believing it to be time-consuming and tedious. However, cleaning pumpkin seeds can be quick and easy with the right techniques and methods.
Here, we will discuss how to clean pumpkin seeds for roasting and snacking, along with some helpful tips and tricks to make the task more efficient. Whether you plan on using pumpkin seeds for snacking or as an ingredient in your favorite recipes, following these guidelines will ensure that your pumpkin seeds are properly cleaned and ready to be enjoyed.
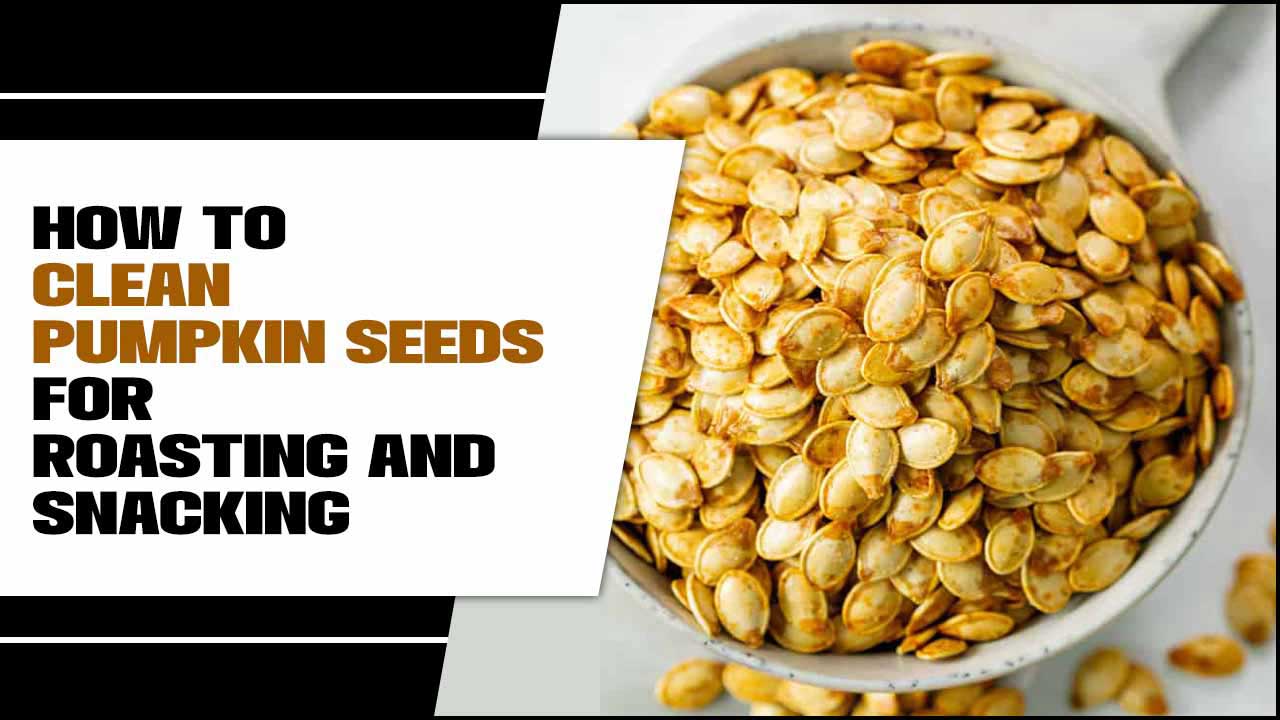
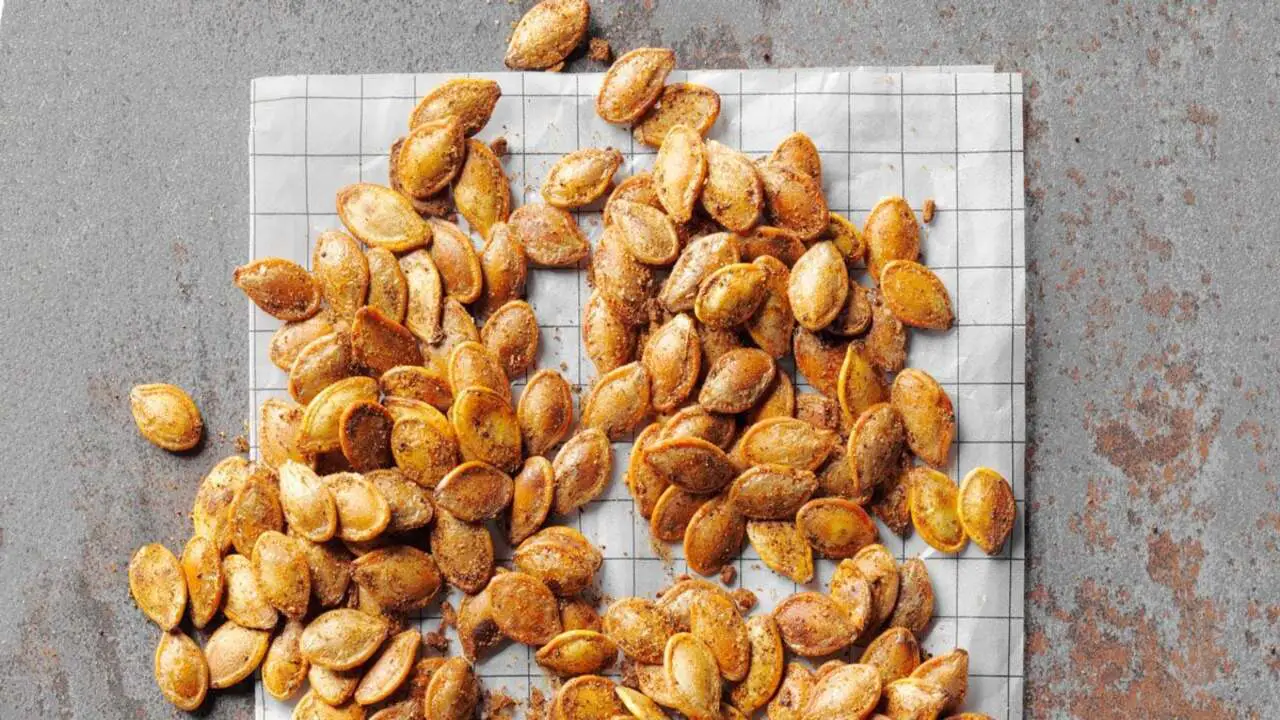
How To Clean Pumpkin Seeds For Roasting And Snacking – [Step By Step] Guide
![How To Clean Pumpkin Seeds For Roasting And Snacking - [Step By Step] Guide](https://ecopatchy.com/wp-content/uploads/2023/12/How-To-Clean-Pumpkin-Seeds-For-Roasting-And-Snacking-Step-By-Step-Guide.webp)
Here is the answer on how to clean pumpkin seeds for roasting and snacking. To clean pumpkin seeds for roasting and snacking, start by removing the seeds from the pumpkin. Cut the pumpkin open and scoop out the seeds using a spoon. Place the seeds in a colander and rinse them under cold water to remove any remaining pumpkin flesh. Transfer the seeds to a clean kitchen or paper towel and pat them dry.
Remove any excess moisture, as this can prevent the seeds from roasting evenly. Once the seeds are dry, preheat your oven to 350°F (175°C). Line a baking sheet with parchment paper or lightly grease it with oil to prevent the seeds from sticking., follow these steps:
1.Remove The Seeds From The Pumpkin
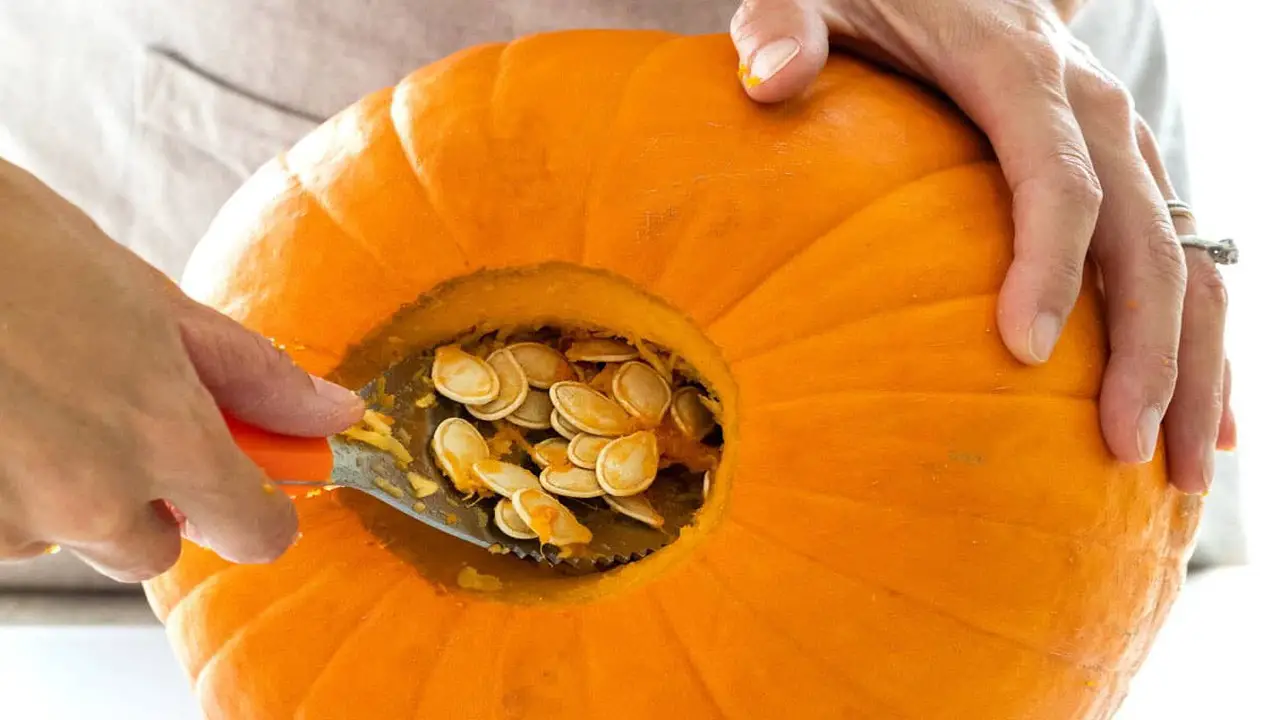
Cut open the pumpkin and scoop out the seeds using a spoon or your hands. Separate the seeds from any flesh or stringy pulp. Once you have extracted all the seeds, place them in a colander and rinse them under cold water. Gently rub the seeds between your fingers to remove any remaining pulp. Removing as much of the flesh as possible is essential to ensure a clean and crispy end result.
After rinsing, spread the seeds on a clean kitchen towel or paper towel and pat them dry. Removing the excess moisture is crucial for achieving a perfectly crunchy texture when roasting. Once the seeds are dry, transfer them to a bowl and toss them with a drizzle of olive oil and your choice of seasonings, such as salt, pepper, or even a sprinkle of cinnamon or paprika for a unique flavor twist. Preheat your oven to 350°F (175°C).
2.Rinse The Seeds
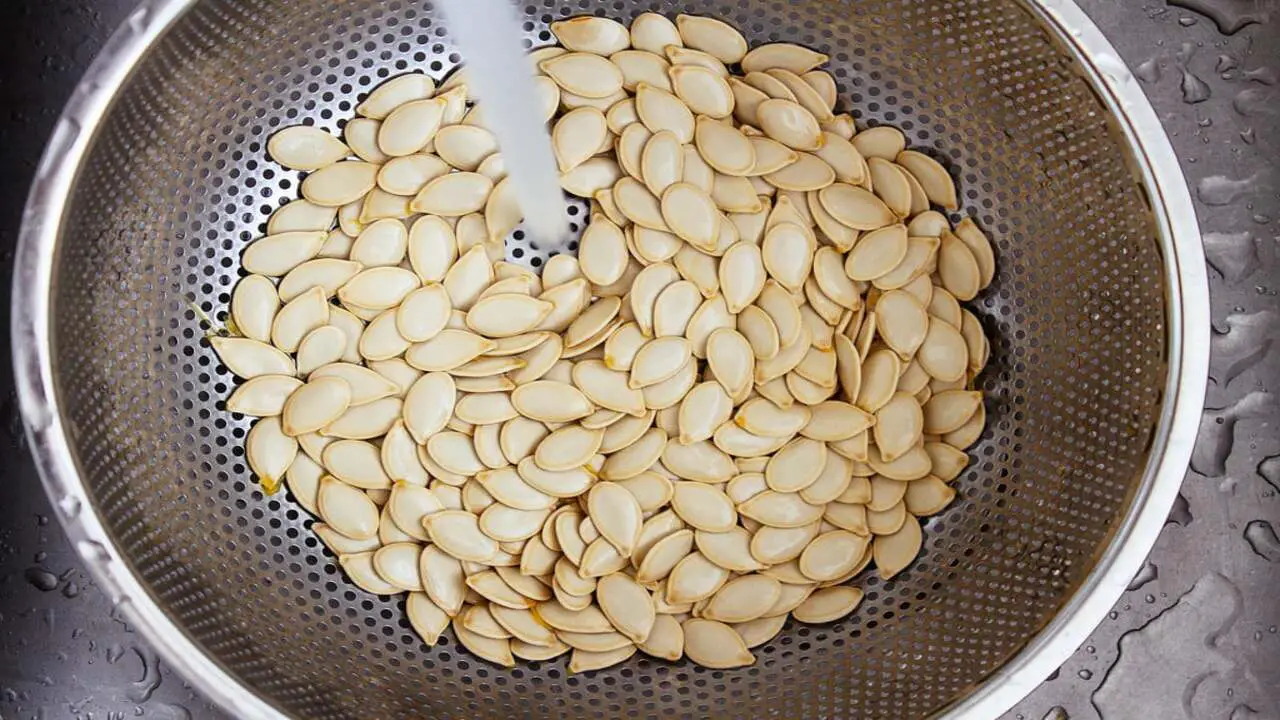
Place the seeds in a colander and rinse them under cold water to remove any remaining pulp. Take a few minutes to separate large chunks of pumpkin flesh from the seeds. Gently pick out the bigger pieces and discard them, ensuring only the seeds remain. Once you have removed most of the flesh, transfer the seeds to a bowl filled with warm water. Allow them to soak for about 10 minutes.
This step will help loosen any stubborn debris that may still be clinging to the seeds. After the soaking period, drain the water from the bowl and give the seeds a final rinse under cold water. Now, it’s time to move on to the drying process. Spread the seeds in a single layer on a clean kitchen towel or a baking sheet lined with parchment paper. Let them air dry for a couple of hours, or
3.Remove Any Remaining Pulp
Use your fingers or a paper towel to rub the seeds and remove any attached pulp gently. Rinse the pumpkin seeds under cool running water to remove all the pulp. This step is crucial as any leftover pulp can affect the taste and texture of the roasted seeds. Once rinsed, spread the seeds on a clean kitchen towel or paper towel and pat them dry.
It’s important to remove as much moisture as possible to achieve a crispy and crunchy texture when roasting. Take your time and ensure that each seed is thoroughly dried before moving on to the next step. Once dry, transfer the seeds to a bowl and drizzle them with a small amount of olive oil or melted butter. Toss them gently to coat each seed, ensuring they are evenly coated.
4.Boil The Seeds
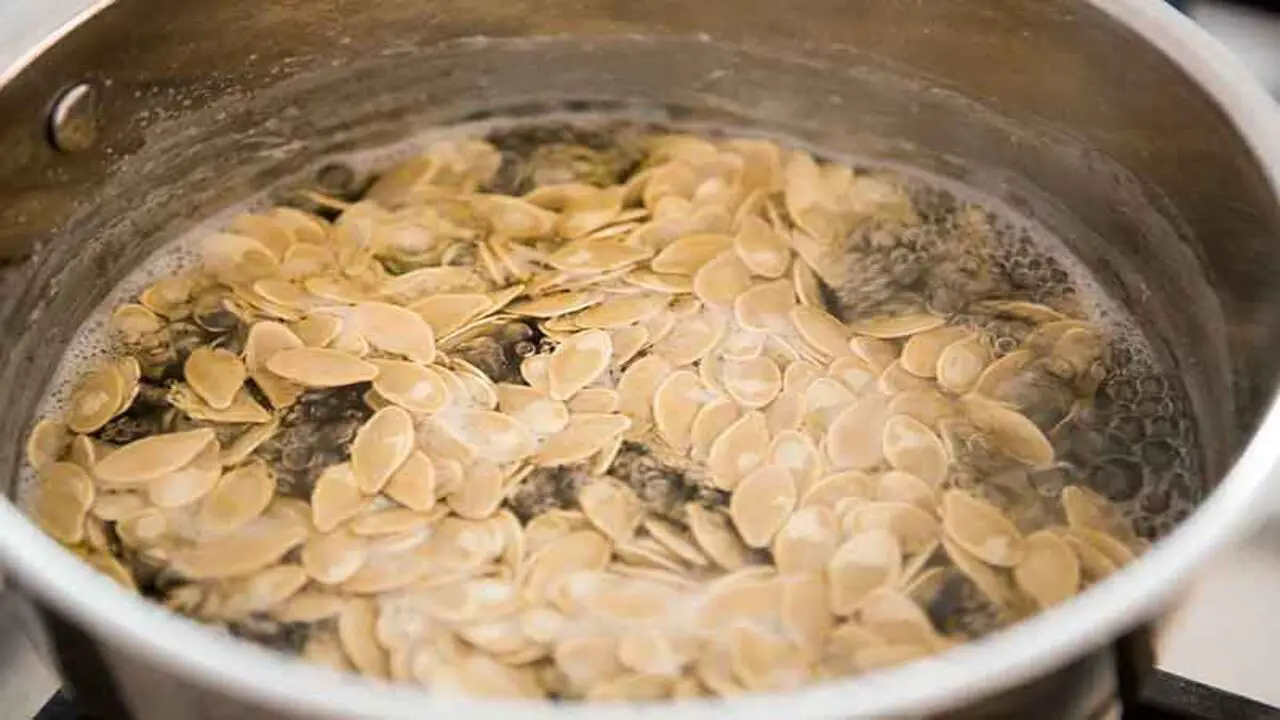
Bring water to a boil in a medium-sized pot and add the pumpkin seeds. Let them boil for about 10 minutes. This helps to soften the seeds and make them easier to digest. Once the seeds have boiled, drain them using a colander and rinse them under cold water.
This will remove any remaining debris or slimy residue. Pat the seeds dry with a clean kitchen towel or paper towels, ensuring they are completely dry before proceeding to the next step. Damp seeds may not roast evenly and can become chewy instead of crispy.
Preheat your oven to 325°F (163°C) and line a baking sheet with parchment paper or aluminum foil. Spread the dried pumpkin seeds evenly on the prepared baking sheet. For added flavor, you can drizzle them with a little olive oil or melted butter and sprinkle them with salt, cinnamon, or any other preferred seasonings.
5.Drain And Dry The Seeds
Drain the seeds using a colander and pat them dry with a clean or paper towel. Once you have successfully separated the pumpkin seeds from the pulp, it is important to drain and dry them thoroughly before moving on to the next step. This will ensure the seeds roast evenly and achieve that perfect crunchy texture.
To drain the seeds, simply transfer them into a colander and give them a good rinse under cold running water. Allow the excess water to drain off completely. Next, gently dry the seeds using a clean kitchen towel or paper towel. Remove any excess moisture, as this can prevent the seeds from roasting properly. Take time to ensure the seeds are completely dry before proceeding.
6.Season The Seeds (Optional)
You can toss the seeds with olive oil and seasonings such as salt, garlic powder, or paprika for added flavor. This step is optional, but it can elevate the taste of the roasted pumpkin seeds. Simply drizzle a tablespoon or two of olive oil over the cleaned seeds and sprinkle your desired seasonings.
Toss the seeds until they are evenly coated with the oil and seasonings. This will ensure that every bite is packed with delicious flavor. Once seasoned, the seeds are ready to be roasted to perfection.
Seasoning And Flavoring Options For Roasted Pumpkin Seeds
roasting and snacking on pumpkin seeds, there are various seasoning and flavoring options to enhance their taste and appeal. One classic option is to toss the pumpkin seeds with olive oil and sprinkle them with salt. This simple combination brings out the natural flavors of the seeds while adding a touch of savory richness.
There are endless possibilities for those looking for a more adventurous flavor profile. A popular choice is to add some spice by dusting the seeds with chili powder, paprika, cayenne pepper, and a pinch of garlic powder. This creates a bold and smoky flavor that will satisfy spice enthusiasts.
If you prefer a sweeter twist, try coating the seeds with cinnamon, nutmeg, and a sprinkle of brown sugar. This creates a warm and aromatic flavor that pairs perfectly with the nuttiness of the pumpkin seeds.
Roasting The Seeds For Perfect Crunchiness
Roasting pumpkin seeds is a delicious way to enjoy them as a snack. To achieve the perfect crunchiness, follow these steps:
- Preparing The Seeds: Start by scooping the seeds from the pumpkin. Separate them from the pulp and rinse them thoroughly to remove any remaining pumpkin debris.
- Drying The Seeds: Spread the seeds evenly on a clean kitchen towel or paper towel. Allow them to dry completely for a few hours or overnight. This step is crucial to ensure crispy results.
- Preheating The Oven: Preheat your oven to 300°F (150°C) while you prepare the seeds.
- Seasoning The Seeds: Toss the dry pumpkin seeds with your desired seasonings in a bowl. Popular options include salt, garlic powder, chili powder, or a sprinkle of cinnamon for a sweet variation. Be creative and adjust the flavors to your liking.
- Roasting The Seeds: Line a baking sheet with parchment paper or foil for easy cleanup
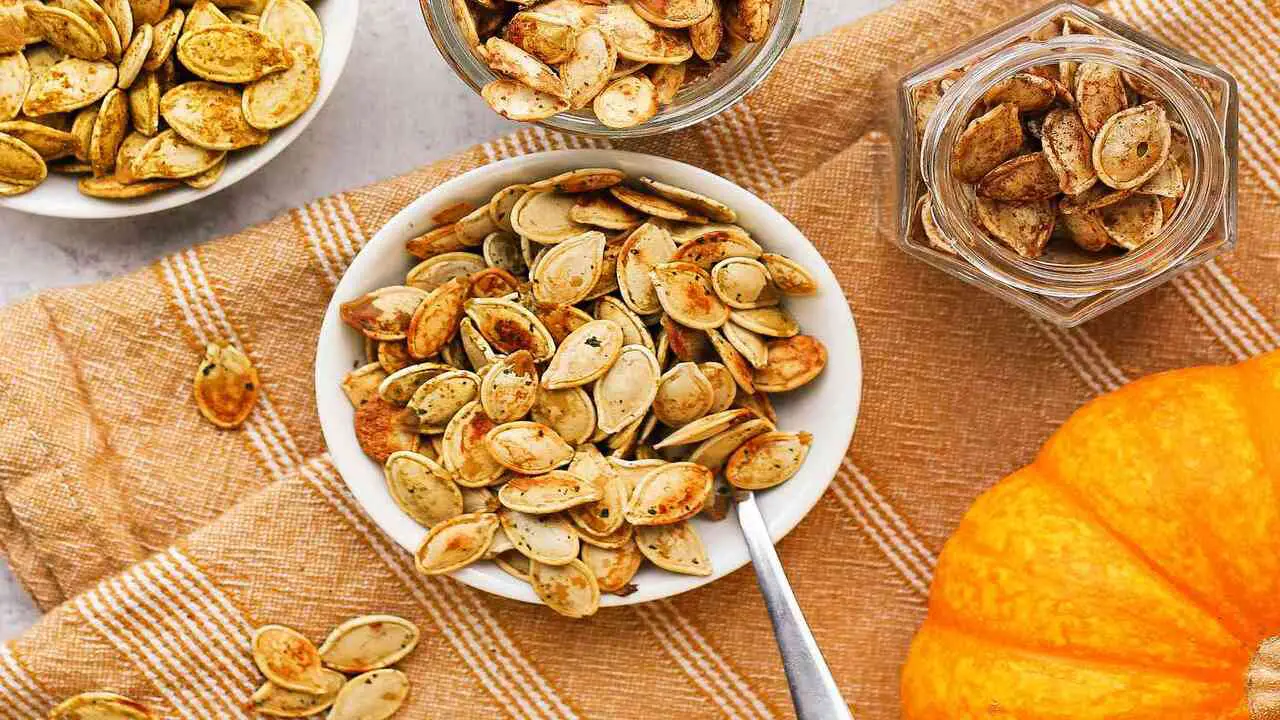
Storing And Enjoying Your Roasted Pumpkin Seeds
Storing and enjoying your roasted pumpkin seeds is a delightful way to make the most of this nutritious snack. After roasting your pumpkin seeds to perfection, it is important to store them properly to maintain their freshness and flavor. Once cooled, transfer the seeds to an airtight container, such as a glass jar or a resealable bag.
Keep them in a cool, dry place, away from direct sunlight, to ensure they stay crispy and delicious. Enjoying your roasted pumpkin seeds, the possibilities are endless. These crunchy treats can be enjoyed as a tasty and nutritious snack.
You can also add them to salads, trail mixes, or granola for an extra crunch and boost of flavor. Try tossing them with your favorite herbs and spices, such as garlic powder, paprika, or cayenne pepper for a savoury twist. Alternatively, sweeten them up by coating them with cinnamon and sugar.
Conclusion
cleaning pumpkin seeds may seem daunting, but with these simple steps, you can easily prepare them for roasting and snacking. Gently rub the seeds with your fingers to help loosen any remaining debris. Once the seeds are clean, transfer them to a pot of boiling water.
Add a pinch of salt to the water, as this will enhance the flavor of the seeds. Let the seeds simmer in the boiling water for about 10 minutes. This step will help soften the seeds and make them easier to digest. After 10 minutes, drain the seeds.
By removing the pumpkin pulp and washing the seeds thoroughly before drying and seasoning, you can achieve perfectly crispy and delicious pumpkin seeds. Experiment with different flavors and spices to create a unique and tasty snack. We hope you understand how to clean pumpkin seeds for roasting and snacking.
FAQ
1.What Is The Best Method For Cleaning Pumpkin Seeds Before Roasting Them For Snacking?
Ans: The best method for cleaning pumpkin seeds before roasting them for snacking is to remove them from the pumpkin and separate them from any excess pulp or strings. Then, rinse the seeds in a colander under cold water to remove any remaining pulp. Pat them dry with a paper towel and spread them on a baking sheet to air dry for a few hours. This will ensure they are clean and ready for roasting.
2.Should I Soak Pumpkin Seeds Before Cleaning Them?
Ans: Soaking pumpkin seeds before cleaning them is unnecessary, but it can be beneficial. Soaking the seeds can help remove any remaining pumpkin pulp and make them easier to clean. Also, soaking can help improve the seeds’ overall texture and taste when roasted or used in other recipes.
However, skipping the soaking step is perfectly fine if you are short on time or prefer a more rustic texture. Ultimately, whether or not to soak pumpkin seeds before cleaning them is a personal preference.
3.Can I Clean Pumpkin Seeds With Water Alone?
Ans: Yes, you can clean pumpkin seeds with water alone. Simply rinse the seeds under running water to remove any dirt or debris on the surface. However, if you want to remove any remaining pulp or stickiness from the seeds, you may need to soak them in water for a few minutes and then rinse them again.
4.Are There Any Specific Tools Or Techniques That Can Make The Cleaning Process Easier And More Efficient?
Ans: Yes, several tools and techniques can make the cleaning process easier and more efficient. Some common tools include microfiber cloths, which are highly effective at removing dirt and dust, and vacuum cleaners with attachments for different surfaces. Additionally, multipurpose cleaning solutions can save time and effort by eliminating the need for multiple products.
5.How Should I Store Cleaned Pumpkin Seeds Before Roasting Them?
Ans: After cleaning pumpkin seeds, storing them in an airtight container in a cool, dry place is best. This will help to maintain their freshness and prevent them from becoming stale. To avoid moisture buildup, it is important to ensure the seeds are completely dry before storing them. You can also store them in the refrigerator to prolong their shelf life.