Quick Summary
Make your own effective DIY fungicide for indoor plants using simple household ingredients. Protect your green friends from common fungal issues like powdery mildew and root rot with natural, budget-friendly solutions. This guide offers easy recipes and application tips to keep your houseplants healthy and thriving without harsh chemicals.
DIY Fungicide for Indoor Plants: Your Essential Guide
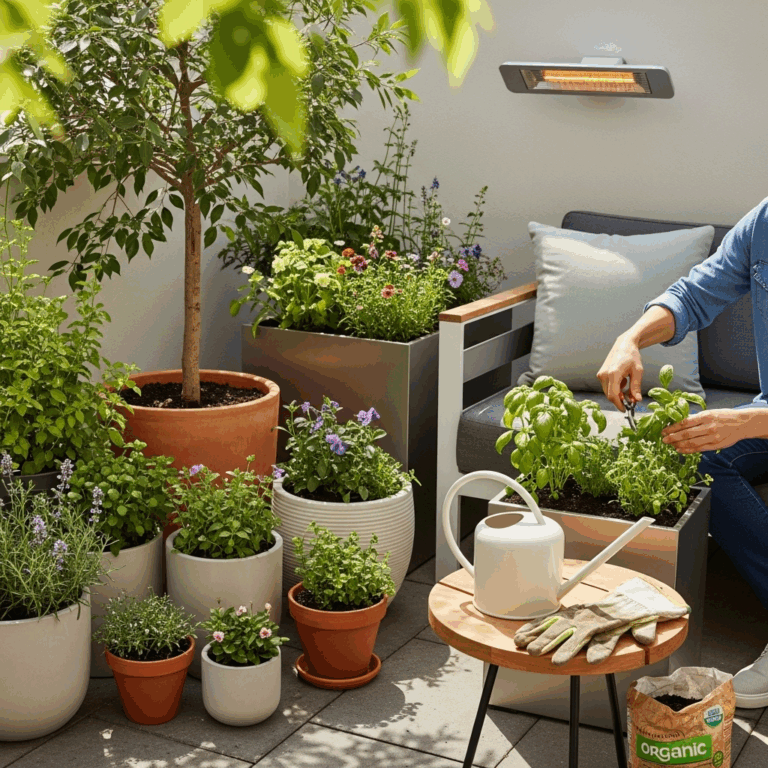
Oh, the joy of lush, vibrant indoor plants! But sometimes, our leafy companions can fall victim to pesky fungal diseases. Seeing spots, wilting leaves, or fuzzy mold can be disheartening for any plant parent, especially beginners. The good news? You don’t need fancy store-bought sprays to combat these issues. Many effective fungicides can be whipped up right in your kitchen with common, eco-friendly ingredients. Let’s dive into creating your own natural defenses and keeping your indoor jungle happy and healthy!
Understanding Fungal Diseases in Indoor Plants
Fungal diseases thrive in environments with too much moisture, poor air circulation, and inadequate light. They can manifest in various ways, from unsightly leaf spots and powdery coatings to more severe issues like root rot. Early detection and treatment are key to preventing widespread damage. Common culprits include powdery mildew, botrytis (gray mold), and various types of root rot.
Common Fungal Issues and Their Signs:
- Powdery Mildew: Looks like a white, powdery dusting on leaves, stems, and flowers. It weakens the plant and can hinder its ability to photosynthesize.
- Gray Mold (Botrytis): Appears as fuzzy, gray patches, often starting on wounded areas or dying organic matter. It can spread rapidly in cool, humid conditions.
- Leaf Spot Diseases: Characterized by distinct spots on leaves, which can be brown, black, or even yellowish, sometimes with concentric rings.
- Root Rot: Caused by overwatering and fungal pathogens, it leads to yellowing leaves, wilting, stunted growth, and a mushy, brown root system.
These fungi often take hold when plants are stressed or their environment isn’t quite right. Overwatering is a frequent offender, creating a damp haven for spores. Poor air movement also allows moisture to linger on leaves, providing a perfect breeding ground. Luckily, nature provides us with simple remedies.
Why Choose DIY Fungicides?
Opting for DIY fungicides for your indoor plants offers a fantastic array of benefits, especially for those of us who love a good sustainable living approach or are just starting out. For beginners, the idea of mixing your own plant care solutions can seem daunting, but it’s actually quite simple and incredibly rewarding!
Key Advantages of DIY Solutions:
- Cost-Effective: Household staples like baking soda, vinegar, and neem oil are significantly cheaper than commercial fungicides. You likely already have some of these items, making it a budget-friendly choice.
- Eco-Friendly: Natural ingredients are biodegradable and much gentler on the environment, your home, and beneficial insects. This aligns perfectly with a greener lifestyle.
- Safer for You and Your Family: Commercial fungicides can contain harsh chemicals. DIY versions reduce exposure to toxins, making them a safer option, particularly if you have pets or children.
- Customizable: You can tailor your DIY fungicide to specific problems or plant types, adjusting concentrations as needed.
- Readily Available Ingredients: No need for special trips to the garden center. Most ingredients can be found in your pantry or local grocery store.
Making your own treatments empowers you to take control of your plant health in a way that feels good for both your wallet and your well-being. It’s a small step toward a more self-sufficient and natural way of caring for your beloved indoor greenery.
Essential Ingredients for Your DIY Fungicide Toolkit
Gathering your ingredients is the first exciting step in becoming a DIY plant doctor! These aren’t exotic items; they are everyday heroes found right in your kitchen or local shop. Having these ready means you can spring into action the moment you spot a fungal foe.
Pantry Powerhouses:
- Baking Soda: A fantastic solution for powdery mildew. It works by raising the pH on the leaf surface, making it inhospitable to fungal spores.
- Milk: Yes, regular milk! When diluted and sprayed, it creates a protective film on leaves and its proteins seem to inhibit fungal growth.
- Garlic and Onion: These potent alliums have natural antifungal properties. Their strong compounds can help deter and combat fungal infections.
- Apple Cider Vinegar (ACV): In very diluted forms, ACV can help balance soil pH and has antifungal properties. However, it needs careful dilution as it can harm plants if too strong.
- Dish Soap: A small amount of liquid dish soap (preferably an eco-friendly, mild one) helps the spray adhere to the plant’s leaves and also disrupts fungal cell membranes.
Nature’s Best:
- Neem Oil: A wonder oil extracted from the neem tree. It’s a broad-spectrum pesticide and fungicide that disrupts fungal growth and insect life cycles effectively. Always use cold-pressed, 100% pure neem oil.
- Hydrogen Peroxide: A diluted solution can kill fungal spores on contact and also provides oxygen to the soil, which can help beneficial microbes.
Remember to always use distilled or filtered water for your mixtures to avoid introducing minerals or chlorine that could irritate your plants.
Top DIY Fungicide Recipes for Indoor Plants
Now for the fun part – mixing up your treatments! These recipes are easy to follow and target common indoor plant fungal issues. Always test any new spray on a small, inconspicuous leaf first and wait 24 hours to ensure it doesn’t cause damage.
Recipe 1: The Classic Baking Soda Spray (for Powdery Mildew)
This is a go-to for powdery mildew. It’s simple, effective, and uses ingredients you likely have at hand.
Ingredients:
- 1 tablespoon baking soda
- 1 tablespoon vegetable oil (like canola or sunflower)
- 1 teaspoon mild liquid dish soap
- 1 gallon (about 4 liters) of water
Instructions:
- Dissolve the baking soda in the water.
- Stir in the vegetable oil and dish soap until well combined.
- Pour into a spray bottle.
Application:
Spray generously on affected areas and on any new growth. Apply every 7-10 days as needed. The oil helps the mixture stick and suffocates fungal spores, while the baking soda creates an unfavorable pH environment.
Recipe 2: Powerful Neem Oil Solution (Broad Spectrum)
Neem oil is a fantastic natural fungicide and insecticide. It works by interfering with the growth and reproduction of fungi and various pests.
Ingredients:
- 1-2 teaspoons 100% cold-pressed neem oil
- 1/2 teaspoon mild liquid dish soap (as an emulsifier)
- 1 quart (about 1 liter) of warm water
Instructions:
- Mix the warm water and neem oil.
- Add the dish soap and stir gently until the mixture emulsifies (looks milky and blended).
- Pour into a spray bottle.
Application:
Apply thoroughly to all leaf surfaces, including the undersides. Use every 1-2 weeks. Avoid spraying during the hottest part of the day. Neem oil is effective against a wide range of fungal diseases and pests.
For more information on neem oil’s benefits and uses in gardening, the University of California’s Integrated Pest Management program provides excellent, science-based insights.
Recipe 3: Milk Spray (for Powdery Mildew & General Protection)
A surprising but effective remedy, milk can be a potent weapon against powdery mildew and offers a bit of general protection.
Ingredients:
- 1 part milk (any kind, though skim or low-fat is often recommended)
- 1 part water
Instructions:
- Combine milk and water in a spray bottle.
Application:
Spray onto affected leaves and new growth every few days. The proteins in milk, when exposed to sunlight, create a preventative and curative antifungall effect. It also helps create a barrier. This is particularly good for young plants or as a preventative measure.
Recipe 4: Garlic Extract Spray (Antifungal & Antibacterial)
Garlic’s potent compounds can combat various microbial invaders.
Ingredients:
- 1-2 whole bulbs of garlic
- 2 cups (about 500 ml) of water
- Optional: 1 teaspoon mild dish soap
Instructions:
- Peel and mince or blend the garlic cloves.
- Steep the minced garlic in water for at least 24 hours, or boil it gently in water for 20 minutes and let it cool.
- Strain the mixture extremely well through a fine mesh sieve or cheesecloth to remove all solids.
- Add dish soap if desired and mix.
- Pour into a spray bottle.
Application:
Apply to plants to combat fungal and some bacterial issues. The strong compounds can deter and kill pathogens.
Recipe 5: Diluted Hydrogen Peroxide Spray (for Soil & Foliage)
A mild disinfectant that also adds a boost of oxygen.
Ingredients:
- 1 tablespoon 3% hydrogen peroxide
- 1 quart (about 1 liter) of water
Instructions:
- Mix the hydrogen peroxide and water in a spray bottle.
Application:
Lightly mist the foliage of affected plants, or use it as a soil drench for overwatered plants to oxygenate and kill harmful microbes. Use this sparingly, no more than once a week, as it can also harm beneficial microorganisms if overused.
How to Apply DIY Fungicides Effectively
Applying your homemade treatments correctly is just as important as making them. A little care in application can make a big difference in how well they work and how safe your plants remain.
Best Practices for Application:
- Timing is Key: Always spray in the early morning or late evening. This avoids direct sunlight, which can cause leaf burn when combined with spray. It also allows the spray to dry before temperatures get too high.
- Test First: Before spraying an entire plant, test your mixture on a single leaf or small area. Wait 24 hours to check for any signs of damage like browning, wilting, or discoloration.
- Full Coverage: Fungal spores are sneaky! Make sure to spray all parts of the plant, especially the undersides of leaves, stems, and any areas showing signs of infection.
- Repeat Application: Fungal spores are persistent. Most DIY fungicides require regular application, typically every 7-14 days, until the infection is cleared. Consistent treatment is crucial.
- Cleanliness Matters: Always use a clean spray bottle. Wash it thoroughly between uses to prevent contamination.
- Ventilation is Crucial: Ensure good air circulation around your plants. Open windows or use a small fan. This helps prevent moisture buildup, which encourages fungal growth in the first place.
For a deeper understanding of plant disease management, including how environmental factors play a role, resources like the USDA’s Agricultural Research Service plant pathology section offer valuable scientific context.
Preventing Fungal Diseases: The Best Defense
While DIY fungicides are great for treatment, the ultimate goal is healthy, resilient plants that aren’t prone to disease. Prevention is always better than cure, and for indoor plants, this often comes down to mimicking their natural, ideal conditions as much as possible.
Key Prevention Strategies:
- Proper Watering: This is paramount. Avoid overwatering. Allow the top inch or two of soil to dry out between waterings. Ensure pots have drainage holes and don’t let plants sit in standing water.
- Good Air Circulation: Fungi love stagnant, damp air. Ensure your plants are not overcrowded. Open windows periodically, or use a small fan on a low setting for a few hours a day.
- Adequate Light: Most indoor plants need bright, indirect light. Insufficient light weakens plants, making them more susceptible to diseases.
- Cleanliness: Regularly remove dead or yellowing leaves and fallen debris from the soil surface. This organic matter can be a breeding ground for fungi.
- Quarantine New Plants: Always keep new plants separate from your existing collection for a few weeks. Inspect them thoroughly for any signs of pests or diseases before introducing them.
- Use Sterile Potting Mix: When repotting, use fresh, sterile potting mix. Avoid reusing old soil, as it may contain pathogens.
- Avoid Leaf Wetness: Try to water the soil directly rather than overhead watering, which can keep leaves wet for extended periods. If you must mist, do so in the morning to allow leaves to dry.
Creating a balanced environment where your plants can thrive naturally is the best way to keep them fungus-free. Think of these preventative measures as building your plant’s immune system!
Troubleshooting and When to Seek Other Options
Even with the best DIY efforts, sometimes a stubborn fungal issue can persist. It’s important to know when your homemade solutions might not be enough.
When DIY Might Not Be Enough:
- Severe Infestation: If a plant is heavily covered in fungus, or the disease has spread rapidly throughout multiple plants, a more aggressive treatment might be necessary.
- Root Rot: While some DIY sprays can help the soil, severe root rot often requires repotting, trimming away all rotted roots, and using fresh, well-draining soil.
- Persistent Issues: If you’ve consistently applied DIY treatments for several weeks with no improvement, it might be time to consider a commercial organic fungicide.
Table: DIY vs. Commercial Fungicides
| Feature | DIY Fungicides | Commercial Organic Fungicides |
|---|---|---|
| Cost | Very low | Moderate |
| Ingredient Control | Complete control over ingredients (natural) | Varies; check labels for organic certification |
| Effectiveness | Good for mild to moderate issues | Can be more potent for stubborn problems |
| Ease of Use | Requires mixing, but ingredients are common | Ready-to-use, follow label directions |
| Environmental Impact | Minimal to none | Generally low for organic options |
If you do opt for a commercial fungicide, look for products certified as organic, often based on copper, sulfur, or Bacillus subtilis. Always read and follow the label instructions carefully. Resources like the ATTRA (National Sustainable Agriculture Information Service) offer guidance on organic pest and disease management options.
Frequently Asked Questions About DIY Fungicides
Can I use any dish soap for DIY fungicides?
It’s best to use a mild, clear liquid dish soap without added degreasers, fragrances, or antibacterial agents. A simple, eco-friendly soap is ideal to avoid harming your plants.
How often should I spray my plants with DIY fungicide?
For treatments like baking soda or milk spray, you might spray every few days to a week. Neem oil is typically applied every 1-2 weeks. Always follow the specific recipe’s recommendation and observe your plant’s response.
Will DIY fungicide hurt my pets?
Generally, DIY fungicides made from common household items are much safer than chemical alternatives. However, it’s always wise to keep pets away from treated plants until the foliage is dry. Some ingredients like neem oil, while natural, can be harmful if ingested in large quantities.
Can I use these on edible plants grown indoors?
Yes, many of these DIY fungicides (like baking soda, milk, and diluted neem oil) are safe for edible indoor plants. Just ensure you rinse edible parts of the plant thoroughly before consumption, especially after using neem oil.
What if my plant doesn’t respond to DIY treatment?
If a fungal issue persists despite consistent DIY treatment, the problem might be more severe, or the specific DIY recipe might not be the right fit. Consider trying a different recipe or consult a local garden center for advice on commercial organic options.
How can I store leftover DIY fungicide?
It’s best to make fresh batches as needed, as the effectiveness of some ingredients can degrade over time. However, if you must store it, keep it in a cool, dark place in a tightly sealed container. Sprays containing milk should be used within 24-48 hours and refrigerated