
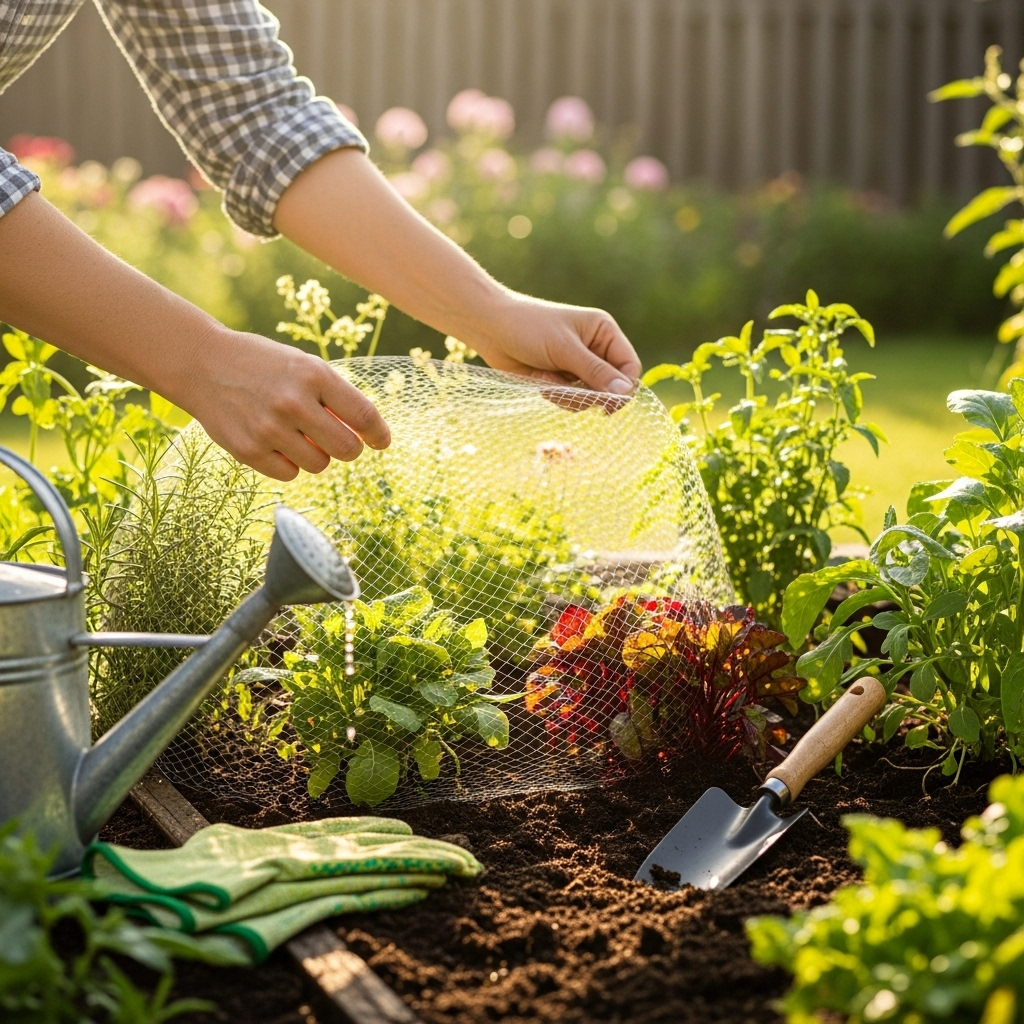
Food nets for outdoors are a simple, effective way to protect your precious produce from hungry pests like birds, squirrels, and insects, ensuring you harvest more of what you grow. They act as a physical barrier, keeping critters out while allowing sunlight, air, and water to reach your plants.
Ever spent weeks nurturing a beautiful tomato plant, only to find all the ripe fruits pecked away by birds or nibbled by squirrels? It’s a gardener’s heartbreak! Pests can be a real challenge, especially when you’re growing your own food outdoors. But don’t let these tiny (or not so tiny!) garden invaders get you down. There’s a super simple solution that’s both effective and easy to use: food nets. These aren’t just for keeping things tidy; they are essential protectors for your outdoor edibles. Let’s dive into how you can use them to guard your garden bounty!
Why Your Garden Needs Outdoor Food Nets
Imagine stepping out to your garden, ready to pick some delicious berries, only to discover birds have had a feast before you. Or perhaps you’ve seen tell-tale signs of squirrels digging up your young seedlings. These are common frustrations for gardeners of all levels. Outdoor food nets, also often referred to as garden netting or bird netting, act as a vital shield. They create a physical barrier that stops these unwanted visitors from reaching your fruits, vegetables, and herbs. This protection is crucial for:
- Maximizing Harvests: Less pest damage means more food for you!
- Protecting Young Plants: Seedlings and tender shoots are particularly vulnerable.
- Preventing Disease Spread: Some pests can carry and spread plant diseases.
- Reducing Frustration: Enjoy the peace of mind knowing your hard work is protected.
Using food nets is a gentle, eco-friendly way to manage pests. Instead of resorting to chemicals, you’re creating a safe, physical defense for your plants. It’s a win-win for both your garden and the environment!
Types of Food Nets for Outdoor Gardens
When we talk about “food nets for outdoors,” we’re generally referring to different types of protective netting designed for garden use. They vary in mesh size, material, and intended application. Understanding these differences will help you choose the best option for your garden’s needs.
Bird Netting
This is perhaps the most common type of garden netting. It’s designed to prevent birds from eating fruits, berries, and vegetables. Bird netting typically has a mesh size large enough to deter birds but small enough to allow sunlight and rain to pass through. It can come in various colors, often black or green, to blend in with the garden environment.
Insect Netting
Insect netting has a much finer mesh than bird netting. Its primary purpose is to keep out smaller pests like aphids, cabbage worms, flea beetles, and other flying or crawling insects. This is especially useful for protecting vulnerable crops like lettuce, brassicas, and young seedlings from significant infestations. Fine insect netting can also help prevent diseases transmitted by insects.
Hail Netting
While not strictly for “food” pests, hail netting protects your plants from the damaging effects of hailstorms. It uses a stronger, more robust mesh to absorb the impact of hailstones, shielding leaves and fruits from physical damage. This is a specialized product but can be a lifesaver in areas prone to severe weather.
Debris Netting
This type of netting is designed to catch larger debris, such as leaves or branches, that might fall onto your plants, particularly if you have trees nearby. It’s typically a coarser mesh, again to allow light and water through.
The material of these nets is also varied. Many are made from UV-stabilized polyethylene or polypropylene, which are durable and designed to withstand outdoor conditions for several seasons. Some might be made from nylon or even natural fibers, though synthetic materials are generally more common for longevity.
Choosing the Right Mesh Size
The mesh size is crucial when selecting food nets for your outdoor garden. It determines what the netting will keep out. Here’s a quick guide:
- Large Mesh (1-inch or larger): Best for deterring larger birds and animals like squirrels. Can sometimes allow smaller birds or larger insects to pass.
- Medium Mesh (around 0.5-inch): Effective against most birds. Still allows pollinators like bees to pass through, which is important for fruiting plants.
- Fine Mesh (around 0.25-inch or smaller): Ideal for keeping out smaller insects such as aphids, cabbage moths, and whiteflies, while still allowing pollinators to enter.
Always consider what specific pests you are trying to deter. If birds are your main concern, a medium to large mesh will probably suffice. If insects are the problem, you’ll need finer mesh. Some gardeners find it useful to use different types of netting on different plants or at different stages of growth.
DIY vs. Pre-made Food Nets: What’s Best for Beginners?
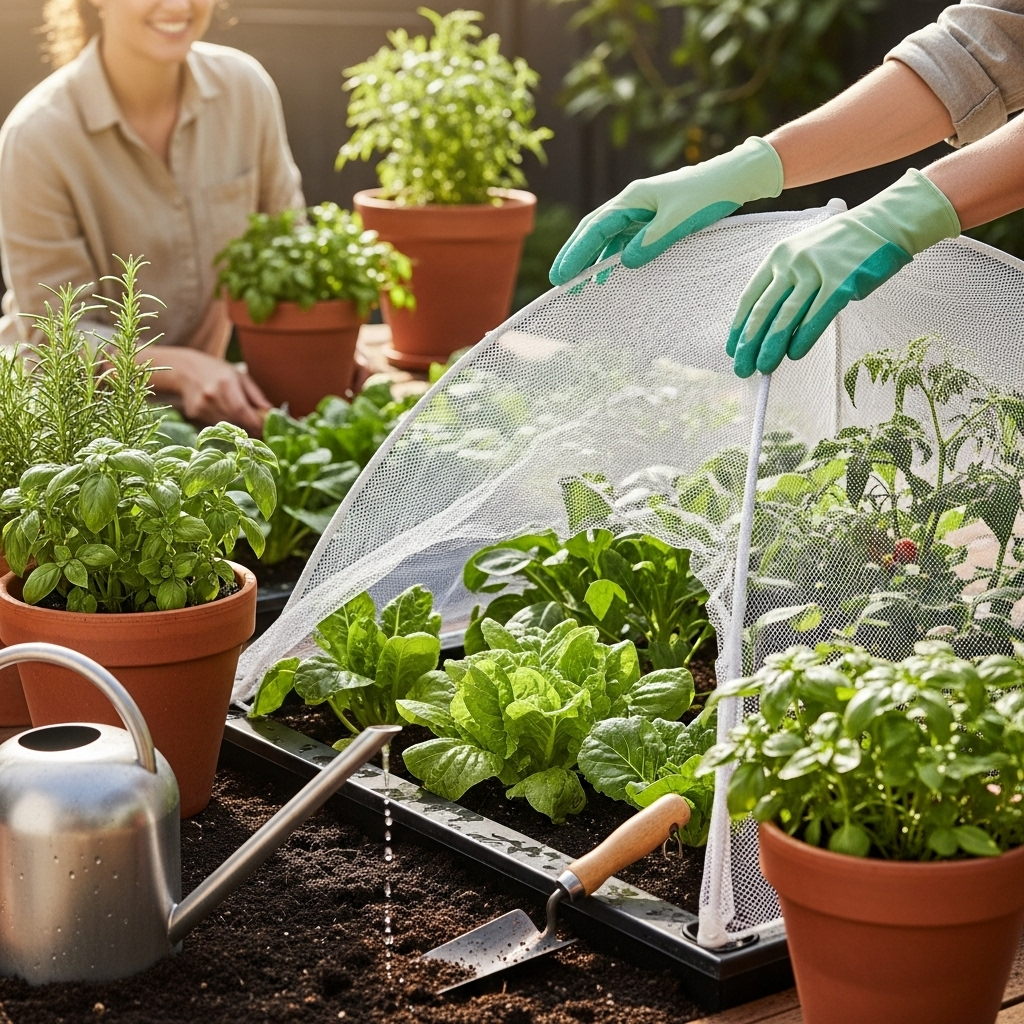
When it comes to protecting your plants, you have two main paths: buying ready-made netting solutions or creating your own. For beginners, ready-made options are often the quickest and easiest way to get started.
Pre-made Netting Solutions
These come in various forms:
- Sheet Netting: Large rolls or pre-cut pieces of netting that you drape over plants or structures.
- Netting Bags: Pre-sewn bags in different sizes, perfect for covering individual fruits like apples or bunches of grapes.
- Netting Tunnels/Cloches: Ready-made structures with hoops and integrated netting, excellent for row crops or smaller beds.
Pros:
- Easy to use, often just draped or secured.
- Available in various sizes and mesh types.
- Saves time compared to DIY.
Cons:
- Can be more expensive initially.
- May not fit unique plant shapes perfectly.
DIY Food Nets
You can create your own netting systems using materials like:
- Window screen material (for insect protection)
- Old curtains or sheer fabric (for very light protection)
- Craft or garden netting
- Support structures like PVC pipes, garden stakes, chicken wire, or even sturdy branches
A popular DIY project is to create a simple frame using PVC pipes or stakes and then stretch netting over it to create a protective cage around a garden bed. For individual plants, you can build small cages or use stakes around the plant to support netting.
Pros:
- Can be very cost-effective, especially if you have leftover materials.
- Customizable to fit any size or shape of garden bed or plant.
- A great weekend DIY project!
Cons:
- Requires more time and effort.
- Might not look as polished as pre-made solutions.
- Durability can vary depending on materials and construction.
Recommendation for Beginners: Start with pre-made netting bags for individual fruits or simple sheet netting for rows. Once you get a feel for it, you can explore DIY options if you find you need more customized solutions or want to save money.
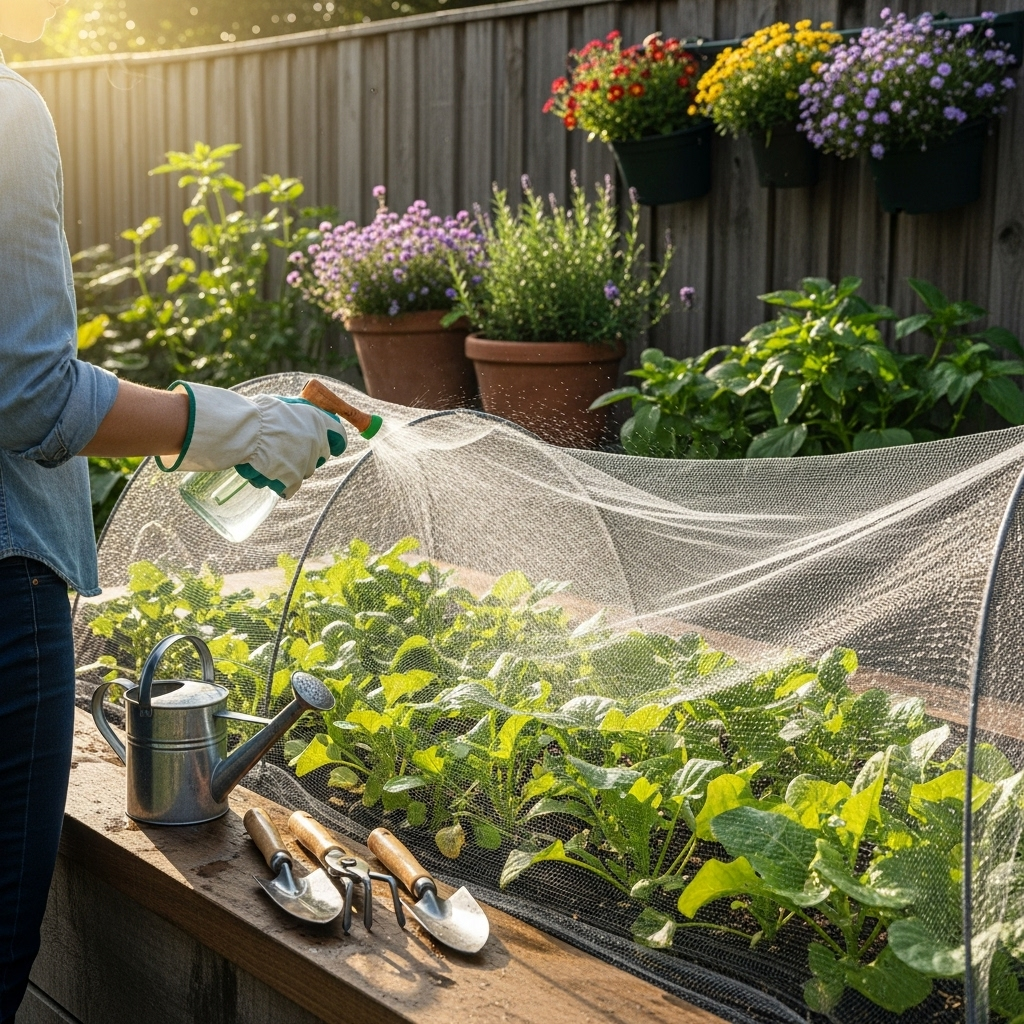
How to Install Food Nets for Maximum Protection
Proper installation is key to ensuring your food nets are effective. A loosely draped net might still allow clever pests to sneak in or get trapped themselves.
General Installation Steps:
- Assess Your Needs: Identify which plants are most vulnerable and what pests you’re targeting.
- Choose Your Netting: Select the appropriate type and mesh size.
- Prepare Your Supports: For larger areas or plants, you’ll need a frame or supports. This could be hoops, stakes, cages, or even a raised bed’s edge. Ensure supports are sturdy enough to hold the netting taut. You can find helpful guides on building garden structures from resources like the Utah State University Extension.
- Drape the Netting: Carefully unfold and drape the netting over your plants or structure. Make sure it covers the entire plant or area you want to protect.
- Secure the Edges: This is critical! The netting must be sealed at the base to prevent pests from crawling underneath. Use garden staples, rocks, soil, or weights to anchor the edges firmly to the ground. For structures, you can use clips or ties to attach the netting securely to the frame.
- Ensure Generous Coverage: Don’t stretch the netting too tightly over plants. Allow some slack so it doesn’t damage delicate stems or fruits as they grow. It also allows for better air circulation.
- Check for Gaps: Periodically inspect the netting for any tears or gaps the pests might exploit. Repair them promptly.
Specific Applications:
For Berry Bushes and Fruit Trees:
These are prime targets! You can use large sheets of netting, draped carefully over the entire bush or tree. It’s best to install netting as soon as the fruits begin to form, before they ripen and attract attention. For trees, you might need to use poles or build a simple frame to keep the netting from resting directly on the foliage and touching the fruit, which can still allow pests access.
For Vegetable Beds (Tomatoes, Peppers, Lettuce):
Create a hoop house structure using PVC pipes or flexible gardening hoops over your raised bed or garden row. Drape the insect or bird netting over the hoops, ensuring it reaches the ground on all sides. Secure the netting to the ground with soil or staples. This also offers a degree of protection against frost.
For Individual Fruits (Tomatoes, Melons, Grapes):
Use pre-made netting bags that tie around the stem of the fruit or plant. Alternatively, you can use fine mesh fabric to create small bags that you place over individual developing fruits and tie around the supporting stem or branch. This is a targeted approach for high-value or particularly vulnerable fruits.
For Seedlings and Young Plants:
Fine insect netting is vital here. You can create small individual covers using stakes and netting, or use larger netting over rows of seedlings. Ensure the netting is secured well at the base so that crawling insects cannot get in.
Tools and Materials for Using Food Nets Successfully

You don’t need a lot of fancy equipment to use garden netting effectively. Here are some essential items:
- The Netting Itself: Of course! Choose based on your pest problem.
- Garden Staples or Stakes: Heavy-duty staples are perfect for securing netting directly to the soil or mulch. Long stakes can help create a more robust frame.
- Clips or Ties: Bungee cords, garden clips, or strong twine are useful for attaching netting to hoops, trellises, or poles.
- Scissors or a Utility Knife: For cutting the netting to size.
- Gloves: To protect your hands while handling netting and securing it.
- Optional: PVC Pipes, Wooden Stakes, Wire Mesh: For building more permanent or robust support structures.
The key is to have a way to keep the netting taut and securely anchored at the bottom. This prevents pests from easily accessing your plants and also stops the netting from blowing away in the wind.
Pros and Cons of Using Food Nets Outdoors
Like any gardening tool, food nets have their advantages and disadvantages. Understanding these will help you decide if they are the right solution for you.
| Pros | Cons |
|---|---|
| Effective Pest Deterrent: Keeps birds, squirrels, and insects away from crops. | Initial Cost: Can be an upfront expense, especially for larger areas. |
| Increases Yields: Protects produce from damage, leading to a larger harvest. | Can Be Tricky to Install: Requires proper technique to be fully effective. |
| Eco-Friendly: A non-toxic, physical barrier that doesn’t harm wildlife. | Potential for Entanglement: Smaller birds or beneficial insects can sometimes get trapped if not installed carefully. |
| Protects Against Weather: Some netting offers minor protection against light hail or wind. | Requires Maintenance: Needs checking for tears and re-securing. |
| Versatile: Can be used on bushes, trees, garden beds, and individual plants. | Aesthetics: Some gardeners find netting detracts from the visual appeal of their garden. |
| Durable: Most modern nets are UV-stabilized and can last for several seasons. | May Affect Pollination: Very fine mesh can sometimes impede the entry of larger pollinators like bees if not managed carefully. |
For most beginner gardeners, the pros of using food nets far outweigh the cons, especially when dealing with persistent pest problems. The peace of mind and increased harvest are often well worth the investment and effort.
Protecting Pollinators: A Crucial Consideration
This is a really important point for any eco-conscious gardener! While we want to protect our food from pests, we absolutely need our pollinators, like bees and butterflies, to thrive. They are essential for many of our fruiting plants, like tomatoes, squash, and berries, to develop properly. So, how do we use food nets without harming them?
- Choose the Right Mesh Size: This is the biggest factor. If your primary concern is birds, use a mesh size of around 0.5 inches or larger. This is typically large enough for most bees to pass through easily. If you are using very fine insect netting (around 0.25 inches or smaller) for specific pest control on certain crops, be mindful of whether those crops require external pollination.
- Timing is Everything: For plants that rely on insect pollination and require protection from other pests (like moths laying eggs), consider only netting them during vulnerable stages. For example, net your cabbage once the butterflies start appearing, but remove it after the main threat has passed or once the plant is established and less susceptible.
- Avoid Covering Flowers if Possible: When netting plants that are actively flowering and need pollination, try to ensure the netting doesn’t completely smother the blossoms. Allow access for pollinators.
- Use Netting Bags Judiciously: For individual fruits that don’t rely on insect pollination (like some apples or pears), netting bags are fantastic. For self-pollinating plants like tomatoes, you can use bags without much concern.
- Regular Inspection: Always check your netting to ensure no beneficial insects have become trapped. If you find one, carefully release it.
By being thoughtful about your netting choices and installation, you can effectively protect your harvest while still supporting the vital work of pollinators in your garden. Many fine mesh nets are designed to allow small beneficial insects like ladybugs in while keeping harmful ones out, and importantly, they still allow bees to move between flowers.
Long-Term Care and Storage of Your Food Nets
To get the most out of your investment in food nets, proper care and storage are essential. This will extend their lifespan and ensure they are ready for use season after season.
During the Growing Season:
- Regular Inspections: Check for rips, tears, or holes at least once a week. Small tears can be mended with needle and thread or even strong tape, but replacing heavily damaged sections might be necessary.
- Maintain Tension: Ensure the netting remains secure at the base. Wind can loosen it, creating entry points for pests. Re-stake or re-bury the edges as needed.
- Cleanliness: If you notice a lot of dead insects or debris on the netting, you can often rinse it off with a hose. Avoid using harsh chemicals.
End of Season Storage:
- Clean the Netting: Once you’ve harvested your last crops and the netting is no longer needed, carefully remove it from your garden. Give it a good shake to remove loose soil, leaves, and debris. If it’s particularly dirty, you can gently hose it down.
- Dry Thoroughly: This is crucial to prevent mildew and rot. Spread the netting out in a sunny, well-ventilated area. Avoid folding it while damp. Ensure it is completely dry before storing.
- Repair Minor Damage: Before storing, take the opportunity to mend any small holes or tears. This will prevent them from getting bigger and make the netting ready for next year.
- Fold or Roll Neatly: Once dry and repaired, fold or roll the netting loosely. Overly tight folding can stress the material and create permanent creases.
- Store in a Dry, Dark Place: Find a cool, dry location like a garden shed, garage, or basement. Protect it from direct sunlight, extreme temperatures, and pests like rodents, which can chew through netting. Storing it in a breathable bag, like an old pillow