Quick Summary
Outdoor carpet tiles for patios offer a fantastic, DIY-friendly way to refresh your space, adding comfort, style, and functionality. They are easy to install, durable, and come in many designs to create a stunning outdoor living area without a huge hassle or expense.
Hello, fellow garden lovers and home improvers! Are you looking at your patio and thinking it needs a little… well, something? Maybe it feels a bit bare, a bit hard underfoot, or just doesn’t quite match the welcoming vibe you’re aiming for. You’re not alone! Many of us dream of a cozy outdoor retreat, a place for morning coffee or evening chats, but feel overwhelmed by expensive decking or complicated renovations. The good news is, transforming your patio doesn’t have to be a huge, complicated project. Today, we’re diving into a simple, beautiful, and surprisingly effective solution: outdoor carpet tiles for your patio. We’ll explore how these versatile tiles can completely change the look and feel of your outdoor space, making it more inviting and enjoyable for everyone.
Outdoor Carpet Tiles for Patio: Your Secret Weapon for a Stunning Makeover
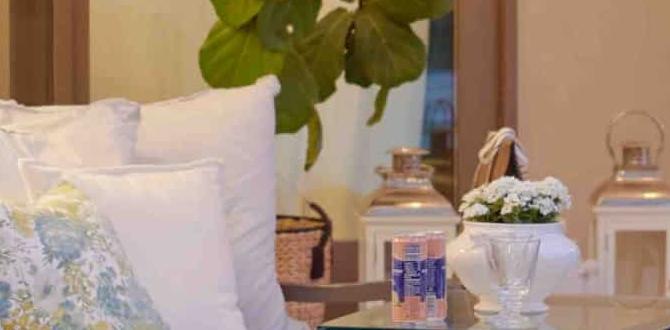
Imagine stepping out onto a soft, welcoming surface instead of cold concrete. Picture a patio that feels like an extension of your living room, perfect for bare feet, playful kids, and relaxed entertaining. This is the magic that outdoor carpet tiles can bring! They are a game-changer for patios, balconies, decks, and even playgrounds. Unlike traditional carpet, these are built to withstand the elements – sun, rain, and spills. And the best part? They are incredibly easy to install, making them a perfect project for beginners!
Why Choose Outdoor Carpet Tiles for Your Patio?
Let’s break down why these little squares are such a big deal for your outdoor space:
- Instant Style Upgrade: They come in a vast array of colors, patterns, and textures. You can create checkerboard designs, mix and match, or opt for a sophisticated solid color.
- Comfort Underfoot: Patios can be hard and hot. Carpet tiles add cushioning, making them much more comfortable to walk, sit, or play on.
- Durability & Weather Resistance: Designed specifically for outdoor use, they are resistant to fading, mold, mildew, and UV rays.
- Easy Installation: No need for professional installers! Most snap or interlock together easily, and many are peel-and-stick, making it a true DIY project.
- Cost-Effective: Compared to full decking or elaborate patio renovations, carpet tiles offer a budget-friendly way to achieve a dramatic transformation.
- Easy Maintenance: Spills? No problem. Just spot clean! Damaged tile? Simply replace that one tile instead of the whole rug or floor.
- Versatility: Perfect for patios, balconies, RVs, play areas, and even home gyms.
Essential Ideas for Stunning Outdoor Carpet Tiles on Your Patio
Ready to get inspired? Here are some fantastic ways to use outdoor carpet tiles to make your patio the envy of the neighborhood:
1. The Classic Comfort Zone
This is the simplest and most popular use. Lay down solid-colored or subtly patterned tiles across your entire patio surface. This instantly softens the look, adds a layer of comfort, and creates a unified, finished appearance. Shades of grey, beige, or deep earth tones work beautifully to create a neutral, relaxing foundation.
Tips for the Classic Look:
- Choose a color that complements your home’s exterior paint or siding.
- Consider a low-pile tile for easier cleaning and a sleeker look.
- Use a subtle pattern if you want a bit of texture without overwhelming the space.
2. Boardwalk Chic
Love the look of a beach boardwalk? You can achieve this with outdoor carpet tiles! Look for tiles that mimic the warm, weathered look of wood planks. Lay them parallel to each other, perhaps shifting them slightly like real deck boards for an authentic feel.
How to Get the Boardwalk Vibe:
- Search for “wood-look outdoor carpet tiles.”
- Lay them in a linear pattern, ensuring the “planks” align.
- Combine with coastal-themed decor – think driftwood accents, seashells, and blue or white cushions.
3. Geometric Wow Factor
Don’t be afraid to play with patterns! Outdoor carpet tiles are perfect for creating bold geometric designs. Think contrasting colors like black and white, navy and cream, or even vibrant pops of teal and orange. You can create stripes, checkerboards, diamonds, or even more intricate patterns.
Creating Geometric Designs:
- Checkerboard: Alternate two contrasting colors.
- Stripes: Lay down rows of alternating colors. You can make wide stripes or thin pinstripes.
- Diamonds: For a more complex look, try orienting tiles at a 45-degree angle to create a diamond effect. This might require more cutting around edges.
- Border Designs: Use a different color or pattern to create an attractive border around the edge of your patio.
4. Playful Play Area
Transform a section of your patio into a fun and safe play zone for kids. Bright, durable outdoor carpet tiles can create a soft landing for toddlers and a cheerful space for games. Consider vibrant colors or even themed tiles if available.
Kid-Friendly Patio Elements:
- Use soft, non-abrasive tiles.
- Opt for easily washable materials.
- Incorporate bright, primary colors or even animal/shape patterns.
- Ensure no small parts can come loose and become a choking hazard.
5. Modern & Minimalist
For a sleek, contemporary feel, choose neutral tones like charcoal, slate grey, or a deep, cool beige. Lay them without a border or with a very simple, clean edge. This creates a sophisticated backdrop for modern outdoor furniture and minimalist decor.
Achieving a Minimalist Look:
- Stick to a limited color palette (1-2 neutrals).
- Ensure tiles are laid perfectly with clean, straight edges.
- Pair with furniture that has clean lines and simple designs.
6. The “Rug” Effect with Tiles
Can’t afford a large outdoor rug, or want something more permanent? Create your own “rug” with outdoor carpet tiles! Lay a border of one color and fill the center with another, or create a more intricate design within the “rug” area. This defines a seating or dining space beautifully.
Creating a Tile Rug:
- Measure the area where you want your “rug.”
- Plan your border and center design.
- Use a contrasting color for the border to make it pop.
Choosing the Right Outdoor Carpet Tiles: What to Look For
Not all outdoor carpet tiles are created equal! Here’s what to consider when you’re shopping:
Material Matters
Most outdoor carpet tiles are made from synthetic fibers designed to withstand the elements. Common materials include:
- Polypropylene (Olefin): Very common, affordable, good resistance to moisture, mold, and mildew. Can fade in direct sunlight over very long periods.
- Nylon: More durable and resilient than polypropylene, better at retaining its shape, but typically more expensive. Good UV resistance.
- Polyester: Often used in combination with other fibers, offers good stain resistance.
Backing Type
The backing is crucial for drainage and stability:
- Rubber Backing: Provides cushioning and good drainage but can sometimes trap moisture underneath depending on the design.
- Interlocking Plastic Base: These often have a grid-like structure that allows water to flow through easily. They are durable and provide good stability.
- Peel-and-Stick Adhesive: Some come with built-in adhesive for easy installation. Ensure the adhesive is rated for outdoor use and temperature fluctuations.
Pile Height and Texture
- Low Pile: Easier to clean, less likely to trap debris, and provides a sleeker appearance.
- High Pile (Carpet Loop or Cut): Softer and plusher underfoot, but can hold more moisture and debris.
- Texture: Consider how the texture will feel under bare feet and how easily it will shed dirt.
Drainage
This is paramount for outdoor use! You want tiles that allow water to drain away quickly to prevent mold, mildew, and slippery surfaces. Tiles with raised bases or perforated backing are excellent for this. Check product descriptions for drainage features.
UV Resistance
Exposure to the sun can cause colors to fade over time. Look for tiles specifically advertised as having good UV resistance. This ensures your beautiful patio design stays vibrant for longer.
Ease of Installation
For beginners, interlocking or peel-and-stick tiles are ideal. Avoid complex locking systems or those requiring special adhesives unless you’re comfortable with those methods.
Installing Your Outdoor Carpet Tiles: A Simple Step-by-Step Guide
Getting your beautiful new patio surface down is surprisingly straightforward. Here’s how to tackle it:
Step 1: Prepare Your Patio Surface
This is the MOST important step for a good result!
- Clean Thoroughly: Sweep away all loose debris, dirt, and leaves.
- Wash (if needed): If your patio is very dirty or has greasy spots, wash it with a deck cleaner or a strong detergent and water solution. Rinse thoroughly and let it dry completely. A dry surface is essential for adhesives and for tiles to sit flat.
- Check for Levelness: Ensure your patio surface is as level as possible. Significant slopes can affect how tiles fit together and how water drains. Small unevenness can sometimes be managed with the tile system itself.
- Remove Obstacles: Clear away any furniture, planters, or other items that will be in your way.
Step 2: Plan Your Layout
Before you start clicking or sticking, lay out a few tiles to visualize your pattern and ensure you know how you’ll start and where you’ll end.
- Find Your Starting Point: Usually, it’s best to start at a corner or along a straight edge of your patio.
- Dry Fit: Lay down a few tiles without connecting them fully to see how they look and fit.
- Edge Considerations: Think about how you’ll handle the edges. Will you need to cut tiles? Most interlocking tiles can be cut with a sharp utility knife or heavy-duty scissors. For peel-and-stick, precise cutting is often needed.
Step 3: Lay the Tiles
This is where the magic happens!
For Interlocking Tiles:
- Take your first tile and place it in your starting corner.
- Take the next tile and align its connectors with the first tile’s connectors.
- Gently press down or tap with your hand or a rubber mallet to ensure a secure connection.
- Continue working your way across the patio, connecting each tile. Work in rows or in a pattern that makes sense for your design.
For Peel-and-Stick Tiles:
- Peel back a small section of the adhesive backing on the first tile without fully removing it.
- Place the tile precisely in your starting position.
- Carefully peel the rest of the backing away as you press the tile firmly onto the surface.
- Align the next tile, peel, and stick.
- Work carefully and precisely, as repositioning can sometimes be difficult once the adhesive has a good grip.
Step 4: Cut to Fit (If Necessary)
Most patios aren’t perfect rectangles. You’ll likely need to cut tiles to fit along walls, steps, or railing posts.
- Measure Carefully: Measure the space you need to fill.
- Mark the Tile: Use a marker to trace the shape onto the back of the carpet tile.
- Cut with a Sharp Blade: Use a sharp utility knife or heavy-duty scissors. It’s often easier to cut through the backing of the tile. For precise cuts, you might find a straight edge helpful.
- Test the Fit: Place the cut tile to ensure it fits snugly.
- Safety First: Always cut away from yourself and be mindful of sharp blades. Keep children and pets away from the work area.
Step 5: Finishing Touches
Once all tiles are laid and cut, give your patio a final inspection.
- Check Connections: Ensure all tiles are securely interlocked or adhered.
- Sweep Clean: Sweep across the new surface to pick up any stray fibers or debris from the installation process.
- Furniture Placement: Wait for adhesives to fully cure if applicable (check manufacturer instructions) before placing heavy furniture back on the tiles.
Outdoor Carpet Tiles vs. Other Patio Flooring Options
It’s always helpful to see how your chosen option stacks up against others. Here’s a quick comparison:
| Feature | Outdoor Carpet Tiles | Pavers/Concrete | Wood Decking | Outdoor Rugs |
|---|---|---|---|---|
| Installation Ease | Very Easy (DIY friendly) | Moderate to Difficult (professional often needed) | Moderate to Difficult (DIY possible, but time-consuming) | Very Easy (just lay it down) |
| Comfort Underfoot | High | Low (can be hard and hot) | Moderate (can get hot, splinters) | Varies (generally good) |
| Durability | Good (UV resistant, weather proof) | Very High (long-lasting) | Moderate (requires regular maintenance to prevent rot/wear) | Moderate (can fade, tear, or wear out faster) |
| Cost | Low to Moderate | Moderate to High | Moderate to High | Low to High (depending on size/quality) |
| Maintenance | Easy (sweep, spot clean) | Moderate (sweeping, occasional sealing) | High (cleaning, sealing, staining) | Moderate (sweeping, hosing down, occasional deep clean) |
| Style Versatility | High (many colors, patterns) | Moderate (color, texture options) | Moderate (wood types, stains) | High (many patterns, colors) |
| Drainage | Excellent (designed for it) | Excellent (permeable or designed to drain) | Good (gaps between boards) | Poor (can trap water, needs constant removal) |
Pros and Cons of Outdoor Carpet Tiles
Like any home improvement choice, there are always advantages and disadvantages to consider:
Pros:
- Affordable Transformation: Get a big visual impact for a reasonable price.
- DIY Heaven: Extremely beginner-friendly installation.
- Comfort Boost: Makes your patio a much more pleasant place to be.
- Customizable Designs: Mix and match for a unique look.
- Easy Replacement: Spills or damage? Just swap out one tile.
- Instant Outdoor Room Feel: Creates a defined living space.
- Good Drainage: Prevents water pooling and related issues.
Cons:
- Sun Fading: Some cheaper variants might fade significantly over time in direct, harsh sunlight.
- Debris Trapping: Any carpet-like surface can trap dirt, leaves, and pet hair, requiring regular sweeping.
- Durability Compared to Hardscaping: While durable, they may not last as long as well-maintained pavers or concrete over many decades.
- Potential for Mold/Mildew: If drainage is exceptionally poor or tiles are consistently damp without drying, mold can still be an issue, though modern outdoor tiles are designed to combat this.
- Aesthetics: Some people prefer the natural look of wood or stone and may find carpet tiles less appealing.
Caring for Your Outdoor Carpet Tiles
Keeping your outdoor carpet tiles looking their best is simple, but requires a little ongoing attention:
- Regular Sweeping: A soft broom or a leaf blower is your best friend here. Sweep regularly to remove dust, leaves, pollen, and other debris. This prevents it from embedding into the fibers.
- Spot Cleaning: For spills, blot up as much of the liquid as possible immediately with a clean cloth. For tougher stains, use a mild soap and water solution. Always test cleaning solutions on an inconspicuous area first.