Outdoor plastic pots for plants are a fantastic, affordable, and versatile choice for gardeners. They are lightweight, durable, and come in many sizes and colors, making them perfect for everything from small herbs to larger shrubs. Choosing the right ones ensures your plants thrive and adds a vibrant touch to your outdoor space.
Hello there, fellow garden lovers! Are you dreaming of a flourishing garden but feeling a little lost when it comes to choosing the perfect containers? Especially when you see all those different kinds of pots out there, it can feel a bit overwhelming, right? Don’t worry, I’ve been there! Today, we’re diving into the wonderful world of outdoor plastic pots for plants. They’re a simple, budget-friendly, and super effective way to give your green friends a happy home. We’ll explore why they’re so great and how to pick the best ones for your unique needs. Ready to transform your patio, balcony, or garden? Let’s get started!
Think of your plants like little houseguests. They need a comfy place to live, the right amount of food (water and nutrients!), and a good spot to soak up the sun. The pot is their house! For beginners, plastic pots are like a welcoming starter home – easy to manage and get the job done beautifully. They’re a fantastic way to dip your toes into container gardening without a huge investment or a lot of fuss.
Why Choose Outdoor Plastic Pots for Plants?
Plastic pots might not sound as fancy as terracotta or ceramic, but they have some amazing advantages, especially for new gardeners. They’re like the comfy, reliable sneakers of the plant world – always there when you need them!
The Pros of Plastic Pots
- Lightweight: Unlike heavy ceramic or concrete pots, plastic pots are super light. This means you can easily move them around your garden or patio to find the sunniest spots for your plants, or to rearrange your display.
- Affordable: This is a big one for many of us! Plastic pots are generally much cheaper than pots made from other materials. This allows you to buy more pots for your budget, letting you plant more of your favorites!
- Durable: Good quality plastic pots won’t crack or shatter easily if they get knocked over. They can withstand a bit of weather, too, making them a long-lasting choice for your outdoor garden.
- Water Retention: Plastic is non-porous, which means it holds onto moisture well. This is great for plants that like consistent watering, as the soil dries out slower than in terracotta pots.
- Variety: You can find plastic pots in almost any size, shape, and color imaginable! This makes it easy to match them to your garden’s style or create a colorful display.
- Easy to Clean: A simple wipe-down or rinse is usually all it takes to clean plastic pots, ready for their next planting.
Potential Downsides to Consider
While plastic pots are wonderful, it’s good to know about any potential drawbacks so you can make informed choices. Every pot type has its own personality!
- Less Breathability: Because plastic isn’t porous, it doesn’t allow as much air to reach the plant’s roots as materials like terracotta. This means you need to be a bit more mindful of watering to avoid root rot.
- Can Get Hot: In very hot, sunny locations, dark-colored plastic pots can absorb a lot of heat, potentially ‘cooking’ the plant’s roots. Lighter colors or using decorative outer sleeves can help with this.
- Environmental Concerns: While many plastic pots are recyclable, the production and disposal of plastic can have environmental impacts. Looking for pots made from recycled plastic is a fantastic eco-friendly choice! You can often find these labeled clearly.
Essential Collection: Sizes, Shapes, and Styles
When building your collection of outdoor plastic pots for plants, thinking about versatility is key. You want a few go-to sizes and styles that can accommodate a variety of plants as they grow.
Common Pot Sizes and What to Plant in Them
Here’s a quick guide to help you pick the right size. It’s always good to have a range!
| Pot Diameter/Size | Ideal For | Examples |
|---|---|---|
| 4-6 inches (10-15 cm) | Seedlings, small herbs, succulents, annual flowers. | Basil, thyme, small petunias, cactus. |
| 8-10 inches (20-25 cm) | Larger herbs, compact vegetables, flowering annuals and perennials. | Rosemary, small tomato plants, marigolds, hostas. |
| 12-16 inches (30-40 cm) | Medium-sized vegetables, shrubby herbs, small shrubs, larger flowering plants. | Bush beans, peppers, dwarf fruit trees, hydrangeas. |
| 18+ inches (45+ cm) | Larger perennial plants, small trees, substantial vegetable plants. | Tomatoes, potatoes, small ornamental trees. |
Popular Shapes for Outdoor Plastic Pots
The shape of a pot can affect its stability, how much soil it holds, and how it looks in your garden.
- Standard Round Pots: The most common type. Great all-rounders for most plants.
- Square Pots: These are excellent for maximizing space, especially on balconies or patios where you can fit more of them together efficiently. They also tend to be quite stable.
- Tall/Slim Pots (Columns): Ideal for plants with deep root systems or for creating a vertical accent in your garden design. Think of plants like ornamental grasses or taller flowering species.
- Window Boxes: Long and rectangular, perfect for growing a collection of herbs, trailing flowers, or a mix of edibles along a windowsill or railing.
- Self-Watering Pots: These have a built-in reservoir that provides water to the plant’s roots as needed. They are fantastic for busy gardeners or for plants that require consistent moisture.
Material Matters: Types of Plastic
Not all plastic is created equal! Look for pots made from sturdy, food-grade plastics that can withstand UV rays from the sun without becoming brittle. Common types include:
- Polypropylene (PP): Often a good choice, it’s flexible and durable.
- Polyethylene (PE): Also strong and flexible, good for larger pots.
- Recycled Plastics: An excellent eco-conscious option. Many manufacturers are now using post-consumer recycled materials. These are often clearly labeled and are a win-win for your garden and the planet!
You might also see pots made from a plastic composite material. These can sometimes offer the look of other materials but with the lightweight benefits of plastic. Always check the product description for details about the materials used.
Getting Started: Choosing the Right Pots for Your Plants
So, how do you pick the perfect plastic pot for your specific plant? It’s all about thinking about the plant’s needs and your garden’s environment.
Step 1: Consider Your Plant’s Needs
Every plant is different! Some are small and wishy-washy, while others are big and thirsty.
- Size: Does the plant have shallow roots or grow very large? Match the pot size to the plant’s current size, with a little room to grow. A general rule is to go up one pot size (about 2 inches wider in diameter) when repotting to give roots space.
- Root System: Plants like carrots or potatoes need deep pots. Bushy plants might do better in wider pots.
- Watering Habits: Do your plants like to dry out between waterings (like succulents)? Or do they prefer consistently moist soil (like many leafy greens)? Plastic’s water retention is great for moisture-lovers, but you’ll need to be diligent with drainage and watering frequency if your plant prefers drier conditions.
Step 2: Location, Location, Location!
Where will the pot live? This affects the pot’s color and drainage needs.
- Sunny Spots: In very hot, sunny areas, opt for lighter-colored plastic pots (white, beige, light grey) as they absorb less heat than dark colors (black, dark green). This helps prevent the soil and roots from overheating.
- Windy Areas: Square pots or wider, heavier-feeling plastic pots can be more stable in windy spots than tall, narrow ones. You might also consider placing them in a more sheltered location or using decorative cachepots to add weight.
- Patio Pavers vs. Soil Beds: If your pots will sit directly on a deck or patio, ensure they have good drainage to prevent water from pooling underneath and potentially damaging the surface.
Step 3: Drainage is Key!
This is non-negotiable for healthy plants. Most plastic pots come with drainage holes, but always check!
- Pre-Drilled Holes: Ensure there are several holes at the bottom of the pot. This allows excess water to escape, preventing root rot – a common killer of container plants.
- Adding Holes: If a pot you love doesn’t have enough holes, you can often add more yourself! A drill with a standard drill bit (or a heated metal skewer for smaller holes – with adult supervision and extreme caution!) can create new drainage points. For drilling plastic, using a drill bit designed for plastics or a general-purpose bit often works well. Start with a small bit and widen if needed. For safety, drill from the outside in on the bottom of the pot.
- Drainage Layer (Optional but helpful): While not always necessary with good drainage holes, some gardeners like to add a layer of gravel or broken pot pieces at the bottom. This can help prevent soil from washing out but also ensure water can freely exit.
Setting Up Your Outdoor Plastic Pots for Success
You’ve chosen your pots – hooray! Now let’s get them ready for your plants.
1. Prepare Your Pots
If your pots are new, a good rinse with water is usually enough. If you’re reusing old pots, it’s essential to clean them thoroughly to remove any lingering soil, pests, or diseases. A solution of 1 part bleach to 9 parts water, followed by a thorough rinse and drying, works wonders for sanitizing.
2. Choose the Right Potting Mix
Don’t use garden soil in pots! Garden soil compacts too much and doesn’t drain well in containers. Instead, use a good quality potting mix specifically designed for containers. These mixes are lighter, drain better, and provide the aeration your plant roots need. You can find general-purpose potting mixes, or specific ones for things like vegetables or cacti.
For a more eco-friendly approach, you can also make your own potting mix. A common recipe is:
- 1 part compost (for nutrients)
- 1 part peat moss or coco coir (for moisture retention and aeration)
- 1 part perlite or vermiculite (for drainage and aeration)
Ensure your potting mix is slightly moist before you start filling pots; it should feel like a wrung-out sponge.
Discover more about creating the perfect soil environment by checking out resources on soil science from university extensions, such as the University of Maryland Extension’s guide to container gardening soils.
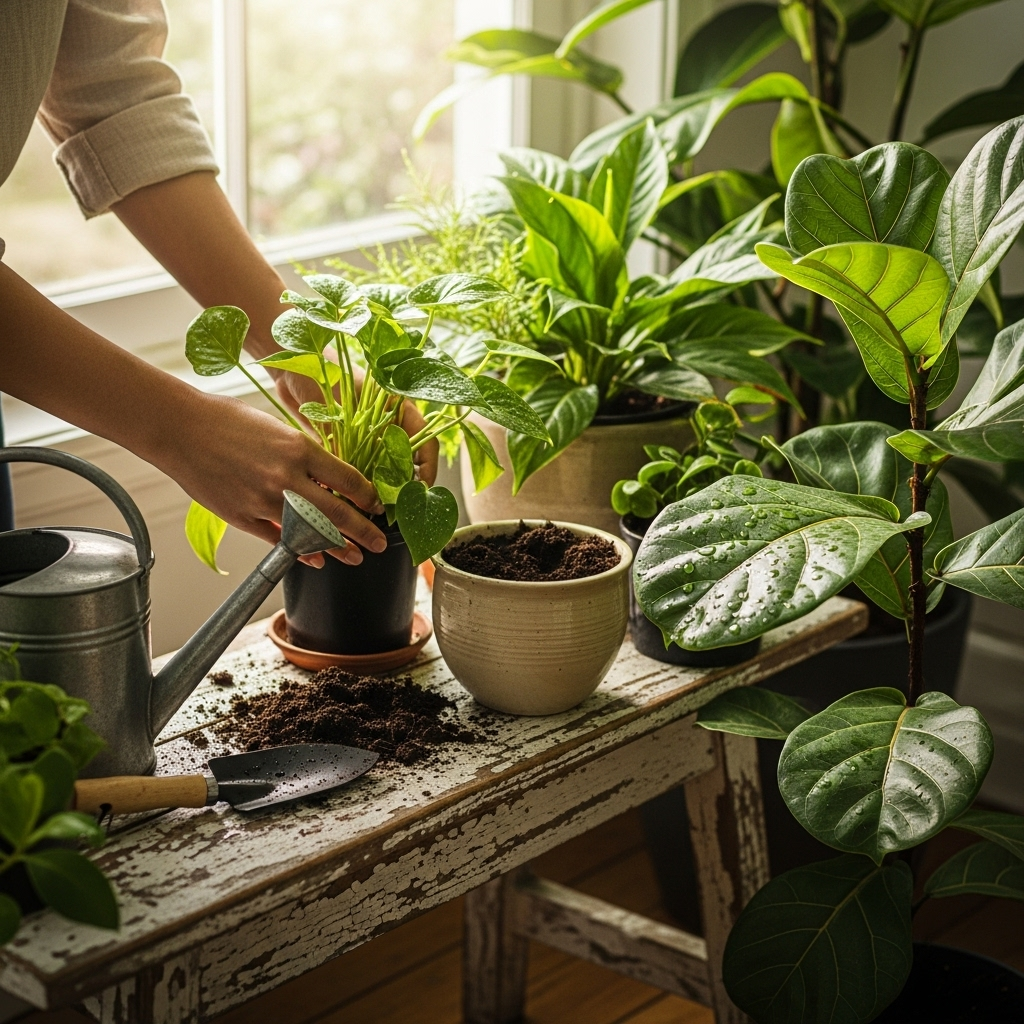
3. Potting Your Plants
Here’s how to plant your new purchase or seedling:
- Fill the Pot: Add your chosen potting mix to the pot, filling it about one-third to halfway full.
- Remove Plant from Old Container: Gently tip the plant’s current pot on its side and ease the plant out. If it’s stuck, try tapping the bottom of the pot or running a knife around the inside edge. Never pull firmly on the stem.
- Loosen Roots (if necessary): If the roots are tightly bound in a circular pattern (root-bound), gently tease them apart with your fingers or a small tool. This encourages them to grow outwards into the new soil.
- Position the Plant: Place the plant in the new pot so that the top of its root ball is about 1-2 inches below the rim of the pot. This leaves space for watering.
- Fill with Soil: Add more potting mix around the root ball, gently firming it down with your hands to eliminate large air pockets. Avoid compacting it too tightly.
- Water Thoroughly: Water your newly potted plant until water runs freely from the drainage holes. This settles the soil and ensures the roots have good contact with the moisture.
Caring for Your Plastic Outdoor Pots
Once your plants are settled in their new plastic homes, a little ongoing care will keep them looking great and your plants thriving.
Watering Wisely
As mentioned, plastic retains moisture. This is a benefit, but it means you need to be careful not to overwater. Stick your finger about 2 inches into the soil. If it feels dry, it’s time to water. If it feels moist, wait a bit longer. Water deeply until it drains from the bottom.
Feeding Your Plants
Potting mix contains nutrients, but they get used up over time. Most plants in containers will need regular feeding, especially during their growing season. You can use a balanced liquid fertilizer diluted according to the package instructions, or a slow-release granular fertilizer sprinkled on top of the soil. Follow the recommendations for your specific plants.
Dealing with Pests and Diseases
Keep an eye out for common garden visitors like aphids or spider mites. Early detection is key! If you spot pests, you can often wash them off with a strong spray of water or use an insecticidal soap designed for organic gardening. Ensure good air circulation around your plants to help prevent fungal issues.
Repotting
As plants grow, they will eventually outgrow their pots. You’ll know it’s time to repot when roots start to grow out of the drainage holes, the plant dries out very quickly, or growth seems to have stalled. This is a great opportunity to move up to a larger plastic pot!
For a helpful guide on identifying and managing plant diseases, you might consult resources from official agricultural departments, like the USDA Animal and Plant Health Inspection Service (APHIS) plant health pages, which offer information on various issues.
Creative Uses for Outdoor Plastic Pots
Beyond just holding plants, plastic pots can be part of your garden’s decor!
- Color Pops: Use brightly colored pots to add visual interest to a dull corner.
- Herb Gardens: Designate specific pots for an aromatic herb garden that’s easy to reach from your kitchen door.
- Themed Areas: Group pots with plants of similar colors or styles to create themed displays, like a “succulent corner” or a “cottage garden patch.”
- DIY Decor: Get creative! You can paint plastic pots with outdoor-friendly paints, decoupage them with fabric or paper, or even wrap them with twine for a more rustic look. Just be sure to use paints and sealants that are safe for outdoor use and won’t harm your plants.
Consider upcycling. Old plastic tubs or containers that are food-safe and sturdy can often be repurposed as planters. Just remember to add those crucial drainage holes!
Frequently Asked Questions (FAQ)
Q1: Are plastic pots good for outdoor plants?
Yes, plastic pots are excellent for outdoor plants! They are lightweight, durable, affordable, and retain moisture well, making them a popular choice for gardeners of all levels.
Q2: What kind of plastic pots are best for the garden?
Look for pots made from sturdy, UV-resistant, and preferably food-grade plastics like polypropylene or polyethylene. Pots made from recycled plastics are also a great eco-friendly option.
Q3: Do plastic pots need drainage holes?
Absolutely! Drainage holes are essential for preventing waterlogging and root rot. Ensure any pot you choose has adequate drainage, or be prepared to add them yourself.
Q4: Can I leave plants in plastic pots outside all year?
In many climates, yes. However, in areas with hard freezes, it’s wise to either bring sensitive plants indoors or protect the pots from extreme cold. Some very thin plastic pots can become brittle in freezing temperatures.
Q5: How often should I water plants in plastic pots outdoors?
Watering frequency depends on the plant, weather, and pot size. A good rule of thumb is to check the soil moisture with your finger. Water when the top 1-2 inches of soil feel dry. Plastic pots hold