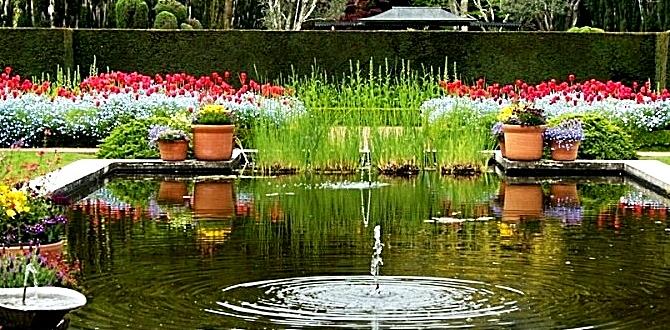
Quick Summary: A pebble tray for indoor plants is a simple, effective DIY humidity solution. Fill a shallow tray with pebbles, add water, and place your potted plant on top. This boosts humidity around your plant by allowing water to evaporate naturally, preventing problems like brown leaf tips and promoting lush growth.
Does your indoor jungle feel a little… sad? Are crispy brown leaf edges a constant disappointment? You’re not alone! Many beautiful houseplants, especially tropical varieties, crave higher humidity than our homes typically provide. Low humidity can stress your plants, making them look less vibrant and more susceptible to pests. But don’t worry, there’s an incredibly easy and affordable fix: the humble pebble tray! It’s a beginner’s best friend for creating a micro-climate of moisture, and I’m here to show you exactly how to make and use one to give your plants the happy, humid home they deserve.
Why Your Indoor Plants Need Humidity (And How a Pebble Tray Helps!)
Think of your favorite tropical houseplant, like a Calathea or a Fern. Where do they originally come from? Chances are, they hail from humid environments like rainforests. When we bring them indoors, our homes (especially with heating and air conditioning) can feel like a desert in comparison. This lack of moisture in the air, known as low humidity, is a common culprit behind many houseplant woes. Signs of low humidity include:
- Brown, crispy leaf tips and edges
- Yellowing leaves
- Drooping leaves
- Increased susceptibility to spider mites (they love dry conditions!)
- Slowed growth
A pebble tray is a genius, low-tech solution to this problem. It’s essentially a shallow tray filled with pebbles and water. When you place your potted plant on the pebbles, the bottom of the pot sits above the water level. As the water evaporates from the tray, it creates a humid micro-environment around your plant. It’s like giving your plant its own little personal humidifier!
The key is that the plant’s pot should not sit directly in the water. Standing in water can lead to root rot, which is a death sentence for many plants. The pebbles elevate the pot, allowing for good airflow and preventing those soggy roots. This natural evaporation method is gentle and effective.
What Exactly is a Pebble Tray?
At its heart, a pebble tray is incredibly simple: a waterproof container, some pebbles or gravel, and water. That’s it! It’s a natural way to increase the humidity around your plants without using electricity. Unlike electric humidifiers, it won’t add to your energy bill, making it a fantastic eco-friendly and budget-conscious choice.
The tray catches excess water that drains from your pot after watering, preventing messes and keeping your surfaces dry. More importantly, the water held in the tray slowly evaporates into the air, directly benefiting your plant’s foliage. It’s a passive humidity system that works wonders.
Choosing the Right Components for Your Pebble Tray
The beauty of the pebble tray is its simplicity, and that extends to choosing materials. You don’t need anything fancy! Here’s what to look for:
1. The Tray
This is your foundation. The most important feature is that it MUST be waterproof to prevent water damage to your furniture or floors. It also needs to be shallow enough to easily hold pebbles and a bit of water without submerging the plant’s pot.
- Materials to Consider:
- Plastic plant saucers (often sold with pots)
- Ceramic saucers (ensure they are glazed inside and out)
- Shallow plastic containers (like storage bin lids or repurposed food containers)
- Galvanized metal trays (ensure they don’t rust easily)
- Size Matters: Choose a tray that is slightly larger than the base of your plant’s pot. This gives you room for pebbles and ensures the pot isn’t directly touching the edges of the tray, which could allow water to spill. If a plant is very large, you might need a larger tray or multiple trays.
2. The Pebbles
These do the heavy lifting by creating space and holding water. You can be quite creative here, but the main goal is to have pieces big enough to provide structure.
- Ideal Choices:
- All-purpose gravel (available at garden centers or pet stores)
- River rocks (smooth, aesthetically pleasing)
- Lava rocks (lightweight and porous, can hold a bit more water)
- LECA (Lightweight Expanded Clay Aggregate) – often used for hydroponics, but works well here if you like the look!
- What to Avoid:
- Very fine sand or soil: This will compact, not allow for good airflow, and won’t hold water effectively.
- Sharp or jagged rocks: These can be a hazard and damage your plant pots.
- Quantity: You’ll need enough pebbles to fill the tray to a depth that is higher than the intended water level, ensuring the bottom of your pot will sit well above the waterline.
3. The Water
Yes, even water has considerations for plant health!
- Best Options:
- Distilled water
- Rainwater
- Filtered water
- Why Filtered Water is Preferred: Tap water can contain minerals and chemicals like chlorine and fluoride. Small amounts are usually fine, but over time these can accumulate in the pebble tray and potentially on the pot or plant roots, which can be harmful to sensitive plants. If tap water is your only option, letting it sit out for 24 hours before use can help some of the chlorine evaporate.
Step-by-Step: How to Make and Use Your Pebble Tray
Ready to create your plant’s personal oasis? It’s wonderfully simple. Follow these easy steps:
Step 1: Select Your Tray and Pebbles
Choose a waterproof tray and a sufficient amount of pebbles. Make sure the tray is clean and the pebbles are rinsed to remove any dust or debris. A quick rinse under the tap will do!
Step 2: Add Pebbles to the Tray
Pour the clean pebbles into the tray. Fill it up so the pebbles create a layer that is at least 1-2 inches deep. The exact depth will depend on the size of your tray and pot, but aim for enough to comfortably elevate the pot.
Step 3: Add Water to the Tray
Carefully pour water into the tray, filling it ONLY to a level just below the top of the pebbles. Remember, you do NOT want the bottom of your plant’s pot to sit directly in the water. The water should be held by the pebbles, not creating a small pool above them.
A good rule of thumb is to fill the water so it comes up to about halfway or two-thirds of the way up the pebble layer. You should be able to see the water nestled between the rocks.
Step 4: Place Your Plant on the Tray
Gently place your potted plant onto the pebbles. Center it so it’s stable. The base of the pot should rest on the pebbles, well above the waterline. Ensure there’s a little space between the pot and the sides of the tray if possible, to allow for air circulation.
Step 5: Position Your Pebble Tray
Place the assembled pebble tray and plant in its usual spot. Avoid placing it in direct, intense sunlight if the tray has dark-colored pebbles, as they can absorb heat and potentially warm the water more than desired, though this is rarely an issue for most plants. It’s best to keep it away from direct heat sources like radiators or HVAC vents, as these will speed up evaporation too quickly and defeat the purpose.
Step 6: Maintain the Water Level
This is the ongoing part! Check the water level in the tray every few days, or more often in dry climates or during winter. Top up the water as needed to keep the pebbles moist and the evaporation going. You’ll see the water level decrease as it evaporates.
Important Note: When you water your plant from the top, allow any excess water to drain fully from the pot’s drainage holes before placing it back on the pebble tray. You don’t want to accidentally create the soggy-bottomed situation you’re trying to avoid!
Which Plants Benefit Most from Pebble Trays?
While many houseplants appreciate a little humidity boost, certain types absolutely LOVE pebble trays:
- Tropical Plants: Originating from humid regions, these plants often struggle in dry indoor air.
- Ferns (Maidenhair Fern, Boston Fern, Staghorn Fern)
- Calatheas and Marantas (Prayer Plants)
- Peperomias (many varieties)
- Orchids
- Alocasias and Colocasias (Elephant Ears)
- Begonias (especially Rex Begonias)
- Fittonias (Nerve Plants)
- Monstera species
- Philodendron species
- Plants Prone to Brown Tips: If you find your Spider Plants, Dracaenas, or certain types of Ficus constantly getting brown leaf tips, a pebble tray can significantly help.
- Plants Recovering from Stress: If a plant has been through a rough patch (e.g., pest infestation, transplant shock), improving its environment with consistent humidity can aid recovery.
Even plants that aren’t strictly tropical can benefit from a humidity boost during dry winter months when heating systems are running constantly. It’s a widespread perk!
When NOT to Use a Pebble Tray
While pebble trays are fantastic, they aren’t for every plant or every situation:
- Plants that prefer dry conditions: Succulents, cacti, and many Mediterranean herbs (like Rosemary or Lavender) need their soil to dry out completely and prefer drier air. A pebble tray would create too much moisture for them and could lead to rot.
- Plants incredibly susceptible to fungal diseases: For some plants that are very prone to fungal issues, the increased ambient moisture might encourage unwanted growth. Ensure good air circulation around your plants regardless.
- Over-watering issues: If you already struggle with over-watering your plants, adding a pebble tray might exacerbate the problem if you’re not careful with watering frequency.
- Areas with already high humidity: If your home is already naturally humid (e.g., a bathroom used frequently, a greenhouse), a pebble tray might not be necessary and could even lead to too much moisture.
Always research the specific needs of your plant! A quick search like “RHS Plant Finder humidity needs” can give you valuable information to tailor your approach.
Pebble Tray vs. Other Humidity Solutions
There are several ways to increase humidity for your indoor plants. Let’s see how the humble pebble tray stacks up:
| Method | Pros | Cons | Best For |
|---|---|---|---|
| Pebble Tray | Inexpensive, easy to set up, low maintenance, no electricity needed, aesthetically pleasing option, catches drips. | Only increases humidity in a small radius around the plant, requires regular water refilling, not effective in large or very dry spaces. | Individual plants or small groupings, beginners, budget-conscious gardeners, sensitive tropical plants. |
| Misting | Quick, easy to do, perceived to be effective by many. | Very temporary effect (humidity drops as soon as water dries), can encourage fungal issues if done too late in the day or in poor airflow, may leave water spots on leaves. | A very brief, temporary boost for plants that tolerate it; not a reliable long-term solution for high humidity needs. |
| Grouping Plants Together | Creates a shared micro-climate, natural, free. | Only effective when plants are very close, can increase competition for light and air circulation, risk of pests or diseases spreading more easily. | Plants with similar light/water needs that are already housed together. |
| Humidifier (Electric) | Most effective for significantly increasing humidity in a larger area, consistent output. | Can be expensive to purchase and operate (electricity), requires regular cleaning to prevent mold/bacteria, needs distilled/filtered water. | Large plant collections, very dry environments, people with multiple humidity-loving plants. |
| Terrarium / Enclosed Plant Case | Creates a highly humid, controlled environment, excellent for fussy plants. | Requires specific plant choices, can be expensive, requires careful monitoring to prevent over-moisture or lack of airflow. | Small, delicate, or very humidity-dependent plants. |
As you can see, the pebble tray offers a wonderful balance of effectiveness, ease, and affordability, making it a top choice for beginners and experienced plant parents alike.
Troubleshooting Common Pebble Tray Issues
Most of the time, pebble trays are trouble-free, but here are a few things to watch out for:
- Mold or Algae Growth:
- Cause: Stagnant water, especially in very warm or humid conditions, or if the tray isn’t cleaned regularly.
- Solution: Pour out the old water, rinse the tray and pebbles thoroughly with soap and water, and then rinse again with diluted vinegar or hydrogen peroxide solution to kill any lingering spores. Scrub the pebbles if needed! Allow everything to dry before refilling with fresh water. Ensure good air circulation around your plant.
- Insects (e.g., Fungus Gnats):
- Cause: Fungus gnats love damp conditions and are attracted to moist soil. If the tray is constantly waterlogged or the soil remains too wet, they can thrive.
- Solution: Allow the top inch or two of soil to dry out between waterings. Reduce the water level in the pebble tray slightly. You can also use sticky traps placed on the soil surface or around the tray to catch adult gnats. Ensure your plant’s drainage is excellent.
- Plant Bobbing Around:
- Cause: The pot is too small for the tray, or the pebbles are too large/sparse, not providing enough stability.
- Solution: Use a tray that is appropriately sized for your pot. Add more (smaller) pebbles to create a more stable base. Ensure the plant is watered adequately from above so it’s not “thirsty” and leaning.
- Water Evaporating Too Quickly:
- Cause: The plant is in a very sunny or warm spot, or the air in your home is extremely dry.
- Solution: If possible, move the plant to a location with less direct sun or away from heat sources. If it’s just a very dry environment, you’ll simply need to be more diligent about refilling the water more frequently. Consider a larger tray or combining multiple pebble trays for a larger plant.
Regular observation is key to catching any potential issues early!
FAQ: Your Pebble Tray Questions Answered
Q1: Can I use any container as a pebble tray?
Yes, as long as it’s waterproof! Plastic plant saucers, old food containers, or even decorative shallow bowls can work. Just make sure it won’t leak and is deep enough to hold pebbles and water without submerging your pot.
Q2: When should I refill the water in my pebble tray?
Check the water level every few days. Refill whenever you see the water level significantly decreased or when the pebbles start to look dry. In very dry or hot conditions, you might need to refill daily. The goal is consistent evaporation.
Q3: My plant’s pot has roots growing into the pebbles. Is this a problem?
This can happen, especially with older plants. It’s usually not a major issue unless you plan on repotting soon. If you do repot, be gentle and try not to damage the roots. If roots are extensively entwined and dry, drenching the pebbles with water before attempting separation can help.
Q4: Can I put more than one plant on a single pebble tray?
Yes, you can! If the plants are small and have similar humidity needs, they can share a larger tray. Ensure there’s enough space between them for light and airflow, and that the tray is large enough to accommodate all their pots comfortably above the water line.
Q5: How long does it take to see results from using a pebble tray?
You might notice an improvement in your plant’s appearance, like fewer brown tips, within a couple of weeks. Lush new growth may