Did you know you can safely can food at home? It is a fun way to keep food fresh. You can enjoy your garden’s yummy treats all year. Canning at home can seem tricky. But it is easier than you think.
Imagine biting into a juicy peach in December. It tastes like summer! That is the magic of home canning. You can safely can food at home. You can keep fruits and veggies from spoiling. This helps you save money. Plus, you know exactly what is in your food.
Canning food is a way to keep it safe. It stops bad germs from growing. These germs can make you sick. Safely canning food at home means following the right steps. This guide will show you how. Let’s learn to can food the right way!
Key Takeaways
- Always follow tested recipes to ensure food is safely canned at home.
- Use the right canning method for the type of food you are preserving.
- Make sure your jars and lids are clean and in good condition.
- Process canned goods for the correct time to kill harmful bacteria.
- Check the jar seals after cooling to confirm a proper seal formed.

Why Safely Can Food at Home
Canning food at home is a great way to preserve your garden’s bounty or take advantage of seasonal sales. You can enjoy fresh fruits and vegetables all year round. However, it is very important to safely can food at home. Improper canning can lead to serious health risks. One of the biggest dangers is botulism. Botulism is a severe illness caused by a toxin. This toxin comes from a bacteria that can grow in improperly canned foods. This bacteria loves low-oxygen environments. Jars can be a perfect place for it to grow if you don’t follow safe canning practices. This is why following tested recipes and methods is key. It ensures the food is heated to a temperature that kills harmful bacteria. By following these steps, you can enjoy your homemade canned goods without worry.
- Home canning lets you control ingredients.
- Proper canning prevents food spoilage.
- Canning helps reduce food waste.
- It saves money compared to buying canned goods.
- Home-canned foods make great gifts.
Canning is a skill that has been passed down for generations. Our grandparents often canned food. They did it to feed their families through the winter. Today, we can still use these methods. But we must use them with modern knowledge. This means understanding the science behind canning. It means using the right equipment. And it means always following tested recipes. Canning can be a rewarding way to connect with our food. It can help us be more self-sufficient. Most importantly, it allows us to safely can food at home. We can enjoy the flavors of summer all year long.
Fun Fact or Stat: Botulism is rare, but it’s a serious illness. Following safe canning practices can prevent it.
What are the Best Foods to Can?
Choosing the best foods to can is important. Some foods are easier and safer to can than others. High-acid foods like fruits, pickles, and jams are generally easier. The acid helps prevent the growth of bad bacteria. Low-acid foods, such as vegetables and meats, need more care. They require pressure canning to reach a high enough temperature. Are you wondering if you can safely can food at home? Start with simple recipes. Try making strawberry jam or pickled cucumbers. As you gain experience, you can try other foods. Always follow a tested recipe. It will tell you the right method and processing time for each food. This ensures that the food is safe to eat. It also ensures that the food will not spoil.
How to Store Canned Foods
Storing canned foods properly is as important as canning them correctly. You want to keep your canned goods in a cool, dark, and dry place. This helps to prevent spoilage and maintain the quality of the food. A pantry or basement is often a good choice. Avoid storing canned goods in areas that get hot or damp. Heat can cause the food to degrade. Dampness can cause the jars to rust or the lids to corrode. After canning, let the jars cool completely before storing them. Make sure the lids are sealed tightly. You should also label each jar with the date. This helps you keep track of how long the food has been stored. When you are ready to eat the food, check the jar for any signs of spoilage. Do you want to know if you can safely can food at home? Proper storage is a key part of the process.
What Equipment do I Need to Start?
To safely can food at home, you will need some essential equipment. The right tools make the process easier and safer. First, you will need canning jars with lids and bands. Jars come in different sizes. Choose the size that is right for the food you are canning. You will also need a large pot with a rack. This is used for boiling water canning. For low-acid foods, you will need a pressure canner. Other useful tools include a jar lifter. It helps you safely remove hot jars from the canner. A wide-mouth funnel makes it easier to fill the jars. A bubble remover helps get rid of air bubbles in the jars. These tools make the canning process smoother. They also help ensure that your canned goods are safe to eat. Always use tools that are designed for canning. This helps prevent accidents and ensures success.

Best Practices to Safely Can Food at Home
Safely canning food at home requires following some best practices. These practices help prevent spoilage and foodborne illnesses. Start by using only fresh, high-quality ingredients. Wash all fruits and vegetables thoroughly before canning. Follow a tested recipe exactly. Do not change the amounts of ingredients or the processing time. This can affect the safety of the canned food. Use the right canning method for the type of food you are canning. High-acid foods can be processed in a boiling water canner. Low-acid foods must be processed in a pressure canner. Always check the jar seals after processing. A properly sealed jar will have a lid that is slightly concave. It will not flex when pressed. If a jar does not seal properly, you can reprocess it or store it in the refrigerator.
- Use tested recipes from trusted sources.
- Wash all produce thoroughly before canning.
- Use the correct canning method for the food.
- Ensure jars are properly sealed after processing.
- Store canned goods in a cool, dark, dry place.
Canning is like a science experiment. You need to follow the instructions carefully to get the right results. Think of the bacteria that can grow in canned food as tiny monsters. These monsters can make you very sick. Canning kills these monsters by using heat. The right amount of heat for the right amount of time is key. This is why tested recipes are so important. They have been carefully designed to kill the bad bacteria. Changing the recipe or the processing time can let the monsters survive. So, always follow the recipe exactly. This ensures that you can safely can food at home. You can enjoy your homemade canned goods without worry.
Fun Fact or Stat: A dented can can be a sign of spoilage. Never use cans that are dented, bulging, or rusty.
Why is Headspace Important?
Headspace is the space between the top of the food and the lid of the jar. It is very important for safely canning food at home. During processing, the air in the headspace is forced out of the jar. This creates a vacuum seal as the jar cools. If there is not enough headspace, the food may expand during processing. This can cause the jar to break or the seal to fail. If there is too much headspace, the air may not be completely forced out. This can lead to spoilage. The recipe will tell you how much headspace to leave. Follow this measurement carefully. Use a ruler or a headspace tool to measure accurately. This small step can make a big difference in the safety and quality of your canned goods.
How Do I Know if a Jar is Sealed?
Knowing if a jar is sealed is crucial. It tells you if you safely can food at home. After processing, let the jars cool completely. This usually takes 12 to 24 hours. Once cooled, check the seal. The lid should be slightly curved inward. Press down on the center of the lid. It should not move or pop. If the lid flexes or pops, the jar is not sealed. You can also tap the lid with a spoon. A sealed jar will make a high-pitched sound. An unsealed jar will sound dull. If a jar is not sealed, you have a few options. You can reprocess the jar within 24 hours. Or you can store the food in the refrigerator and use it soon. Never store an unsealed jar at room temperature. This can lead to spoilage and foodborne illness.
What is the Difference Between Water Bath and Pressure Canning?
Water bath canning and pressure canning are two different methods. They are used for different types of food. Water bath canning is for high-acid foods. These include fruits, jams, jellies, and pickles. The jars are submerged in boiling water. The heat kills bacteria and creates a vacuum seal. Pressure canning is for low-acid foods. These include vegetables, meats, and poultry. A pressure canner creates a higher temperature than boiling water. This higher temperature is needed to kill harmful bacteria. Especially Clostridium botulinum. This bacteria can cause botulism. Using the wrong method can be dangerous. It can lead to spoilage and foodborne illness. Always use the method that is recommended for the specific food you are canning. This ensures that you safely can food at home.

Step-by-Step Guide to Safely Can Food at Home
Canning food at home can be easy. Especially if you follow a step-by-step guide. First, gather your equipment and ingredients. Choose a tested recipe. Make sure you have all the necessary tools. Wash your jars, lids, and bands in hot, soapy water. Rinse them well. Keep the jars hot until you are ready to fill them. Prepare your food according to the recipe. Fill the jars, leaving the correct amount of headspace. Remove any air bubbles. Wipe the jar rims clean. Place the lids and bands on the jars. Tighten the bands finger-tight. Process the jars according to the recipe. Use either a water bath canner or a pressure canner. After processing, let the jars cool completely. Check the seals. Store the sealed jars in a cool, dark, dry place. This process helps you to safely can food at home.
- Gather equipment and ingredients.
- Wash and prepare jars.
- Prepare food according to recipe.
- Fill jars, leaving correct headspace.
- Process jars using correct method.
- Check seals after cooling.
- Store sealed jars properly.
Think of canning as a cooking adventure. You are taking fresh ingredients. You are turning them into something special that you can enjoy later. Each step is important. Like following a treasure map. The map shows you the way to a safe and delicious result. Start with clean jars. Clean jars help prevent bad bacteria from growing. Fill the jars carefully. Headspace is like leaving room for the food to breathe. Processing is like cooking the food in a special oven. It kills any remaining bacteria. Checking the seals is like making sure the treasure chest is locked. Storing the jars properly is like hiding the treasure in a safe place. By following these steps, you can safely can food at home. You can enjoy the fruits of your labor for months to come.
Fun Fact or Stat: Canning has been used for over 200 years to preserve food.
How to Prepare Jars for Canning
Preparing jars is a key first step. This ensures you safely can food at home. Start by washing the jars, lids, and bands. Use hot, soapy water. Rinse them very well. Inspect the jars for any cracks or chips. Do not use damaged jars. They can break during processing. To sterilize the jars, you can boil them in water for 10 minutes. Or you can run them through a dishwasher cycle. Keep the jars hot until you are ready to fill them. This helps prevent them from breaking when you add hot food. You can keep the jars hot in the simmering water. Or you can keep them in a warm oven. Preparing the jars correctly helps ensure a good seal. It also helps prevent spoilage. This small step is essential for safe canning.
How to Fill Jars and Remove Air Bubbles
Filling the jars correctly is important. It helps you safely can food at home. Use a wide-mouth funnel to fill the jars. This helps prevent spills. Leave the correct amount of headspace. The recipe will tell you how much. After filling, use a bubble remover. This is a plastic or wooden tool. Run it around the inside of the jar. This releases any trapped air bubbles. Air bubbles can cause problems during processing. They can prevent a good seal. They can also cause the food to spoil. After removing air bubbles, wipe the jar rims clean. Use a clean, damp cloth. This removes any food particles that could interfere with the seal. Filling the jars carefully helps ensure a safe and successful canning experience.
How to Process Jars in a Water Bath Canner
Processing jars in a water bath canner is easy. If you follow the right steps, you can safely can food at home. Fill the canner with enough water. The water should cover the jars by at least one inch. Bring the water to a boil. Carefully lower the filled jars into the canner. Use a jar lifter. Make sure the jars are not touching each other. Or the sides of the canner. Once all the jars are in, cover the canner. Bring the water back to a boil. Process the jars for the time specified in the recipe. Adjust the processing time for your altitude. After processing, turn off the heat. Remove the lid and let the jars sit in the canner for 5 minutes. Then, carefully remove the jars. Place them on a towel-lined surface to cool.
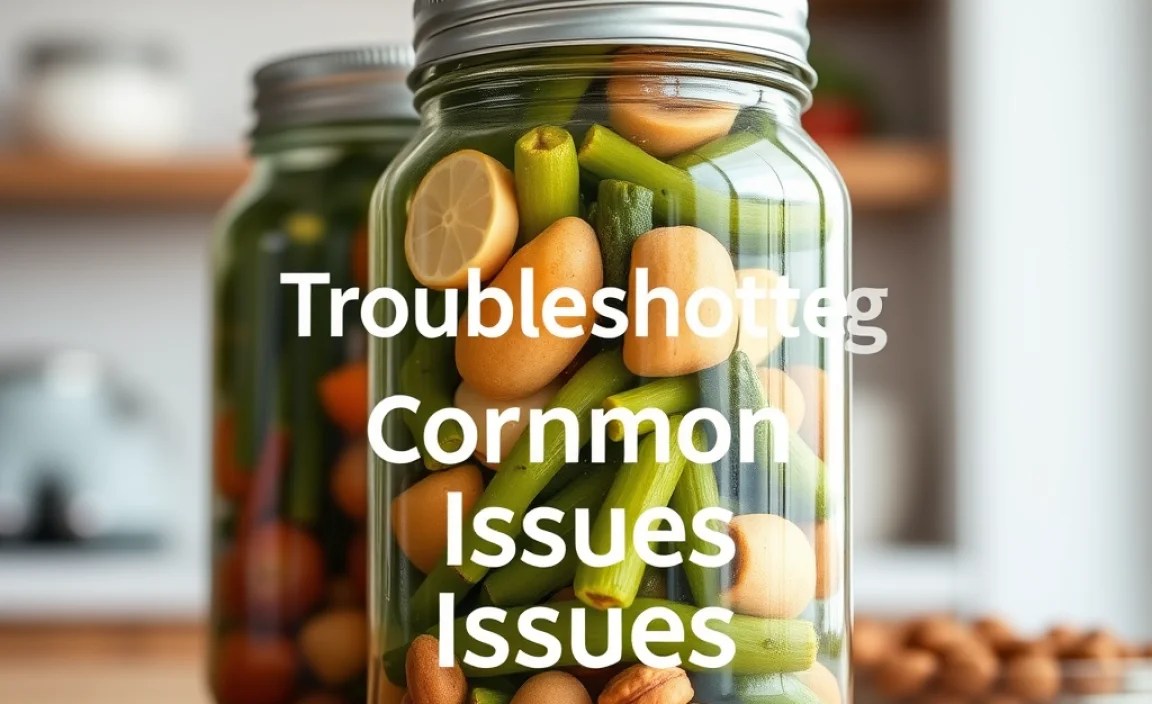
Troubleshooting Common Canning Issues
Even with careful planning, canning issues can happen. Knowing how to fix them is key. This ensures you safely can food at home. One common problem is jars not sealing. This can be caused by several things. Not enough headspace, food on the jar rim, or a damaged lid. If a jar doesn’t seal, you can reprocess it within 24 hours. Or you can store it in the refrigerator. Another issue is food spoilage. This can be caused by improper processing. Or by using contaminated ingredients. If you see signs of spoilage, like a bulging lid or a bad smell, throw the food away. Do not taste it. Following tested recipes and using proper techniques can help prevent these issues.
| Issue | Possible Cause | Solution |
|---|---|---|
| Jars not sealing | Not enough headspace, food on rim, damaged lid | Reprocess within 24 hours or refrigerate |
| Food spoilage | Improper processing, contaminated ingredients | Discard the food |
| Siphoning | Too much headspace, fluctuating canner temperature | Ensure correct headspace, maintain steady temperature |
| Broken jars | Jars touching, temperature shock | Space jars properly, preheat jars |
- Jars not sealing: Reprocess or refrigerate.
- Food spoilage: Discard the food.
- Siphoning: Ensure correct headspace.
- Broken jars: Space jars properly.
Imagine you are a detective. You are trying to solve a canning mystery. You notice that some of your jars did not seal. You need to figure out why. Was there food on the rim of the jar? Did you leave enough headspace? Was the lid damaged? By asking these questions, you can find the cause. You can prevent the problem from happening again. Or maybe you open a jar and the food smells bad. This is a sign of spoilage. It means that something went wrong during the canning process. It is important to throw the food away. Do not risk getting sick. Canning can be a bit like detective work. You need to pay attention to the details. You need to solve problems as they arise. By doing so, you can safely can food at home. You can enjoy your homemade canned goods with confidence.
Fun Fact or Stat: Altitude affects canning times. You need to process food longer at higher altitudes.
What Causes Jars to Break During Canning?
Jars breaking during canning can be scary. It can also ruin your hard work. There are a few reasons why this might happen. One common cause is temperature shock. This happens when the jars are exposed to a sudden change in temperature. For example, putting cold jars into boiling water. Or placing hot jars on a cold surface. To prevent this, preheat your jars before filling them. Also, let the jars cool gradually after processing. Another cause of broken jars is overcrowding. If the jars are too close together in the canner, they can bump into each other. This can cause them to crack or break. Make sure to space the jars properly. Also, do not over-tighten the bands. This can also cause the jars to break during processing. Taking these precautions can help you safely can food at home.
How Can I Prevent Siphoning?
Siphoning is when liquid escapes from the jars during processing. This can leave the food exposed at the top of the jar. It can also affect the seal. There are a few things you can do to prevent siphoning. Make sure you are leaving the correct amount of headspace. Too much headspace can cause siphoning. Also, maintain a steady temperature in the canner. Fluctuating temperatures can cause the liquid to expand and contract. This can lead to siphoning. After processing, let the jars sit in the canner for 5 minutes before removing them. This helps to equalize the pressure inside and outside the jars. By following these tips, you can reduce the risk of siphoning. You can safely can food at home.
What are the Signs of Food Spoilage in Canned Goods?
Knowing the signs of food spoilage is important. It ensures that you safely can food at home. Before opening a jar, check the lid. It should be curved slightly inward. It should not flex when pressed. If the lid is bulging or the jar is leaking, throw it away. Do not taste it. When you open the jar, listen for a hissing sound. This can indicate spoilage. Look at the food. It should look and smell normal. If the food is discolored, moldy, or has an off odor, throw it away. Do not taste it. If you are unsure about the safety of the food, it is always best to err on the side of caution. Throw it away. Food spoilage can cause serious illness. It is not worth the risk.
Tips for Beginner Home Canners
Starting to safely can food at home can be exciting. Here are some tips for beginners. Start with easy recipes. Jams, jellies, and pickles are great for beginners. They are high in acid. This makes them safer to can. Use tested recipes from trusted sources. This ensures that you are following safe canning practices. Gather all your equipment before you start. This will make the process smoother. Read the recipe carefully before you begin. Understand each step. Follow the instructions exactly. Do not change the amounts of ingredients or the processing time. Take your time. Canning is not a race. Be patient. Enjoy the process. With practice, you will become a skilled home canner.
- Start with easy recipes.
- Use tested recipes.
- Gather equipment beforehand.
- Read the recipe carefully.
- Take your time and enjoy.
Imagine you are learning to ride a bike. You would not start by trying to ride on a busy street. You would start in a safe place. Like a park or a backyard. You would practice the basics. Like balancing and pedaling. Canning is the same way. You should start with easy recipes. Like making strawberry jam. It is simple. It is fun. It is a great way to learn the basics of canning. As you gain confidence, you can try more challenging recipes. But always remember to follow the instructions carefully. Canning is a skill that takes practice. Be patient with yourself. Do not be afraid to ask for help. There are many experienced canners who are happy to share their knowledge. With time and practice, you will be able to safely can food at home. You can enjoy the delicious rewards of your hard work.
Fun Fact or Stat: Home canning can save you money on groceries.
What are Some Good Starter Recipes?
Choosing the right starter recipes is key. This helps you safely can food at home. Jams and jellies are excellent choices. They are high in acid. This makes them easier and safer to can. Strawberry jam, grape jelly, and apple jelly are all good options. Pickles are another good choice. Cucumber pickles, dill pickles, and bread and butter pickles are all popular. These recipes use vinegar, which is an acid. This helps to preserve the food. Tomato sauce is another option. But it requires careful attention to acidity. Always follow a tested recipe exactly. This will ensure that the food is safe to eat. It will also give you confidence as you learn to can.
How Do I Find Reliable Canning Recipes?
Finding reliable canning recipes is very important. It ensures that you safely can food at home. Use recipes from trusted sources. The USDA Complete Guide to Home Canning is a great resource. It provides detailed information on safe canning practices. University extension services also offer reliable recipes. Look for recipes that have been tested for safety. Avoid recipes from unknown sources. Especially on the internet. These recipes may not be safe. They may not provide enough heat to kill harmful bacteria. Always follow the recipe exactly. Do not change the amounts of ingredients or the processing time. This can affect the safety of the canned food. Trustworthy recipes are the foundation of safe canning.
Where Can I Get Help if I Have Questions?
It is normal to have questions when you start canning. Knowing where to get help is very important. This allows you to safely can food at home. Your local university extension service is a great resource. They can answer your questions about canning. They can also provide workshops and classes. Online canning forums are another good place to get help. You can ask questions and share tips with other canners. The USDA Complete Guide to Home Canning is also a valuable resource. It provides detailed information on safe canning practices. Do not be afraid to ask for help. Canning is a skill that takes practice. With the right resources, you can become a confident home canner.
Summary
Canning food at home is a great way to preserve fresh produce. It allows you to enjoy the flavors of summer all year round. However, it is very important to safely can food at home. Improper canning can lead to serious health risks. Botulism is a major concern. It is a severe illness caused by bacteria. This bacteria can grow in improperly canned foods. To prevent botulism, follow tested recipes. Use the right canning method for the type of food you are canning. High-acid foods can be processed in a boiling water canner. Low-acid foods must be processed in a pressure canner.
Always check the jar seals after processing. A properly sealed jar will have a lid that is slightly concave. It will not flex when pressed. Store canned goods in a cool, dark, dry place. This helps to prevent spoilage. By following these guidelines, you can safely can food at home. You can enjoy your homemade canned goods without worry. Canning is a rewarding way to connect with our food. It can help us be more self-sufficient. It can also save us money on groceries.
Conclusion
Safely canning food at home is a wonderful skill. It lets you preserve fresh fruits and veggies. You can enjoy them all year. Always use tested recipes and follow instructions. Make sure your jars are clean and sealed. Canning can be fun and rewarding. You can enjoy homemade goodness. Remember safety first! Enjoy the tasty results of your work.
Frequently Asked Questions
Question No 1: What is botulism and why is it a concern when canning?
Answer: Botulism is a serious illness. It is caused by a toxin from bacteria. This bacteria can grow in improperly canned foods. It thrives in low-oxygen environments. Like inside canning jars. To prevent botulism, you must follow safe canning practices. This includes using tested recipes. It also includes processing food for the correct time. You should also use the right canning method. Pressure canning is needed for low-acid foods. This ensures the bacteria are killed. Safely canning food at home requires careful attention. This will prevent this dangerous illness.
Question No 2: What are the key differences between water bath and pressure canning?
Answer: Water bath canning and pressure canning are different methods. They are used for different types of food. Water bath canning is for high-acid foods. These include fruits, jams, and pickles. The jars are submerged in boiling water. Pressure canning is for low-acid foods. These include vegetables and meats. A pressure canner creates a higher temperature. This higher temperature kills harmful bacteria. Especially Clostridium botulinum. Using the wrong method can be dangerous. It can lead to spoilage and foodborne illness. This is important to understand to safely can food at home.
Question No 3: How do I know if my canned food has spoiled?
Answer: Checking for spoilage is important. Before opening a jar, check the lid. It should be curved slightly inward. It should not flex when pressed. If the lid is bulging or the jar is leaking, throw it away. Do not taste it! When you open the jar, listen for a hissing sound. This can indicate spoilage. Look at the food. It should look and smell normal. If the food is discolored, moldy, or has an off odor, throw it away. Do not taste it! If you are unsure, it is always best to be safe. Throw it away. Safely canning food at home means knowing these signs.
Question No 4: What equipment do I need to start canning food at home?
Answer: To safely can food at home, you’ll need specific equipment. Canning jars with lids and bands are essential. These are designed to withstand the canning process. A large pot with a rack is needed for water bath canning. For low-acid foods, you’ll need a pressure canner. Other useful tools include a jar lifter. It helps you safely remove hot jars from the canner. A wide-mouth funnel makes it easier to fill the jars. A bubble remover helps get rid of air bubbles in the jars. These tools make canning safer and easier.
Question No 5: Where can I find reliable canning recipes and information?
Answer: Finding reliable recipes is key. This ensures that you safely can food at home. The USDA Complete Guide to Home Canning is a great resource. It provides detailed information on safe canning practices. University extension services also offer reliable recipes. Look for recipes that have been tested for safety. Avoid recipes from unknown sources online. These recipes may not be safe. They may not provide enough heat to kill harmful bacteria. Always follow the recipe exactly. This will ensure that the food is safe to eat.
Question No 6: Can I use any jar for canning, or do I need special canning jars?
Answer: You must use special canning jars for canning. These jars are designed to withstand high temperatures. They are also designed to create a proper seal. Regular glass jars, like those from store-bought food, are not suitable. They can break during the canning process. They may not create a proper seal. Canning jars have a two-part lid system. This includes a flat lid and a metal band. This system helps to create a vacuum seal. This prevents spoilage. Using the correct jars is essential to safely can food at home.
