Forest gardening is a sustainable, layered planting method that mimics natural woodland ecosystems to grow food and other useful plants. It’s a low-maintenance, highly productive way to garden that increases biodiversity and soil health. This guide covers proven essential techniques for beginners to successfully establish their own forest garden.
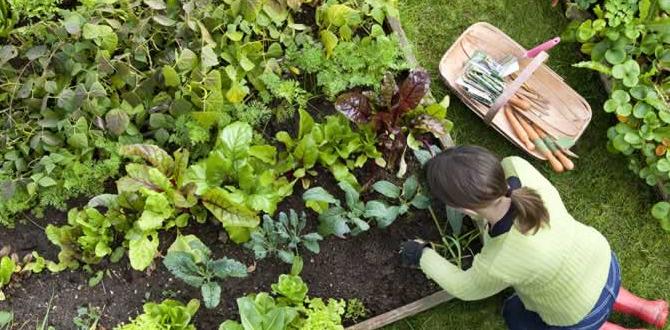
Ever looked at a thriving forest and wondered how nature manages to pack so much life and bounty into one space? It seems almost magical, doesn’t it? Many of us dream of a garden that’s not only beautiful but also productive, offering a continuous harvest of delicious food and valuable resources with minimal fuss. The good news is, you don’t need to be a seasoned expert to create something truly special. Forest gardening offers a way to work with nature, not against it, to build a resilient and abundant garden. It can feel overwhelming at first, like putting together a complex puzzle, but it doesn’t have to be. This guide will break down the core forest gardening techniques into simple, actionable steps, making it easy for anyone to start their own thriving ecosystem at home.
What is Forest Gardening?
Forest gardening, also known as food forestry, is an innovative and sustainable approach to gardening that mimics the structure and function of a natural woodland ecosystem. Instead of just rows of vegetables or a single type of fruit tree, a forest garden is designed as a multi-layered system incorporating a variety of edible and useful plants that grow together in harmony. Think of it as planting vertically, utilizing different layers of a forest – from the canopy of tall trees down to the groundcover and even the underground root systems.
The concept draws inspiration from natural, unmanaged forests, where diverse plant species coexist and support each other. By replicating these natural synergies, forest gardens can become incredibly productive, require less tilling, conserve water, improve soil health, and support local wildlife. It’s a way to create a beautiful, edible landscape that is both resilient and regenerative.
The Seven Layers of a Forest Garden
A key principle of forest gardening is understanding and utilizing the different vertical layers of a woodland environment. By planting species that thrive in each layer, you maximize your space and resource use, creating a highly productive and biodiverse system. These layers allow plants to coexist, often benefiting each other, while offering a wider variety of harvests.
1. The Canopy Layer
This is the uppermost layer, typically consisting of large, long-lived fruit or nut trees. These trees provide shade for the lower layers as they mature and form the backbone of the forest garden. Think of classic orchard trees like apples, pears, or walnuts. It’s important to choose varieties suitable for your climate and soil.
- Examples: Apple, Pear, Cherry, Walnut, Pecan, Chestnut.
- Considerations: Ensure adequate spacing for mature trees, as they will cast significant shade. Choose disease-resistant varieties.
2. The Understory Layer
Beneath the canopy, this layer comprises smaller trees and large shrubs. These plants are adapted to partial shade and can tolerate some competition from the larger canopy trees. They often produce fruits or nuts themselves. This layer creates the ‘edge’ effect often found in natural forests.
- Examples: Dwarf fruit trees (apple, pear, peach), Serviceberry, Hazelnut, Elderberry, Pawpaw.
- Considerations: Plant these at a suitable distance from canopy trees to avoid excessive competition for light, water, and nutrients.
3. The Shrub Layer
This layer consists of smaller woody shrubs, typically those that are more tolerant of shade. Many berries thrive here. They provide a mid-level of harvest and can help suppress weeds.
- Examples: Blueberry, Raspberry, Blackberry, Gooseberry, Currant, Goji Berry.
- Considerations: Many berries require acidic soil (like blueberries) or specific pruning techniques.
4. The Herbaceous Layer
This layer is made up of perennial non-woody plants that die back to the ground each winter and re-emerge in the spring. This layer is incredibly diverse and can include vegetables, herbs, medicinal plants, and nitrogen-fixers. This is where you can pack in a lot of variety.
- Examples: Rhubarb, Asparagus, Perennial herbs (mint, oregano, thyme, sage), Leafy greens (sorrel, spinach), Perennial flowers (echinacea), Nitrogen-fixers (clover, lupine).
- Considerations: Choose plants that can tolerate the shade cast by the upper layers. Some plants in this layer can also help attract beneficial insects.
5. The Groundcover Layer
These are low-growing plants that spread horizontally, covering the soil. They help to retain moisture, suppress weeds, and prevent soil erosion. Many edible groundcovers exist, providing a supplementary harvest.
- Examples: Strawberries, Creeping Thyme, Wintergreen, Clover, Purslane.
- Considerations: Ensure groundcovers are vigorous enough to compete with weeds but not so aggressive they smother other desirable plants.
6. The Rhizosphere Layer (Root Crops)
This layer focuses on the edible roots and tubers that grow underground. These plants occupy a different niche, accessing nutrients and space below the surface. Diverse root crops add to the variety of harvests and can improve soil structure.
- Examples: Potatoes, Sweet Potatoes, Carrots, Parsnips, Jerusalem Artichokes, Ramps (wild leeks).
- Considerations: Root crops benefit from well-drained soil. Some can be quite vigorous.
7. The Vertical Layer (Climbers and Vines)
Although not strictly a “layer” in the same way as the others, this category includes plants that grow upwards, using structures like trees, trellises, or fences for support. They maximize the use of vertical space and can produce abundant harvests.
- Examples: Grapes, Kiwis, Passionflower, Pole Beans, Cucumbers, Hops.
- Considerations: Provide sturdy support for climbers. Some vines can be quite heavy and require strong structures.
Designing Your Forest Garden: Key Principles
Creating a successful forest garden involves thoughtful planning. You’re not just randomly planting; you’re designing an ecosystem. The goal is to select plants that not only grow well together but also mutually benefit each other. Consider these principles to set your forest garden up for success.
1. Observe Your Site
Before planting anything, spend time observing your proposed garden area. Note sunlight patterns throughout the day and year, wind direction, water flow, existing vegetation, and soil type. Understanding your microclimate is crucial for selecting the right plants.
- Sunlight: Identify full sun, partial shade, and full shade areas.
- Water: Observe where water collects or drains away.
- Wind: Note prevailing wind patterns that might affect plant growth.
- Soil: Assess drainage and texture.
2. Design for Diversity
The strength of a forest garden lies in its diversity. Planting a wide variety of species increases resilience against pests and diseases, provides a more varied diet, and supports a broader range of wildlife. Aim for diversity in plant types (trees, shrubs, herbs, groundcovers), plant functions (nitrogen-fixers, pollinator attractors, pest repellents), and harvest times.
- Plant Types: Mix canopy, understory, shrubs, herbaceous, groundcovers, and climbers.
- Plant Functions: Include nitrogen-fixers, flowering plants, and plants that improve soil.
- Harvest Times: Plan for harvests throughout the year.
3. Mimic Natural Patterns
Look at how plants grow in natural forests. They often form guilds – groups of plants that grow together beneficially. For example, a fruit tree might be surrounded by nitrogen-fixing shrubs, groundcovers that retain moisture, and medicinal herbs that attract pollinators. Recreate these beneficial relationships in your design.
A classic guild often includes:
A central “fruiting” or “nut” element (e.g., fruit tree).
Nitrogen-fixers to enrich the soil.
Plants that attract beneficial insects and pollinators.
Plants that repel pests.
Groundcovers to suppress weeds and retain moisture.
4. Start Small
If you’re new to forest gardening, begin with a smaller section of your yard. This allows you to learn and experiment without becoming overwhelmed. As you gain confidence and experience, you can gradually expand your forest garden.
5. Soil Building is Key
Healthy soil is the foundation of any thriving garden, and forest gardens are no exception. Focus on adding organic matter, mulching generously, and avoiding compaction. As your forest garden matures, the plants themselves will contribute to soil fertility through litterfall and nutrient cycling.
Key soil-building practices include:
Mulching: Use wood chips, straw, or leaf mold to retain moisture, suppress weeds, and feed soil organisms. A thick layer of mulch is essential in a forest garden.
Composting: Incorporate compost into planting holes and use it as a top dressing.
Cover Cropping: Use nitrogen-fixing cover crops in less established areas to build soil fertility.
* Minimal Tillage: Avoid unnecessary digging, which can disrupt soil structure and beneficial microorganisms.
Choosing the Right Plants for Your Forest Garden
Selecting the right plants is crucial for the success of your forest garden. Consider your climate, soil type, available light, and your desired outcomes (food, wildlife habitat, beauty). It’s a good idea to prioritize perennial plants, as they establish themselves and require less replanting than annuals. Aim for plants that are hardy, productive, and have multiple benefits.
Edible Plants
This is the heart of many forest gardens. Choose a mix of fruits, nuts, berries, vegetables, herbs, and roots. Prioritize perennial varieties that will provide harvests year after year.
Fruiting Trees & Nut Trees:
- Apples & Pears: Hardy, productive, and offer varieties for different climates.
- Cherries & Plums: Sweet and tart options, can be grown as standards or espaliers.
- Peaches & Nectarines: Often prefer warmer climates and good drainage.
- Pawpaws: Native to North America, with delicious tropical-like fruit.
- Walnuts & Pecans: Offer protein-rich nuts and valuable timber, but require space and patience.
- Hazelnuts: Can be grown as large shrubs or small trees, producing tasty nuts.
Berries & Shrubs:
- Blueberries: Require acidic soil and consistent moisture.
- Raspberries & Blackberries: Vigorous growers, can be managed with support.
- Strawberries: Excellent groundcover, offering delicious early-season fruit.
- Elderberries: Fast-growing, medicinal flowers and berries.
- Gooseberries & Currants: Tolerant of some shade.
Herbaceous Perennials:
- Asparagus: A classic for the herbaceous layer, long-lived.
- Rhubarb: Another long-lived and productive perennial.
- Sorrel: Tangy leafy green that tolerates shade.
- Perennial Herbs: Mint, oregano, thyme, sage, chives, lemon balm – many are hardy and useful.
Root Crops:
- Jerusalem Artichokes: Prolific tubers, can spread aggressively.
- Ramps (Wild Leeks): Native, slow-growing in shady, moist areas.
- Groundnut (Apios americana): Native nitrogen-fixing vine with edible tubers and beans.
Support Plants (Beneficial Roles)
These plants are chosen for their ability to improve the overall health and productivity of the forest garden system, even if they aren’t the primary harvest. These are crucial for mimicking natural forest synergies.
Nitrogen Fixers
These plants convert atmospheric nitrogen into a form usable by other plants, enriching the soil naturally. They are essential for providing fertility without synthetic fertilizers.
- Shrubs: Goumi, Siberian Pea Shrub, Autumn Olive (note: can be invasive in some areas, check local advice).
- Herbaceous: Clover (various types), Lupine, Vetch.
- Vines: Groundnut (Apios americana).
For more information on nitrogen-fixing plants often used in permaculture and forest gardening, the USDA Natural Resources Conservation Service provides extensive resources on plant species, including their ecological roles.
Pollinator Attractors
These plants provide nectar and pollen for bees, butterflies, and other beneficial insects, which are vital for the pollination of your fruiting plants and for pest control.
- Flowers: Bee Balm (Monarda), Echinacea, Salvia, Lavender, Borage, Comfrey (use sterile varieties to prevent spread).
- Herbs: Dill, Fennel, Parsley (allow some to flower).
- Shrubs: Butterfly Bush (ensure non-invasive varieties), Serviceberry, Elderberry.
Dynamic Accumulators
These plants have deep taproots that draw up minerals and nutrients from the subsoil. When their leaves decompose, they release these nutrients into the topsoil, making them available to other plants.
- Examples: Comfrey (highly recommended, use sterile Bocking 14 variety), Dandelion, Yarrow, Nettle, Oak trees.
Pest Repellents & Attractors of Beneficial Insects
Certain aromatic plants can deter pests, while others attract predatory insects that feed on common garden pests.
- Repellents: Marigolds, Nasturtiums, Garlic, Onions, Mint (plant in containers to control its spread), Tansy.
- Beneficial Insect Attractors: Fennel, Dill, Parsley, Yarrow, Caraway.
Implementing Forest Gardening Techniques: Step-by-Step
Now that you understand the theory, let’s get practical. Here’s a general guide to setting up your forest garden. Remember, this is a long-term project, so patience is key!
Step 1: Site Assessment and Planning
As mentioned earlier, thoroughly assess your site. Draw a map of your chosen area, noting sun exposure, slopes, existing structures, and any large trees or shrubs. Decide which areas will be your primary planting zones, pathways, and any water features or seating areas.
Step 2: Initial Site Preparation
Clear any unwanted vegetation, but try to do so sustainably. If there’s grass or weeds, you can lasagna garden by layering compostable materials (cardboard, compost, manure, straw) over the area. This suppresses weeds, starts building soil, and reduces disturbance. Avoid deep tilling if possible.
Tools that can be helpful:
- Shovel & Spade
- Garden Fork
- Wheelbarrow
- Pruning Shears & Loppers
- Trowel
- Measuring Tape
- Garden Hose or Watering Can
Step 3: Establish the Canopy Layer (if applicable)
If you’re planting large trees, do this first. Dig a wide, shallow hole. Place the tree, backfill, and water thoroughly. Mulch around the base, keeping it a few inches away from the trunk.
Step 4: Plant the Understory and Shrub Layers
Position smaller trees and shrubs, considering their mature size and light requirements. Again, dig wide, shallow holes and mulch well. Group plants thoughtfully, thinking about their needs and how they might benefit each other.
Step 5: Introduce Herbaceous Plants
Fill in the spaces with perennial herbs, vegetables, and flowers. Consider planting nitrogen-fixers and dynamic accumulators strategically amongst your fruit and nut plants. Plant in drifts or clusters for visual appeal and ecological benefit.
Step 6: Add Groundcovers
Once the larger plants are established, introduce your chosen groundcovers. They will help to knit the system together, retain soil moisture, and suppress weeds.
Step 7: Install Climbers and Vines
If you’re using trellises or other supports, install them now. Plant your vines and train them onto the supports. Ensure the supports are strong enough to hold mature plants and their fruit.
Step 8: Ongoing Management: Mulching and Observation
The most critical ongoing task is mulching. Keep a thick layer of organic matter around your plants. Observe your garden regularly for signs of stress, pest problems, or areas that are thriving. Make small adjustments as needed. Forest gardens are designed to become more self-sufficient over time, but they benefit from continued care, especially in the early years.