Framing for outdoor kitchen: Essential design principles ensure a sturdy, beautiful, and functional foundation for your al fresco cooking space, making it a joyous extension of your home. Get it right from the start with this easy guide!
Dreaming of sizzling steaks and fresh herbs straight from your garden, all under the open sky? An outdoor kitchen is a fantastic way to extend your living space and enjoy cooking in the fresh air. But before you pick out countertops or the perfect grill, there’s a crucial first step: the framing. Getting the framing right is like laying a strong foundation for a house – it ensures everything above it will be safe, stable, and look great for years to come. Don’t worry if this sounds a bit daunting; we’ll break down the essential design elements of framing for your outdoor kitchen, making it simple and stress-free. You’ll be cooking up a storm in no time!
Why Outdoor Kitchen Framing Matters
The Backbone of Your Outdoor Oasis
Think of the framing as the skeleton of your outdoor kitchen. It’s what holds up the countertop, supports the appliances like your grill and sink, and gives the entire structure its shape and strength. Without proper framing, your beautiful outdoor kitchen could sag, become unstable, or even suffer damage from the elements. This isn’t just about looks; it’s about safety and longevity.
Unlike indoor kitchens, outdoor structures face unique challenges: rain, sun, wind, and temperature fluctuations. The framing needs to be robust and made from materials that can withstand these conditions. Choosing the right materials and design ensures your investment remains a source of joy and delicious meals for many seasons. We’ll guide you through the key decisions to make your outdoor kitchen dream a solid reality.
Key Design Considerations for Framing

When planning the framing for your outdoor kitchen, several important factors come into play. These decisions will shape the practicality, durability, and aesthetic of your finished cooking area. Let’s explore them.
1. Location, Location, Location
Before any lumber is cut, decide where your outdoor kitchen will live. Consider:
- Proximity to the house: How far will you carry food and supplies? Easy access from your indoor kitchen is a big plus.
- Wind direction: You don’t want smoke from your grill blowing into your seating area or your neighbor’s yard.
- Sun exposure: Will you be cooking in direct, hot sun? Consider shade options like pergolas or awnings.
- Drainage: Ensure the area doesn’t collect water, which can be detrimental to framing materials.
- Utilities: Access to water, gas, and electricity is crucial for appliances.
2. Material Selection: Durability is Key
The materials you choose for framing are critical for an outdoor structure. They need to resist moisture, rot, and pests. Here are the most common and recommended options:
Wood Framing
While common for indoor construction, standard lumber like pine or fir isn’t ideal for direct outdoor exposure unless meticulously treated.
- Pressure-Treated Lumber: This is the most budget-friendly and widely available option for outdoor wood framing. It’s treated with chemicals to resist rot, decay, and insects. Ensure you use lumber rated for “ground contact” for any parts that might touch the soil or moisture.
- Cedar and Redwood: These are naturally resistant to rot and insects, making them excellent choices. However, they are more expensive than pressure-treated pine. They offer a beautiful, natural look.
Important Note: Always use exterior-grade fasteners (screws and bolts) designed to resist rust and corrosion when working with outdoor framing.
Steel Framing
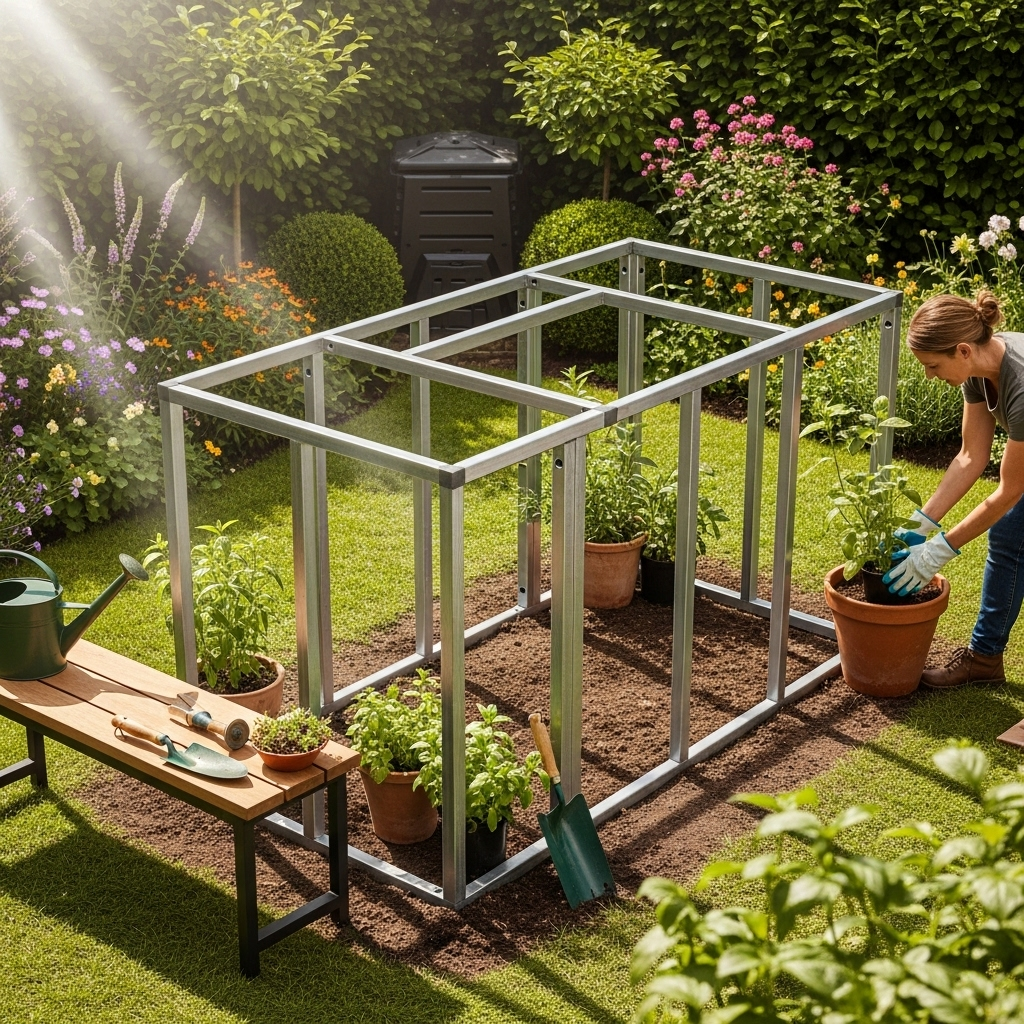
Steel framing, often galvanized steel studs, is an excellent choice for outdoor kitchens due to its incredible durability and resistance to fire, pests, and moisture.
- Pros: Extremely sturdy, weather-resistant, non-combustible, dimensionally stable (won’t warp or shrink).
- Cons: Can be more challenging and expensive to work with for DIYers compared to wood, requires specialized tools and knowledge for cutting and fastening. It also conducts heat, which needs to be considered in the design.
For a robust and long-lasting outdoor kitchen structure, particularly in humid or wet climates, steel often comes out on top. Resources like The American Iron and Steel Institute provide valuable insights into the benefits and applications of steel in construction.
Concrete Block (CMU)
While not strictly “framing” in the stick-built sense, concrete blocks are a very popular and durable material for building the base structure of outdoor kitchens.
- Pros: Highly durable, fire-resistant, can be used to create sturdy, monolithic structures. Excellent for supporting heavy countertops.
- Cons: Requires significant labor, masonry skills, and time to construct compared to wood or steel framing. Less forgiving if you need to make design changes later.
3. Structural Support and Load Bearing
Your outdoor kitchen frame needs to support significant weight. This includes:
- Countertops: Granite, concrete, stone – these materials are heavy!
- Appliances: Grills, refrigerators, sinks, pizza ovens all add considerable mass.
- Roof/Overhang: If you plan on having a covering, the frame must support its weight and withstand wind loads.
- People: Imagine people leaning on the counter or sitting on a built-in bench.
Engineered joist hangers, strong connections, and appropriate spacing of vertical supports are vital. If you are using standard dimensional lumber, consult span tables or local building codes to ensure your joists and beams are sized correctly for the intended loads.
4. Water Management and Drainage
This is non-negotiable for outdoor structures. Your framing must be designed to shed water, not trap it.
- Sloping: If your structure has a top (like a bar or counter), it should ideally have a slight slope away from the house or seating areas to allow water to run off.
- Ventilation: Ensure there are gaps or weep holes where necessary to allow air to circulate and moisture to escape, preventing rot.
- Moisture Barriers: In some designs, applying a house wrap or specific exterior sheathing can help protect the framing from direct moisture, especially if you are using wood.
5. Appliance Integration
Plan for your appliances from the start! This means:
- Cutouts for grills, side burners, sinks, trash pull-outs, and doors need to be precisely measured and framed into the structure.
- Ventilation for Grills: Most built-in grills require specific clearances and ventilation to prevent heat buildup and potential fires. Check your grill manufacturer’s specifications.
- Access Panels: You’ll need access to shut-off valves for gas and water, as well as electrical connections. Frame in small access doors for these essential components.
6. Aesthetics and Customization
The framing is the foundation upon which you’ll build the visible aspects of your kitchen.
- Smooth Surfaces: Ensure your framing results in plumb and level surfaces. This makes it easier to attach your exterior cladding (stone veneer, tile, wood panels) smoothly.
- Design Freedom: Whether you envision a sleek modern look or a rustic charm, the framing allows you to create curved edges, built-in seating, or L-shaped layouts.
Step-by-Step Guide to Framing an Outdoor Kitchen (Beginner-Friendly)
Let’s get down to the practical steps. This guide assumes you’re building a relatively standard island-style outdoor kitchen frame, often built from pressure-treated lumber for accessibility and affordability.
Step 1: Plan and Design
This is the most important step. Measure your space, sketch out your design, and decide on appliance placement. Consider the overall dimensions and height of your countertops.
- Sketch it out: Draw a birds-eye view and a front view. Label dimensions.
- Appliance measurements: Get exact dimensions for your grill, sink, etc.
- Height: Standard counter height is around 36 inches.
Step 2: Prepare the Site
Clear the area where your kitchen will be built. Ensure it’s level. You might want to lay down a gravel base or pour a small concrete pad for stability, especially if you’re not building on an existing patio.
- Level the ground: Use a spirit level and shovel to get the area flat.
- Gravel base: A few inches of compacted gravel can improve drainage and stability.
Step 3: Build the Base Frame
This is the foundation of your island. Typically, it’s a rectangular or square box frame made from 2×4 or 2×6 pressure-treated lumber.
- Cut your lumber: Cut pieces for the bottom plate (the perimeter) and vertical studs.
- Assemble the base box: Screw the lumber together to form a sturdy rectangular frame. Use 3-inch exterior screws.
- Add cross braces: For larger structures, add cross braces within the base frame for extra support.
Step 4: Construct the Walls (Vertical Framing)
Attach vertical studs to the base frame to create the walls of your kitchen. These studs are usually placed 16 or 24 inches apart on center, depending on your cladding.
- Attach studs: Screw vertical studs into the base frame, ensuring they are plumb (perfectly vertical) using a spirit level.
- Frame appliance openings: As you build up, frame out the specific openings for your grill, doors, and drawers using double studs for support and headers (horizontal beams) above openings.
- Top plate: Cap the vertical studs with a top plate, often doubled up for added strength, especially if it will support a countertop.
Step 5: Add Shelving and Internal Supports
Think about where shelves or internal storage will go and frame them in now. This is also when you’d add any necessary support for the countertop.
- Horizontal supports: Install horizontal pieces between studs where shelves will rest.
- Countertop support: Depending on your countertop material, you might need thicker framing members or specialized brackets along the top edges.
Step 6: Install Sheathing (Optional but Recommended)
For a stronger, more rigid structure and a better surface for attaching exterior finishes, you can sheath the frame with exterior-grade plywood or cement board.
- Cut sheathing: Cut panels to fit the frame.
- Attach sheathing: Screw the sheathing to the studs. Ensure you leave gaps around appliance openings.
For highly durable and weather-resistant projects, consider using exterior-grade sheathing products designed to withstand the elements.
Step 7: Framing for Plumbing and Electrical
If your design includes a sink with plumbing or electrical outlets, plan and frame for these now. Ensure any framing doesn’t obstruct necessary access for utility hookups.
- Leave access: Make sure there’s space for pipes and wires to be run.
- Consider future access: Frame in small access panels for shut-off valves or electrical boxes.
Step 8: Final Checks
Before moving on to cladding and countertops, double-check that everything is square, plumb, and level. Ensure all connections are secure.
- Squareness: Measure diagonally. Both diagonal measurements should be equal.
- Plumb and Level: Use your spirit level on all vertical and horizontal elements.
Materials Comparison Table

Choosing the right framing material significantly impacts your outdoor kitchen’s longevity and maintenance. Here’s a quick comparison:
| Material | Pros | Cons | Best For |
|---|---|---|---|
| Pressure-Treated Lumber | Affordable, widely available, easy to work with | Can rot/warp if not properly sealed or in constant contact with water, requires exterior-grade fasteners | Budget-conscious DIYers, moderate climates |
| Cedar/Redwood | Naturally weather and pest resistant, beautiful aesthetic | More expensive, can still be susceptible to prolonged moisture | Natural look, eco-conscious builders seeking durability |
| Galvanized Steel Studs | Extremely durable, fireproof, pest-proof, won’t warp/rot | More expensive, requires specialized tools/skills, conducts heat | High-durability projects, humid/wet climates, professional builds |
| Concrete Blocks (CMU) | Very durable, fire-resistant, provides excellent structural mass | Labor-intensive, requires masonry skills, less design flexibility | Permanent, robust structures, heavy countertop support |
Common Framing Mistakes to Avoid
Even with the best intentions, a few common pitfalls can sabotage your outdoor kitchen framing. Awareness is the first step to prevention!
- Using the wrong materials: Standard indoor lumber will quickly degrade outdoors. Always opt for treated lumber, naturally resistant woods, steel, or masonry for outdoor structures.
- Ignoring drainage: Trapped water is the enemy of any outdoor structure. Ensure your design actively sheds water away from the framing.
- Underestimating weight: Heavy countertops and appliances need robust support. Don’t skimp on structural bracing.
- Forgetting appliance clearances: Grills and other appliances need airflow and specific spacing. Check manufacturer guidelines closely.
- Not planning for utilities: Leaving utility access as an afterthought can lead to costly rework. Frame in access points early.
- Building on uneven ground: A level base is crucial for a stable and square structure.
FAQ: Your Outdoor Kitchen Framing Questions Answered

Q1: What is the best material for framing an outdoor kitchen?
For durability and resistance to the elements, galvanized steel studs or sturdy concrete blocks are top choices. However, pressure-treated lumber is a more accessible and affordable option for many DIYers, provided it’s installed correctly with proper drainage and exterior-grade fasteners.
Q2: Do I need a building permit for an outdoor kitchen frame?
This varies greatly by location. Many municipalities require permits for any permanent outdoor structure, especially those involving gas lines or electrical work. It’s always best to check with your local building department before you start construction.
Q3: How do I protect my wood framing from moisture?
Use pressure-treated lumber rated for ground contact if any part is near the ground. Ensure good drainage around the structure. Consider using a quality exterior-grade sheathing and a moisture barrier. Seal all cut ends of lumber with a suitable wood preservative.
Q4: What kind of fasteners should I use for outdoor framing?
Always use exterior-grade fasteners, such as hot-dipped galvanized or stainless steel screws and bolts. These materials resist rust and corrosion, which is essential for outdoor applications.
Q5: How far apart should studs be in an outdoor kitchen frame?
Typically, studs are spaced 16 or 24 inches on center, similar to interior walls. The specific spacing might depend on the type of exterior cladding you plan to use. Thicker, heavier cladding might require closer stud spacing for adequate support.
Q6: Can I build my outdoor kitchen frame directly on grass?
It’s not recommended. Even with treated lumber, constant contact with soil and moisture will eventually lead to rot. It’s best to build on a solid, level base like a concrete patio, pavers, or at least a well-compacted gravel pad to ensure stability and longevity.
Q7: Do I need a professional to frame my outdoor kitchen?
While many DIYers successfully frame their outdoor kitchens, it’s a structural project. If you’re unsure about local codes, structural loads, or building techniques, hiring a professional contractor experienced in outdoor construction is a wise investment for safety and a high-quality result.
Conclusion
Building an outdoor kitchen is an exciting project that can significantly enhance your home and lifestyle. By paying close attention to the essential design elements of framing, you’re setting the stage for a safe, durable, and beautiful outdoor cooking space. Remember, a well-framed structure is the unsung hero of any successful build, providing the integrity that allows your creativity to shine through with beautiful finishes and functional appliances.
From selecting resilient materials that can brave the elements to ensuring proper structural support and water management, each step in the framing process contributes to the long-term success of your outdoor kitchen. Don’

