Do you want your outdoor lights to turn on by themselves? Imagine your lights switching on as soon as it gets dark. An automatic timer for outdoor lights can do just that! It makes life easier and keeps your home safe.
Have you ever forgotten to turn off your outdoor lights? An automatic timer for outdoor lights can help you save energy. It turns off the lights when you don’t need them. This saves you money on your electricity bill.
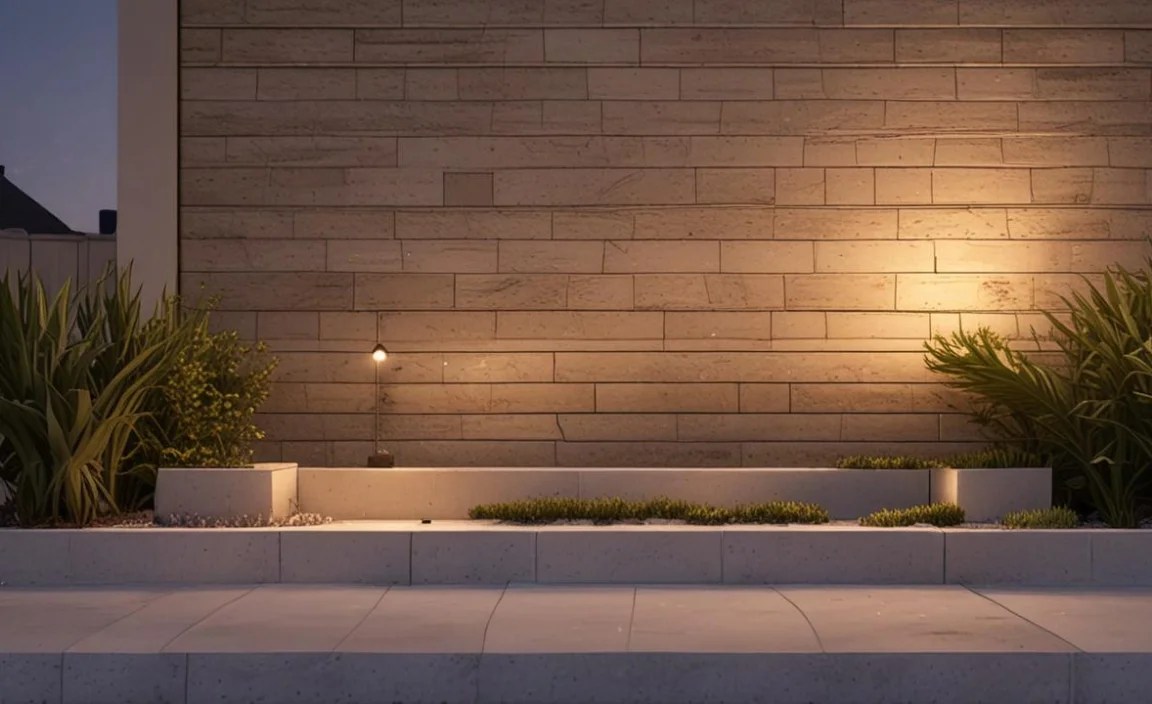
Want to make your home look lived-in, even when you are away? Using an automatic timer for outdoor lights is a smart idea. It gives the impression that someone is home. It can help to keep burglars away.
Key Takeaways
- An automatic timer for outdoor lights adds safety and ease to your home.
- Timers save energy by only running lights when they are needed.
- Timers can deter crime by making your home look occupied.
- You can easily set the timer to match your schedule.
- Outdoor timers are simple to install and use.
Benefits of an Automatic Timer for Outdoor Lights

An automatic timer for outdoor lights offers many great benefits. It can help you save money. It can also make your home safer. It even adds convenience to your daily life. Imagine not having to worry about turning your lights on and off. A timer does it for you! This is especially helpful if you are away from home often. Timers are easy to install. They are also simple to program. You can set them to turn on and off at specific times. Some timers even adjust with the changing seasons. This means your lights come on at the right time, all year round. Using a timer can also extend the life of your bulbs. They aren’t on all the time, so they last longer. This saves you even more money. It also reduces waste. Outdoor timers are a smart addition to any home.
- Timers save you money on your energy bill.
- They make your home safer by deterring crime.
- They add convenience to your daily life.
- Timers are easy to install and use.
- They extend the life of your light bulbs.
Think about how much time you spend turning your lights on and off. An automatic timer for outdoor lights eliminates this task. It gives you more time to do the things you enjoy. It also provides peace of mind. You know your lights are on when they should be. You also know they are off when they are not needed. This simple device can make a big difference in your home. It’s an easy way to improve your safety and save money. It also makes your life a little bit easier every day. Consider adding a timer to your outdoor lighting system today.
Fun Fact or Stat: Did you know that using a timer for your outdoor lights can save you up to 33% on your lighting energy costs?
Why Use Timers for Security?
Do you worry about your home when you are away? Using an automatic timer for outdoor lights can help. It makes your home look occupied. This can deter burglars. They are less likely to target a home that looks lived-in. Timers can be set to turn lights on and off at different times each day. This makes it harder for someone to know when you are actually home. It adds an extra layer of security to your property. Many people use timers when they go on vacation. Others use them every day to provide a constant sense of security. A timer is a simple and affordable way to protect your home. It gives you peace of mind, knowing your home looks safe and secure, even when you are not there.
How Do Timers Save Energy?
Have you ever left your outdoor lights on all day by accident? An automatic timer for outdoor lights prevents this. It ensures your lights are only on when you need them. This saves energy and reduces your carbon footprint. Timers can be programmed to turn off lights during daylight hours. They can also be set to turn off lights late at night. This reduces unnecessary energy consumption. Over time, these small savings add up. They make a big difference in your energy bill. They also help protect the environment. Using a timer is a responsible way to manage your energy use. It’s a simple step that can have a positive impact.
Can Timers Extend Bulb Life?
Did you know that leaving your lights on all the time can shorten their lifespan? Automatic timers for outdoor lights help bulbs last longer. Timers reduce the amount of time your lights are on. This prevents them from overheating and burning out quickly. When bulbs last longer, you don’t have to replace them as often. This saves you money on replacement bulbs. It also reduces waste. It’s a simple way to make your lighting system more efficient and sustainable. Timers can significantly extend the life of your bulbs, saving you time and money in the long run. It’s a smart investment for any homeowner.
Types of Automatic Timers for Outdoor Lights

There are different types of automatic timers for outdoor lights. Each type has its own features. Mechanical timers are simple and easy to use. They have a dial that you turn to set the on and off times. Digital timers are more advanced. They have a screen and buttons. You can program them with more precise settings. Some timers are even smart timers. These can be controlled with your smartphone. They can also connect to your home’s Wi-Fi network. This allows you to adjust the settings from anywhere. Another type is a photocell timer. This timer turns on the lights when it gets dark. It turns them off when it gets light. It automatically adjusts to the changing seasons. Choosing the right timer depends on your needs. Consider your budget and how much control you want over your lights.
- Mechanical timers are simple and affordable.
- Digital timers offer more precise control.
- Smart timers can be controlled with your smartphone.
- Photocell timers automatically adjust to the seasons.
- Consider your needs and budget when choosing a timer.
When selecting an automatic timer for outdoor lights, think about where you will use it. Some timers are designed for indoor use only. Others are made for outdoor use. Outdoor timers are weatherproof. This means they can withstand rain, snow, and other weather conditions. It’s important to choose a timer that is suitable for its environment. This will ensure it lasts a long time. It will also ensure it works properly. Read the product description carefully before you buy a timer. Make sure it is rated for outdoor use if that’s where you plan to use it. This will help you avoid any problems down the road.
Fun Fact or Stat: Smart timers are becoming increasingly popular, with sales increasing by 20% each year as more people automate their homes!
Mechanical Timers: Are They Right for You?
Are you looking for a simple and affordable timer? A mechanical timer might be the right choice. These timers are easy to use. They don’t require any complicated programming. You simply turn the dial to set the on and off times. Mechanical timers are also very reliable. They don’t depend on electricity or Wi-Fi. They will continue to work even during a power outage. However, mechanical timers are not as precise as digital timers. They may not be suitable if you need to set very specific times. But if you just want a basic timer for your outdoor lights, a mechanical timer is a great option. It’s a simple and effective way to automate your lighting system.
Digital Timers: More Control and Options
Do you want more control over your outdoor lights? A digital timer can give you that. Digital timers allow you to set precise on and off times. You can even set different schedules for different days of the week. This is useful if you have different lighting needs on weekdays and weekends. Digital timers also have features like sunrise and sunset settings. This means the timer will automatically adjust to the changing seasons. Digital timers are more expensive than mechanical timers. But they offer more features and flexibility. If you want to fine-tune your outdoor lighting system, a digital timer is a great choice.
Smart Timers: The Future of Lighting?
Have you heard about smart home technology? Smart timers are part of this trend. They connect to your home’s Wi-Fi network. This allows you to control them with your smartphone or tablet. You can adjust the settings from anywhere in the world. Smart timers also have advanced features like voice control. You can use voice commands to turn your lights on and off. Some smart timers even learn your habits. They automatically adjust the lighting schedule based on your preferences. Smart timers are the most expensive type of timer. But they offer the most convenience and control. If you want to fully automate your outdoor lighting system, a smart timer is the way to go.
How to Choose the Best Timer for Your Needs

Choosing the best automatic timer for outdoor lights depends on your specific needs. Consider the size of your outdoor space. If you have a large yard, you may need multiple timers. Think about the types of lights you want to control. Some timers are designed for low-voltage lights. Others are for standard voltage lights. Also, consider your budget. Timers range in price from a few dollars to over a hundred dollars. Determine how much you are willing to spend. Finally, think about the features you need. Do you want a simple timer with basic on and off settings? Or do you want a smart timer with advanced features? By considering these factors, you can choose the best timer for your outdoor lighting system.
- Consider the size of your outdoor space.
- Think about the types of lights you want to control.
- Determine your budget.
- Decide what features you need.
- Read reviews before making a purchase.
Before you buy an automatic timer for outdoor lights, read online reviews. See what other people have to say about the timer. Pay attention to reviews that mention ease of use. Also, look for reviews that mention reliability. A good timer should be easy to set up and use. It should also work consistently. If you see a lot of negative reviews, it’s probably best to avoid that timer. Look for a timer with mostly positive reviews. This will increase your chances of being happy with your purchase. Reading reviews is a great way to get unbiased information about different timers.
Fun Fact or Stat: Studies show that homes with automated lighting systems are 30% less likely to be burglarized!
What Size Timer Do You Need?
The size of your outdoor space matters when choosing a timer. If you have a small porch, a single timer might be enough. But if you have a large yard, you might need multiple timers. You can use one timer for the front yard lights. You can use another timer for the backyard lights. You can even use separate timers for different sections of your yard. This allows you to customize the lighting schedule for each area. Consider the number of lights you want to control. Make sure the timer has enough capacity to handle all of them. If you are unsure, it’s always best to choose a timer with a higher capacity.
What About Timer Features?
Think about the features you need in a timer. Do you want a timer with sunrise and sunset settings? This feature automatically adjusts the on and off times based on the time of year. Do you want a timer with a random setting? This feature turns the lights on and off at random times. This can make it look like someone is home, even when you are away. Do you want a timer with a countdown timer? This feature allows you to set the lights to turn off after a certain amount of time. Consider which features are most important to you. Choose a timer that has those features.
Comparing Top Timer Brands
Several brands make automatic timers for outdoor lights. Some popular brands include Woods, GE, and Intermatic. Woods timers are known for their simplicity and affordability. GE timers are known for their reliability and durability. Intermatic timers are known for their advanced features and flexibility. Each brand has its own strengths and weaknesses. Do some research to compare the different brands. Read reviews and compare prices. Choose a brand that fits your needs and budget. A well-known brand is often a good choice. But don’t be afraid to try a lesser-known brand if it has good reviews.
Installing Your Automatic Timer for Outdoor Lights
Installing an automatic timer for outdoor lights is usually a simple process. Most timers come with detailed instructions. Follow the instructions carefully. If you are not comfortable working with electricity, hire a professional. Safety is always the most important thing. Before you start, turn off the power to the circuit. This will prevent electric shock. Locate the wires that control your outdoor lights. Connect the timer to these wires. Make sure the connections are secure. Once you have connected the timer, turn the power back on. Test the timer to make sure it is working properly. If you have any problems, consult the instructions or call a professional.
- Turn off the power before you start.
- Follow the instructions carefully.
- Connect the timer to the wires that control your lights.
- Make sure the connections are secure.
- Test the timer to make sure it is working properly.
If you are replacing an existing timer, take a picture of the wiring before you disconnect it. This will help you remember how to connect the new timer. Label the wires with tape. This will also help you avoid confusion. When connecting the wires, use wire connectors. These connectors are designed to make secure connections. They also prevent the wires from coming loose. After you have connected the wires, tuck them neatly into the electrical box. This will prevent them from getting damaged. It will also make it easier to close the box.
Fun Fact or Stat: Professional electricians can install an outdoor timer in under an hour, ensuring safety and proper function!
Safety First: Electrical Precautions
Working with electricity can be dangerous. Always take precautions to protect yourself. Turn off the power to the circuit before you start any work. Use a voltage tester to make sure the power is off. Wear rubber gloves and eye protection. These will protect you from electric shock and sparks. Don’t work in wet conditions. Water conducts electricity and can increase your risk of shock. If you are not comfortable working with electricity, hire a professional. It’s better to be safe than sorry. Electrical work should only be done by qualified individuals.
Step-by-Step Installation Guide
Follow these steps to install your automatic timer for outdoor lights: 1. Turn off the power to the circuit. 2. Remove the old timer or switch. 3. Identify the wires that control your outdoor lights. 4. Connect the new timer to these wires. 5. Secure the connections with wire connectors. 6. Tuck the wires neatly into the electrical box. 7. Close the electrical box. 8. Turn the power back on. 9. Test the timer to make sure it is working properly. If you follow these steps, you should be able to install your timer safely and easily.
Troubleshooting Common Issues
Sometimes, things don’t go as planned. If your timer is not working properly, don’t panic. Check the power to the circuit. Make sure the breaker is not tripped. Check the wiring connections. Make sure they are secure. Check the timer settings. Make sure they are correct. If you have a digital timer, check the battery. A dead battery can prevent the timer from working. If you have tried all of these things and the timer is still not working, consult the instructions or call a professional. There may be a problem with the timer itself.
Programming Your Automatic Timer for Outdoor Lights

Programming your automatic timer for outdoor lights depends on the type of timer you have. Mechanical timers are programmed by turning a dial. Digital timers are programmed by pressing buttons. Smart timers are programmed with a smartphone app. Read the instructions that came with your timer. This will explain how to program it. If you are using a mechanical timer, set the on and off times by turning the dial. If you are using a digital timer, enter the on and off times using the buttons. If you are using a smart timer, open the app and follow the instructions. Most timers allow you to set different schedules for different days of the week. This is useful if you have different lighting needs on weekdays and weekends.
- Read the instructions that came with your timer.
- Set the on and off times according to your needs.
- Consider setting different schedules for different days.
- Test the timer to make sure it is working properly.
- Adjust the settings as needed.
After you have programmed your automatic timer for outdoor lights, test it to make sure it is working properly. Set the timer to turn on a few minutes in the future. Wait to see if the lights turn on at the correct time. Set the timer to turn off a few minutes in the future. Wait to see if the lights turn off at the correct time. If the lights do not turn on or off at the correct time, check the settings. Make sure you have entered the correct times. If you are still having problems, consult the instructions or call a professional.
Fun Fact or Stat: Many smart timers can be programmed remotely, allowing you to adjust your lighting schedule even when you’re on vacation!
Understanding Timer Settings
Most automatic timers for outdoor lights have several settings. These settings allow you to customize the timer to your needs. Some common settings include on time, off time, day of the week, and sunrise/sunset. The on time setting tells the timer when to turn the lights on. The off time setting tells the timer when to turn the lights off. The day of the week setting tells the timer which days of the week to follow the schedule. The sunrise/sunset setting tells the timer to turn the lights on at sunset and off at sunrise. Understanding these settings will help you get the most out of your timer.
Setting Up Different Schedules
Do you need different lighting schedules on different days? Many timers allow you to set up multiple schedules. You can set one schedule for weekdays. You can set another schedule for weekends. You can even set up special schedules for holidays. This allows you to customize your lighting to your specific needs. For example, you might want the lights to turn on earlier on weekdays. This is because you might be leaving for work before sunrise. On weekends, you might want the lights to turn on later. This is because you might be sleeping in. Setting up different schedules is easy with most timers.
Testing and Adjusting Your Timer
After you have programmed your timer, it’s important to test it. This will ensure that it is working properly. Set the timer to turn on a few minutes in the future. Wait to see if the lights turn on at the correct time. If they don’t, check the settings. Make sure you have entered the correct times. Also, check the wiring connections. Make sure they are secure. If the lights turn on at the correct time, test the off time. Set the timer to turn off a few minutes in the future. Wait to see if the lights turn off at the correct time. If they don’t, repeat the steps above. Testing your timer is an important part of the installation process.
Maintaining Your Automatic Timer for Outdoor Lights
Maintaining your automatic timer for outdoor lights will help it last longer. It will also help it work properly. Check the timer regularly for any signs of damage. Look for cracks, loose wires, or corrosion. If you see any damage, repair it or replace the timer. Clean the timer regularly with a damp cloth. This will remove any dirt or debris. If you have a digital timer, check the battery regularly. Replace the battery when it gets low. If you have a mechanical timer, lubricate the moving parts occasionally. This will keep them working smoothly. By following these tips, you can keep your timer in good condition for years to come.
- Check the timer regularly for damage.
- Clean the timer with a damp cloth.
- Replace the battery in digital timers.
- Lubricate the moving parts in mechanical timers.
- Protect the timer from extreme weather.
Extreme weather can damage your automatic timer for outdoor lights. Protect the timer from rain, snow, and direct sunlight. If you live in an area with severe weather, consider installing a weatherproof cover. This will protect the timer from the elements. During a power outage, your timer may lose its settings. If this happens, you will need to reprogram it. Keep a copy of your timer settings in a safe place. This will make it easier to reprogram the timer after a power outage. Proper maintenance will help your timer last longer and work better.
Fun Fact or Stat: Regular maintenance can extend the lifespan of your outdoor timer by up to 50%!
Checking for Damage and Wear
Regularly inspect your automatic timer for outdoor lights. Look for any signs of damage or wear. Check the housing for cracks or breaks. Check the wiring for loose connections or frayed insulation. Check the dial or buttons for damage or wear. If you find any problems, address them promptly. Repair any damage or replace the timer if necessary. Ignoring small problems can lead to bigger problems down the road. Regular inspections can help you catch problems early and prevent them from getting worse.
Cleaning and Protecting Your Timer
Keep your automatic timer for outdoor lights clean. This will help it work properly. Use a damp cloth to wipe the timer down. Remove any dirt, dust, or debris. Don’t use harsh chemicals or abrasive cleaners. These can damage the timer. Protect the timer from extreme weather. Install a weatherproof cover if necessary. Keep the timer out of direct sunlight. This can cause the plastic to fade or crack. Cleaning and protecting your timer will help it last longer.
Replacing Batteries and Parts
If you have a digital automatic timer for outdoor lights, it probably uses batteries. These batteries power the timer’s display and settings. Replace the batteries when they get low. This will prevent the timer from losing its settings. The type of battery you need will depend on the timer. Check the instructions to find out what type of battery to use. You may also need to replace other parts of the timer over time. These parts may include the dial, buttons, or wiring. You can usually find replacement parts online or at a hardware store. Replacing worn or damaged parts can help extend the life of your timer.
| Timer Type | Lifespan | Maintenance | Cost |
|---|---|---|---|
| Mechanical | 5-10 years | Lubricate moving parts | Low |
| Digital | 3-7 years | Replace batteries | Medium |
| Smart | 2-5 years | Software updates | High |
| Photocell | 4-8 years | Clean sensor | Medium |
Summary
An automatic timer for outdoor lights is a great way to save energy and add security to your home. These timers turn your lights on and off automatically. This eliminates the need to manually control them. They come in various types, including mechanical, digital, and smart timers. Each type has its own features and benefits. Choosing the right timer depends on your needs and budget. Installing a timer is usually a simple process. But if you are not comfortable working with electricity, hire a professional.
Programming your timer is also easy. Most timers come with detailed instructions. Maintaining your timer will help it last longer and work properly. Check the timer regularly for damage. Clean it with a damp cloth. Replace the batteries in digital timers. Protect the timer from extreme weather. An automatic timer for outdoor lights is a worthwhile investment for any homeowner. It can save you money, improve your security, and make your life easier.
Conclusion
Using an automatic timer for outdoor lights is a smart choice. It helps you save energy and money. It also makes your home safer. Timers are easy to install and use. They can be programmed to fit your schedule. Consider adding a timer to your outdoor lighting system today. You will enjoy the convenience and peace of mind it provides.
Frequently Asked Questions
Question No 1: What is an automatic timer for outdoor lights?
Answer: An automatic timer for outdoor lights is a device that turns your outdoor lights on and off automatically. You can set it to turn the lights on at dusk and off at dawn. You can also set it to turn the lights on and off at specific times. This eliminates the need to manually control your outdoor lights. It saves you time and energy. It can also improve your home’s security by making it look occupied even when you are away.
Question No 2: How does an automatic timer for outdoor lights save energy?
Answer: An automatic timer for outdoor lights saves energy by ensuring that your lights are only on when you need them. You can set the timer to turn the lights off during daylight hours. This prevents you from accidentally leaving the lights on all day. You can also set the timer to turn the lights off late at night. This reduces unnecessary energy consumption. Over time, these small savings can add up to a significant reduction in your energy bill. Using a timer is a responsible way to manage your energy use.
Question No 3: How does an automatic timer for outdoor lights improve security?
Answer: An automatic timer for outdoor lights improves security by making your home look occupied even when you are away. Burglars are less likely to target a home that looks lived-in. You can set the timer to turn the lights on at dusk and off at dawn. You can also set the timer to turn the lights on and off at random times. This makes it harder for someone to know when you are actually home. It adds an extra layer of security to your property. This gives you peace of mind.
Question No 4: What are the different types of automatic timers for outdoor lights?
Answer: There are several different types of automatic timers for outdoor lights. Mechanical timers are simple and affordable. They have a dial that you turn to set the on and off times. Digital timers are more advanced. They have a screen and buttons. You can program them with more precise settings. Smart timers can be controlled with your smartphone or tablet. They offer the most convenience and flexibility. Photocell timers automatically turn the lights on at dusk and off at dawn.
Question No 5: How do I install an automatic timer for outdoor lights?
Answer: Installing an automatic timer for outdoor lights is usually a simple process. Most timers come with detailed instructions. Follow the instructions carefully. Before you start, turn off the power to the circuit. This will prevent electric shock. Locate the wires that control your outdoor lights. Connect the timer to these wires. Make sure the connections are secure. Once you have connected the timer, turn the power back on. Test the timer to make sure it is working properly. If you are not comfortable working with electricity, hire a professional.
Question No 6: How do I program an automatic timer for outdoor lights?
Answer: Programming an automatic timer for outdoor lights depends on the type of timer you have. Mechanical timers are programmed by turning a dial. Digital timers are programmed by pressing buttons. Smart timers are programmed with a smartphone app. Read the instructions that came with your timer. This will explain how to program it. Set the on and off times according to your needs. Consider setting different schedules for different days of the week. Test the timer to make sure it is working properly. Adjust the settings as needed.
