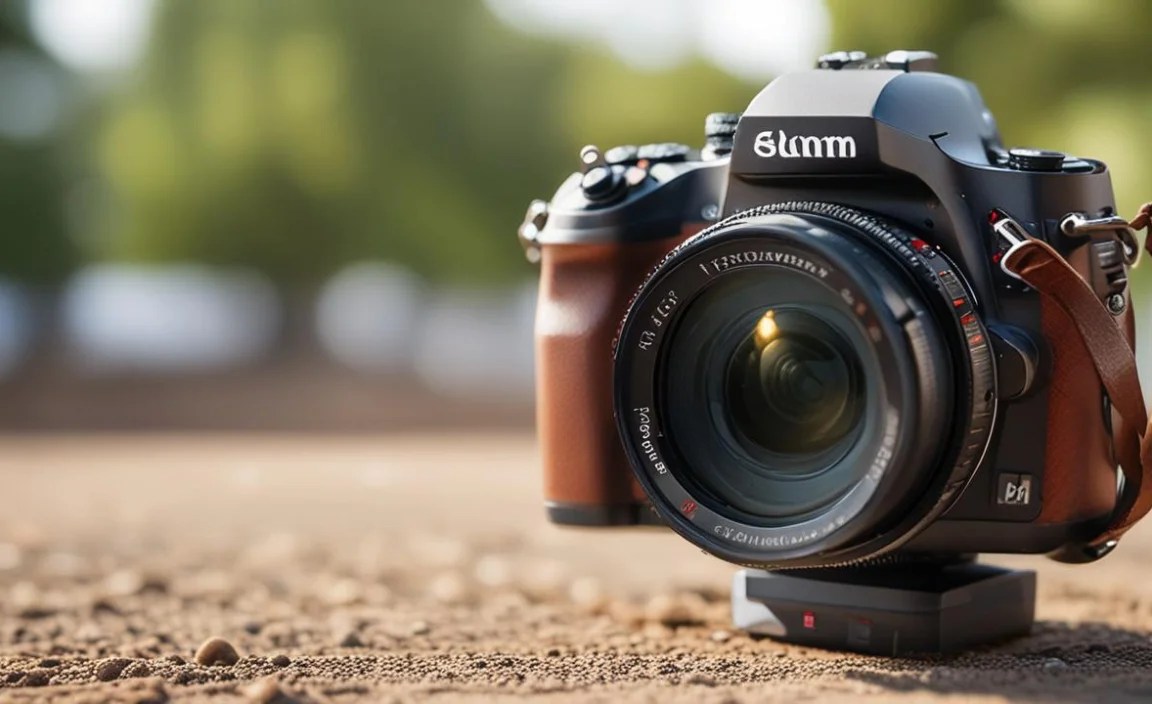
Have you ever wondered how photographers take amazing outdoor photos? Do you want to learn their secrets? It all starts with understanding camera settings outdoor photography. Taking photos outside can be tricky. The light changes all the time. But don’t worry, it’s easier than you think.
Learning about camera settings for outdoor photography opens a new world. You can capture beautiful landscapes. You can also photograph exciting wildlife. You just need to know a few key things. Let’s explore how to make your outdoor photos great.
Key Takeaways
- Understanding camera settings for outdoor photography will improve your photos.
- Aperture controls depth of field, blurring backgrounds or keeping everything sharp.
- ISO affects brightness and graininess; keep it low for clear outdoor shots.
- Shutter speed freezes motion or creates blur, depending on your subject.
- Practice adjusting these settings to master outdoor photography in different conditions.
Understanding Aperture in Outdoor Photography

Aperture is like the pupil of your eye. It controls how much light enters the camera. It also affects the depth of field. Depth of field is how much of your photo is in focus. A wide aperture (like f/2.8) lets in lots of light. It also creates a shallow depth of field. This means only a small part of the photo is sharp. The background will be blurry. A narrow aperture (like f/16) lets in less light. It creates a large depth of field. Everything in the photo will be in focus. When doing camera settings for outdoor photography, think about what you want to be in focus. Do you want a blurry background? Or do you want everything to be sharp?
- A wide aperture lets in more light.
- A narrow aperture lets in less light.
- Aperture affects the depth of field.
- Use a wide aperture for blurry backgrounds.
- Use a narrow aperture for sharp photos.
Choosing the right aperture is key for great outdoor photos. If you’re taking a portrait, use a wide aperture. This will make the person stand out. The blurry background won’t distract from the subject. If you’re photographing a landscape, use a narrow aperture. This will make sure everything is sharp. The mountains, trees, and sky will all be in focus. Experiment with different apertures. See how they change your photos. Once you get the hang of it, you will be taking amazing photos in no time. Remember, practice makes perfect. Understanding aperture is a big step in mastering camera settings outdoor photography.
What is the Best Aperture for Landscapes?
Landscapes are beautiful scenes. We often want everything to be in focus. What if only the trees were sharp? Or what if only the mountains were clear? That would not be good. When shooting landscapes, use a narrow aperture. Something like f/8 or f/11 works well. This aperture ensures everything is in focus. The foreground, middle ground, and background will all be sharp. This makes the photo look more detailed. It also captures the beauty of the scene. Aperture is a key element to consider in camera settings outdoor photography. Don’t forget to adjust your ISO and shutter speed too!
What is the Best Aperture for Portraits?
Portraits are photos of people. Do you want the person to really stand out? A wide aperture can help with that. An aperture like f/2.8 or f/4 will create a shallow depth of field. This means the background will be blurry. The person will be sharp and clear. This makes the portrait look professional. A blurry background helps to remove distractions. It keeps the focus on the person. Some photographers like really blurry backgrounds. They might use an even wider aperture. When setting your aperture, think about the background. What do you want it to look like? This choice is key when considering camera settings outdoor photography for portraits.
How Does Aperture Affect Light?
Aperture doesn’t just affect focus. It also affects how much light enters the camera. A wide aperture lets in a lot of light. This is good when it’s dark outside. A narrow aperture lets in less light. This is better when it’s very bright outside. If you are shooting in bright sunlight, use a narrow aperture. This will prevent your photo from being too bright. If you are shooting at sunset, use a wide aperture. This will help you capture more light. Think of aperture as a way to control light. This is a very important part of camera settings outdoor photography. Mastering light helps you take better photos.
Fun Fact or Stat: The widest aperture ever used on a camera lens was f/0.7, created for special low-light photography!
Shutter Speed for Capturing Outdoor Action
Shutter speed is how long the camera’s shutter stays open. It’s measured in seconds or fractions of a second. A fast shutter speed (like 1/1000 second) freezes motion. It’s great for capturing fast-moving subjects. Think of a bird flying or a car racing. A slow shutter speed (like 1 second) blurs motion. It’s good for creating artistic effects. Think of flowing water or light trails from cars. When thinking about camera settings outdoor photography, consider your subject. Is it moving fast? Use a fast shutter speed. Is it still? Use a slower shutter speed. Experiment and see what works best for you. Shutter speed is a fun tool to play with. It can change the whole feel of your photo.
- Fast shutter speeds freeze motion.
- Slow shutter speeds blur motion.
- Use fast shutter speeds for sports.
- Use slow shutter speeds for water.
- Shutter speed affects brightness.
Choosing the right shutter speed can make a big difference. If you are photographing a waterfall, try a slow shutter speed. This will make the water look smooth and dreamy. If you are photographing a soccer game, use a fast shutter speed. This will freeze the action. You will capture the players jumping and kicking the ball. Shutter speed also affects the brightness of your photo. A slow shutter speed lets in more light. A fast shutter speed lets in less light. You may need to adjust your aperture or ISO to get the right exposure. Mastering shutter speed is a key step in camera settings outdoor photography. It gives you more creative control over your images.
What is Shutter Speed Measured In?
Shutter speed is measured in seconds. It can also be measured in fractions of a second. For example, 1 second is a slow shutter speed. 1/1000 of a second is a fast shutter speed. Most cameras show shutter speed as a fraction. So, 1/1000 will look like 1000 on your camera. The bigger the number, the faster the shutter speed. Understanding how shutter speed is measured will help you. It will help you choose the right setting. What if you saw “30” on your camera? That might mean 1/30 of a second. It’s all about understanding the numbers. Shutter speed is a vital aspect of camera settings outdoor photography.
How Does Shutter Speed Affect Brightness?
Shutter speed affects how much light enters the camera. A slow shutter speed lets in more light. This makes the photo brighter. A fast shutter speed lets in less light. This makes the photo darker. If your photo is too dark, try using a slower shutter speed. If your photo is too bright, try using a faster shutter speed. You may also need to adjust your aperture or ISO. Think of shutter speed as a way to control light. It’s like opening and closing a window. The longer the window is open, the more light comes in. This concept is crucial in camera settings outdoor photography. You can use it to take perfect photos.
Can Shutter Speed Affect Sharpness?
Yes, shutter speed can affect sharpness! If you use a slow shutter speed, your photos might be blurry. This is especially true if your subject is moving. Or if you are not holding the camera still. To avoid blurry photos, use a faster shutter speed. A good rule of thumb is to use a shutter speed that is faster than your lens’s focal length. For example, if you are using a 50mm lens, use a shutter speed of 1/60 second or faster. You can also use a tripod to keep your camera still. Sharpness is very important in photography. This is why shutter speed is a key part of camera settings outdoor photography.
Fun Fact or Stat: The fastest shutter speed ever recorded was by a special camera used in nuclear testing, clocking in at an incredible 1/1,000,000,000 of a second!
ISO and Its Role in Outdoor Photography

ISO measures your camera’s sensitivity to light. A low ISO (like 100) means the camera is not very sensitive. This is good for bright, sunny days. A high ISO (like 3200) means the camera is very sensitive. This is good for dark situations. But a high ISO can also create noise or grain in your photos. Noise makes the photo look fuzzy. When considering camera settings outdoor photography, start with the lowest ISO possible. Only increase it if you need more light. Finding the right ISO is a balancing act. You want enough light without too much noise. Experiment with different ISO settings. See how they affect your photos. Practice will help you find the sweet spot.
- Low ISO for bright light.
- High ISO for low light.
- High ISO can cause noise.
- Start with the lowest ISO.
- Adjust ISO as needed.
Choosing the right ISO is important for clear, sharp photos. On a sunny day, use ISO 100. This will give you the best image quality. On a cloudy day, you might need to increase the ISO to 400 or 800. If you are shooting indoors or at night, you might need to use an even higher ISO. But be careful! The higher the ISO, the more noise you will see in your photos. Try to keep the ISO as low as possible. Use other camera settings like aperture and shutter speed to control the light. Understanding ISO is a key part of mastering camera settings outdoor photography. It can help you take great photos in any situation.
When Should You Increase ISO?
You should increase ISO when you need more light. This is usually when you are shooting in dark conditions. For example, you might need to increase ISO at sunset. Or you might need to increase ISO when shooting indoors. Increasing ISO makes the camera more sensitive to light. This allows you to use faster shutter speeds. It also allows you to use narrower apertures. But remember, increasing ISO can also create noise. So only increase it when you really need to. Think of ISO as a last resort. Use it when you can’t get enough light any other way. ISO is one of the critical camera settings outdoor photography.
Does ISO Affect Color?
Yes, ISO can affect color. At high ISO settings, colors can become less accurate. They might look washed out. Or they might have strange tints. This is because the camera is working harder to amplify the light. This can distort the colors. To avoid color problems, try to keep your ISO as low as possible. If you need to use a high ISO, try to correct the colors in post-processing. You can use photo editing software to adjust the colors. Accurate colors are important for good photos. This makes ISO a vital part of camera settings outdoor photography.
How Can You Reduce Noise?
Noise is the grainy stuff that can appear in your photos. It’s more common when you use high ISO settings. There are several ways to reduce noise. First, try to use a lower ISO setting. This will prevent noise from appearing in the first place. Second, make sure you have enough light. The more light you have, the less you need to increase the ISO. Third, use noise reduction software. Many photo editing programs have tools to reduce noise. These tools can help clean up your photos. Reducing noise is key to getting clear photos. It also showcases the importance of camera settings outdoor photography.
| ISO Setting | Light Level | Image Quality | Best Use |
|---|---|---|---|
| ISO 100 | Bright Sunlight | Excellent | Landscapes, Portraits in Sunlight |
| ISO 400 | Cloudy Day | Good | Outdoor Portraits, General Use |
| ISO 1600 | Low Light Indoors | Fair | Indoor Sports, Concerts |
| ISO 3200+ | Very Dark | Noisy | Emergency Situations Only |
Fun Fact or Stat: The first digital cameras had very poor ISO performance, with noticeable noise even at ISO 400. Now, modern cameras can shoot clean images at ISO 3200 or higher!
White Balance for Accurate Outdoor Colors

White balance is like telling your camera what “white” looks like. Different light sources have different colors. Sunlight is different from shade. Shade is different from indoor lights. White balance adjusts the colors in your photo. It makes sure white objects look white. If the white balance is wrong, your photos might look too blue or too yellow. Most cameras have automatic white balance. This works well in many situations. But sometimes, you need to adjust it manually. When thinking about camera settings outdoor photography, pay attention to white balance. It can make a big difference in the overall look of your photos. Accurate colors make your photos look more real.
- White balance corrects colors.
- Automatic white balance is often good.
- Adjust white balance manually when needed.
- Different light sources need different settings.
- White balance affects the mood of the photo.
Setting the correct white balance can be tricky. On a sunny day, use the “sunlight” setting. On a cloudy day, use the “cloudy” setting. Indoors, use the “incandescent” or “fluorescent” setting. You can also use a gray card. A gray card is a neutral gray surface. You take a photo of the gray card. Then, you tell your camera to use that photo as the white balance. This is the most accurate way to set white balance. Experiment with different white balance settings. See how they change the colors in your photos. Mastering white balance is a key part of camera settings outdoor photography. It helps you capture true-to-life colors.
What Happens if White Balance is Wrong?
If the white balance is wrong, your photos will have strange colors. They might look too blue. Or they might look too yellow. This can make your photos look unnatural. It can also distract from the subject. For example, if you take a photo indoors with the “sunlight” setting, the photo will look too blue. If you take a photo outdoors with the “incandescent” setting, the photo will look too yellow. Getting the white balance right is important. It helps you capture accurate colors. Always double-check your white balance settings. Good white balance is part of good camera settings outdoor photography.
What are Common White Balance Presets?
Cameras have different white balance presets. These presets are designed for different lighting conditions. Some common presets include “sunlight,” “cloudy,” “shade,” “incandescent,” and “fluorescent.” The “sunlight” preset is for sunny days. The “cloudy” preset is for cloudy days. The “shade” preset is for shaded areas. The “incandescent” preset is for indoor lights. The “fluorescent” preset is for fluorescent lights. Each preset adjusts the colors in a different way. Experiment with these presets. See which one works best for your situation. Presets make camera settings outdoor photography easier.
Can You Fix White Balance in Editing?
Yes, you can fix white balance in editing! Most photo editing software has tools to adjust white balance. You can use these tools to correct the colors in your photos. For example, you can adjust the temperature and tint. Temperature controls how warm or cool the colors are. Tint controls how green or magenta the colors are. By adjusting these settings, you can make the colors look more accurate. However, it’s always best to get the white balance right in the first place. Fixing it in editing can be time-consuming. Getting it right in-camera is a key part of good camera settings outdoor photography.
Fun Fact or Stat: Some professional photographers use a special tool called a color checker passport. This helps them to get perfect white balance and color accuracy every time!
Focus Modes for Sharp Outdoor Images

Focus is all about making sure your subject is sharp. Cameras have different focus modes. These modes help you focus on different types of subjects. Single-point focus is good for stationary subjects. Continuous focus is good for moving subjects. Face detection focus is good for portraits. When thinking about camera settings outdoor photography, choose the right focus mode. This will help you get sharp, clear photos. If your subject is blurry, the photo won’t look good. Take some time to learn about different focus modes. They can make a big difference in your photos.
- Single-point focus for still subjects.
- Continuous focus for moving subjects.
- Face detection focus for portraits.
- Focus affects sharpness.
- Choose the right focus mode.
Using the right focus mode can make your photos look professional. If you are photographing a flower, use single-point focus. This will make sure the flower is sharp. If you are photographing a bird in flight, use continuous focus. This will keep the bird in focus as it moves. If you are photographing a person, use face detection focus. This will make sure the person’s face is sharp. Experiment with different focus modes. See how they affect your photos. Mastering focus is a key part of camera settings outdoor photography. It helps you create stunning images.
What is Single-Point Focus?
Single-point focus is a focus mode. It lets you choose one specific point to focus on. This is good for subjects that are not moving. For example, you might use single-point focus for a flower. You select the focus point on the flower. The camera will focus on that point. Everything else will be blurry. Single-point focus gives you a lot of control. You can choose exactly what you want to be in focus. It’s like aiming a laser beam. This is a simple, yet effective tool in camera settings outdoor photography.
What is Continuous Focus?
Continuous focus is a focus mode. It’s also called AI Servo on some cameras. It keeps focusing on a moving subject. The camera will track the subject as it moves. It will adjust the focus automatically. This is good for sports or wildlife photography. For example, you might use continuous focus for a bird in flight. The camera will keep the bird in focus. Even if the bird is moving fast. Continuous focus is a powerful tool. This is especially true when considering camera settings outdoor photography. It helps you capture sharp photos of moving subjects.
How Does Focus Affect Composition?
Focus can affect your composition. Composition is how you arrange the elements in your photo. By choosing what to focus on, you can draw the viewer’s eye to a specific part of the scene. For example, you might focus on a person in the foreground. This will make the person stand out. Or you might focus on a mountain in the background. This will create a sense of depth. Focus is a powerful tool. It helps you tell a story with your photos. Understanding focus is crucial in camera settings outdoor photography. It adds depth and interest to your images.
Fun Fact or Stat: Some cameras have hundreds of focus points! The more focus points, the more precise you can be when focusing on your subject.
Metering Modes and Outdoor Lighting
Metering is how your camera measures light. It helps the camera decide what camera settings outdoor photography will make the photo look best. There are different metering modes. Each mode measures light in a different way. Evaluative metering measures light across the whole scene. Center-weighted metering measures light in the center of the scene. Spot metering measures light in a very small area. When taking photos outside, choose the right metering mode. This will help you get the correct exposure. Exposure is how bright or dark your photo is. If the exposure is wrong, your photo might be too bright or too dark. Metering helps you get the right exposure.
- Evaluative metering for general use.
- Center-weighted metering for portraits.
- Spot metering for tricky lighting.
- Metering affects exposure.
- Choose the right metering mode.
Using the right metering mode can make a big difference. If you are photographing a landscape, use evaluative metering. This will measure the light across the whole scene. If you are photographing a person with a bright background, use center-weighted metering. This will measure the light on the person’s face. If you are photographing a small object in a very bright scene, use spot metering. This will measure the light on the object. Experiment with different metering modes. See how they affect your photos. Mastering metering is a key part of camera settings outdoor photography. It helps you get perfect exposures every time.
What is Evaluative Metering?
Evaluative metering is a metering mode. It’s also called matrix metering on some cameras. It measures the light across the entire scene. The camera divides the scene into zones. It analyzes the light in each zone. Then, it calculates the best exposure for the whole scene. Evaluative metering is good for general use. It works well in most situations. It’s a good starting point for camera settings outdoor photography. But sometimes, you need to use a different metering mode.
When Should You Use Spot Metering?
You should use spot metering when you need to measure the light in a very small area. This is useful when you are photographing a subject in a tricky lighting situation. For example, you might use spot metering when photographing a bird against a bright sky. You point the spot metering point at the bird. The camera will measure the light on the bird. It will ignore the bright sky. This will help you get a good exposure of the bird. Spot metering is a precise tool. This is useful for certain scenarios in camera settings outdoor photography.
How Does Metering Affect Exposure?
Metering directly affects exposure. Exposure is how bright or dark your photo is. Metering tells the camera how much light there is in the scene. The camera then uses this information to set the aperture, shutter speed, and ISO. If the metering is wrong, the exposure will be wrong. The photo might be too bright. Or it might be too dark. This is why it’s important to choose the right metering mode. Understanding metering is a key part of camera settings outdoor photography. It helps you get the right exposure every time.
Fun Fact or Stat: Some cameras have a “highlight weighted” metering mode. This protects the bright areas of your photo from being overexposed!
Composition Tips for Stunning Outdoor Photos
Composition is how you arrange the elements in your photo. Good composition makes your photos more interesting. It draws the viewer’s eye to the subject. There are many composition techniques. The rule of thirds is a popular one. Leading lines are another useful technique. Symmetry can also create beautiful photos. When thinking about camera settings outdoor photography, don’t forget about composition. It’s just as important as the camera settings. Good composition can turn an ordinary photo into an extraordinary one. Take some time to learn about different composition techniques. They can help you improve your photos.
- Use the rule of thirds.
- Look for leading lines.
- Find symmetry in nature.
- Frame your subject.
- Simplify the scene.
Applying composition techniques is easy. Imagine your photo is divided into nine equal squares. This is the rule of thirds. Place your subject at one of the intersections of the lines. This will make the photo more balanced. Leading lines are lines that lead the viewer’s eye to the subject. Roads, rivers, and fences can all be leading lines. Symmetry is when one half of the photo is a mirror image of the other half. Reflections in water can create symmetry. Experiment with these techniques. See how they change your photos. Mastering composition is a key part of camera settings outdoor photography. It helps you create visually appealing images.
What is the Rule of Thirds?
The rule of thirds is a composition technique. It divides your photo into nine equal squares. Imagine two horizontal lines and two vertical lines. These lines divide the photo. Place your subject at one of the intersections of the lines. This will make the photo more balanced and interesting. The rule of thirds is a simple technique. It can improve your photos. It’s a good starting point for learning about composition. Try using the rule of thirds for camera settings outdoor photography.
How Can Leading Lines Improve Photos?
Leading lines are lines that lead the viewer’s eye to the subject. These lines can be roads, rivers, fences, or any other line in the scene. By using leading lines, you can draw the viewer’s eye to the main subject. This makes the photo more engaging. Leading lines can also create a sense of depth. They can make the photo look more three-dimensional. Look for leading lines in your environment. Use them to improve your camera settings outdoor photography.
Why is Symmetry Important?
Symmetry is when one half of the photo is a mirror image of the other half. Symmetry can create a sense of balance and harmony. It can also create a sense of beauty. Reflections in water can create symmetry. Buildings and trees can also create symmetry. Look for symmetry in your environment. Use it to create visually appealing photos. Symmetrical elements can enhance the impact of camera settings outdoor photography.
Fun Fact or Stat: The golden ratio, a mathematical ratio found in nature, is often used by photographers to create pleasing compositions!
Summary
Understanding camera settings outdoor photography is key to taking amazing photos. Aperture controls the depth of field. Shutter speed freezes or blurs motion. ISO measures the camera’s sensitivity to light. White balance corrects colors. Focus modes ensure your subject is sharp. Metering modes help you get the right exposure. Composition techniques make your photos more interesting. By mastering these elements, you can take your outdoor photography to the next level. Practice these techniques. Experiment with different settings. Have fun and be creative. The more you practice, the better you will get.
Conclusion
Taking great outdoor photos is within your reach. By understanding aperture, shutter speed and ISO, you can take amazing photos. Mastering white balance and focus will also help. Experiment with composition. Practice using different camera settings outdoor photography. Soon, you will be capturing beautiful moments. Go outside and start shooting today!
Frequently Asked Questions
Question No 1: What is the best camera setting for sunny days?
Answer: On a sunny day, you want to use a low ISO. Set it to 100. This will give you the best image quality. You can use a narrow aperture, like f/8 or f/11. This will make sure everything is in focus. Use a fast shutter speed to prevent overexposure. Something like 1/250 of a second. This will help you capture clear, sharp photos. Remember, these are just starting points. Adjust the settings as needed to get the perfect exposure. Understanding camera settings outdoor photography is a must!
Question No 2: How do I take sharp photos of moving objects?
Answer: Taking sharp photos of moving objects can be tricky. Use a fast shutter speed. This will freeze the motion. A shutter speed of 1/500 of a second or faster is good. Use continuous focus mode. This will keep the object in focus as it moves. You might also need to increase the ISO. This will allow you to use a faster shutter speed. Practice tracking the object with your camera. This will help you keep it in the frame. These tips can help you master camera settings outdoor photography.
Question No 3: What is the best aperture for landscape photography?
Answer: For landscape photography, you want everything to be in focus. Use a narrow aperture. Something like f/8 or f/11 works well. This will create a large depth of field. The foreground, middle ground, and background will all be sharp. You might need to use a tripod. This will keep the camera still. Especially if you are using a slow shutter speed. Experiment with different apertures. See how they affect the depth of field. Camera settings outdoor photography are essential for stunning results.
Question No 4: How do I prevent my photos from being too bright?
Answer: If your photos are too bright, you need to reduce the amount of light entering the camera. Use a faster shutter speed. This will let in less light. Use a narrower aperture. This will also let in less light. Lower the ISO. This will make the camera less sensitive to light. You can also use a neutral density filter. This is like sunglasses for your camera. It reduces the amount of light without affecting the colors. These adjustments are a key part of camera settings outdoor photography.
Question No 5: What is white balance and why is it important?
Answer: White balance corrects the colors in your photos. Different light sources have different colors. Sunlight is different from shade. White balance makes sure white objects look white. If the white balance is wrong, your photos might look too blue or too yellow. This can make your photos look unnatural. Setting the correct white balance is important. It helps you capture accurate colors. It is a critical component of camera settings outdoor photography.
Question No 6: How does ISO affect the quality of my photos?
Answer: ISO measures the camera’s sensitivity to light. A low ISO (like 100) gives you the best image quality. A high ISO (like 3200) can create noise or grain in your photos. Noise makes the photo look fuzzy. Try to keep the ISO as low as possible. Only increase it if you need more light. Use other camera settings outdoor photography like aperture and shutter speed to control the light. Adjust the ISO as a last resort to maintain quality.
