Do you love bright, beautiful flowers? Have you ever seen an amaryllis? These amazing plants can grow indoors. With the right care, your indoor amaryllis will bloom. You can enjoy its colorful flowers all winter.
Amaryllis bulbs are easy to grow. They bring joy and beauty to any home. Let’s learn how to care for these plants. Then you can have your own indoor amaryllis.
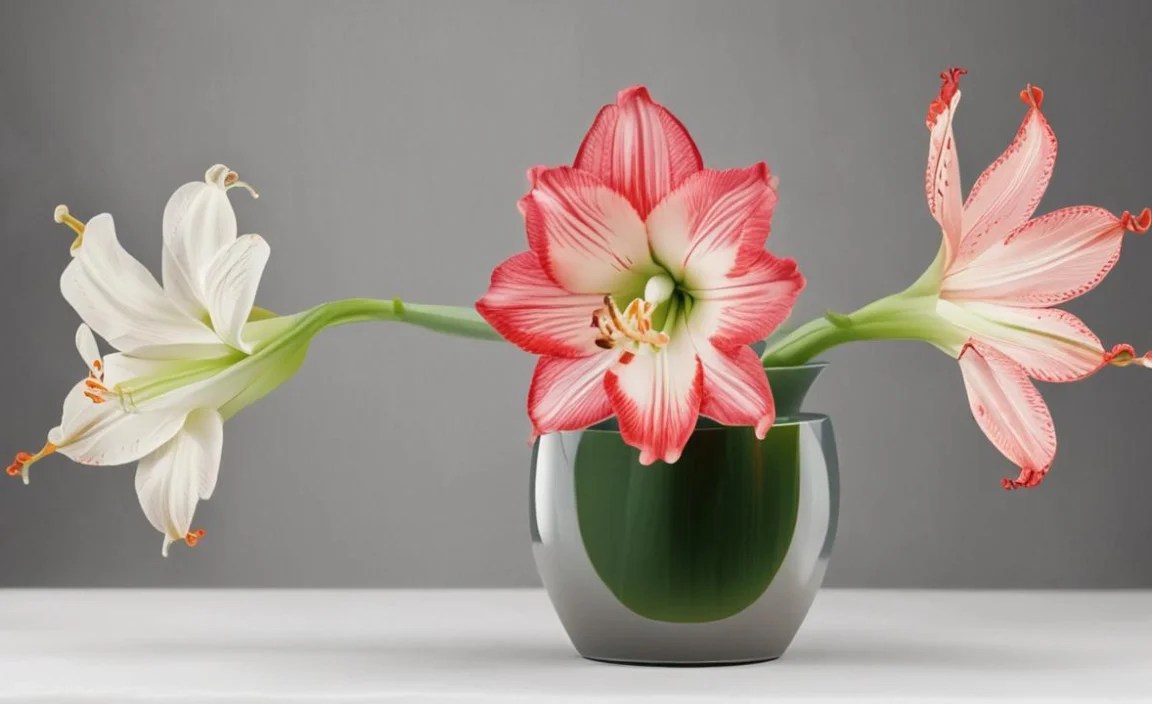
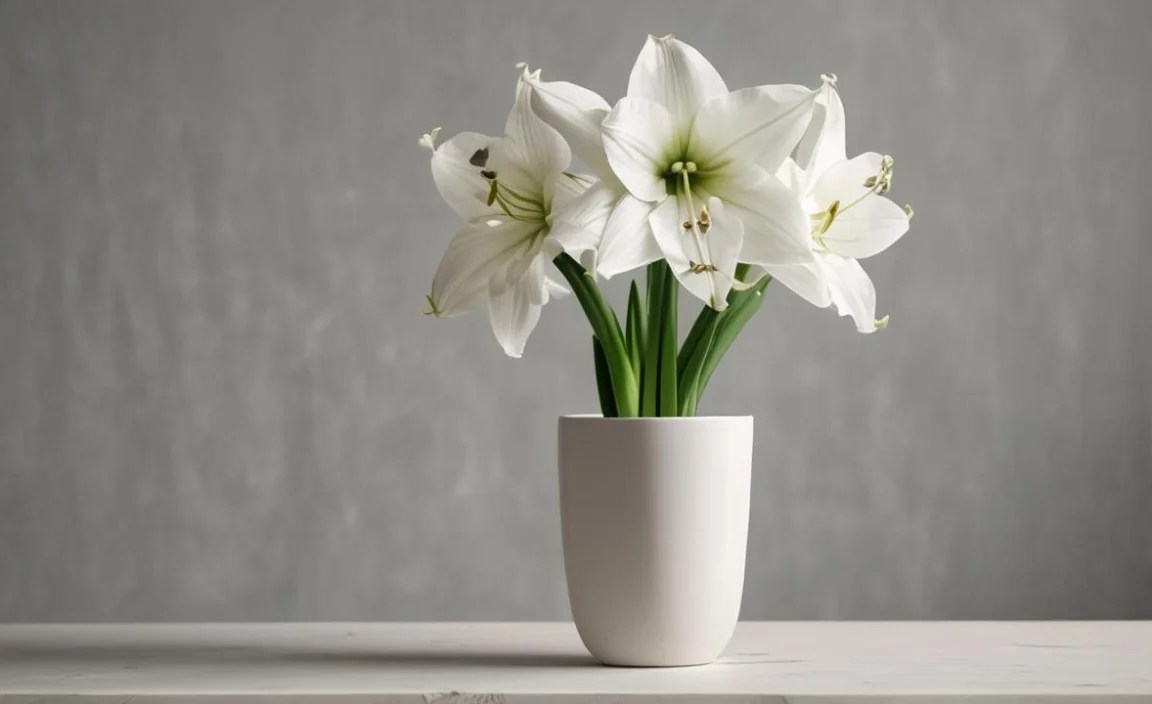
Amaryllis flowers come in many colors. They can be red, pink, white, or even striped! Imagine having these flowers in your house. Caring for your indoor amaryllis is simple. Just follow these easy steps. Soon, you’ll have a beautiful blooming plant.
Key Takeaways
- Proper watering is critical; avoid overwatering your indoor amaryllis.
- Provide bright, indirect sunlight to help your amaryllis thrive and bloom.
- Use well-draining soil to prevent root rot, a common issue.
- Rotate the pot regularly to ensure even growth toward the light.
- After blooming, cut off the flower stalk but keep watering for future blooms.
Choosing the Right Bulb for Indoor Amaryllis

Selecting the perfect bulb is the first step. A healthy bulb means a beautiful flower. Look for firm, large bulbs. Avoid bulbs that are soft or damaged. Larger bulbs usually produce more flowers. Check the bulb for any signs of mold or rot. A good bulb should feel heavy for its size. You can find amaryllis bulbs at garden centers. You can also order them online. Make sure the bulb is labeled with the flower color. This helps you know what to expect. A healthy start is key to successful care for your indoor amaryllis. This choice sets the stage for vibrant blooms. With the right bulb, you’re already on your way to enjoying beautiful flowers.
- Choose large, firm bulbs.
- Avoid soft or damaged bulbs.
- Check for mold or rot.
- Buy from reputable sources.
- Know the flower color.
Once you have your bulb, prepare a pot. The pot should be slightly larger than the bulb. Use well-draining potting mix. Plant the bulb so that one-third of it is above the soil. Water the soil lightly after planting. Place the pot in a bright, warm location. Avoid direct sunlight at first. As the plant grows, you can move it to a sunnier spot. Remember, good soil and a proper pot are essential. These steps will help your indoor amaryllis thrive. Selecting the right bulb and preparing the pot are important steps. They ensure your plant has the best start possible. Proper planting is key to successful growth and blooming.
Fun Fact or Stat: Did you know that the size of the amaryllis bulb often correlates with the number of flower stalks it will produce? Larger bulbs tend to yield more impressive displays!
What Size Bulb is Best?
Have you ever wondered why some amaryllis plants have more flowers? The secret often lies in the size of the bulb. Larger bulbs store more energy. This energy helps the plant grow strong and produce more blooms. Think of it like this: a small bulb is like a small snack, while a large bulb is like a full meal. The full meal gives the plant more fuel to grow. When choosing a bulb, pick the biggest one you can find. A bigger bulb means more flowers and a healthier plant. Remember, size matters when it comes to amaryllis bulbs. It is the first step in the care of your indoor amaryllis.
Where Can You Buy Bulbs?
Finding the right place to buy your amaryllis bulb is important. Garden centers are a great option. They often have a wide selection of bulbs. You can see and touch the bulbs before you buy them. Online stores are another good choice. They offer convenience and a large variety. Read reviews before buying online. This helps you choose a reputable seller. Farmers’ markets sometimes sell amaryllis bulbs too. These bulbs are often locally grown. No matter where you buy your bulb, check it carefully. Make sure it is firm and healthy. A good source ensures a healthy start for your indoor amaryllis.
How to Store Bulbs Before Planting?
Imagine you bought an amaryllis bulb but you’re not ready to plant it. What should you do? The key is to store the bulb in a cool, dry place. A basement or garage works well. Keep the bulb away from direct sunlight. You want to prevent it from sprouting too early. Store it in a paper bag or box. This helps protect it from moisture. Check the bulb regularly for any signs of rot. If you see any, remove the affected areas. Proper storage helps keep the bulb healthy until you’re ready to plant. This ensures your indoor amaryllis gets off to a good start. Storing the bulb correctly is a simple way to provide good care.
Potting Mix and Container Choices

The right potting mix is essential for your indoor amaryllis. It needs well-draining soil to prevent root rot. A mix of potting soil, peat moss, and perlite works well. This combination provides good drainage and nutrients. Avoid using garden soil, as it can be too heavy. The container should be slightly larger than the bulb. Make sure it has drainage holes. This allows excess water to escape. Terracotta pots are a good choice because they allow the soil to breathe. Plastic pots can also work, but be careful not to overwater. Proper soil and container choices are vital for healthy growth. These choices will help your indoor amaryllis thrive. Choosing the right mix is part of the ongoing care. Ensuring the right container is crucial for proper drainage and growth.
- Use well-draining potting mix.
- Avoid garden soil.
- Choose a pot with drainage holes.
- Terracotta pots are a good option.
- The pot should be slightly larger than the bulb.
When planting, place a layer of potting mix at the bottom of the pot. Set the bulb on top of the soil. Add more potting mix around the bulb, leaving the top one-third exposed. Water the soil lightly to settle it. Place the pot in a bright, warm location. Avoid direct sunlight at first. As the plant grows, you can move it to a sunnier spot. Remember, proper planting is key to success. This ensures your indoor amaryllis has the best start. A well-chosen pot and potting mix are the foundation for a healthy, blooming plant. Taking these steps will reward you with beautiful flowers.
Fun Fact or Stat: Amaryllis plants prefer to be slightly root-bound, meaning they like their roots to be a bit crowded. This encourages blooming!
Why is Drainage So Important?
Imagine leaving your feet in wet socks all day. How uncomfortable would that be? The same thing happens to plants when their roots sit in water. This is why drainage is so important. When soil doesn’t drain well, the roots can rot. Root rot can kill your amaryllis plant. Well-draining soil allows excess water to escape. This keeps the roots healthy and happy. Always choose a pot with drainage holes. Use a potting mix that is light and airy. Your indoor amaryllis will thank you with beautiful blooms. Good drainage is a key part of providing the best care.
Can You Reuse Old Potting Mix?
Using old potting mix might seem like a good way to save money. However, it’s not always the best idea. Old potting mix can lose its nutrients. It may also contain harmful bacteria or fungi. These can harm your amaryllis plant. It’s best to use fresh potting mix for each planting. Fresh mix provides the nutrients your plant needs to grow strong. If you do reuse old mix, sterilize it first. You can do this by baking it in the oven. However, fresh mix is always the safest option. This simple step ensures healthy growth for your indoor amaryllis. Remember that proper care starts with the right soil.
What About Self-Watering Pots?
Self-watering pots can be convenient. They help keep the soil moist without overwatering. However, they may not be the best choice for amaryllis plants. Amaryllis bulbs are prone to root rot. Self-watering pots can keep the soil too wet. This increases the risk of root rot. If you use a self-watering pot, be very careful. Monitor the soil moisture closely. Allow the top of the soil to dry out between waterings. Regular pots with drainage holes are often a safer choice. They give you more control over watering. Proper watering is a vital part of care for your indoor amaryllis.
Watering Techniques for Healthy Growth

Watering is a crucial part of care for your indoor amaryllis. Overwatering can lead to root rot, which can kill the plant. Underwatering can cause the plant to dry out and not bloom. The key is to find the right balance. When you first plant the bulb, water the soil lightly. Keep the soil slightly moist but not soggy. Once the plant starts to grow, water it more regularly. Allow the top inch of soil to dry out between waterings. When you water, water thoroughly until water drains out of the bottom of the pot. Avoid getting water on the bulb itself. This can cause it to rot. Proper watering is essential for healthy growth and beautiful blooms.
- Water lightly when first planting.
- Allow the top inch of soil to dry out.
- Water thoroughly when you do water.
- Avoid getting water on the bulb.
- Adjust watering based on the plant’s growth.
During the plant’s dormant period, reduce watering significantly. The plant doesn’t need as much water when it’s not actively growing. Check the soil occasionally to make sure it doesn’t dry out completely. Resume regular watering when new growth appears. Remember, watering needs can vary depending on the environment. Plants in warmer, drier locations may need more water. Plants in cooler, more humid locations may need less. Pay attention to your plant and adjust your watering accordingly. This will help your indoor amaryllis thrive. This is a critical aspect of providing the best possible care.
Fun Fact or Stat: Amaryllis plants go through a dormant period, usually in the fall. During this time, they need very little water to rest and prepare for the next blooming season!
How Often Should You Water?
Figuring out how often to water can be tricky. There’s no one-size-fits-all answer. The frequency depends on several factors. These include the size of the pot, the type of soil, and the environment. A good rule of thumb is to check the soil. Stick your finger about an inch into the soil. If it feels dry, it’s time to water. If it feels moist, wait a few days and check again. Overwatering is more harmful than underwatering. Err on the side of caution. When in doubt, wait a day or two before watering. Consistent monitoring will help you determine the best watering schedule for your indoor amaryllis. Regular observation is part of a healthy care routine.
What Type of Water is Best?
The type of water you use can affect your plant’s health. Tap water is often fine, but it can contain chemicals. These chemicals can build up in the soil over time. Rainwater is a great option if you have access to it. It’s naturally soft and free of chemicals. Filtered water is another good choice. It removes harmful substances from tap water. Avoid using softened water. Softened water contains salt, which can harm your plant. No matter what type of water you use, let it sit for a while. This allows the water to reach room temperature. Cold water can shock the plant. Using the right type of water is a simple way to provide better care for your indoor amaryllis.
What are Signs of Overwatering?
Knowing the signs of overwatering can save your plant. Overwatered plants often have yellowing leaves. The leaves may also feel soft and mushy. The soil will be constantly wet. You might even see mold growing on the surface. The bulb itself may start to rot. If you notice these signs, take action immediately. Stop watering the plant. Allow the soil to dry out completely. You may need to repot the plant with fresh soil. Remove any rotted parts of the bulb. Catching overwatering early can help you save your indoor amaryllis. Being observant is key to proper care.
Light and Temperature Needs
Light and temperature play a big role in the health of your indoor amaryllis. Amaryllis plants need bright, indirect sunlight. Direct sunlight can scorch the leaves. A south-facing window is often a good choice. However, you may need to filter the light with a sheer curtain. The ideal temperature for amaryllis is between 60 and 75 degrees Fahrenheit. Avoid placing the plant near drafts or heating vents. These can cause the plant to dry out. Rotate the pot regularly to ensure even growth. This prevents the plant from leaning towards the light. Providing the right light and temperature is essential for healthy growth and blooming.
- Provide bright, indirect sunlight.
- Avoid direct sunlight.
- Maintain a temperature between 60 and 75 degrees Fahrenheit.
- Avoid drafts and heating vents.
- Rotate the pot regularly.
During the dormant period, the plant needs less light. You can move it to a cooler, darker location. This helps the plant rest and prepare for the next blooming season. Once new growth appears, move the plant back to a brighter location. Remember, light and temperature needs can vary depending on the plant’s stage of growth. Pay attention to your plant and adjust its environment accordingly. This will help your indoor amaryllis thrive. These considerations are part of ongoing care.
Fun Fact or Stat: Amaryllis plants are phototropic, meaning they grow towards the light. Rotating the pot ensures they grow straight and strong!
How Much Light is Enough?
Determining the right amount of light can be tricky. Amaryllis plants need bright light, but not direct sunlight. Think of it like this: they want to be in a well-lit room, but not right next to the window. If the leaves start to turn pale or yellow, it may be a sign of too much light. If the plant is not growing or blooming, it may not be getting enough light. Experiment with different locations in your home. Observe how the plant responds. Finding the right balance is key to healthy growth. Providing adequate light is a vital aspect of care for your indoor amaryllis.
What If You Don’t Have Enough Natural Light?
Not everyone has a sunny window. If you don’t have enough natural light, don’t worry. You can use artificial light. Grow lights are a great option. They provide the spectrum of light that plants need to grow. You can also use fluorescent lights. Place the lights a few inches above the plant. Keep them on for about 12-16 hours per day. Monitor the plant’s growth. Adjust the light as needed. Artificial light can help your indoor amaryllis thrive, even in a dark room. Using artificial light is a good solution when natural light is limited. This ensures proper care for your plant.
How Does Temperature Affect Blooming?
Temperature plays a crucial role in blooming. Amaryllis plants need a period of cool temperatures to initiate blooming. After the dormant period, move the plant to a warmer location. This signals to the plant that it’s time to grow. A temperature between 60 and 75 degrees Fahrenheit is ideal. Avoid sudden temperature changes. These can stress the plant. Consistent temperatures will encourage healthy growth and beautiful blooms. Maintaining the right temperature is important for successful blooming. This aspect of care ensures your indoor amaryllis blooms beautifully.
Fertilizing Your Amaryllis
Fertilizing is an important part of care for your indoor amaryllis. It provides the nutrients the plant needs to grow and bloom. Start fertilizing when new growth appears. Use a balanced liquid fertilizer. Dilute the fertilizer to half strength. Fertilize every two to four weeks. Avoid over-fertilizing, as this can damage the plant. During the dormant period, stop fertilizing. The plant doesn’t need extra nutrients when it’s not actively growing. Resume fertilizing when new growth appears. Remember, proper fertilization is essential for healthy growth and beautiful blooms.
- Start fertilizing when new growth appears.
- Use a balanced liquid fertilizer.
- Dilute the fertilizer to half strength.
- Fertilize every two to four weeks.
- Stop fertilizing during the dormant period.
Choose a fertilizer that is specifically formulated for flowering plants. These fertilizers are higher in phosphorus, which promotes blooming. Follow the instructions on the fertilizer label carefully. Avoid getting fertilizer on the leaves or bulb. This can cause burns. Water the plant after fertilizing to help distribute the nutrients. Remember, fertilization is just one part of caring for your indoor amaryllis. Proper watering, light, and temperature are also important. A well-fed plant is a happy plant. This aspect of care ensures your plant has the nutrients it needs.
Fun Fact or Stat: Amaryllis plants are heavy feeders, meaning they benefit from regular fertilization during their growing season to support their large blooms!
What Does “Balanced” Fertilizer Mean?
You may have heard the term “balanced” fertilizer. But what does it really mean? Balanced fertilizer contains equal amounts of nitrogen, phosphorus, and potassium. These are the three main nutrients that plants need. Nitrogen promotes leafy growth. Phosphorus promotes blooming and root development. Potassium helps with overall plant health. A balanced fertilizer has an N-P-K ratio of 10-10-10 or 20-20-20. This means it contains 10% or 20% of each nutrient. Using a balanced fertilizer provides your indoor amaryllis with all the nutrients it needs. This helps it grow strong and bloom beautifully. Providing balanced nutrition is a key part of proper care.
Can You Use Homemade Fertilizer?
Making your own fertilizer can be a fun and sustainable option. There are many recipes for homemade fertilizer. One popular recipe involves using banana peels. Banana peels are rich in potassium. You can bury them in the soil around the plant. You can also make banana peel tea. Soak the peels in water for a few days. Then, use the water to fertilize your plant. Another option is to use coffee grounds. Coffee grounds are rich in nitrogen. Sprinkle them around the base of the plant. Be careful not to use too much, as they can make the soil acidic. While homemade fertilizers can be beneficial, they may not provide all the nutrients your plant needs. Supplement with a commercial fertilizer if necessary. Making homemade fertilizer is a creative way to provide care for your indoor amaryllis.
What are Signs of Over-Fertilization?
Just like overwatering, over-fertilizing can harm your plant. Signs of over-fertilization include yellowing leaves, especially at the tips. The leaves may also look burnt or crispy. You may also see a white crust on the soil surface. This is a build-up of fertilizer salts. If you notice these signs, take action immediately. Stop fertilizing the plant. Flush the soil with water to remove excess fertilizer. You may need to repot the plant with fresh soil. Over-fertilization can damage the roots and prevent the plant from absorbing nutrients. Catching it early can help you save your indoor amaryllis. Being observant is key to providing proper care.
Dealing with Pests and Diseases
Pests and diseases can sometimes affect indoor amaryllis plants. However, they are generally quite resistant. Common pests include spider mites and aphids. These pests can suck the sap from the leaves, causing them to yellow and wilt. You can control these pests with insecticidal soap. Spray the plant thoroughly, making sure to cover all surfaces of the leaves. Root rot is a common disease, especially if the soil is too wet. Prevent root rot by using well-draining soil and avoiding overwatering. If you suspect root rot, repot the plant with fresh soil and remove any rotted roots. Proper care can help prevent most pest and disease problems.
| Pest/Disease | Symptoms | Treatment | Prevention |
|---|---|---|---|
| Spider Mites | Yellowing leaves, webbing | Insecticidal soap, neem oil | Maintain humidity, regular inspection |
| Aphids | Sticky leaves, distorted growth | Insecticidal soap, water spray | Regular inspection, introduce beneficial insects |
| Root Rot | Soft bulb, foul smell | Repot with fresh soil, remove rotted roots | Well-draining soil, avoid overwatering |
| Fungal Infections | Spots on leaves, mold | Fungicide, improve air circulation | Avoid overcrowding, proper watering |
- Inspect plants regularly for pests.
- Use insecticidal soap for pests.
- Prevent root rot with well-draining soil.
- Repot if you suspect root rot.
- Improve air circulation to prevent fungal infections.
Good sanitation is also important. Remove any dead leaves or flowers from the pot. This helps prevent the spread of pests and diseases. Keep the area around the plant clean and free of debris. If you notice any signs of pests or diseases, take action immediately. Early detection is key to successful treatment. Remember, a healthy plant is less likely to be affected by pests and diseases. Proper care is the best defense. Consistent vigilance is part of providing the best care for your indoor amaryllis.
Fun Fact or Stat: Amaryllis plants are relatively pest-resistant, but keeping them healthy with proper care makes them even less susceptible to problems!
What is Insecticidal Soap?
You might have heard of insecticidal soap. But what is it, and how does it work? Insecticidal soap is a type of pesticide. It’s made from fatty acids found in soaps. It works by disrupting the outer layer of insects. This causes them to dehydrate and die. Insecticidal soap is effective against many common pests. These include aphids, spider mites, and whiteflies. It’s also relatively safe for plants and humans. When using insecticidal soap, follow the instructions on the label carefully. Spray the plant thoroughly, making sure to cover all surfaces of the leaves. Repeat the treatment as needed. Insecticidal soap is a safe and effective way to control pests on your indoor amaryllis. It is an important tool in providing good care.
How Can You Improve Air Circulation?
Good air circulation is important for plant health. It helps prevent fungal diseases. It also helps keep pests away. There are several ways to improve air circulation around your plants. Avoid overcrowding plants. Give each plant enough space to breathe. Use a fan to circulate the air. A small oscillating fan works well. Open windows to allow fresh air to circulate. However, avoid drafts, as these can harm the plant. Prune the plant to remove any dead or crowded leaves. This allows air to flow more freely. Improving air circulation is a simple way to provide better care for your indoor amaryllis. Proper ventilation contributes to the overall health of your plant.
When Should You Use Fungicide?
Fungicides are used to treat fungal diseases. These diseases can cause spots on leaves, mold, and other problems. You should use fungicide when you see signs of fungal infection. Early detection is key to successful treatment. There are many different types of fungicides. Choose one that is specifically designed for the type of fungus you are dealing with. Follow the instructions on the label carefully. Apply the fungicide to all affected areas of the plant. Repeat the treatment as needed. Fungicides can be effective, but they should be used as a last resort. Proper care and prevention are always the best approach. Using fungicide is a treatment option when fungal diseases threaten your indoor amaryllis. It’s important to act quickly to protect your plant.
Encouraging Reblooming After the First Bloom
Encouraging reblooming is a rewarding part of caring for your indoor amaryllis. After the flowers fade, cut off the flower stalk. Leave the leaves intact. Continue to water and fertilize the plant. This helps the plant store energy for the next blooming season. In the late summer or early fall, stop watering the plant. Allow the leaves to die back naturally. Move the plant to a cool, dark location for about 8-10 weeks. This dormant period is essential for reblooming. After the dormant period, repot the bulb with fresh soil. Start watering again and move the plant to a bright, warm location. With proper care, your amaryllis should bloom again in a few months.
- Cut off the flower stalk after blooming.
- Continue to water and fertilize.
- Allow the leaves to die back in late summer.
- Provide a cool, dark dormant period.
- Repot and resume watering after dormancy.
Be patient, as it may take some time for the plant to rebloom. Some amaryllis varieties are easier to rebloom than others. The key is to provide the plant with the right conditions. This includes proper watering, light, temperature, and fertilization. Remember, reblooming is a natural process. It requires time and patience. With the right care, you can enjoy beautiful blooms year after year. This makes the effort of caring for your indoor amaryllis worthwhile.
Fun Fact or Stat: With proper care, an amaryllis bulb can rebloom for many years, providing a stunning display each winter!
Why is the Dormant Period Important?
Imagine working hard all year without a break. You’d eventually get tired and worn out. Plants need rest too. The dormant period is a time for the plant to rest and recharge. During this time, the plant stores energy for the next growing season. Without a dormant period, the plant may not bloom again. The cool, dark conditions signal to the plant that it’s time to rest. Reducing watering and fertilization also helps. The dormant period is essential for reblooming. It is a crucial part of caring for your indoor amaryllis. Giving your plant a rest is part of good care.
Can You Force an Amaryllis to Bloom?
Forcing an amaryllis to bloom means encouraging it to bloom out of its natural season. You can do this by manipulating the temperature and light. After the dormant period, move the plant to a warm, bright location. This signals to the plant that it’s time to grow. Water the plant regularly and fertilize it every two to four weeks. You can also increase the humidity around the plant. This helps encourage blooming. While forcing an amaryllis to bloom is possible, it can be stressful for the plant. It’s best to allow the plant to bloom naturally. This ensures healthy growth and beautiful blooms. While forcing blooms is possible, proper timing is part of good care.
What If Your Amaryllis Doesn’t Rebloom?
Sometimes, even with the best care, an amaryllis may not rebloom. Don’t be discouraged. There could be several reasons why. The plant may not have stored enough energy during the growing season. The dormant period may not have been long enough. The plant may not be getting enough light or nutrients. Review your care routine. Make sure you are providing the plant with the right conditions. Be patient and continue to provide proper care. Sometimes, it just takes time. If your amaryllis doesn’t rebloom, try again next year. Consistent care is key to success. Don’t give up on your indoor amaryllis!
Summary
Caring for an indoor amaryllis is a rewarding experience. Choosing the right bulb is the first step. Use well-draining potting mix and a pot with drainage holes. Water carefully, allowing the soil to dry out between waterings. Provide bright, indirect sunlight and maintain a temperature between 60 and 75 degrees Fahrenheit. Fertilize regularly during the growing season. Protect the plant from pests and diseases. After blooming, cut off the flower stalk and allow the plant to rest. With proper care, your amaryllis will bring beauty to your home year after year.
Conclusion
Growing an indoor amaryllis is easier than you think. With a little knowledge, you can enjoy its stunning blooms. Remember to choose a healthy bulb and use well-draining soil. Water properly and provide bright, indirect light. Fertilize regularly and protect from pests. After blooming, allow the plant to rest. Follow these simple steps. You can enjoy beautiful flowers every winter. Proper care for your indoor amaryllis will reward you with years of beauty.
Frequently Asked Questions
Question No 1: How often should I water my amaryllis bulb after planting?
Answer: After planting your amaryllis bulb, water it sparingly until you see new growth. Overwatering can cause the bulb to rot. Once growth appears, water more regularly. Allow the top inch of soil to dry out between waterings. Ensure that the pot has good drainage. This prevents the bulb from sitting in water. Adjust watering based on the temperature and humidity. Proper watering is key to successful care for your indoor amaryllis. Observing the soil moisture is the best way to determine when to water.
Question No 2: What kind of light does an amaryllis need to bloom indoors?
Answer: Amaryllis plants need bright, indirect sunlight to bloom indoors. Direct sunlight can scorch the leaves. Place your plant near a south-facing window. If the light is too intense, filter it with a sheer curtain. If you don’t have enough natural light, use a grow light. Provide 12-16 hours of light per day. Rotate the pot regularly to ensure even growth. Proper lighting is crucial for healthy growth and blooming. Adequate light is an essential element in the care of your indoor amaryllis.
Question No 3: How do I get my amaryllis to rebloom after it finishes flowering?
Answer: To encourage reblooming, cut off the flower stalk after the blooms fade. Leave the leaves intact. Continue to water and fertilize the plant. In late summer, stop watering and allow the leaves to die back. Move the bulb to a cool, dark place for 8-10 weeks. After this dormant period, repot the bulb and resume watering. Place it in a bright, warm location. Be patient. It may take several months for the plant to rebloom. This process is vital for successful care of your indoor amaryllis.
Question No 4: What type of soil is best for planting an amaryllis bulb?
Answer: The best type of soil for planting an amaryllis bulb is a well-draining potting mix. A mix of potting soil, peat moss, and perlite works well. Avoid using garden soil, as it can be too heavy and retain too much water. Good drainage is essential to prevent root rot. Ensure that the pot has drainage holes. This allows excess water to escape. The right soil provides the necessary nutrients and support for healthy growth. This is an important factor in the care of your indoor amaryllis.
Question No 5: How do I know if I am overwatering my amaryllis plant?
Answer: Signs of overwatering include yellowing leaves, soft or mushy leaves, and constantly wet soil. You may also see mold growing on the soil surface. The bulb itself may start to rot. If you notice these signs, stop watering immediately. Allow the soil to dry out completely. You may need to repot the plant with fresh soil. Remove any rotted parts of the bulb. Overwatering can lead to root rot, which can kill the plant. Recognizing these signs is crucial for proper care of your indoor amaryllis.
Question No 6: Can I leave my amaryllis bulb in the same pot year after year?
Answer: While you can leave your amaryllis bulb in the same pot, it’s best to repot it every year or two. This allows you to refresh the soil and provide the bulb with new nutrients. Choose a pot that is slightly larger than the bulb. Use fresh, well-draining potting mix. Repotting also allows you to inspect the bulb for any signs of rot or disease. This is a good practice to maintain healthy growth. Regular repotting is a beneficial part of the ongoing care of your indoor amaryllis.
