Do you love ferns? These green plants add beauty to any garden. But what happens when winter comes? Many people worry about care outdoor ferns winter. Ferns need special attention when it gets cold. This helps them survive until spring. Let’s learn how to protect your ferns!
Key Takeaways
- Proper care outdoor ferns winter ensures they return in spring.
- Mulch helps insulate the soil and protect fern roots.
- Reduce watering as ferns need less water in the winter.
- Protect ferns from frost with burlap or blankets.
- Knowing your fern type helps with specific winter care.

Preparing Outdoor Ferns for Winter
Winter can be tough on plants. Ferns are no exception. Preparing your outdoor ferns for winter is very important. This helps them survive the cold weather. Start by cleaning up around your ferns. Remove any dead leaves or debris. This prevents pests and diseases. Next, check your fern’s soil. Make sure it drains well. Soggy soil can freeze and hurt the roots. Add some compost to enrich the soil. This gives your ferns extra nutrients. A little preparation goes a long way. Your ferns will thank you in the spring. They will grow back strong and healthy. Preparing now saves work later. It also keeps your garden looking great.
- Clean up dead leaves around the ferns.
- Check the soil drainage.
- Add compost to enrich the soil.
- Reduce watering as the weather cools.
- Consider moving potted ferns indoors.
Ferns are amazing plants. Each type needs slightly different care outdoor ferns winter. Some ferns are hardier than others. Knowing your fern type is key. For example, some ferns can handle frost. Others need to be brought inside. Always research your specific fern. Find out its cold tolerance. This helps you give it the best care. Proper care ensures your ferns survive. They will thrive for many years. Don’t guess when it comes to winter care. Take the time to learn and prepare. Your ferns will reward you with their beauty.
Should I cut back my ferns in winter?
Should you cut back your ferns in winter? This is a common question. The answer depends on your fern type. Some ferns benefit from being cut back. Others do not. For example, deciduous ferns lose their fronds in winter. You can cut these back to the ground. Evergreen ferns keep their fronds. Only remove dead or damaged fronds. Cutting back the wrong fern can harm it. Always research your specific fern type. Find out if it needs to be cut back. If you’re unsure, leave the fronds alone. They can provide extra insulation. They also protect the crown of the plant. Cutting back can be done in early spring if needed.
How do I protect ferns from frost?
Frost can be very damaging to ferns. It can kill the fronds. It can even damage the roots. Protecting your ferns from frost is crucial. One way to do this is with mulch. Add a thick layer of mulch around the base of the fern. This insulates the soil. It also protects the roots from freezing. You can also use burlap or blankets. Cover the ferns when frost is predicted. Remove the covers during the day. This allows the plants to get sunlight. Another option is to move potted ferns indoors. This protects them from the cold completely. Remember, prevention is key. Taking steps to protect your ferns will help them survive the winter.
What type of mulch is best for ferns?
Choosing the right mulch is important. Different mulches have different benefits. For ferns, organic mulches are best. These include pine straw, shredded bark, and compost. Pine straw is lightweight. It allows air to circulate. Shredded bark decomposes slowly. It provides long-lasting insulation. Compost adds nutrients to the soil. Avoid using heavy mulches like rocks. These can compact the soil. They can also prevent air circulation. Apply a 2-3 inch layer of mulch around the base of the fern. Keep the mulch away from the crown of the plant. This prevents rot. The right mulch helps protect your ferns. It also improves the soil.
Fun Fact or Stat: Some fern species can survive temperatures as low as -20°F with proper winter protection!

Mulching for Winter Fern Protection
Mulching is a great way to protect ferns in winter. It acts like a blanket for the soil. Mulch keeps the soil warmer. This protects the roots from freezing. When you care outdoor ferns winter, mulching is a must. Start by choosing the right mulch. Pine straw, shredded leaves, or wood chips work well. Avoid using heavy materials like rocks. These can compact the soil. Spread a 2-4 inch layer of mulch around the base of the fern. Be careful not to cover the crown of the plant. This can cause rot. Mulching also helps retain moisture. It prevents the soil from drying out. This is especially important in winter. Mulch also suppresses weeds. This reduces competition for nutrients. A well-mulched fern is a happy fern.
- Use organic mulches like pine straw.
- Apply a 2-4 inch layer around the base.
- Keep mulch away from the plant’s crown.
- Water the ferns before applying mulch.
- Check the mulch depth throughout winter.
Think of mulch as a cozy blanket. It keeps your ferns warm all winter long. But how does it really work? Mulch insulates the soil. It prevents temperature fluctuations. This means the soil stays warmer when it’s cold. It also stays cooler when it’s warm. Mulch also helps retain moisture. This is important because dry soil can freeze more easily. The type of mulch matters too. Organic mulches decompose over time. This adds nutrients to the soil. These nutrients help your ferns grow strong. Mulching is a simple yet effective way. It protects your ferns from winter’s harsh conditions. It ensures they come back healthy in the spring.
How often should I replace the mulch?
Mulch breaks down over time. It needs to be replaced to maintain its effectiveness. How often should you replace it? It depends on the type of mulch. Organic mulches decompose faster. You may need to replace them every year. Inorganic mulches last longer. But they don’t add nutrients to the soil. Check the mulch depth in the fall. Add more mulch if it’s less than 2 inches thick. You can also add more mulch in the spring. This helps replenish what has decomposed. Regular maintenance ensures the mulch does its job. It protects your ferns throughout the winter. It also improves your soil over time.
Can I use leaves as mulch for ferns?
Yes, you can use leaves as mulch for ferns. Leaves are a great natural mulch. They are readily available in the fall. Shredded leaves work best. Whole leaves can mat together. This prevents air circulation. Shredding the leaves helps them decompose faster. It also prevents them from compacting. Use a lawnmower or leaf shredder to shred the leaves. Apply a 2-4 inch layer around the base of the fern. Leaves provide insulation. They also add nutrients to the soil as they break down. Make sure the leaves are dry before using them. Wet leaves can promote fungal growth. Using leaves as mulch is a great way. It recycles yard waste and protects your ferns.
How does mulch protect against temperature changes?
Mulch acts like a buffer. It protects the soil from temperature changes. In winter, it keeps the soil warmer. It prevents the soil from freezing solid. In summer, it keeps the soil cooler. It prevents the soil from overheating. This is important because extreme temperatures can harm plant roots. Mulch also helps retain moisture. This prevents the soil from drying out. Dry soil is more susceptible to temperature changes. Mulch creates a more stable environment for your ferns. This helps them thrive year-round. It reduces stress on the plants. This makes them more resilient to diseases and pests.
Fun Fact or Stat: A 4-inch layer of mulch can keep the soil up to 20°F warmer than bare ground!
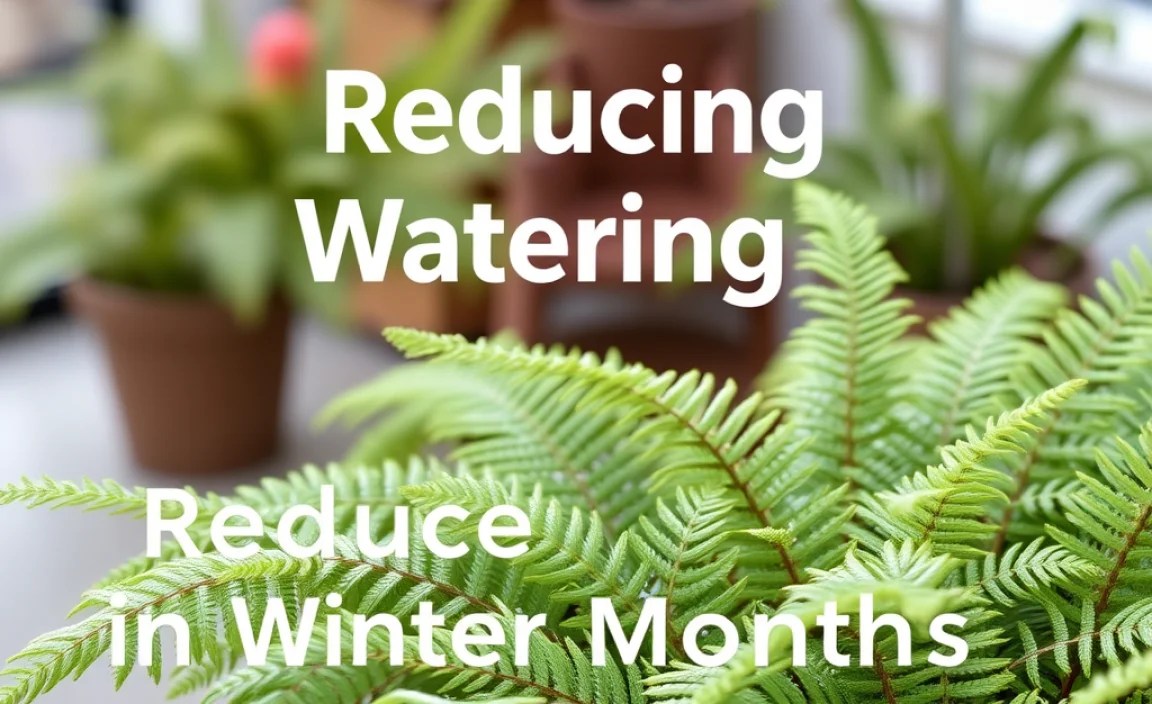
Reducing Watering in Winter Months
Watering is essential for plant health. But too much water can be harmful, especially in winter. When you care outdoor ferns winter, reduce watering. Ferns need less water when it’s cold. The soil stays moist longer. Overwatering can lead to root rot. This can kill your ferns. Check the soil moisture before watering. Stick your finger into the soil. If it feels moist, don’t water. Only water when the soil feels dry to the touch. Water in the morning. This gives the plants time to dry out before nightfall. Avoid watering in the evening. This can promote fungal growth. Adjust your watering schedule. This helps your ferns survive winter.
- Check soil moisture before watering.
- Water only when the soil is dry.
- Water in the morning, not the evening.
- Reduce watering frequency significantly.
- Ensure good drainage to prevent root rot.
Imagine your ferns are like sleeping bears. They need less energy in winter. They don’t need as much water. Overwatering in winter can be very harmful. The cold, wet soil can damage the roots. This can lead to root rot. Root rot is a serious problem. It can kill your ferns. To prevent this, reduce watering. Let the soil dry out between waterings. Check the soil moisture regularly. Use your finger or a moisture meter. Water only when the top inch of soil is dry. This helps your ferns stay healthy. They will be ready to grow again in spring.
How do I know if I am overwatering my ferns?
Overwatering is a common mistake. It can be hard to tell if you’re doing it. Look for signs of overwatering. Yellowing leaves are a common symptom. The leaves may also feel soft and mushy. The soil may be constantly wet. There may be a foul odor coming from the soil. These are all signs of root rot. If you see these signs, stop watering immediately. Allow the soil to dry out completely. You may need to repot the fern. Remove any damaged roots. Use fresh, well-draining soil. Adjust your watering schedule. Water less frequently. Overwatering can be fixed if you catch it early.
What type of water is best for ferns?
The type of water you use matters. Ferns are sensitive to chemicals. Tap water can contain chlorine and fluoride. These can harm your ferns. Rainwater is the best option. It is free of chemicals. It is also naturally soft. If you don’t have access to rainwater, use distilled water. You can also use tap water. Let it sit out for 24 hours. This allows the chlorine to evaporate. Avoid using softened water. It contains high levels of salt. This can damage your ferns. Using the right type of water helps your ferns thrive. It prevents chemical buildup in the soil.
Should I fertilize my ferns in the winter?
Fertilizing is important for plant growth. But ferns don’t need fertilizer in winter. They are mostly dormant. They are not actively growing. Fertilizing can actually harm them. It can cause salt buildup in the soil. This can damage the roots. Wait until spring to fertilize your ferns. Use a balanced fertilizer. Follow the instructions on the label. Fertilize sparingly. Over-fertilizing can burn the roots. A light feeding in spring is all your ferns need. They will be ready to grow strong and healthy.
Fun Fact or Stat: Ferns require up to 50% less water during their dormant winter phase!

Providing Shelter from Harsh Winds
Harsh winds can damage ferns. They can dry out the fronds. They can even break the stems. When you care outdoor ferns winter, protect them from the wind. Choose a sheltered location for your ferns. Plant them near a wall or fence. This blocks the wind. You can also use windbreaks. These are temporary barriers that protect plants. Burlap screens or blankets work well. Place them on the windward side of the ferns. This blocks the wind. For potted ferns, move them to a sheltered spot. A garage or shed works well. Just make sure they still get some light. Protecting your ferns from the wind helps them survive winter. They will be healthier in the spring.
- Plant ferns in sheltered locations.
- Use windbreaks like burlap screens.
- Move potted ferns to a protected area.
- Ensure adequate light even when sheltered.
- Check wind protection after storms.
Imagine the wind as a bully. It’s trying to knock your ferns down. You need to protect them. How can you do this? Start by choosing the right location. A spot that’s naturally sheltered is best. This could be near a building. Or under a tree. If you can’t move your ferns, create a windbreak. Use burlap or plastic sheeting. Attach it to stakes around the ferns. Make sure the windbreak is tall enough. It needs to block the wind from hitting the ferns. Check the windbreak regularly. Make sure it’s still secure. Strong winds can knock it down. Protecting your ferns from the wind is important. It keeps them healthy and strong.
What are the best materials for windbreaks?
The best materials for windbreaks are durable and effective. Burlap is a good option. It is natural and breathable. It allows some air to circulate. This prevents moisture buildup. Plastic sheeting is another option. It is waterproof and blocks the wind completely. However, it can trap moisture. This can lead to fungal growth. Use plastic sheeting carefully. Make sure there is good air circulation. Snow fences are also effective. They are designed to block the wind. They are often used in snowy areas. Choose a material that is appropriate for your climate. Make sure it is strong enough to withstand the wind.
How close should windbreaks be to the ferns?
The distance of the windbreak is important. If it’s too close, it can block sunlight. If it’s too far away, it won’t be effective. Place the windbreak 2-3 feet away from the ferns. This allows sunlight to reach the plants. It also provides adequate wind protection. The height of the windbreak matters too. It should be taller than the ferns. This ensures the wind is blocked. Adjust the distance and height as needed. Consider the size of your ferns. Also consider the direction of the wind. Experiment to find the best placement for your windbreak.
What if my ferns are in hanging baskets?
Hanging baskets are more exposed to the wind. They need extra protection. Move the hanging baskets to a sheltered location. A porch or patio is a good option. You can also bring them indoors. Place them near a window. This provides adequate light. If you can’t move the baskets, use a windbreak. Wrap the baskets in burlap or plastic sheeting. Secure the material with twine or tape. Make sure the material is breathable. This prevents moisture buildup. Check the baskets regularly. Make sure they are still secure. Wind can easily knock them down. Extra care is needed for hanging baskets.
Fun Fact or Stat: Windbreaks can reduce wind speed by up to 75% in the protected area!
Protecting Ferns from Snow and Ice
Snow and ice can be heavy. They can damage fern fronds. They can even break the stems. When you care outdoor ferns winter, protect them from snow and ice. Gently brush off snow from the fronds. Use a soft brush or broom. Be careful not to damage the plant. Cover the ferns with a blanket or tarp. This protects them from heavy snow. Remove the cover when the snow stops. Ice can be more difficult to remove. Avoid trying to break off ice. This can damage the plant. Let the ice melt naturally. You can also use de-icing salts. But use them sparingly. They can harm the soil. Protecting your ferns from snow and ice helps them survive winter. They will be healthier in the spring.
| Protection Method | Pros | Cons |
|---|---|---|
| Brushing off snow | Simple, prevents frond damage | Time-consuming, may not be effective for heavy snow |
| Covering with blanket | Protects from heavy snow, easy to do | Can trap moisture, needs to be removed |
| De-icing salts | Melts ice quickly | Can harm soil, use sparingly |
| Letting ice melt naturally | No risk of damage, environmentally friendly | Slow, may not be practical in all situations |
Imagine snow and ice as a heavy weight. It’s pressing down on your ferns. You need to relieve the pressure. How can you do this? Start by gently brushing off the snow. Use a soft brush. Be careful not to break the fronds. If there is a lot of snow, cover the ferns. Use a blanket or tarp. This protects them from the weight of the snow. Remember to remove the cover after the snow stops. Ice is more difficult to deal with. Don’t try to chip it off. This can damage the plant. Let the ice melt on its own. Protect your ferns from snow and ice. They will thank you in the spring.
Is it safe to use salt to melt ice around ferns?
Salt can be effective for melting ice. But it can also harm plants. Salt draws moisture out of the soil. This can dehydrate the ferns. It can also damage the roots. Use salt sparingly around ferns. Or avoid using it altogether. There are alternative de-icing methods. Sand or gravel can provide traction. They don’t harm plants. Calcium chloride is another option. It is less harmful than rock salt. But it should still be used sparingly. Protect your ferns from salt damage. Use alternative de-icing methods. Or use salt carefully and sparingly.
How can I prevent ice from forming on my ferns?
Preventing ice formation is better than trying to remove it. Cover the ferns before a freeze. This protects them from ice. Use a blanket or tarp. Make sure the cover is breathable. This prevents moisture buildup. You can also use anti-desiccant sprays. These sprays protect the fronds from drying out. They also prevent ice from forming. Apply the spray before a freeze. Follow the instructions on the label. Water the ferns before a freeze. This hydrates the plants. It makes them more resistant to cold damage. Prevention is the best approach to protecting your ferns from ice.
What should I do if my ferns are covered in ice?
If your ferns are covered in ice, don’t panic. Avoid trying to break off the ice. This can damage the plant. Let the ice melt naturally. This is the safest option. If you need to remove the ice, use warm water. Gently pour warm water over the ice. This will help it melt. Be careful not to use hot water. This can damage the plant. After the ice melts, check the ferns. Look for any signs of damage. Prune off any broken or damaged fronds. Provide extra care to help the ferns recover. Water them well. Fertilize them lightly in the spring.
Fun Fact or Stat: Ice can weigh up to 57 pounds per cubic foot, putting significant stress on plant structures!
Bringing Potted Ferns Indoors
Potted ferns are easier to protect in winter. You can bring them indoors. This shields them from the cold. When you care outdoor ferns winter, consider this option. Before bringing them inside, check for pests. Inspect the leaves and soil. Look for insects or diseases. Treat any problems before bringing them in. Choose a bright location indoors. Ferns need light, even in winter. A sunny window is ideal. Keep the ferns away from drafts. Cold air can damage them. Water the ferns less often indoors. The air is drier. The soil will stay moist longer. Bringing potted ferns indoors is a simple way. It protects them from winter’s harsh conditions.
- Inspect ferns for pests before bringing them in.
- Choose a bright, draft-free location indoors.
- Reduce watering frequency.
- Maintain humidity with a humidifier or pebble tray.
- Monitor for signs of stress like yellowing leaves.
Imagine your ferns are going on vacation. They’re leaving the cold outside. They are coming to a warm, cozy home. But bringing them indoors isn’t always easy. The change in environment can be stressful. The air indoors is drier. The light is different. To make the transition smoother, prepare your ferns. Water them well before bringing them in. This hydrates them. Choose a spot that mimics their natural habitat. Ferns like bright, indirect light. They also like humidity. Place a humidifier near the ferns. Or put them on a tray of pebbles and water. This increases humidity. Check the ferns regularly. Look for signs of stress. Adjust their care as needed. Your ferns will adjust to their new home.
How do I adjust to lower humidity indoors?
Indoor air is often dry, especially in winter. This can be a problem for ferns. They need humidity to thrive. There are several ways to increase humidity. Use a humidifier. This adds moisture to the air. Place the humidifier near the ferns. Mist the ferns regularly. Use a spray bottle to mist the leaves. This increases humidity around the plants. Group plants together. This creates a microclimate with higher humidity. Place the ferns on a tray of pebbles and water. The water evaporates. This increases humidity. Adjusting to lower humidity is important. It keeps your ferns healthy indoors.
What type of light do indoor ferns need?
Ferns need bright, indirect light. Avoid direct sunlight. It can burn the leaves. A north-facing window is ideal. It provides consistent, indirect light. An east-facing window can also work. It provides morning sunlight. But it’s not as intense. A south-facing window can be too bright. Use a sheer curtain to filter the light. Artificial light can also be used. Use fluorescent or LED grow lights. Place the lights a few feet above the ferns. Provide 12-14 hours of light per day. The right type of light is essential for healthy ferns.
How often should I water indoor ferns?
Watering is important for indoor ferns. But overwatering can be harmful. Check the soil moisture before watering. Stick your finger into the soil. If it feels dry, water the ferns. Water thoroughly. Let the excess water drain out of the pot. Don’t let the ferns sit in standing water. This can lead to root rot. Water less frequently in winter. The air is drier. The soil stays moist longer. Adjust your watering schedule as needed. Consider the humidity and temperature. The right watering schedule keeps your ferns healthy.
Fun Fact or Stat: Indoor humidity levels are often 20-40% lower in winter compared to summer!
Choosing Winter-Hardy Fern Varieties
Not all ferns are created equal. Some are more tolerant of cold weather. Choosing winter-hardy varieties is smart. It makes care outdoor ferns winter easier. These ferns can withstand colder temperatures. They require less protection. Some popular winter-hardy ferns include Christmas ferns. These ferns stay green all winter. They provide year-round interest. Ostrich ferns are also hardy. They die back in winter. But they return in spring. Maidenhair ferns are another good choice. They are delicate but surprisingly resilient. Research different fern varieties. Choose ones that are suitable for your climate. This reduces the need for extensive winter protection. Your ferns will thrive even in cold weather.
- Research hardy fern varieties for your region.
- Christmas ferns stay green all winter.
- Ostrich ferns die back but return in spring.
- Maidenhair ferns are surprisingly resilient.
- Consider native ferns for natural hardiness.
Imagine you’re picking a winter coat. You want one that’s warm and durable. The same goes for ferns. Choose varieties that can handle the cold. How do you know which ones are hardy? Look for information about their cold hardiness. This is usually listed on the plant label. Or you can find it online. Choose ferns that are rated for your USDA plant hardiness zone. This ensures they can survive your winter temperatures. Hardy ferns may still need some protection. But they require less care than tender varieties. Choosing the right ferns makes winter care much easier. You will enjoy their beauty year after year.
What are the best native ferns for my region?
Native ferns are adapted to your local climate. They are often more resilient to cold weather. Research native ferns for your region. Contact your local extension office. Or consult a native plant guide. They can provide information about native ferns. Some popular native ferns include sensitive ferns. These ferns are easy to grow. They tolerate a wide range of conditions. Cinnamon ferns are another good choice. They have beautiful cinnamon-colored fronds. Lady ferns are also native to many regions. They are delicate but hardy. Choosing native ferns supports local ecosystems. It also makes winter care easier.
How do I find out my USDA plant hardiness zone?
The USDA plant hardiness zone map is a valuable tool. It provides information about average winter temperatures. This helps you choose plants that can survive in your area. You can find your hardiness zone online. Go to the USDA website. Enter your zip code. The map will show your hardiness zone. The zones range from 1 to 13. Each zone represents a 10°F difference in average winter temperature. Use your hardiness zone to choose plants. This ensures they are adapted to your climate. It also makes gardening easier and more successful.
Do hardy ferns still need winter protection?
Even hardy ferns can benefit from winter protection. While they are more tolerant of cold weather. They can still be damaged by extreme temperatures. Mulch helps insulate the soil. It protects the roots from freezing. Windbreaks protect the ferns from drying winds. Covers protect them from heavy snow and ice. Provide extra protection during severe weather. Monitor the weather forecast. Take action when needed. Even hardy ferns appreciate a little extra care in winter.
Fun Fact or Stat: Native plants are up to 10 times more resilient and require less maintenance than non-native species!
Summary
Care outdoor ferns winter is important. It helps ensure they survive until spring. Start by preparing your ferns for the cold. Clean up around them. Check the soil drainage. Add compost for nutrients. Mulch is essential. It insulates the soil. It protects the roots. Reduce watering in winter. Ferns need less water when it’s cold. Protect your ferns from harsh winds. Use windbreaks or sheltered locations. Protect them from snow and ice. Brush off snow gently. Cover them with a blanket. Potted ferns can be brought indoors. This provides complete protection. Choose winter-hardy fern varieties. They require less care. By following these tips, you can help your ferns thrive. They will be beautiful in the spring.
Conclusion
Taking the time to care outdoor ferns winter is well worth the effort. By following these simple steps, you can protect your ferns from the harsh conditions. You will ensure they return strong and healthy in the spring. Remember to mulch, reduce watering, and provide shelter from wind and snow. With a little bit of attention, your ferns will thrive for years to come. So get out there and give your ferns the winter care they need!
Frequently Asked Questions
Question No 1: How do I know if my fern is dead or just dormant?
Answer: It can be tricky to tell! Gently scratch the stem near the base of the plant. If it’s green underneath, it’s still alive. If it’s brown and brittle, the stem is dead. Even if the fronds are brown, the plant may still be alive. Dormant ferns will often have new growth in the spring. Give it some time and see if it comes back. Proper care outdoor ferns winter will improve its chances of survival.
Question No 2: Can I leave my ferns outside all winter if I live in a mild climate?
Answer: It depends on your specific climate and the type of fern. Some ferns are more cold-hardy than others. Even in mild climates, temperatures can dip below freezing. This can damage sensitive ferns. It’s best to provide some protection. Mulch around the base of the plant. Cover it with a blanket during cold snaps. If you’re unsure, it’s better to err on the side of caution. Give your ferns some extra care outdoor ferns winter. This increases their chances of survival.
Question No 3: What are some signs that my ferns are not getting enough water in the winter?
Answer: Even though you need to reduce watering in winter, ferns still need some moisture. Signs of underwatering include dry, brittle fronds. The leaves may also turn yellow or brown. The soil will feel dry to the touch. If you notice these signs, water your ferns. Water them thoroughly. Let the excess water drain out of the pot. Adjust your watering schedule as needed. Remember to check the soil moisture regularly. This helps you determine when to water.
Question No 4: Is it better to move my ferns to a garage or shed for the winter, or should I bring them inside the house?
Answer: Both options can work, depending on your situation. A garage or shed provides protection from the cold. But it may not provide enough light. If you choose this option, make sure the ferns get some light. A sunny window is ideal. Bringing them inside the house provides more consistent temperatures. It also provides more light. However, the air indoors is drier. You’ll need to increase humidity. Consider the pros and cons of each option. Choose the one that best meets your ferns’ needs. Remember, proper care outdoor ferns winter is key.
Question No 5: How do I prevent pests from infesting my ferns when I bring them indoors for the winter?
Answer: Pests can be a problem when bringing plants indoors. Inspect your ferns carefully before bringing them in. Look for insects or diseases. Pay close attention to the undersides of the leaves. Treat any problems before bringing them inside. Use insecticidal soap or neem oil. Quarantine the ferns for a few weeks. This prevents pests from spreading to other plants. Monitor the ferns regularly. Look for signs of infestation. Take action quickly if you see any pests. Prevention is key to keeping your ferns healthy.
Question No 6: What should I do with the dead fronds on my ferns in the spring?
Answer: In the spring, remove any dead or damaged fronds. This helps the plant focus its energy on new growth. Use clean, sharp scissors or pruning shears. Cut the fronds close to the base of the plant. Be careful not to damage the healthy fronds. Removing dead fronds improves the appearance of the plant. It also helps prevent the spread of disease. Proper care outdoor ferns winter and spring ensures healthy growth.
