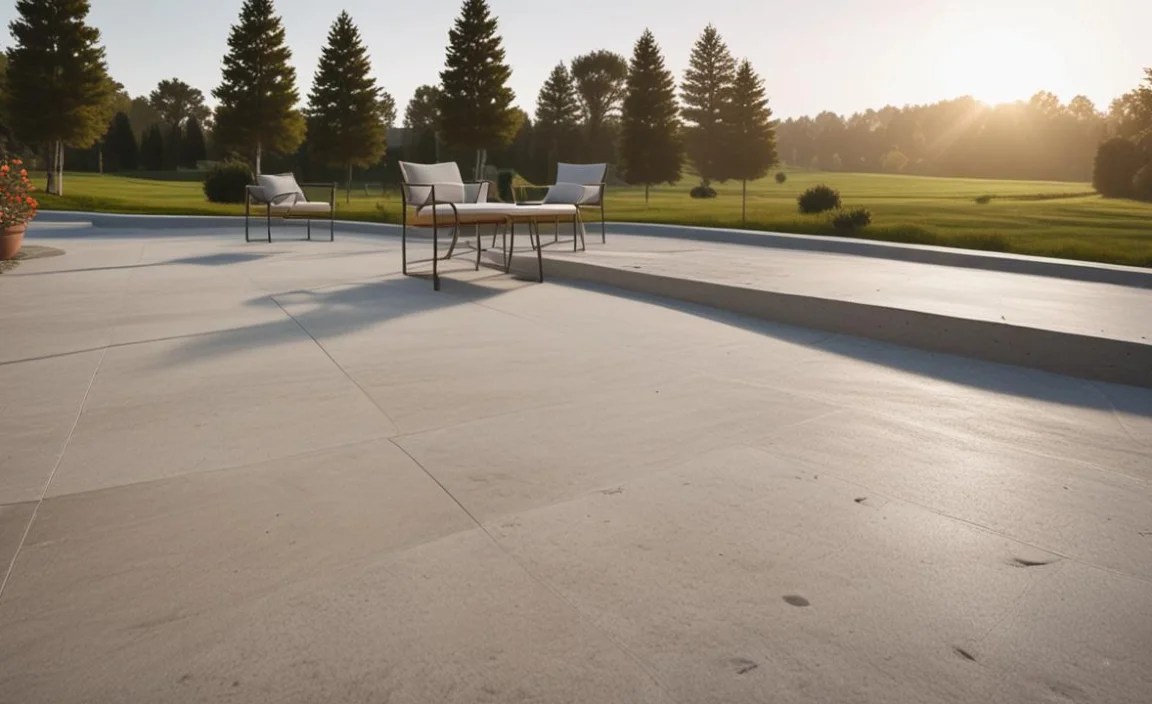
Did you ever build a sandcastle at the beach? What held it together? Cement for outdoor projects works a bit like that! It helps things stick together and stay strong. It is used to build things that can handle sun, rain, and snow.
Have you seen a sidewalk crack? Using the right kind of cement for outdoor use can stop that! It is important to choose the best type so things last a long time. Let’s learn more about it!
Cement for outdoor spaces is a very important building material. It can make our world a better place. Let’s find out how!
Key Takeaways
- Using the correct cement for outdoor projects ensures long-lasting results.
- Different types of cement exist, each suited for specific outdoor uses.
- Proper mixing and application are key to prevent cracks and damage.
- Consider weather conditions when working with cement outdoors.
- Always follow safety guidelines when handling cement and related materials.
Understanding Different Types of Cement for Outdoor

When you’re planning an outdoor project, choosing the right cement for outdoor use is super important. Not all cement is the same! Different types have different strengths and work best in different situations. For example, some cement is great for building a strong patio that can handle lots of sunshine. Other types are better for fixing a leaky fountain. Understanding the differences will help your project last longer and look great. Think of it like choosing the right tool for a job – a hammer won’t work for painting, and the wrong cement won’t work for your outdoor project!
- Portland cement is a common choice.
- It’s strong and good for many projects.
- Rapid-setting cement dries very quickly.
- Use it when you need a fast fix.
- White cement is used for decoration.
- It makes things look bright and clean.
Choosing the right type of cement for outdoor projects can seem tricky, but it doesn’t have to be! Think about what you’re building and where it is. Will it be in a place that gets a lot of rain? Will it need to hold a lot of weight? Asking these questions will help you pick the best cement for the job. Also, don’t be afraid to ask for help at the hardware store. The people who work there can give you advice and help you find exactly what you need. They know a lot about cement and can guide you to make the best choice for your project.
Fun Fact or Stat: The Romans used a type of cement to build structures that still stand today, over 2000 years later!
What is Portland Cement?
Have you ever seen a big construction site? Chances are they’re using Portland cement. Portland cement is a very common type of cement. It is used in many different projects. But why is it called Portland? It’s named after a type of stone found in Portland, England. When the cement hardens, it looks similar to this stone! Portland cement is made by heating limestone and clay together. This creates a powder that, when mixed with water, becomes a strong, durable material. It’s like magic, but it’s really science!
What is Rapid-Setting Cement?
Imagine you’re fixing a broken step on your porch. You don’t want to wait days for the cement to dry! That’s where rapid-setting cement comes in handy. This type of cement hardens much faster than regular cement. It can set in just a few minutes! This is because it has special ingredients that speed up the drying process. Rapid-setting cement is great for small repairs and projects where you need a quick fix. It’s like having a superhero cement that saves the day when you’re in a hurry.
What is White Cement?
White cement is like the fancy cousin of regular cement. Instead of being gray, it’s bright white! This makes it perfect for projects where you want a clean, bright look. Have you ever seen a beautiful white statue in a park? It might be made of white cement! White cement is made with special ingredients that give it its color. It’s often used for decorative things like fountains, sculptures, and even fancy sidewalks. It can make any outdoor space look elegant and stylish. It’s like adding a touch of sparkle to your project!
Preparing the Area for Cement for Outdoor Projects

Before you start mixing cement for outdoor projects, you need to get the area ready. This is a very important step! Imagine trying to build a tower on a wobbly table. It won’t work very well, right? The same goes for cement. If the ground isn’t prepared right, your project might crack or fall apart. Make sure the area is clean and free of dirt, grass, and rocks. You might also need to add a base layer of gravel or sand to help with drainage. This will keep water from damaging the cement over time. Taking the time to prepare the area will help your project last for years to come!
- Clear away any plants or debris.
- Level the ground with a shovel.
- Add a layer of gravel for drainage.
- Compact the gravel with a tamper.
- Build a form to hold the cement.
- Make sure the form is level.
Think of preparing the area like getting ready to bake a cake. You need to have all your ingredients and tools ready before you start mixing. If you forget something, the cake might not turn out right. Preparing the area for cement for outdoor projects is the same. It’s all about making sure you have everything you need before you start. This includes tools like a shovel, a tamper, and a level. It also includes materials like gravel, sand, and wood for building a form. When you’re well-prepared, your cement project will be much easier and more successful.
Fun Fact or Stat: Preparing the ground properly can increase the lifespan of your cement project by up to 50%!
Why is Leveling Important?
Have you ever tried to stack blocks on a slanted surface? It’s really hard, and the tower always falls over! Leveling the ground before pouring cement is just as important. If the ground isn’t level, the cement will be thicker in some places and thinner in others. This can cause cracks and make the project weak. Leveling the ground ensures that the cement is evenly distributed and can support weight properly. It’s like making sure the foundation of a house is strong and stable.
What is a Cement Form?
Imagine you’re pouring juice into a glass. The glass holds the juice in place and gives it shape. A cement form does the same thing for cement! It’s a temporary structure that holds the wet cement in place while it hardens. Forms are usually made of wood or metal. They can be any shape you need, depending on your project. Building a strong and accurate form is very important. It ensures that your cement project has the correct shape and size. It’s like having a mold for your cement creation!
Why is Drainage Important?
Have you ever left a toy outside in the rain? What happened? It probably got wet and maybe even rusty! Water can also damage cement over time. When water gets under the cement, it can freeze and expand. This can cause cracks and make the cement break apart. Adding a layer of gravel or sand under the cement helps with drainage. It allows water to flow away from the cement and prevents it from causing damage. It’s like giving your cement project an umbrella to protect it from the rain!
Mixing Cement for Outdoor Use Correctly

Mixing cement for outdoor projects might seem like a simple task, but it’s actually very important to do it right! The correct mix will make your cement strong and durable. Too much water can make the cement weak and crumbly. Not enough water can make it hard to work with. Always follow the instructions on the cement bag. Use the right amount of water and mix it well. You can mix cement by hand with a shovel or use a cement mixer for larger projects. A good mix will look smooth and creamy, like thick oatmeal.
| Type of Cement | Water Ratio | Mixing Time | Ideal Use |
|---|---|---|---|
| Portland Cement | 1 part water to 4 parts cement | 3-5 minutes | Patios, sidewalks, foundations |
| Rapid-Setting Cement | 1 part water to 3 parts cement | 2-3 minutes | Quick repairs, setting posts |
| White Cement | 1 part water to 4 parts cement | 3-5 minutes | Decorative projects, sculptures |
| Mortar Mix | 1 part water to 5 parts mortar | 5-7 minutes | Laying bricks, stone work |
- Wear gloves and eye protection.
- Use a clean mixing container.
- Add water slowly while mixing.
- Mix until smooth and consistent.
- Avoid adding too much water.
- Use the cement within 30 minutes.
Think of mixing cement for outdoor projects like following a recipe for cookies. If you don’t use the right amounts of ingredients, the cookies won’t taste very good. The same goes for cement. Using the right amount of water and mixing it well will ensure that your cement is strong and durable. Always read the instructions on the cement bag carefully. They will tell you exactly how much water to use and how long to mix the cement. If you’re not sure, ask for help at the hardware store. They can show you how to mix cement properly and give you tips for success.
Fun Fact or Stat: The strength of cement can be reduced by up to 50% if it is mixed with too much water!
Why is the Right Water Ratio Important?
Have you ever made a drink that was too watery or too thick? It didn’t taste very good, right? The same thing happens with cement. If you add too much water, the cement will be weak and crumbly. If you don’t add enough water, it will be hard to work with. The right water ratio is like the perfect balance of ingredients. It ensures that the cement is strong, durable, and easy to use. Always follow the instructions on the cement bag to get the water ratio just right.
How Long Should You Mix Cement?
Imagine you’re stirring a pot of soup. You need to stir it long enough to mix all the ingredients together. But if you stir it too much, it might get mushy! The same is true for cement. You need to mix it long enough to combine all the ingredients. But if you mix it too long, it can start to set too quickly. The ideal mixing time is usually a few minutes. The cement should look smooth and creamy, like thick oatmeal. Follow the instructions on the cement bag for the best mixing time.
What Tools Do You Need for Mixing?
Imagine you’re building a treehouse. You need the right tools, like a hammer, saw, and nails. Mixing cement also requires the right tools. You’ll need a clean mixing container, a shovel or hoe, and water. For larger projects, you might want to use a cement mixer. This machine makes it easier to mix large amounts of cement. Using the right tools will make the job easier and help you get a better mix. It’s like having the perfect set of tools for your cement adventure!
Applying Cement for Outdoor Surfaces

Once you’ve mixed your cement for outdoor projects, it’s time to apply it! This is where you get to shape and mold the cement into the project you’re building. Use a trowel to spread the cement evenly over the surface. Make sure to fill in any cracks or gaps. Work quickly, because cement can start to harden fast. Smooth the surface with the trowel to create a nice, even finish. You can also use special tools to add texture or designs to the cement. Applying cement is like sculpting with a very strong material!
- Use a trowel to apply the cement.
- Spread it evenly over the surface.
- Fill in any cracks or gaps.
- Work quickly before it hardens.
- Smooth the surface with the trowel.
- Add texture or designs if desired.
- Clean your tools right after use.
Think of applying cement for outdoor projects like frosting a cake. You want to spread the frosting evenly and smoothly over the cake. The same goes for cement. You want to spread it evenly and smoothly over the surface you’re working on. Use a trowel to spread the cement and fill in any cracks or gaps. If you want a smooth finish, use the trowel to smooth the surface. If you want to add texture, use a special tool or brush. Applying cement is all about being creative and having fun with the material.
Fun Fact or Stat: Adding color to cement can make your outdoor projects look even more amazing and last longer!
How to Use a Trowel?
Have you ever seen a builder using a flat, rectangular tool? That’s a trowel! A trowel is like a magic wand for cement. It helps you spread, smooth, and shape the cement. To use a trowel, hold it at a slight angle to the surface. Scoop up some cement and spread it evenly. Use the trowel to smooth the surface and fill in any gaps. Practice makes perfect, so don’t worry if you don’t get it right away. With a little practice, you’ll be a trowel pro!
How to Create Texture on Cement?
Imagine you’re making a painting. You can use different brushes and tools to create different textures. You can do the same thing with cement! There are many ways to add texture to cement. You can use a brush, a sponge, or even your fingers! You can also use special tools designed for creating texture. Experiment with different techniques to see what you like best. Adding texture can make your cement project look unique and interesting.
What is a Float?
A float is another tool used to smooth and finish cement surfaces. It’s like a bigger, flatter version of a trowel. Floats are often made of wood or plastic. They’re used to create a smooth, even surface on large areas. To use a float, hold it flat against the cement and move it in a circular motion. This will help to remove any bumps or imperfections. A float is a great tool for creating a professional-looking finish on your cement project.
Curing Cement for Outdoor Durability
Curing cement for outdoor projects is like taking care of a baby plant. You need to give it the right conditions to grow strong. Curing is the process of keeping the cement moist while it hardens. This helps the cement gain strength and prevents it from cracking. You can cure cement by covering it with plastic, spraying it with water, or using a special curing compound. The curing process usually takes several days. The longer you cure the cement, the stronger it will be.
- Keep the cement moist for several days.
- Cover it with plastic sheeting.
- Spray it with water regularly.
- Use a curing compound if needed.
- Protect it from direct sunlight.
- Avoid walking on it during curing.
Think of curing cement for outdoor projects like letting bread rise. You need to give the dough time to rise so it becomes light and fluffy. Curing cement is the same. You need to give it time to harden and gain strength. Keeping the cement moist prevents it from drying out too quickly, which can cause cracks. The longer you cure the cement, the stronger it will be. So be patient and give your cement project the time it needs to cure properly.
Fun Fact or Stat: Properly cured cement can be twice as strong as cement that is not cured!
Why is Moisture Important for Curing?
Have you ever seen a plant that didn’t get enough water? It probably looked dry and wilted. Moisture is just as important for cement. When cement dries out too quickly, it can crack and become weak. Moisture helps the cement to harden properly and gain strength. Keeping the cement moist during the curing process is essential for a strong and durable project. It’s like giving your cement project a drink of water to help it grow strong.
How Long Should Cement Cure?
Imagine you’re baking a cake. You need to bake it for the right amount of time so it’s cooked all the way through. Curing cement is similar. You need to cure it for the right amount of time so it hardens properly. The curing time depends on the type of cement and the weather conditions. Generally, cement should be cured for at least three to seven days. The longer you cure it, the stronger it will be. Follow the instructions on the cement bag for the best curing time.
What is Curing Compound?
Have you ever used sunscreen to protect your skin from the sun? Curing compound is like sunscreen for cement! It’s a special liquid that you spray on the cement surface. It helps to keep the cement moist and prevents it from drying out too quickly. Curing compound is especially useful in hot or windy weather. It can help to ensure that the cement cures properly and becomes strong and durable. It’s like giving your cement project an extra layer of protection.
Protecting Cement for Outdoor Structures From Weather
Weather can be tough on cement for outdoor projects. Rain, sun, and freezing temperatures can all cause damage over time. To protect your cement project, you can use sealants. Sealants are special coatings that you apply to the cement surface. They help to prevent water from seeping into the cement and causing cracks. You can also use covers to protect the cement from the sun and rain. Regular maintenance, like cleaning and repairing cracks, can also help to extend the life of your cement project.
- Apply a sealant to the surface.
- Use covers to protect from sun and rain.
- Clean the cement regularly.
- Repair any cracks promptly.
- Avoid using harsh chemicals.
- Consider adding drainage.
Think of protecting cement for outdoor projects like taking care of your skin. You need to protect it from the sun, wind, and cold. Sealants are like sunscreen for cement. They help to protect it from the elements and prevent damage. Regular cleaning is like washing your face. It helps to remove dirt and grime. Repairing cracks is like treating a cut. It helps to prevent further damage. Taking care of your cement project will help it last for many years to come.
Fun Fact or Stat: Applying a sealant can double the lifespan of your outdoor cement structures!
What are Cement Sealants?
Imagine you’re wearing a raincoat to protect yourself from the rain. Cement sealants do the same thing for cement! They’re special coatings that you apply to the cement surface. They create a barrier that prevents water from seeping into the cement. This helps to prevent cracks and other damage. There are many different types of cement sealants available. Some are designed for specific types of weather conditions. Choose the right sealant for your project to ensure maximum protection.
How to Prevent Cracks in Outdoor Cement?
Have you ever seen a sidewalk with lots of cracks? It doesn’t look very nice, and it can be dangerous! Preventing cracks in outdoor cement is important for both appearance and safety. There are several things you can do to prevent cracks. Make sure the ground is properly prepared before pouring the cement. Use the right mix of cement and water. Cure the cement properly. And apply a sealant to protect it from the elements. Taking these steps will help to keep your cement project looking great for years to come.
Why is Drainage So Important for Cement?
Imagine you’re building a dam. You need to make sure there’s a way for the water to flow through, or the dam will collapse! Drainage is just as important for cement. When water gets trapped under the cement, it can freeze and expand. This can cause cracks and make the cement break apart. Adding drainage to your project helps to prevent this from happening. You can add drainage by using gravel, sand, or a drainage system. Proper drainage will help to protect your cement project from water damage.
Maintaining Your Cement for Outdoor Spaces
Taking care of your cement for outdoor spaces is like taking care of your toys. If you want them to last a long time, you need to clean them and fix them when they’re broken. Clean your cement surfaces regularly to remove dirt and grime. Use a mild soap and water. Avoid using harsh chemicals, which can damage the cement. Inspect the cement for cracks and repair them promptly. You can use a cement patch to fill in small cracks. Regular maintenance will help to keep your cement project looking great and lasting for years to come.
- Clean the surfaces regularly.
- Use mild soap and water.
- Inspect for cracks and damage.
- Repair cracks with cement patch.
- Reapply sealant as needed.
- Avoid using de-icing salts.
Think of maintaining cement for outdoor projects like taking care of a garden. You need to water the plants, pull the weeds, and trim the branches. Maintaining cement is the same. You need to clean it, repair it, and protect it from the elements. Regular maintenance will help to keep your cement project looking beautiful and functioning properly. It’s like giving your cement project the love and attention it needs to thrive.
Fun Fact or Stat: Regular maintenance can extend the life of your cement project by up to 25%!
How to Clean Outdoor Cement Surfaces?
Have you ever helped wash a car? You use soap and water to remove the dirt and grime. Cleaning outdoor cement surfaces is similar. Use a mild soap and water to scrub the surface. You can use a brush or a sponge to help remove stubborn dirt. Rinse the surface with clean water. Avoid using harsh chemicals, which can damage the cement. Regular cleaning will help to keep your cement project looking its best.
How to Repair Cracks in Cement?
Imagine you have a favorite toy that’s broken. You can fix it with glue or tape. You can also fix cracks in cement! Use a cement patch to fill in the cracks. Clean the area around the crack first. Then, apply the cement patch according to the instructions. Smooth the patch with a trowel. Let it dry completely. Repairing cracks promptly will help to prevent further damage to your cement project.
Why Avoid De-Icing Salts on Cement?
Have you ever seen salt used to melt ice on sidewalks in the winter? While salt can be helpful for melting ice, it can also damage cement. De-icing salts can seep into the cement and cause it to crack and crumble. If you need to de-ice your cement surfaces, use a safer alternative, such as sand or gravel. Protecting your cement from de-icing salts will help to extend its lifespan.
Summary
Choosing the right cement for outdoor use is very important. Different types of cement work best for different projects. Portland cement is a common choice for many outdoor tasks. Rapid-setting cement is great for quick repairs. White cement is perfect for decorative projects. Preparing the area properly before mixing the cement is also important. This includes clearing debris, leveling the ground, and building a form. Mixing the cement correctly is also important. Use the right amount of water and mix it well.
Applying the cement evenly and smoothly is key. Curing the cement properly helps it gain strength. Protect your outdoor cement structures from the weather. Use sealants, covers, and regular cleaning. Maintaining your cement surfaces will keep them looking great. Repair cracks quickly and avoid harsh chemicals. By following these tips, your outdoor cement projects will last for years.
Conclusion
Using the right kind of cement for outdoor projects makes a big difference. It helps things last longer and look better. Remember to prepare well, mix carefully, and protect your work. Now you know how to build strong and beautiful outdoor spaces! You can create patios, sidewalks, and more with confidence.
Frequently Asked Questions
Question No 1: What is the best type of cement for building a patio?
Answer: For building a patio, Portland cement is usually the best choice. It’s strong and durable, which means it can handle lots of foot traffic and different weather conditions. Make sure to mix it properly with the right amount of water. Prepare the ground well by leveling it and adding a gravel base for drainage. This will help your patio last a long time and look great. Also, think about adding a sealant after it cures to protect it from stains and water damage. This will keep your patio looking new for years to come. You can even add color to the cement for outdoor patio for a more customized look.
Question No 2: How can I prevent cracks in my outdoor cement projects?
Answer: Preventing cracks in outdoor cement projects is very important. First, make sure to prepare the ground properly. Level the ground and add a base of gravel for drainage. Second, use the right mix of cement and water. Too much or too little water can cause cracks. Third, cure the cement properly by keeping it moist for several days. Fourth, apply a sealant to protect it from the elements. Finally, avoid using de-icing salts in the winter. Following these steps will help to keep your cement projects crack-free. Using the correct cement for outdoor projects is also key to preventing cracks.
Question No 3: How long does it take for cement to dry?
Answer: The drying time for cement depends on several factors. These include the type of cement, the weather conditions, and the thickness of the cement. Generally, cement will be hard to the touch in about 24 to 48 hours. However, it takes longer for the cement to fully cure and reach its maximum strength. Curing can take anywhere from three to seven days, or even longer. During this time, it’s important to keep the cement moist to prevent cracks. Always follow the instructions on the cement bag for specific drying and curing times. Using the right cement for outdoor conditions also affects drying time.
Question No 4: Can I add color to cement?
Answer: Yes, you can definitely add color to cement! This is a great way to customize your outdoor projects and make them look more interesting. You can use special cement pigments to add color to the mix. These pigments come in a variety of colors, so you can choose the perfect shade for your project. Add the pigment to the dry cement mix before adding water. Mix it well to ensure the color is evenly distributed. Always follow the instructions on the pigment packaging for the correct amount to use. Adding color can make your cement for outdoor projects stand out.
Question No 5: What is the best way to clean outdoor cement surfaces?
Answer: Cleaning outdoor cement surfaces is important to keep them looking their best. Start by sweeping away any loose dirt or debris. Then, mix a mild soap with water in a bucket. Use a brush or sponge to scrub the cement surface. Rinse the surface with clean water. For stubborn stains, you can use a pressure washer, but be careful not to damage the cement. Avoid using harsh chemicals, which can also damage the cement. Regular cleaning will help to keep your outdoor cement surfaces looking clean and new.
Question No 6: What tools do I need for working with cement?
Answer: Working with cement requires a few essential tools. You’ll need a mixing container, such as a wheelbarrow or a large bucket. A shovel or hoe is needed for mixing the cement and water. A trowel is used for spreading and smoothing the cement. A level is important for making sure the surface is even. A tamper is used for compacting the ground. You’ll also need safety glasses and gloves to protect yourself. For larger projects, you might want to use a cement mixer. Having the right tools will make your cement project much easier and more successful. And remember, choosing the right type of cement for outdoor use is the first important tool!
