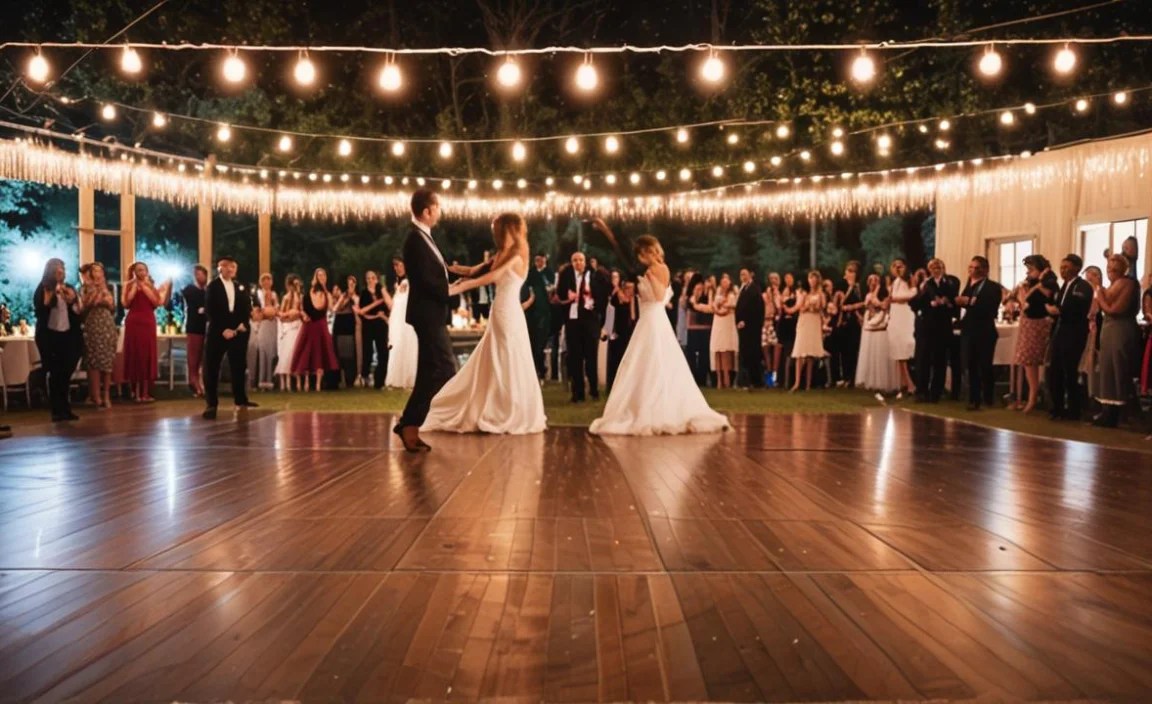
Outdoor weddings are so fun. Have you ever been to one? The sun shines, and the birds sing. Everyone feels happy. But what about dancing? Dancing outside can be tricky. Grass and dirt are not good for dancing. So, how can you have a great dance floor? One idea is a diy dance floor outdoor wedding.
It sounds hard, but it’s not. You can make a dance floor yourself. This will make your wedding even more special. Plus, it saves money. Let’s find out how to build one!
Key Takeaways
- Creating a diy dance floor outdoor wedding adds a personal touch to your special day.
- Use durable materials like wood or pallets to ensure a safe and stable surface.
- Proper planning and measuring are key to a successful DIY dance floor project.
- Decorate your dance floor with lights and flowers to match your wedding theme.
- Building your own dance floor can be much cheaper than renting one.
Planning Your Diy Dance Floor Outdoor Wedding

Planning is very important. Do you want your diy dance floor outdoor wedding to be perfect? You need to think about many things. First, where will it go? Choose a flat place. This will make building easier. Next, how big should it be? Think about how many people will dance. A small wedding needs a smaller floor. A big wedding needs a bigger floor. Then, what materials will you use? Wood is a good choice. It is strong and looks nice. Pallets are another idea. They are cheap and easy to find. Remember to measure everything. Write down the measurements. This will help you when you start building. Good planning makes everything easier later.
- Find a flat and even area for the dance floor.
- Measure the space to determine the size needed.
- Choose durable materials like wood or pallets.
- Consider the number of guests who will be dancing.
- Plan the design and layout of the dance floor.
- Think about how to decorate the dance floor.
Think about the weather too. Will it rain? If so, you might need a cover. A tent can protect the dance floor. It will also keep your guests dry. Think about the look of the dance floor. Do you want it to be plain? Or do you want to decorate it? Lights can make it look magical. Flowers can make it look pretty. You can add your own style. This will make your diy dance floor outdoor wedding unique. Don’t forget to ask for help. Friends and family can help you build it. It will be more fun with a team. Plus, it will get done faster. Now you are ready to start building!
Choosing the Right Location
Where should you put your dance floor? This is a very important question. The location can make or break your diy dance floor outdoor wedding. Look for a spot that is flat. This will make building much easier. If the ground is bumpy, it will be hard to make a level floor. Also, think about the view. Do you want the dance floor to have a nice backdrop? A beautiful view will make the dancing even more special. Consider the sun too. You don’t want the sun shining right in people’s eyes. Shade can make it more comfortable. Trees or a tent can provide shade. Think about these things when you choose the location.
Selecting Your Dance Floor Materials
What should you use to build your dance floor? This is another important question. The materials you choose will affect how the dance floor looks and feels. Wood is a popular choice. It is strong and looks classic. Pallets are a cheaper option. They can be painted or decorated. Plywood is another choice. It is smooth and easy to work with. Think about your budget. Also, think about the look you want. Do you want a rustic look? Pallets might be perfect. Do you want a more elegant look? Wood might be better. Choose materials that fit your style and budget for your diy dance floor outdoor wedding.
Determining the Size and Shape
How big should your dance floor be? And what shape should it be? These are good questions to ask. The size depends on how many people will be dancing. A small wedding can have a smaller dance floor. A big wedding needs a bigger dance floor. Think about the shape too. A square or rectangle is easy to build. But you could also do a circle or an oval. This might be more difficult. Measure your space carefully. Mark out the area where the dance floor will go. This will help you decide on the right size and shape for your diy dance floor outdoor wedding.
Fun Fact or Stat: Did you know that the average size of a wedding dance floor is 12×12 feet? This size can comfortably fit about 20-30 dancers!
Building a Simple Wooden Dance Floor

Building a wooden dance floor is a great project. It is perfect for a diy dance floor outdoor wedding. First, gather your materials. You will need wood planks. You will also need screws and a drill. Start by building a frame. The frame will hold the wood planks. Make sure the frame is strong. This will keep the dance floor stable. Next, attach the wood planks to the frame. Use screws to hold them in place. Make sure the planks are close together. You don’t want any gaps. Sand the surface to make it smooth. This will prevent splinters. Finally, paint or stain the wood. This will protect it from the weather. It will also make it look nice.
- Gather wood planks, screws, and a drill.
- Build a strong frame to support the floor.
- Attach the planks securely to the frame.
- Sand the surface to prevent splinters.
- Paint or stain the wood for protection.
- Consider adding a sealant for weather resistance.
Think about safety. Make sure the dance floor is level. Use shims to level it if needed. Check for any loose screws. Tighten them to prevent accidents. You can also add a non-slip surface. This will help people from slipping. Use a special paint or coating for this. Remember to test the dance floor before the wedding. Have some friends dance on it. This will help you find any problems. Fix them before the big day. Now you have a beautiful wooden dance floor. Your guests will love dancing on it at your diy dance floor outdoor wedding.
Creating the Frame
The frame is the most important part of the dance floor. It holds everything together. Without a strong frame, the dance floor will be wobbly. Use strong wood for the frame. Two-by-fours are a good choice. Cut the wood to the right size. Use screws to connect the pieces. Make sure the corners are square. A square frame is stronger. Add extra supports in the middle. This will help prevent sagging. The frame should be level. Use a level to check it. Adjust the frame as needed. A good frame will make your diy dance floor outdoor wedding dance floor last longer.
Attaching the Planks
Now it’s time to attach the wood planks to the frame. This is where your dance floor starts to look like a dance floor. Use screws to attach the planks. Space the screws evenly. This will make the planks more secure. Make sure the planks are straight. Use a level to check them. Leave a small gap between the planks. This will allow the wood to expand and contract. If the planks are too close together, they might buckle. Sand the edges of the planks. This will prevent splinters. A smooth surface is important for dancing at your diy dance floor outdoor wedding.
Sanding and Finishing
Sanding and finishing are the final touches. They make your dance floor look professional. Sand the entire surface of the dance floor. Use a sander for big areas. Use sandpaper for small areas. Start with rough sandpaper. Then use finer sandpaper. This will make the surface very smooth. Wipe off the dust after sanding. Now you can finish the dance floor. Paint or stain it to protect it. You can also add a sealant. This will protect it from the weather. Choose a color that matches your wedding theme. A well-sanded and finished dance floor will look amazing at your diy dance floor outdoor wedding.
Fun Fact or Stat: Sanding a wooden surface can increase its smoothness by up to 50%! A smooth surface is essential for a great dance floor.
Using Pallets for a Rustic Dance Floor
Pallets are a cheap and easy way to build a dance floor. They are perfect for a diy dance floor outdoor wedding with a rustic theme. You can often find pallets for free. Look at local businesses or online. Make sure the pallets are in good condition. Avoid pallets that are broken or damaged. Clean the pallets before you use them. You can use soap and water. Let them dry completely. Arrange the pallets in the desired shape. You can use them as they are. Or you can paint or stain them. Connect the pallets together. Use screws or nails. Make sure they are securely attached. Add some decorations. Lights and flowers can make it look festive.
| Material | Cost | Durability | Appearance |
|---|---|---|---|
| Wood Planks | High | High | Classic |
| Pallets | Low | Medium | Rustic |
| Plywood | Medium | Medium | Modern |
| Composite Decking | High | High | Modern |
- Find free or inexpensive pallets in good condition.
- Clean the pallets thoroughly before using them.
- Arrange the pallets in the desired layout.
- Connect the pallets securely with screws or nails.
- Paint or stain the pallets to match your theme.
- Add lights and decorations for a festive look.
- Ensure the surface is even and stable for dancing.
Pallets can be rough. Sand them down to make them smoother. This will prevent splinters. You can also add a layer of plywood on top. This will create a smoother surface. Secure the plywood to the pallets. Use screws or nails. Consider the height of the dance floor. Pallets can be quite high. This might be a problem for some guests. You can build a ramp to make it easier to access. Make sure the ramp is safe and sturdy. A pallet dance floor is a great way to save money. It also adds a unique touch to your diy dance floor outdoor wedding.
Finding and Preparing Pallets
Where can you find pallets? And how do you get them ready for your dance floor? These are important questions. Many businesses throw away pallets. Ask if you can have them. Check with grocery stores, hardware stores, and construction sites. Look online for free pallets. Once you have the pallets, clean them well. Use soap and water to remove dirt and grime. Check for any nails or staples. Remove them to prevent injuries. Sand the pallets to smooth out rough spots. This will make them safer to dance on. Preparing the pallets is key for your diy dance floor outdoor wedding.
Connecting the Pallets Securely
How do you keep the pallets from moving around? You need to connect them securely. Use screws or nails to attach the pallets together. Place the screws or nails at each corner. You can also add extra supports underneath. This will make the dance floor more stable. Check the connections regularly. Tighten any loose screws or nails. You can also use metal straps to connect the pallets. This will make them even more secure. A stable dance floor is important for safety at your diy dance floor outdoor wedding.
Decorating Your Pallet Dance Floor
Now for the fun part: decorating! This is where you can really make your dance floor special. Paint the pallets in your wedding colors. Add stencils or designs. String lights around the edges. This will create a magical atmosphere. Place flowers or greenery on the dance floor. This will add a touch of nature. Use fabric to drape over the pallets. This will soften the look. You can also add rugs or carpets. This will make the dance floor more comfortable. Let your creativity shine at your diy dance floor outdoor wedding.
Fun Fact or Stat: Reusing pallets is an eco-friendly way to build your dance floor! It helps reduce waste and gives the pallets a new life.
Decorating Your Diy Dance Floor Outdoor Wedding

Decorating your dance floor is so much fun. It’s like adding the final touch to a painting. Lights can make a big difference. String lights are easy to hang. They create a warm and inviting atmosphere. You can also use lanterns. They add a romantic touch. Flowers are another great idea. Place them around the edges of the dance floor. Use flowers that match your wedding theme. You can also use fabric. Drape it around the dance floor. This will make it look elegant. Think about adding a monogram. This is a special touch. It makes the dance floor unique to you. Don’t forget about safety. Make sure the decorations don’t get in the way of dancing. You want everyone to have fun at your diy dance floor outdoor wedding.
- Hang string lights for a warm atmosphere.
- Place lanterns for a romantic touch.
- Use flowers matching your wedding theme.
- Drape fabric for an elegant look.
- Add a monogram for a personal touch.
- Consider using rugs or carpets for comfort.
- Ensure decorations don’t obstruct dancing.
Consider the time of day. If your wedding is at night, lights are very important. They will make the dance floor visible. If your wedding is during the day, flowers and fabric will stand out more. Think about the style of your wedding. Is it rustic? Use natural decorations. Is it modern? Use sleek and simple decorations. You can also add candles. Place them in safe containers. They create a beautiful glow. Remember to have fun. Decorating your diy dance floor outdoor wedding should be enjoyable. It’s a chance to express your creativity. Ask for help from friends and family. They can offer great ideas. Together, you can create a stunning dance floor.
Adding Lights and Lanterns
Lights and lanterns can transform your dance floor. They create a magical atmosphere. String lights are a popular choice. They are easy to hang and look beautiful. You can use different types of string lights. Fairy lights are small and delicate. They create a soft glow. Edison bulbs are bigger and brighter. They add a vintage touch. Lanterns can also add a special touch. Place them around the edges of the dance floor. You can use paper lanterns or metal lanterns. Consider using colored lights. This can add a fun and festive vibe. Make sure the lights are safe. Use outdoor lights that are waterproof for your diy dance floor outdoor wedding.
Using Flowers and Greenery
Flowers and greenery can add a touch of nature to your dance floor. Place flowers around the edges of the dance floor. Use flowers that match your wedding theme. You can also use greenery. Greenery can add a fresh and natural look. Consider using potted plants. Place them around the dance floor. You can also hang flowers from above. This will create a beautiful canopy. Make sure the flowers are not poisonous. You don’t want anyone to get sick. You can also use artificial flowers. They are a good option if you are allergic to real flowers. Flowers and greenery will make your diy dance floor outdoor wedding look amazing.
Creating a Themed Look
What is the theme of your wedding? Use this theme to decorate your dance floor. If you have a rustic theme, use natural decorations. Wood, burlap, and lace are good choices. If you have a vintage theme, use old-fashioned decorations. Vintage lanterns, antique furniture, and lace tablecloths are good choices. If you have a modern theme, use sleek and simple decorations. Clean lines, geometric shapes, and metallic colors are good choices. You can also add personal touches. Add photos of you and your partner. Use your favorite colors. Your diy dance floor outdoor wedding should reflect your personality.
Fun Fact or Stat: The right lighting can increase dance floor activity by up to 30%! Good lighting encourages guests to get up and dance.
Ensuring Safety and Stability
Safety is very important. You want everyone to have fun at your diy dance floor outdoor wedding. But you also want them to be safe. Make sure the dance floor is stable. It should not wobble or shake. Use shims to level the dance floor. Check for any gaps or holes. Cover them up to prevent accidents. Add a non-slip surface. This will help prevent people from slipping. You can use a special paint or coating for this. Place lights around the dance floor. This will help people see where they are going. Make sure there are no cords or wires in the way. These can be tripping hazards. Check the dance floor regularly. Fix any problems right away.
- Level the dance floor using shims.
- Cover gaps and holes to prevent accidents.
- Apply a non-slip surface for better grip.
- Provide adequate lighting around the floor.
- Keep cords and wires out of the way.
- Regularly inspect the floor for issues.
- Have a first-aid kit nearby for emergencies.
Think about the weather. If it might rain, have a backup plan. A tent can protect the dance floor. It will also keep your guests dry. If it is very hot, provide shade. Trees or umbrellas can provide shade. Make sure the dance floor is not too close to any hazards. Avoid placing it near fire pits or sharp objects. Have a first-aid kit nearby. This is in case someone gets hurt. Designate someone to be in charge of safety. This person can check the dance floor regularly. They can also help if there is an accident. By taking these steps, you can ensure a safe and fun diy dance floor outdoor wedding.
Leveling the Surface
A level surface is essential for a safe dance floor. If the dance floor is not level, people might trip and fall. Use shims to level the dance floor. Shims are small pieces of wood or plastic. Place them under the frame to raise it up. Use a level to check the surface. Adjust the shims until the dance floor is level. Check the level in different directions. Make sure the entire surface is level. A level dance floor will make your diy dance floor outdoor wedding much safer.
Adding a Non-Slip Surface
Slipping is a common cause of accidents on dance floors. Prevent slips by adding a non-slip surface. You can use a special paint or coating. These products are designed to provide extra grip. Apply the coating according to the instructions. You can also use non-slip mats. Place them on the dance floor. Make sure the mats are securely attached. You can also use rugs or carpets. These can provide extra traction. Choose rugs that are non-slip. A non-slip surface will help prevent accidents at your diy dance floor outdoor wedding.
Providing Adequate Lighting
Good lighting is important for safety. It helps people see where they are going. Place lights around the dance floor. Use string lights, lanterns, or spotlights. Make sure the lights are bright enough. But not too bright. You don’t want to blind your guests. Avoid using strobe lights. These can cause seizures. Place the lights so they don’t create shadows. Shadows can make it hard to see. Use outdoor lights that are waterproof. This will protect them from the weather. Adequate lighting will make your diy dance floor outdoor wedding safer and more enjoyable.
Fun Fact or Stat: Non-slip surfaces can reduce slip and fall accidents by up to 80%! A safe dance floor is a happy dance floor.
Considering the Weather
The weather can be unpredictable. You need to be prepared for anything at your diy dance floor outdoor wedding. If it might rain, have a backup plan. A tent can protect the dance floor and your guests. Make sure the tent is big enough to cover the entire dance floor. If it is very hot, provide shade. Trees or umbrellas can provide shade. You can also use fans to keep people cool. If it is cold, provide heaters. Outdoor heaters can keep your guests warm. Think about the wind. Secure any decorations that might blow away. Check the weather forecast before the wedding. This will help you plan ahead. Be prepared for anything. This will ensure a successful diy dance floor outdoor wedding.
- Have a tent as a backup for rain.
- Provide shade for hot weather.
- Use fans or heaters for comfort.
- Secure decorations against wind.
- Check the weather forecast beforehand.
- Consider the ground conditions after rain.
- Have blankets available for cold evenings.
Rain can make the ground muddy. This can be a problem for your dance floor. Make sure the dance floor is elevated. This will keep it out of the mud. You can also use gravel or wood chips to create a dry surface around the dance floor. Wind can also be a problem. Secure the dance floor to the ground. This will prevent it from blowing away. Use stakes or weights to hold it in place. Be flexible. The weather can change quickly. Be ready to adjust your plans as needed. Your guests will appreciate your efforts to keep them comfortable at your diy dance floor outdoor wedding.
Having a Backup Plan for Rain
Rain can ruin an outdoor wedding. But you can be prepared. Have a backup plan in case it rains. Rent a tent to cover the dance floor. This will keep your guests dry. Choose a tent that is big enough to accommodate everyone. Make sure the tent is waterproof. Check the seams and zippers. You can also use a covered patio or porch. This can provide shelter from the rain. If you don’t have a tent or covered area, move the wedding indoors. Find a large room that can accommodate your guests. Be flexible. The most important thing is to keep everyone safe and dry at your diy dance floor outdoor wedding.
Providing Shade in Hot Weather
Hot weather can be uncomfortable for your guests. Provide shade to keep them cool. Use trees or umbrellas to create shade. You can also rent a shade structure. This will provide a large area of shade. Provide plenty of water and other drinks. This will help people stay hydrated. You can also use fans to circulate the air. Place the fans around the dance floor. Encourage your guests to take breaks. They can go inside to cool off. Be mindful of the heat. Take steps to protect your guests from the sun at your diy dance floor outdoor wedding.
Securing Against the Wind
Wind can be a problem at an outdoor wedding. It can blow away decorations and make it difficult to dance. Secure the dance floor to the ground. Use stakes or weights to hold it in place. Tie down any decorations that might blow away. Use strong rope or wire. Place heavy objects on top of tablecloths. This will prevent them from blowing off. Choose decorations that are wind-resistant. Avoid using lightweight materials. Be aware of the wind. Take steps to protect your wedding from the wind at your diy dance floor outdoor wedding.
Fun Fact or Stat: A tent can reduce the temperature inside by up to 20 degrees on a hot day! Providing shade is crucial for guest comfort.
Summary
Creating a diy dance floor outdoor wedding can be a fun and rewarding project. It allows you to personalize your special day and save money. Planning is key. Choose the right location and materials. Build the dance floor carefully. Decorate it to match your wedding theme. Remember to ensure safety and stability. Be prepared for any weather conditions. With a little effort, you can create a beautiful and memorable dance floor for your wedding. Your guests will love dancing the night away on your unique creation.
Conclusion
A diy dance floor outdoor wedding is a great way to add a personal touch to your big day. It takes some work, but the result is worth it. You get a unique dance floor that fits your style. Plus, you save money compared to renting one. So, grab your tools and get started. Your guests will be impressed with your creation. And you’ll have a dance floor that you can be proud of.
Frequently Asked Questions
Question No 1: How much does it cost to build a DIY dance floor?
Answer: The cost of a DIY dance floor varies. It depends on the materials you use. Pallets are the cheapest option. Wood planks are more expensive. Other costs include screws, paint, and decorations. A simple pallet dance floor might cost $50-$100. A wooden dance floor could cost $200-$500. Shop around for the best deals on materials. Consider using recycled materials to save money. Building a diy dance floor outdoor wedding saves significant money compared to renting.
Question No 2: How long does it take to build a dance floor?
Answer: Building a dance floor takes time. The time depends on the size and complexity. A simple pallet dance floor might take a day. A wooden dance floor could take several days. Gather your materials in advance. Enlist the help of friends and family. This will speed up the process. Don’t rush. Take your time to do it right. A well-built dance floor will last for years. Plan ahead for your diy dance floor outdoor wedding.
Question No 3: What tools do I need to build a dance floor?
Answer: You will need some basic tools. A drill is essential for screwing the pieces together. A saw is needed for cutting the wood. A level is important for making sure the dance floor is even. A sander is used for smoothing the surface. A tape measure is needed for measuring the materials. Safety glasses and gloves are also important. These will protect you from injury. Gather all your tools before you start. This will make the process easier for your diy dance floor outdoor wedding.
Question No 4: How do I make sure the dance floor is level?
Answer: Leveling the dance floor is very important. A level dance floor is safer and more enjoyable to dance on. Use shims to level the dance floor. Shims are small pieces of wood or plastic. Place them under the frame to raise it up. Use a level to check the surface. Adjust the shims until the dance floor is level. Check the level in different directions. Make sure the entire surface is level. A level dance floor will make your diy dance floor outdoor wedding a success.
Question No 5: How do I decorate the dance floor?
Answer: Decorating the dance floor is a fun part. Use lights to create a warm atmosphere. String lights are easy to hang. Lanterns add a romantic touch. Flowers can add a touch of nature. Use flowers that match your wedding theme. Fabric can be draped around the dance floor. This creates an elegant look. Add a monogram for a personal touch. Consider using rugs or carpets for comfort. Ensure decorations don’t obstruct dancing. Your decorations will make your diy dance floor outdoor wedding special.
Question No 6: How do I protect the dance floor from the weather?
Answer: The weather can be unpredictable. Be prepared for anything. If it might rain, have a backup plan. A tent can protect the dance floor and your guests. If it is very hot, provide shade. Trees or umbrellas can provide shade. If it is cold, provide heaters. Secure any decorations that might blow away. Check the weather forecast before the wedding. Be flexible. The weather can change quickly. These protections are crucial for your diy dance floor outdoor wedding.
