Have you ever felt sticky and gross while camping? Do you wish you could rinse off? A diy outdoor shower for camping can solve this problem! It’s a fun project. You can make one yourself. It will make your camping trips much better. Imagine feeling clean after a long day of hiking. Sounds great, right? Let’s learn how.
Key Takeaways
- Building a diy outdoor shower for camping enhances hygiene and comfort during trips.
- Simple designs use materials like buckets, tarps, and portable pumps.
- Consider water source, privacy, and environmental impact for responsible use.
- Test your shower at home before taking it on a camping adventure.
- Proper drainage and biodegradable soap protect the environment.
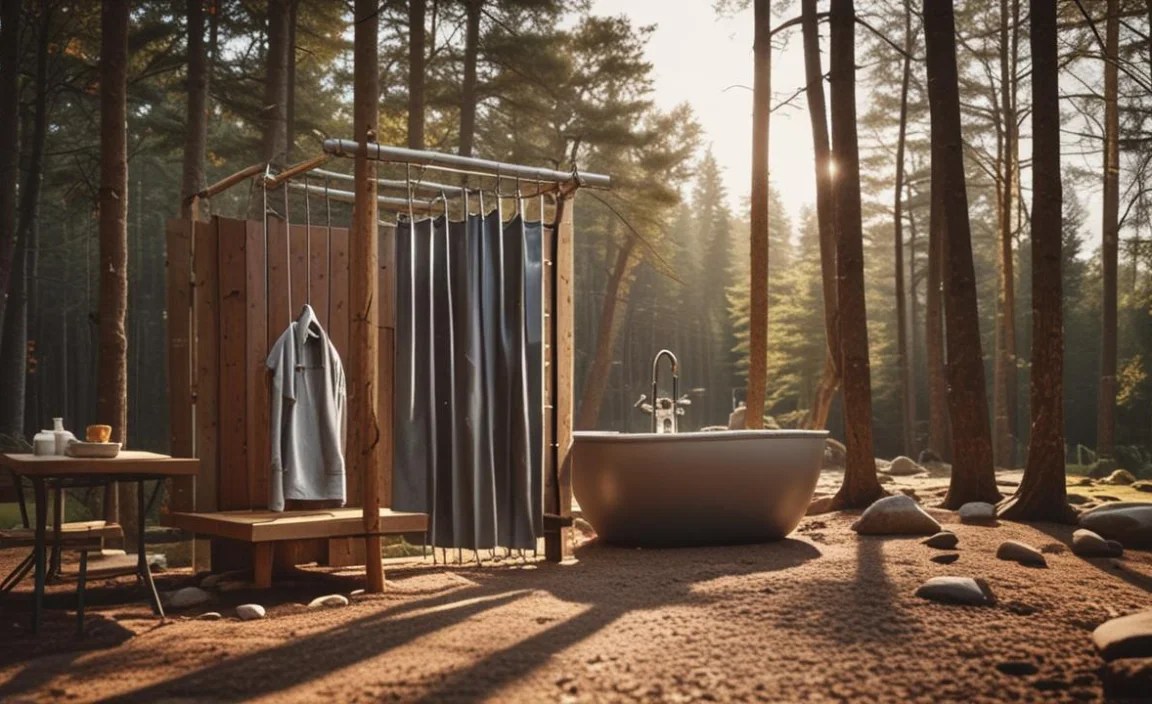
Simple Diy Outdoor Shower for Camping Ideas

Making your own diy outdoor shower for camping doesn’t have to be hard. There are many easy ideas you can try. One simple idea uses a bucket. You can hang a bucket from a tree. Add a shower head to the bottom. Another idea uses a portable water pump. The pump moves water from a container to the shower head. You can also use a solar shower bag. The sun heats the water in the bag. These showers are easy to set up. They make camping much more comfortable. Choose an idea that works for you.
- Use a bucket with a shower head.
- Try a portable water pump.
- Use a solar shower bag.
- Hang your shower from a tree.
- Find a private spot to shower.
When planning your diy outdoor shower for camping, think about where you will get water. Will you bring water with you? Can you get water from a stream or lake? If you use water from a natural source, make sure to filter it. This will remove any germs or dirt. Also, think about how you will dispose of the used water. You don’t want to pollute the environment. Use biodegradable soap. Dig a small hole to drain the water away from your campsite. Always leave your campsite cleaner than you found it. A little planning makes a big difference.
Fun Fact or Stat: Did you know that the first portable camping shower was invented in the late 19th century and used a hand pump to spray water?
What Kind of Bucket Should I Use?
Choosing the right bucket is important for your diy outdoor shower for camping. You want a bucket that is strong and easy to carry. A five-gallon bucket is a good size. It holds enough water for a quick shower. Make sure the bucket is clean. You don’t want to shower with dirty water. Some buckets have lids. Lids can help keep the water clean. You can also find buckets with handles. Handles make it easier to hang the bucket from a tree. Look for a bucket made of durable plastic. This will help it last longer. A good bucket makes your shower better.
How High Should I Hang the Shower?
The height of your shower matters for your diy outdoor shower for camping. Hang it high enough so you can stand under it. But don’t hang it so high that you can’t reach it. A good height is about six to seven feet. This will allow the water to flow down on you. You can use a rope to hang the shower. Make sure the rope is strong. You don’t want the shower to fall down while you are using it. Test the height before you start showering. Adjust it if needed. The right height makes showering easier.
What About Privacy?
Privacy is important when using a diy outdoor shower for camping. You don’t want everyone to see you showering. Find a private spot away from the main campsite. You can use a tarp to create a privacy screen. Hang the tarp around the shower area. Make sure the tarp is tall enough. You can also use trees and bushes for privacy. Choose a spot that is hidden from view. Tell your camping buddies where you are showering. This will help avoid any surprises. Respect your privacy and the privacy of others.
Making A Simple Water Pump Shower
A water pump shower is a great diy outdoor shower for camping idea. It uses a pump to move water from a container. This gives you a steady stream of water. You will need a water container, a pump, and a shower head. Submersible pumps work well. They sit inside the water container. Connect the pump to a battery or solar panel. This powers the pump. Attach a hose to the pump. Connect the shower head to the hose. Now you have a portable shower. It’s easy to set up and use. A water pump shower is a convenient way to stay clean while camping.
- Get a submersible pump.
- Use a water container.
- Connect the pump to a battery.
- Attach a hose and shower head.
- Test the pump before camping.
- Bring extra batteries.
Think about the size of your water container for your diy outdoor shower for camping. A larger container means more water. But it also means more weight to carry. A five-gallon container is a good balance. It provides enough water without being too heavy. Choose a container with a wide opening. This makes it easier to fill. Also, look for a container with a handle. This makes it easier to carry. Keep the container clean. This will help keep your shower water clean. A good container is important for a good shower.
Fun Fact or Stat: Solar-powered showers can heat water up to 110 degrees Fahrenheit on a sunny day, providing a warm and comfortable shower experience.
How Much Power Does the Pump Need?
The power of your pump matters for your diy outdoor shower for camping. You need a pump that is strong enough to move water. But you don’t want a pump that uses too much power. Look for a pump that runs on 12 volts. These pumps are efficient and easy to power with a battery. Check the pump’s flow rate. This tells you how much water the pump can move per minute. A flow rate of 1 to 2 gallons per minute is good. This will give you a steady stream of water. Choose a pump that meets your needs.
What Kind of Shower Head Should I Use?
The shower head affects your diy outdoor shower for camping experience. You want a shower head that provides a good spray. Look for a shower head with adjustable settings. This lets you control the water flow. Some shower heads have a wide spray. Others have a more focused stream. Choose a shower head that you like. A lightweight shower head is easier to handle. Make sure the shower head is durable. You don’t want it to break easily. A good shower head makes your shower more enjoyable.
How Do I Store the Shower When Not in Use?
Storing your shower properly is important for your diy outdoor shower for camping. When you are not using the shower, drain all the water. This prevents mold and mildew. Disconnect the pump and shower head. Store them in a dry place. Roll up the hose neatly. Keep it away from sharp objects. If you used a bucket, clean it out. Let it dry completely before storing it. This helps prevent odors. Pack all the shower parts in a bag or container. This keeps everything together. Proper storage helps your shower last longer.
Using A Solar Shower Bag For Camping

A solar shower bag is a simple diy outdoor shower for camping solution. It uses the sun to heat the water. You fill the bag with water and hang it in the sun. The black material of the bag absorbs heat. After a few hours, the water will be warm. Most solar shower bags have a shower head attached. This makes it easy to rinse off. Solar shower bags are lightweight and easy to pack. They are a great option for camping. Just remember to give the water enough time to heat up.
- Fill the bag with water.
- Hang it in the sun.
- Wait for the water to heat up.
- Use the attached shower head.
- Pack it easily when empty.
- Find a sunny spot to hang it.
When using a solar shower bag for your diy outdoor shower for camping, consider the weather. On a sunny day, the water will heat up quickly. On a cloudy day, it may take longer. You can also use a thermometer to check the water temperature. You don’t want the water to be too hot. Test the water before you start showering. If the water is too hot, add some cold water. Be careful not to overfill the bag. Overfilling can make it difficult to hang. A solar shower bag is a simple and eco-friendly option.
Fun Fact or Stat: A full solar shower bag can weigh over 40 pounds, so make sure the branch or support you hang it from is strong enough!
How Long Does It Take to Heat the Water?
Heating time depends on the weather for your diy outdoor shower for camping. On a hot, sunny day, the water can heat up in as little as three hours. On a cooler, cloudy day, it may take five to six hours. The size of the bag also affects heating time. Larger bags take longer to heat. Place the bag in direct sunlight for the best results. Check the water temperature regularly. You can use a thermometer or test it with your hand. Be patient and let the sun do its job. Warm water is worth the wait.
How Hot Does the Water Get?
The water temperature in a solar shower bag can get quite hot. It can reach up to 110 degrees Fahrenheit. This is hot enough to burn you. Always test the water before showering. If the water is too hot, add some cold water. You can also let the bag sit in the shade for a while. This will help it cool down. Be careful when handling the bag. The black material can get very hot in the sun. Use caution to avoid burns. Safety is important when using a solar shower bag for your diy outdoor shower for camping.
How Do I Clean the Shower Bag?
Keeping your shower bag clean is important for your diy outdoor shower for camping. After each use, drain all the water. Rinse the inside of the bag with clean water. You can use a mild soap if needed. Be sure to rinse the bag thoroughly. Let the bag dry completely before storing it. This prevents mold and mildew. You can also use a disinfectant to kill any germs. Follow the instructions on the disinfectant. Store the bag in a cool, dry place. Proper cleaning helps your shower bag last longer.
Choosing The Right Location For Your Shower

Choosing the right location is key for your diy outdoor shower for camping. You want a spot that is private and has good drainage. Look for a place away from trails and other campsites. This will give you more privacy. Make sure the ground slopes slightly. This will help the water drain away. Avoid setting up your shower near streams or lakes. This can pollute the water. Choose a spot that is easy to access. You don’t want to have to walk too far to take a shower. A good location makes your shower experience better.
- Find a private spot.
- Look for good drainage.
- Avoid streams and lakes.
- Choose an easily accessible location.
- Consider the wind direction.
- Check for poisonous plants.
Think about the wind direction when choosing a location for your diy outdoor shower for camping. You don’t want the wind to blow the water back at you. Try to set up your shower so the wind is at your back. This will help keep the water flowing away from you. Also, check for any poisonous plants in the area. Avoid setting up your shower near poison ivy or poison oak. These plants can cause a rash. Wear shoes while showering to protect your feet. A little planning can help you avoid discomfort. Your shower should be a pleasant experience.
Fun Fact or Stat: Some national parks have designated shower areas with proper drainage systems to minimize environmental impact.
What Kind of Ground Surface Is Best?
The ground surface affects your diy outdoor shower for camping experience. You want a surface that is stable and drains well. Gravel or sand are good options. These surfaces allow water to drain quickly. Avoid setting up your shower on grass. Grass can get muddy and slippery. Also, avoid setting up your shower on bare dirt. Dirt can turn into mud. If you have to use grass or dirt, try to create a drainage area. Dig a small trench to channel the water away. A good ground surface makes showering more comfortable.
How Far Away From My Tent Should It Be?
The distance from your tent is important for your diy outdoor shower for camping. You don’t want the shower to be too close to your tent. This can make your tent wet and muddy. A good distance is about 20 to 30 feet. This will give you enough space to shower without getting your tent wet. Also, consider the privacy of other campers. Don’t set up your shower too close to their tents. Respect their privacy and space. A little distance makes camping more enjoyable for everyone.
What About Wildlife?
Wildlife is something to consider for your diy outdoor shower for camping. You don’t want to attract animals to your shower area. Avoid using scented soaps or shampoos. These can attract animals. Store your soap and shampoo in a sealed container. Keep the container away from your shower area. After showering, clean up any spilled water. This will help prevent animals from being attracted to the area. Be aware of your surroundings. If you see any animals, give them space. Respect wildlife and their habitat.
Essential Items To Bring For Your Shower

Bringing the right items is important for your diy outdoor shower for camping. You will need soap, shampoo, a towel, and a washcloth. Choose biodegradable soap and shampoo. These are better for the environment. A quick-drying towel is a good choice. It will dry faster than a regular towel. A washcloth helps you scrub yourself clean. You may also want to bring a shower caddy. This will help you keep your items organized. Don’t forget to bring a pair of shoes to wear in the shower. These will protect your feet. Having the right items makes showering easier.
| Item | Description | Why You Need It |
|---|---|---|
| Biodegradable Soap | Soap that breaks down naturally. | Good for the environment. |
| Quick-Drying Towel | Towel that dries fast. | Dries quickly after use. |
| Shower Caddy | Container to hold shower items. | Keeps items organized. |
| Shower Shoes | Shoes worn in the shower. | Protects your feet. |
When packing for your diy outdoor shower for camping, think about the weight of your items. You don’t want to carry too much weight. Choose lightweight items whenever possible. Travel-sized toiletries are a good option. They are smaller and lighter than regular-sized items. You can also use a reusable water bottle. This will help you save water. Pack your items in a waterproof bag. This will protect them from getting wet. A little planning can help you pack efficiently. This makes your camping trip more enjoyable.
Fun Fact or Stat: Biodegradable soaps break down up to 90% faster than regular soaps, reducing their impact on the environment.
What Kind of Soap Should I Use?
The type of soap you use matters for your diy outdoor shower for camping. Choose biodegradable soap. This type of soap breaks down naturally. It is better for the environment. Regular soap can pollute the water. It can harm plants and animals. Biodegradable soap is made from natural ingredients. It is less harmful to the environment. Look for soap that is labeled “biodegradable.” You can find it at most outdoor stores. Using biodegradable soap is a responsible choice.
Should I Bring a Washcloth or a Loofah?
A washcloth and a loofah both work well for your diy outdoor shower for camping. A washcloth is soft and gentle. It is good for sensitive skin. A loofah is more exfoliating. It helps remove dead skin cells. Choose the one that you prefer. Make sure to clean your washcloth or loofah regularly. This will prevent the growth of bacteria. You can wash them with soap and water. Let them dry completely before storing them. A clean washcloth or loofah helps you stay clean.
What About Shampoo and Conditioner?
Shampoo and conditioner can make your hair feel clean and healthy for your diy outdoor shower for camping. Choose biodegradable shampoo and conditioner. These are better for the environment. Look for travel-sized bottles. These are smaller and lighter than regular-sized bottles. You can also use a solid shampoo bar. Shampoo bars are lightweight and easy to pack. They also last longer than liquid shampoo. Rinse your hair thoroughly after shampooing and conditioning. This will prevent buildup. Clean hair makes you feel refreshed.
How To Dispose Of Waste Water Responsibly
Disposing of waste water responsibly is important for your diy outdoor shower for camping. You don’t want to pollute the environment. Dig a small hole to drain the water. The hole should be at least 200 feet away from any streams or lakes. This will prevent the water from contaminating the water source. Use biodegradable soap. This will help the water break down naturally. After the water has drained, fill in the hole. Cover it with leaves and dirt. Leave the area as you found it. Responsible disposal protects the environment.
- Dig a hole to drain the water.
- Use biodegradable soap.
- Keep the hole away from water sources.
- Fill in the hole after use.
- Scatter leaves and dirt.
- Leave no trace.
Think about the impact of your actions on the environment for your diy outdoor shower for camping. Every little bit helps. Avoid using too much water. Take short showers. This will conserve water. Don’t leave any trash behind. Pack out everything you pack in. Respect the plants and animals. Don’t disturb their habitat. Follow the principles of Leave No Trace. This will help protect the environment for future generations. Responsible camping is important.
Fun Fact or Stat: It takes about 25 years for a plastic bottle to decompose in a landfill, highlighting the importance of proper waste disposal.
How Far Away From Water Sources Should I Drain Water?
The distance from water sources is crucial for your diy outdoor shower for camping. You should drain your waste water at least 200 feet away from any streams, lakes, or rivers. This will prevent the water from contaminating these sources. Water sources are important for plants, animals, and people. Contaminating them can harm the environment. Use a measuring tape to ensure you are far enough away. Err on the side of caution. It’s better to be too far away than too close. Protecting water sources is essential.
What If There Are No Trees To Dig Near?
If there are no trees to dig near, find a spot with good drainage for your diy outdoor shower for camping. Look for a place where the ground slopes slightly. This will help the water drain away. Avoid areas with standing water. These areas are likely to be muddy. Dig a shallow hole. It doesn’t need to be very deep. Just deep enough to hold the waste water. Make sure the hole is at least 200 feet away from any water sources. Fill in the hole after use. Cover it with leaves and dirt. Leave no trace.
What Are The Principles Of Leave No Trace?
The principles of Leave No Trace are important for your diy outdoor shower for camping. These principles help protect the environment. They include: plan ahead and prepare, travel and camp on durable surfaces, dispose of waste properly, leave what you find, minimize campfire impacts, respect wildlife, and be considerate of other visitors. By following these principles, you can help protect the environment for future generations. Learn more about Leave No Trace before your camping trip. It’s a responsible way to enjoy the outdoors.
Summary
A diy outdoor shower for camping can greatly improve your camping experience. You can choose from simple designs like bucket showers, water pump showers, or solar shower bags. Each option has its own advantages. Consider factors like water source, privacy, and environmental impact when planning your shower. Remember to use biodegradable soap and dispose of waste water responsibly. Choose a location that is private and has good drainage. With a little planning, you can enjoy a refreshing shower while camping. This will make your trips more comfortable and enjoyable.
Conclusion
Building a diy outdoor shower for camping is a fun and rewarding project. It allows you to stay clean and refreshed while enjoying the great outdoors. By following the tips and guidelines in this article, you can create a shower that meets your needs and respects the environment. Remember to choose biodegradable soap, dispose of waste water responsibly, and leave no trace. Happy camping and happy showering!
Frequently Asked Questions
Question No 1: What is the best type of soap to use for a diy outdoor shower for camping?
Answer: The best type of soap to use is biodegradable soap. Biodegradable soap breaks down naturally in the environment. This means it is less harmful to plants, animals, and water sources. Regular soap can contain chemicals that pollute the water. These chemicals can harm aquatic life and contaminate drinking water. Biodegradable soap is made from natural ingredients. It is a safer and more responsible choice for camping. Look for soap that is labeled “biodegradable” at outdoor stores.
Question No 2: How far away from a water source should I set up my diy outdoor shower for camping?
Answer: You should set up your shower at least 200 feet away from any water source. This includes streams, lakes, rivers, and ponds. This distance helps prevent contamination of the water source. Soap and other chemicals can pollute the water. This can harm aquatic life and make the water unsafe to drink. Setting up your shower far away ensures that any waste water is filtered by the soil before it reaches the water source. Use a measuring tape to make sure you are far enough away.
Question No 3: What are some tips for conserving water when using a diy outdoor shower for camping?
Answer: There are several ways to conserve water when using your shower. Take short showers. This will reduce the amount of water you use. Turn off the water while you are soaping up. This will prevent water from running unnecessarily. Use a shower head that has a low flow rate. This will reduce the amount of water that comes out. Collect the water that you use for showering. You can use this water to water plants or put out a campfire. Conserving water helps protect the environment.
Question No 4: How can I make a simple and inexpensive diy outdoor shower for camping?
Answer: A simple and inexpensive shower can be made with a few basic materials. You will need a five-gallon bucket, a shower head, and some rope. Drill a hole in the bottom of the bucket. Attach the shower head to the hole. Use the rope to hang the bucket from a tree branch. Fill the bucket with water. Then, use the shower head to rinse off. This is a simple and affordable way to stay clean while camping. You can find these materials at most hardware stores.
Question No 5: What are some ways to create privacy when using a diy outdoor shower for camping?
Answer: Privacy is important when using your shower. Find a secluded spot away from trails and other campsites. Use a tarp or blanket to create a privacy screen. Hang the tarp around the shower area. Use trees and bushes to create a natural barrier. Tell your camping buddies where you are showering. This will help avoid any surprises. Be respectful of other campers’ privacy. A little planning can help you create a private showering experience.
Question No 6: How do I clean my diy outdoor shower for camping equipment after use?
Answer: Cleaning your shower equipment after use is important for hygiene. Drain all the water from the bucket or bag. Rinse the equipment with clean water. Use soap and water to scrub the shower head and hose. Let the equipment dry completely before storing it. This will prevent the growth of mold and mildew. Store the equipment in a dry place. This will help it last longer. Clean equipment ensures a more pleasant showering experience on your next camping trip.
