Have you ever seen a frozen pipe burst in winter? It can cause lots of damage! Water expands when it freezes. This can break pipes. That’s why draining outdoor faucet winter is super important. Let’s learn how to protect your faucets.
Do you know why some people wrap their outdoor faucets? It helps keep them from freezing. But wrapping alone isn’t always enough. We need to do more to keep our pipes safe. Let’s find out the best ways to get ready for the cold.
Key Takeaways
- Draining outdoor faucet winter is essential to prevent frozen pipes and costly repairs.
- Always turn off the water supply to your outdoor faucets before winter arrives.
- Insulate your outdoor faucets with covers to provide an extra layer of protection.
- Open the outdoor faucet after draining to release any trapped water pressure.
- Regularly inspect your outdoor faucets for leaks and address them promptly.
Why Draining Outdoor Faucet Winter Matters

Winter can be tough on our homes. Freezing temperatures can cause water to expand. This expansion puts pressure on pipes. Outdoor faucets are especially at risk. They are exposed to the cold air. When water freezes inside them, it can crack the pipes. This leads to leaks and costly repairs. Draining outdoor faucet winter helps prevent this. It removes the water that could freeze and cause damage. It’s a simple step that can save you a lot of trouble. Think of it like putting on a warm coat before going outside. You’re protecting yourself from the cold. Draining your faucets does the same thing for your home. It guards against the dangers of freezing water. Taking this step can give you peace of mind all winter long. You will know your pipes are safe and sound.
- Freezing water expands and can break pipes.
- Outdoor faucets are exposed to cold air.
- Draining removes water that could freeze.
- It prevents leaks and costly repairs.
- Protecting faucets gives peace of mind.
Imagine you forget to draining outdoor faucet winter. A cold snap hits, and the water in your pipes freezes. The pipes burst, and water starts flooding your basement. Now you have a big mess to clean up. You also have to pay for expensive repairs. All of this could have been avoided by taking a few simple steps. Draining your outdoor faucets is a small task. But it can make a big difference. It protects your home and saves you money in the long run. So, make sure to add it to your winter preparation checklist. Your home will thank you! It’s like giving your house a warm blanket for the winter.
Fun Fact or Stat: The average cost to repair a burst pipe due to freezing is over $5,000!
When Should You Drain Your Faucets?
Knowing when to drain your outdoor faucets is key. You should do it before the first freeze of the season. Keep an eye on the weather forecast. As soon as you see temperatures dropping near or below freezing (32°F or 0°C), it’s time to act. Don’t wait until the last minute. It’s better to be prepared early than to risk frozen pipes. Some people drain their faucets in the fall as part of their general winter preparations. This way, they don’t have to worry about it later. If you live in an area with mild winters, you might be able to wait a bit longer. But it’s always better to be safe than sorry.
How Cold Is Too Cold for Faucets?
Outdoor faucets can start to freeze at 32°F (0°C). This is the freezing point of water. But even temperatures slightly above freezing can be a problem. If the temperature hovers around 33-35°F for several hours, your faucets could still freeze. Wind chill can also make a difference. A strong wind can make the temperature feel much colder. This increases the risk of freezing. So, it’s important to consider all these factors when deciding when to drain your faucets. It’s better to err on the side of caution and drain them early. This will protect your pipes from damage.
What Happens if You Don’t Drain Faucets?
If you don’t draining outdoor faucet winter, bad things can happen. The water inside the faucet and pipes can freeze. As it freezes, it expands. This expansion puts pressure on the pipes. The pressure can cause the pipes to crack or burst. A burst pipe can lead to a flood in your home. This can damage walls, floors, and furniture. It can also lead to mold growth. Repairing the damage from a burst pipe can be very expensive. That’s why it’s so important to take the time to drain your faucets. It’s a simple task that can prevent a lot of problems.
Steps for Draining Outdoor Faucet Winter

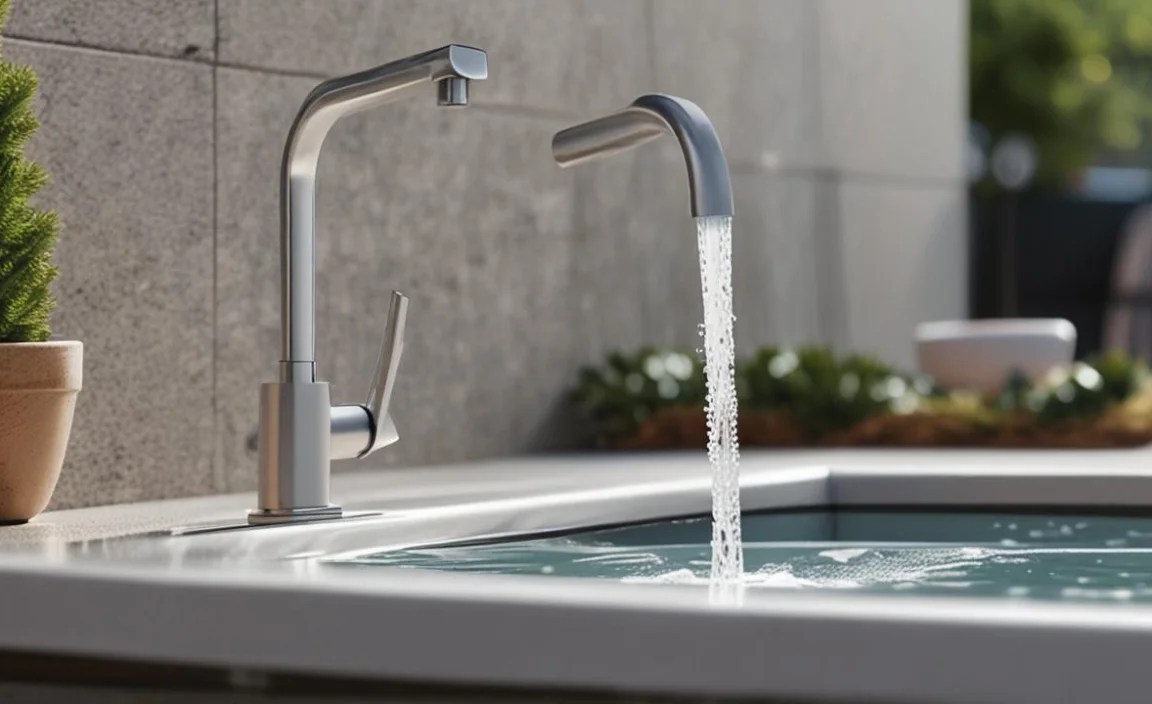
Draining outdoor faucet winter doesn’t have to be hard. The first thing you need to do is find the shut-off valve for your outdoor faucets. This valve is usually located inside your house. It’s often in the basement or crawl space. Once you find it, turn it off. This will stop the water supply to the outdoor faucet. Next, go outside and open the outdoor faucet. Let any remaining water drain out. If you have a frost-free faucet, there may be a small bleeder cap on the valve inside your home. Open this cap to let any trapped water escape. After the water is drained, close the outdoor faucet. Now your faucets are ready for winter.
- Find the shut-off valve inside your house.
- Turn off the water supply to the outdoor faucet.
- Open the outdoor faucet to let water drain.
- Open the bleeder cap on the valve (if present).
- Close the outdoor faucet after draining.
Imagine you’re getting ready for a big snowstorm. You make sure you have plenty of food and water. You check your heating system. You also make sure your car is ready for the snow. Draining outdoor faucet winter should be part of this preparation. It’s just as important as having food and water. It protects your home from potential damage. Think of it as giving your home a check-up before the cold weather arrives. You want to make sure everything is in good working order. Taking these steps will help you avoid problems later on.
Fun Fact or Stat: It takes only about 30 minutes to properly drain your outdoor faucets for winter!
Finding the Shut-Off Valve
Finding the shut-off valve is the first step. This valve controls the water supply to your outdoor faucets. It’s usually located inside your home. Look in the basement, crawl space, or utility room. The valve might be near where the water pipes enter your house. It could also be near your water heater. Once you find it, you should see a handle or knob. This is what you turn to shut off the water. Some valves have a lever that you turn. Others have a round knob. If you’re not sure which valve controls your outdoor faucets, you can test them. Turn off one valve and then go outside and turn on the faucet. If no water comes out, you’ve found the right valve.
Opening the Outdoor Faucet
After you’ve turned off the water supply, go outside. Open the outdoor faucet. This will allow any remaining water to drain out. Let the faucet run until no more water comes out. This might take a few minutes. If you have multiple outdoor faucets, repeat this step for each one. Opening the faucet also helps relieve any pressure in the pipes. This can further protect them from freezing. Make sure to close the faucet after all the water has drained. This will prevent any new water from entering the pipes. Now your faucets are ready for winter.
Dealing with Frost-Free Faucets
Frost-free faucets are designed to prevent freezing. But they still need some protection. These faucets have a longer valve stem. The valve is located inside your house, where it’s warmer. This helps prevent the water in the faucet from freezing. However, even frost-free faucets can freeze if they’re not properly protected. After you’ve turned off the water supply and opened the faucet, look for a bleeder cap. This is a small cap located on the valve stem inside your house. Open this cap to allow any trapped water to drain out. This will further protect your frost-free faucet from freezing.
Insulating Outdoor Faucets for Winter

Even after draining outdoor faucet winter, insulation is key. Insulating your outdoor faucets adds another layer of protection. Faucet covers are a great way to insulate them. These covers are made of foam or other insulating materials. They fit snugly over the faucet. This helps keep the cold air out. You can find faucet covers at most hardware stores. Another option is to wrap your faucets with insulation tape. This tape is specially designed for pipes and faucets. It’s easy to apply and provides good insulation. Make sure to wrap the entire faucet, including the handle. This will help prevent any exposed parts from freezing.
- Insulation adds another layer of protection.
- Faucet covers keep cold air out.
- Insulation tape is easy to apply.
- Wrap the entire faucet, including the handle.
- Consider using both covers and tape.
Imagine you’re building a fort in the winter. You don’t just build the walls. You also add a roof to keep the snow out. You might even add some blankets to keep warm. Insulating your outdoor faucets is like adding those extra layers to your fort. It provides extra protection from the cold. Even if you’ve already drained your faucets, insulation can help prevent them from freezing. It’s a simple step that can give you extra peace of mind. It’s like giving your faucets a warm hug for the winter.
Fun Fact or Stat: Insulating your faucets can raise the temperature inside the faucet cover by as much as 20 degrees!
Choosing the Right Faucet Cover
Choosing the right faucet cover is important. There are many different types of faucet covers available. Some are made of foam. Others are made of insulated fabric. Choose a cover that fits snugly over your faucet. It should cover the entire faucet, including the handle. Make sure the cover is made of a durable, weather-resistant material. This will help it withstand the harsh winter conditions. Some covers have a drawstring or Velcro closure. This helps keep the cover securely in place. Consider the size of your faucet when choosing a cover. You want to make sure it’s not too big or too small.
Applying Insulation Tape
Insulation tape is another great way to protect your outdoor faucets. This tape is specially designed for pipes and faucets. It’s easy to apply and provides good insulation. Start by cleaning the faucet and making sure it’s dry. Then, begin wrapping the tape around the faucet. Overlap each layer of tape slightly. This will create a tight seal. Wrap the entire faucet, including the handle. Make sure to cover any exposed parts. Secure the end of the tape with electrical tape. This will prevent it from unraveling. Insulation tape can be used in addition to faucet covers for extra protection.
Combining Covers and Tape
For the best protection, consider using both faucet covers and insulation tape. This combination provides a double layer of insulation. First, wrap the faucet with insulation tape. Then, place a faucet cover over the tape. This will provide maximum protection from the cold. This is especially important in areas with very cold winters. Using both covers and tape can help prevent your faucets from freezing. It’s like wearing a hat and a scarf in the winter. You’re protecting yourself from the cold in multiple ways.
Checking for Leaks Before Winter
Before you start draining outdoor faucet winter, check for leaks. Leaks can make the problem worse. Even a small leak can cause water to freeze more quickly. This can lead to bigger problems. Inspect your outdoor faucets carefully. Look for any signs of water dripping or seeping. Check the connections between the faucet and the pipes. Make sure they are tight and secure. If you find any leaks, fix them right away. You can tighten the connections with a wrench. If the leak is more serious, you might need to replace the faucet or the pipes.
| Leak Type | Severity | Solution |
|---|---|---|
| Drip from Faucet | Minor | Tighten handle or replace washer |
| Seep from Connection | Moderate | Tighten connection with wrench |
| Crack in Pipe | Severe | Replace damaged section of pipe |
| Leak from Valve | Severe | Replace the entire faucet |
Imagine you have a small hole in your winter coat. The cold air will get in and make you feel colder. A leaky faucet is like that hole in your coat. It allows water to escape and freeze. This can damage your pipes and make them more vulnerable to freezing. Fixing leaks before winter is like patching that hole in your coat. It helps keep the cold out and protects you from the elements. Taking care of these small problems now can prevent bigger problems later.
Fun Fact or Stat: A small drip can waste up to 20 gallons of water per day!
Identifying Common Leak Sources
Knowing where leaks commonly occur can help. One common source of leaks is the faucet handle. Over time, the washer inside the handle can wear out. This can cause water to drip from the faucet. Another common source is the connection between the faucet and the pipes. These connections can loosen over time. This can cause water to seep out. Cracks in the pipes can also cause leaks. These cracks can be caused by freezing and thawing. Inspect these areas carefully when checking for leaks.
Simple Leak Repair Techniques
Some leaks can be repaired easily. If you have a drip from the faucet handle, try tightening the handle. If that doesn’t work, you might need to replace the washer inside the handle. You can buy a new washer at most hardware stores. If you have a seep from the connection between the faucet and the pipes, try tightening the connection with a wrench. Be careful not to overtighten it, as this can damage the pipes. If the leak is more serious, you might need to call a plumber.
When to Call a Professional Plumber
Sometimes, you need to call a professional plumber. If you have a large leak or a crack in the pipes, it’s best to call a plumber. They have the tools and expertise to fix the problem safely and effectively. If you’re not comfortable working with plumbing, it’s always a good idea to call a plumber. They can diagnose the problem and recommend the best solution. Trying to fix a serious plumbing problem yourself can sometimes make it worse. It’s better to be safe and call a professional.
Using Heat Tape on Outdoor Faucets

Heat tape can provide extra protection against freezing. It’s a special type of tape that produces heat. You wrap it around your pipes and faucets. The heat helps keep the water from freezing. Heat tape is especially useful in areas with very cold winters. It can also be helpful for pipes that are difficult to insulate. When using heat tape, follow the manufacturer’s instructions carefully. Make sure to use heat tape that is designed for outdoor use. Don’t overlap the tape, as this can cause it to overheat. Heat tape can be a good way to prevent frozen pipes. But it’s important to use it safely and correctly. Remember, even with heat tape, draining outdoor faucet winter can add another layer of protection.
- Heat tape provides extra protection against freezing.
- Wrap the tape around pipes and faucets.
- Use heat tape designed for outdoor use.
- Follow the manufacturer’s instructions carefully.
- Don’t overlap the tape.
Imagine you’re camping in the winter. You have a warm sleeping bag. But you also add a blanket for extra warmth. Heat tape is like that extra blanket for your pipes. It provides an additional layer of protection against the cold. It can help prevent your pipes from freezing, even in very cold weather. But remember, heat tape is not a substitute for proper insulation. It’s best to use it in combination with other methods, such as faucet covers and insulation tape.
Fun Fact or Stat: Heat tape can raise the temperature of a pipe by up to 10 degrees!
Types of Heat Tape Available
There are two main types of heat tape available. Self-regulating heat tape adjusts its heat output based on the temperature. This type of tape is more energy-efficient. It also reduces the risk of overheating. Constant wattage heat tape produces a constant amount of heat. This type of tape is less expensive. But it can be more prone to overheating. Choose the type of heat tape that is best for your needs. Consider the climate in your area and the type of pipes you have.
Proper Installation of Heat Tape
Proper installation of heat tape is important. Before you start, read the manufacturer’s instructions carefully. Make sure the pipes are clean and dry. Wrap the heat tape around the pipes and faucets. Follow the recommended spacing. Don’t overlap the tape. Secure the tape with electrical tape. Plug the heat tape into a grounded outlet. Don’t use an extension cord. Monitor the heat tape regularly to make sure it’s working properly.
Safety Precautions When Using Heat Tape
Safety is important when using heat tape. Always use heat tape that is designed for outdoor use. Don’t use heat tape on flammable materials. Don’t use heat tape on pipes that are already insulated. Inspect the heat tape regularly for damage. If you see any damage, replace the tape immediately. Don’t touch the heat tape while it’s plugged in. Unplug the heat tape before making any repairs. Follow all safety precautions to prevent fires and electrical shocks.
Maintaining Outdoor Faucets During Winter
Draining outdoor faucet winter is a great start. But maintaining your faucets is key. Check your faucets regularly throughout the winter. Look for any signs of freezing or leaks. If you see ice forming on the faucet, take action right away. You can try using a hair dryer to thaw the ice. Be careful not to overheat the faucet. If you have heat tape, make sure it’s working properly. If you notice any leaks, repair them as soon as possible. Regular maintenance can help prevent problems. It will also keep your faucets in good working order.
- Check faucets regularly for freezing or leaks.
- Thaw ice with a hair dryer (carefully).
- Ensure heat tape is working properly.
- Repair any leaks as soon as possible.
- Keep the area around faucets clear of snow.
Imagine you have a garden. You don’t just plant the seeds and forget about it. You water it, weed it, and protect it from pests. Maintaining your outdoor faucets is like taking care of your garden. You need to check them regularly and address any problems that arise. This will help them stay in good condition and prevent them from freezing. Taking the time to maintain your faucets can save you a lot of trouble in the long run.
Fun Fact or Stat: Regular faucet maintenance can extend the lifespan of your outdoor faucets by several years!
Regular Inspections for Freezing
Regular inspections are important. Check your outdoor faucets at least once a week. Look for any signs of freezing. This includes ice forming on the faucet or pipes. Also, check for any signs of leaks. If you see any problems, take action right away. The sooner you address the problem, the less likely it is to cause serious damage. Regular inspections can help you catch problems early. This will allow you to fix them before they become major issues.
Thawing Frozen Faucets Safely
If your faucets do freeze, thaw them safely. Don’t use a torch or open flame to thaw frozen pipes. This can damage the pipes and create a fire hazard. Instead, use a hair dryer to gently warm the faucet and pipes. Start at the end closest to the faucet. Work your way back towards the house. Keep the hair dryer moving to avoid overheating any one spot. Be patient, as it may take some time to thaw the ice. Once the ice is thawed, check the faucet for leaks.
Preventing Future Freezing
After you’ve thawed a frozen faucet, take steps to prevent it from freezing again. Make sure the faucet is properly insulated. Use a faucet cover and insulation tape. Check the shut-off valve to make sure it’s working properly. If the faucet freezes repeatedly, you might need to call a plumber. They can help you identify the cause of the problem and recommend a solution. Preventing future freezing can save you time and money.
Summary
Protecting your outdoor faucets from freezing is important. Draining outdoor faucet winter is a key step. Turn off the water supply to the faucet. Then, open the faucet to drain any remaining water. Insulate the faucet with a cover or tape. Check for leaks before winter arrives. Fix any leaks you find. Consider using heat tape for extra protection. Check your faucets regularly throughout the winter. If they freeze, thaw them safely. Follow these steps to keep your faucets safe.
Taking these steps will prevent costly repairs. Freezing pipes can cause a lot of damage. Draining and insulating your faucets is a simple way to protect your home. Remember to act before the first freeze of the season. A little preparation can go a long way. It will give you peace of mind all winter long. Protecting your faucets is a smart investment in your home.
Conclusion
Draining outdoor faucet winter is a simple but crucial task. This protects your home from costly damage. Freezing pipes can lead to leaks and floods. Taking the time to prepare your faucets for winter is worth it. Turn off the water, drain the faucet, and add insulation. A little effort can save you a lot of trouble. Stay warm and keep your pipes safe this winter!
Frequently Asked Questions
Question No 1: Why is draining outdoor faucets in the winter important?
Answer: Draining your outdoor faucets is important because water expands when it freezes. This expansion can put a lot of pressure on your pipes. The pressure can cause the pipes to crack or burst. Burst pipes can lead to leaks and floods. Repairing the damage from a burst pipe can be very expensive. Draining your faucets removes the water that could freeze. This protects your pipes from damage. It’s a simple step that can save you a lot of money. It also gives you peace of mind.
Question No 2: When should I drain my outdoor faucets for the winter?
Answer: You should drain your outdoor faucets before the first freeze of the season. Keep an eye on the weather forecast. As soon as you see temperatures dropping near or below freezing (32°F or 0°C), it’s time to act. Don’t wait until the last minute. It’s better to be prepared early than to risk frozen pipes. Some people drain their faucets in the fall as part of their general winter preparations. This way, they don’t have to worry about it later. If you live in an area with mild winters, you might be able to wait a bit longer. But it’s always better to be safe than sorry.
Question No 3: How do I drain my outdoor faucets?
Answer: Draining your outdoor faucets is easy. First, find the shut-off valve for your outdoor faucets. This valve is usually located inside your house. It’s often in the basement or crawl space. Once you find it, turn it off. This will stop the water supply to the outdoor faucet. Next, go outside and open the outdoor faucet. Let any remaining water drain out. If you have a frost-free faucet, there may be a small bleeder cap on the valve inside your home. Open this cap to let any trapped water escape. After the water is drained, close the outdoor faucet. Now your faucets are ready for winter.
Question No 4: What is a frost-free faucet?
Answer: A frost-free faucet is designed to prevent freezing. These faucets have a longer valve stem. The valve is located inside your house, where it’s warmer. This helps prevent the water in the faucet from freezing. However, even frost-free faucets can freeze if they’re not properly protected. It is still important to consider draining outdoor faucet winter, even with frost-free faucets. After you’ve turned off the water supply and opened the faucet, look for a bleeder cap. This is a small cap located on the valve stem inside your house. Open this cap to allow any trapped water to drain out. This will further protect your frost-free faucet from freezing.
Question No 5: Should I insulate my outdoor faucets?
Answer: Yes, you should insulate your outdoor faucets. Insulating your faucets adds another layer of protection against freezing. Faucet covers are a great way to insulate them. These covers are made of foam or other insulating materials. They fit snugly over the faucet. This helps keep the cold air out. Another option is to wrap your faucets with insulation tape. This tape is specially designed for pipes and faucets. It’s easy to apply and provides good insulation. For the best protection, consider using both faucet covers and insulation tape.
Question No 6: What else can I do to protect my outdoor faucets in the winter?
Answer: In addition to draining outdoor faucet winter and insulating them, you can also check for leaks. Leaks can make the problem worse. Even a small leak can cause water to freeze more quickly. This can lead to bigger problems. Inspect your outdoor faucets carefully. Look for any signs of water dripping or seeping. Also, consider using heat tape. Heat tape is a special type of tape that produces heat. You wrap it around your pipes and faucets. The heat helps keep the water from freezing.
