Drip irrigation for your garden is an essential system that delivers water directly to plant roots, saving water, time, and promoting healthier plants with less effort. This guide makes setting it up simple for any beginner.
Drip Irrigation for Your Garden: The Proven Essential System for Thriving Plants
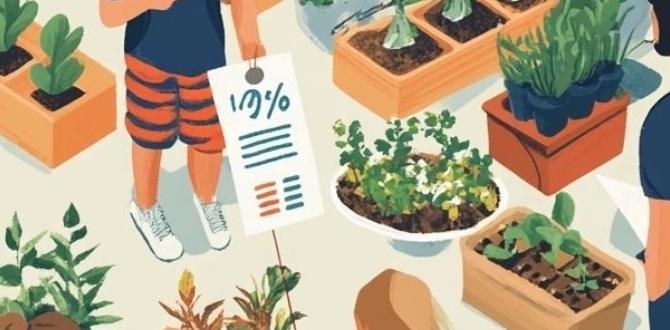
Tired of wilting plants or spending hours with a watering can? Especially when you’re just starting out, figuring out the best way to keep your garden happy can feel like a puzzle. Too much water can be just as bad as too little, leading to sad, unhealthy plants and wasted effort. But what if there was a way to give your plants precisely what they need, right where they need it, without all the fuss? That’s where drip irrigation comes in! It’s a simple, effective system that can transform your gardening experience from a chore into a joy. We’ll walk you through everything you need to know to set up your own “drip-itation” system.
Why Drip Irrigation is a Gardener’s Best Friend
Imagine walking through your garden and seeing every plant perfectly watered, every single time. That’s the magic of drip irrigation! Unlike sprinklers that can lose a lot of water to evaporation or wind, drip systems deliver water slowly and directly to the base of your plants, right at the root zone. This means less water wasted, healthier roots, and a much happier garden.
For beginners, this system is a game-changer. It takes away the guesswork and the constant worry about watering. Plus, it’s incredibly efficient, which is great for your water bill and the environment. Let’s dive into why this system is so loved by gardeners everywhere.
Key Benefits You’ll Love
- Water Efficiency: Direct delivery means up to 70% less water is wasted compared to traditional sprinklers.
- Healthier Plants: Consistent moisture at the root zone prevents over- or under-watering, leading to stronger growth and fewer diseases.
- Weed Reduction: Water is applied only where needed, leaving the spaces between plants drier and discouraging weed growth.
- Time Saving: Set it and forget it! Automate your watering schedule and reclaim your free time.
- Cost-Effective: While there’s an initial setup cost, the long-term savings in water and plant replacement are significant.
- Versatile: Works perfectly for raised beds, containers, vegetable patches, flower beds, and even trees or shrubs.
Understanding the Components of a Drip Irrigation System
Setting up a drip irrigation system might sound complex, but it’s surprisingly simple when you break it down. Think of it like a miniature plumbing system for your plants! Each part plays a crucial role in delivering that perfect amount of água.
Most systems start with a water source, like your outdoor faucet, and then connect to a series of tubes and emitters that deliver water to each plant. Here’s a look at the essential players:
The Core Components
- Your Water Source: Usually an outdoor faucet.
- Timer: To automate watering schedules (optional but highly recommended!).
- Backflow Preventer: Stops garden water from flowing back into your home’s drinking water supply. Essential for safety!
- Filter: Prevents small particles from clogging the system’s emitters.
- Pressure Regulator: Drip systems work best at low pressure; this ensures the right amount.
- Mainline Tubing: Larger diameter tubing that carries water from your source to different areas of your garden.
- Distribution Tubing (or Feeder Tubes): Smaller tubing that branches off the mainline to reach individual plants.
- Emitters (or Drip Emitters): Small devices that attach to the tubing and release water slowly at a specific rate (e.g., gallons per hour).
- Fittings and Connectors: Elbows, tees, and goof plugs to connect all the pieces and make turns.
- End Caps or Stakes: To close off the ends of tubing lines and secure them in place.
Step-by-Step Guide: Setting Up Your Drip Irrigation System
Ready to get started? Don’t worry, we’ll break it down into easy steps. This process is designed to be as straightforward as possible for any beginner.
Step 1: Plan Your Layout
Before you buy anything, grab a notebook and sketch out your garden. Where are your plants? What kind of plants do you have? This will help you figure out how much tubing and how many emitters you’ll need. Think about where your water source is and how you’ll run the main lines. For example, if you have a long raised bed, one mainline running down the center might be perfect. For multiple containers, you might need to branch off to each one.
Step 2: Gather Your Materials
Based on your plan, head to your local garden center or a reputable online retailer. Drip irrigation kits are often a great place to start for beginners, as they include many of the essential components. Look for kits designed for the size of your garden or the number of plants you have. Remember to pick up any extra fittings or tubing you might need.
A good starting point for basic components can be found on resources like the University of California, Division of Agricultural and Natural Resources which offers extensive information on design and best practices.
Step 3: Connect to Your Water Source
This is usually the first connection point. You’ll likely attach a timer (if using one) to your outdoor faucet, followed by the backflow preventer, filter, and pressure regulator. These three should typically be connected in that order. Most connections use simple threaded fittings that screw together. Ensure they are snug to prevent leaks.
Tip: If you’re new to plumbing, having a few spare washers on hand can be helpful for ensuring a watertight seal.
Step 4: Lay Out the Mainline Tubing
Connect your mainline tubing to the pressure regulator. Now, run this tubing across your garden area according to your plan. You can secure the tubing with stakes to keep it in place. If you need to make turns, use elbow fittings. If you need multiple lines to split off, use tee fittings.
Step 5: Attach Distribution Tubing and Emitters
This is where the water gets to your plants! Punch small holes into your mainline tubing where you want to branch off. Insert the barbed end of a smaller distribution tubing (often called a “spaghetti tube”) into these holes. Then, run the distribution tubing to the base of each plant. At the end of the distribution tubing, attach a drip emitter. Place the emitter close to the plant’s stem but not touching it.
Alternatively, some gardeners use “drip line” tubing, which has emitters pre-installed at regular intervals. You just lay this tubing around your plants.
Step 6: Flush the System
Before you cap off the ends and finalize everything, it’s a good idea to flush the system. Turn on the water for a minute or two with the end caps off. This helps clear out any dirt or debris that might have gotten into the tubing during installation. After flushing, turn off the water and install your end caps.
Step 7: Test and Adjust
Turn on your system and let it run for a while. Walk around and check that all the emitters are dripping correctly. Are any plants getting too much water? Too little? You can adjust by adding more emitters, moving existing ones, or changing to a different flow rate if your emitters are adjustable. Most emitters drip at a rate of 0.5, 1, or 2 gallons per hour (GPH). For most plants, 1 GPH is a good starting point.
Drip Irrigation vs. Other Watering Methods: A Comparison
Choosing the right watering method can make a big difference in your garden’s success and your workload. Let’s see how drip irrigation stacks up against more traditional methods.
| Feature | Drip Irrigation | Soaker Hoses | Sprinklers | Hand Watering |
|---|---|---|---|---|
| Water Efficiency | Very High (up to 70% savings) | High (around 30-50% savings) | Low (significant loss to evaporation/wind) | Moderate (depends on technique) |
| Root Zone Watering | Excellent (direct to roots) | Good (moisture seeps out) | Poor (waters foliage, surface soil) | Good (if aimed correctly) |
| Weed Growth | Minimized (water only where needed) | Reduced | Can encourage weeds between plants | Can encourage weeds |
| Disease Prevention | Excellent (keeps foliage dry) | Good (keeps foliage dry) | Poor (wet foliage can lead to fungal diseases) | Moderate (can wet foliage) |
| Installation Complexity | Moderate (planning required) | Simple | Simple | N/A |
| Cost (Initial) | Moderate to High | Low | Low to Moderate | N/A |
| Maintenance | Filter cleaning, occasional emitter check | Check for clogs, leaks | Nozzle cleaning, pressure checks | Physical effort required |
| Automation | Easy with a timer | Easy with a timer | Easy with a timer | Difficult |
Tips for Optimizing Your Drip Irrigation System
Once your system is installed, a few tweaks can make it even better. These tips are simple but effective ways to ensure your garden gets the most out of its new watering method.
Make Every Drop Count
- Use a Timer: This is arguably the most important addition. Set it to water in the early morning or late evening when temperatures are cooler to minimize evaporation.
- Check Emitter Types: Different plants have different water needs. You can use emitters with varying flow rates (GPH) or even adjustable emitters. For example, a thirsty tomato plant might need a higher flow rate than a drought-tolerant herb.
- Consider Micro-Sprayers: For areas with densely planted ground cover or seedlings, small micro-sprayers can be a good addition to your drip system. They attach in a similar way but spray water over a wider area.
- Mulch, Mulch, Mulch: Adding a layer of organic mulch (like wood chips or straw) around your plants will help retain soil moisture, reduce evaporation, and further suppress weeds.
- Seasonal Adjustments: Your watering needs will change with the seasons. In hot, dry spells, you’ll need to water more frequently. During cooler, wetter periods, you can reduce the frequency or duration.
- Walk Your Garden: Regularly check your plants for signs of stress. While drip irrigation is efficient, it’s always good to observe. Look for wilting or if the soil seems too dry or waterlogged.
Troubleshooting Common Drip Irrigation Issues
Even the best systems can sometimes have a hiccup. Don’t get discouraged if something doesn’t work perfectly right away. Most problems are easy to fix.
What to Do When Things Go Wrong
- No Water Coming Out: Check that the faucet is on, the timer is set correctly and has batteries (if applicable), and the filter isn’t clogged. Also, ensure the pressure regulator is working and the tubing isn’t kinked.
- Low Water Pressure: Make sure all connections are tight. A clog in the filter or mainline can also reduce pressure. Your system might also be too long for your water source’s pressure.
- Emitters Clogged: This is common! Clean or replace clogged emitters. Regularly flushing the system (as mentioned in step 6) helps prevent this. If you have hard water, you might need to flush more often.
- Leaks: Check all connections, especially where tubing meets fittings or emitters. Often, a loose connection is the culprit. Sometimes, a tiny hole in the tubing can be fixed with a special goof plug or by patching the tubing.
- Water Pooling or Not Reaching Roots: Adjust the emitter’s position or add another emitter. Ensure the mainline is at the correct depth or elevation to distribute water evenly.
Frequently Asked Questions About Drip Irrigation
We know you might have a few more questions buzzing around. Here are some common ones beginners ask, with simple answers!
Is drip irrigation difficult to set up?
Not at all! While it requires some planning, the actual installation involves connecting pipes and tubes, which is quite straightforward. Many starter kits make it even easier.
How often should I water with drip irrigation?
This depends on your plants, soil, and climate. Generally, it’s better to water deeply and less often. Instead of daily light watering, try watering for a longer period (e.g., 30-60 minutes) every 2-4 days. Check your soil moisture to be sure.
Can I use drip irrigation for indoor plants?
Yes! You can adapt drip irrigation for houseplants and indoor gardening, especially for multiple pots. You’ll need smaller emitters and probably a timer that can connect to an indoor faucet or a small pump system.
How do I know if my plants are getting enough water?
The best way is to feel the soil. Dig your finger about 2-3 inches down. If it feels dry, it’s time to water. Also, observe your plants for signs of wilting, which indicates thirst.
What pressure should my drip system run at?
Most drip systems operate best at low pressures, typically between 10 and 30 PSI (pounds per square inch). This is why a pressure regulator is a crucial part of the system!
Can drip irrigation damage my plants?
When set up correctly, drip irrigation is extremely beneficial. Overwatering, improper emitter placement (too close to the stem), or using a system with too high pressure could potentially cause issues, but these are easily avoided with proper setup and monitoring.
Conclusion: Your Thriving Garden Awaits!
Drip irrigation truly is an essential system for any gardener, especially those just starting out. It’s a smart, efficient, and eco-friendly way to ensure your plants get the water they need to flourish. By delivering water directly to the root zone, you’ll see healthier growth, fewer weeds, and save on water bills. The initial setup might seem like a small project, but the rewards are immense. Your garden will thank you with vibrant colors, delicious produce, and robust growth. So, gather your tools, follow these steps, and get ready to enjoy a more beautiful and less work-intensive garden!