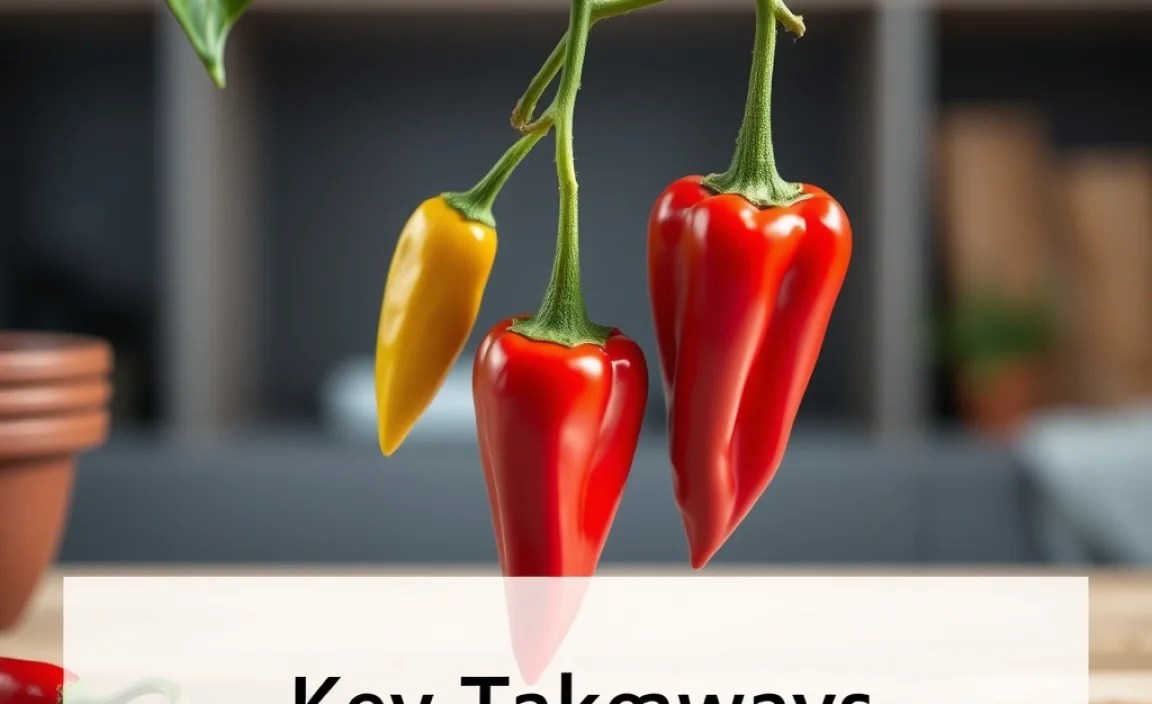
Do you like spicy food? Chili peppers can add a lot of flavor. It is fun to grow chili peppers seeds. You can have your own spicy garden. Let’s learn how to do it together!
Growing chili peppers from seeds is easy. You can grow them indoors or outdoors. All you need are some seeds and a little patience. Soon, you’ll have lots of peppers!
Imagine adding your own fresh chilies to your meals. You can make salsa or spice up tacos. Growing your own peppers is a fun and rewarding hobby. Let’s get started and grow chili peppers seeds!
Key Takeaways
- Growing your own chili peppers from seeds is a fun and rewarding experience.
- Start seeds indoors 6-8 weeks before the last expected frost for best results.
- Use well-draining soil and provide plenty of sunlight for healthy pepper plants.
- Water regularly and fertilize occasionally to encourage pepper production.
- Choose the right chili pepper variety for your desired level of spiciness and growing conditions.

Best Time to Grow Chili Peppers Seeds
Knowing when to grow chili peppers seeds is very important. You want to start at the right time. This helps the plants grow strong and healthy. Starting too early or too late can cause problems. The best time to start seeds indoors is usually 6-8 weeks before the last frost. Find out when the last frost usually happens in your area. You can ask a local gardener or look it up online. Starting early gives the plants a head start. They will be bigger and stronger when you plant them outside. If you live in a warm climate, you can start seeds directly in the ground. Make sure the soil is warm and the weather is good. Always check the seed packet for specific instructions. Different chili pepper varieties may have different needs. Starting at the right time will help you have lots of delicious chili peppers!
- Check your local frost dates.
- Start seeds indoors 6-8 weeks before.
- Use a seed starting tray.
- Keep the soil moist.
- Provide warmth and light.
Even if you miss the ideal time, don’t worry! You can still try to grow chili peppers seeds. The plants might just need a little extra care. Make sure they get enough sunlight and water. You can also use grow lights to help them along. It is always worth trying. Sometimes the plants will surprise you. Growing chili peppers can be a fun experiment. You can learn a lot along the way. Just remember to be patient and keep trying!
When is the best season?
Do you know when the best season is to plant chili peppers? Chili peppers love warm weather. They need lots of sunshine to grow well. That’s why the best season to plant them is usually in the spring or early summer. The soil needs to be warm enough for the seeds to sprout. If you start them indoors, you can get a head start. Then, you can transplant them outside when the weather is warm. Make sure there is no more frost. Frost can hurt the plants. If you live in a place with mild winters, you might be able to grow chili peppers year-round. Just make sure they get enough sunlight and protection from the cold. Knowing the best season will help you have a successful chili pepper garden.
What if I start too late?
What if you start too late in the season to grow chili peppers seeds? Don’t worry, it’s not the end of the world! You can still try to grow them. The peppers might not have as much time to grow big. But you can still get a harvest. Choose a variety that matures quickly. This means it doesn’t take as long to produce peppers. Make sure the plants get plenty of sunlight and water. You can also use fertilizer to help them grow faster. If the weather starts to get cold, you can cover the plants. This will protect them from frost. Starting late might mean you get fewer peppers, but it’s better than nothing! And you’ll still learn a lot about growing chili peppers.
How does climate affect timing?
How does the climate affect when you grow chili peppers seeds? The climate plays a big role. If you live in a warm climate, you can start the seeds earlier. You might even be able to grow them year-round. If you live in a cold climate, you need to wait until the weather warms up. You also need to protect the plants from frost. The length of the growing season is also important. If you have a short growing season, choose varieties that mature quickly. This will give them enough time to produce peppers. You can also use techniques like starting seeds indoors to get a head start. Pay attention to your local climate and adjust your planting schedule accordingly. This will help you have a successful chili pepper harvest.
Fun Fact or Stat: Chili peppers are native to South America and were first cultivated over 6,000 years ago!

Choosing the Right Chili Pepper Seeds
Choosing the right seeds is key when you grow chili peppers seeds. There are so many different kinds of chili peppers! Some are mild, and some are super spicy. Think about what you like to eat. Do you want a little kick or a lot of heat? Jalapeños are a popular mild choice. Habaneros are much hotter. Consider your growing conditions too. Some peppers grow better in certain climates. Read the seed packets carefully. They will tell you how much sun the plants need. They also say how long it takes for the peppers to mature. You can also ask for advice at your local garden store. They can help you pick the perfect chili pepper seeds for your garden. Choosing the right seeds will make your chili pepper growing experience more fun and successful!
- Consider your spice preference.
- Research different chili pepper varieties.
- Check the Scoville Heat Units (SHU).
- Read seed packet descriptions.
- Think about your climate and growing space.
Don’t be afraid to try different varieties. Growing chili peppers can be an adventure. You can experiment with different flavors and heat levels. You might discover a new favorite pepper. Start with a few different types of seeds. See which ones grow best in your garden. Keep track of which ones you like the most. You can even trade seeds with friends. That way, you can try even more varieties. Growing chili peppers is a great way to add some spice to your life. Have fun and enjoy the process!
What are Scoville Heat Units?
Have you ever heard of Scoville Heat Units? They measure how spicy a chili pepper is! The higher the number, the hotter the pepper. Sweet bell peppers have a Scoville Heat Unit of zero. That means they have no heat at all. Jalapeños have a Scoville Heat Unit of around 2,500 to 8,000. Habaneros can have a Scoville Heat Unit of 100,000 to 350,000! Some super-hot peppers like the Carolina Reaper can have over 2 million Scoville Heat Units. The Scoville scale was invented by a pharmacist named Wilbur Scoville in 1912. He used a panel of tasters to measure the heat of different peppers. Now, scientists use machines to measure the amount of capsaicin in peppers. Capsaicin is the chemical that makes peppers spicy. Knowing the Scoville Heat Units can help you choose the right chili pepper for your taste!
Mild, Medium, or Hot?
When you grow chili peppers seeds, do you want mild, medium, or hot peppers? Mild peppers are good for adding a little flavor without too much heat. Bell peppers and banana peppers are mild. Medium peppers have a bit more kick. Jalapeños and poblano peppers are medium. Hot peppers can be very spicy! Habaneros and Scotch bonnets are hot. Super-hot peppers like ghost peppers and Carolina reapers are extremely spicy. Think about what you like to eat. If you don’t like spicy food, stick to mild peppers. If you like a little heat, try medium peppers. If you are a spice lover, go for the hot ones! You can also mix different types of peppers in your cooking. This lets you control the level of heat. Choose the peppers that are right for you!
Organic vs. Non-Organic Seeds
Should you choose organic or non-organic seeds when you grow chili peppers seeds? Organic seeds come from plants that were grown without synthetic fertilizers or pesticides. This means they are better for the environment. Non-organic seeds may have been treated with chemicals. Some people prefer organic seeds because they believe they are healthier. They also support sustainable farming practices. Organic seeds can sometimes be more expensive. Non-organic seeds are often easier to find. Both types of seeds can grow healthy chili pepper plants. It’s up to you to decide which type you prefer. Consider your values and your budget when making your choice. You can grow great chili peppers with either organic or non-organic seeds!
Fun Fact or Stat: The Carolina Reaper is currently recognized as the world’s hottest chili pepper!

How to Start Chili Peppers Seeds Indoors
Starting seeds indoors is a great way to grow chili peppers seeds. It gives them a head start before the weather warms up. You will need a few things to get started. First, you need a seed starting tray or small pots. Fill them with seed starting mix. This soil is light and fluffy. It helps the seeds sprout easily. Next, plant the seeds about ¼ inch deep. Water them gently. Keep the soil moist but not too wet. Place the tray in a warm place. Chili pepper seeds need warmth to germinate. A heat mat can help. You also need to provide light. A sunny window or grow lights will work. Once the seedlings have a few leaves, you can transplant them into bigger pots. Keep them indoors until the weather is warm enough to plant them outside.
- Use a seed starting mix.
- Plant seeds ¼ inch deep.
- Keep the soil moist.
- Provide warmth and light.
- Transplant seedlings to bigger pots.
Starting seeds indoors takes a little bit of work, but it is worth it. You will have stronger, healthier plants. This means you will get more chili peppers. It’s also a fun way to learn about plants. You can watch the seeds sprout and grow. It’s amazing to see how a tiny seed can turn into a big plant. When you transplant the seedlings outside, make sure to harden them off. This means gradually exposing them to the outdoor conditions. This will help them adjust to the sun and wind. Starting seeds indoors is a great way to get a head start on your chili pepper garden!
Do I need a heat mat?
Do you need a heat mat to grow chili peppers seeds? Chili pepper seeds like warmth. A heat mat can help them germinate faster. It keeps the soil at the right temperature. This can be especially helpful if your house is cool. You don’t need a heat mat, but it can improve your success rate. If you don’t have a heat mat, you can put the seed tray in a warm place. A sunny windowsill or on top of the refrigerator can work. Just make sure the soil doesn’t dry out too quickly. A heat mat is a helpful tool, but it’s not essential. You can still grow chili peppers without one.
What kind of light do they need?
What kind of light do chili pepper seedlings need? They need plenty of light to grow strong and healthy. A sunny windowsill is a good option. But sometimes it’s not enough, especially in the winter. Grow lights can provide the extra light they need. Fluorescent lights or LED grow lights are good choices. Keep the lights close to the seedlings. About 2-4 inches away is ideal. Turn the lights on for 14-16 hours a day. This will give the seedlings enough energy to grow. As the seedlings grow, you may need to adjust the height of the lights. Make sure they are not getting too hot. Proper lighting is important for growing healthy chili pepper seedlings.
How often should I water?
How often should you water your chili pepper seedlings? It’s important to keep the soil moist, but not too wet. Overwatering can cause the seeds to rot. Underwatering can cause them to dry out. Check the soil every day. If the top inch of soil feels dry, it’s time to water. Water gently so you don’t disturb the seeds. A spray bottle can be helpful. Water until the soil is evenly moist. Don’t let the seedlings sit in water. This can cause root rot. The amount of water they need will depend on the temperature and humidity. Check the soil regularly and adjust your watering schedule as needed. Proper watering is key to helping your chili pepper seeds grow.
Fun Fact or Stat: Chili peppers can cross-pollinate, meaning you can create new and unique pepper varieties!

Preparing the Garden for Chili Pepper Plants
Getting your garden ready is key when you grow chili peppers seeds. Chili peppers need a sunny spot. Choose a place that gets at least 6-8 hours of sunlight each day. The soil should be well-draining. This means water doesn’t sit on top of the soil. If your soil is heavy clay, add some compost or other organic matter. This will help improve drainage. You can also grow chili peppers in raised beds or containers. This gives you more control over the soil. Before you plant, test your soil. This will tell you if it needs any nutrients. Chili peppers like soil that is slightly acidic. Add fertilizer if needed. Make sure the area is free of weeds. Weeds can steal nutrients from your chili pepper plants. Preparing your garden properly will give your chili pepper plants the best start.
- Choose a sunny location.
- Ensure well-draining soil.
- Add compost or organic matter.
- Test your soil’s pH.
- Remove weeds and debris.
Think about the spacing between your plants. Chili pepper plants need room to grow. Check the seed packet for recommended spacing. Usually, you will want to space them about 18-24 inches apart. This gives them enough room to spread out. It also allows for good air circulation. Good air circulation helps prevent diseases. Water the plants well after planting. This will help them settle into their new home. Mulch around the plants to help retain moisture. Mulch also helps suppress weeds. Keep an eye on your plants. Watch for any signs of pests or diseases. Taking care of your garden will help you have a bountiful chili pepper harvest.
What kind of soil is best?
What kind of soil is best to grow chili peppers seeds? Chili peppers like well-draining soil. This means the water doesn’t stay in the soil for too long. Soil that is too wet can cause the roots to rot. Loamy soil is a good choice. It’s a mix of sand, silt, and clay. This type of soil drains well but also holds moisture. You can also add compost to your soil. Compost is made from decayed organic matter. It adds nutrients to the soil and improves drainage. Avoid heavy clay soil. Clay soil doesn’t drain well and can become compacted. If you have clay soil, add lots of compost to improve it. You can also grow chili peppers in raised beds or containers. This allows you to use a soil mix that is specifically designed for growing vegetables.
How much sunlight is needed?
How much sunlight do chili pepper plants need? They need at least 6-8 hours of sunlight each day. Sunlight is like food for plants. They use it to make energy through a process called photosynthesis. Without enough sunlight, chili pepper plants will not grow well. They might become leggy, meaning they will have long, thin stems. They also might not produce many peppers. Choose a spot in your garden that gets plenty of sunlight. If you don’t have a sunny spot, you can use grow lights. Grow lights can provide the extra light that chili pepper plants need. Make sure the plants are not shaded by trees or buildings. Give them plenty of sunlight for the best results.
Should I use fertilizer?
Should you use fertilizer when you grow chili peppers seeds? Fertilizer can help your chili pepper plants grow bigger and produce more peppers. But you don’t want to over-fertilize them. Too much fertilizer can burn the roots. Start by testing your soil. This will tell you if it’s lacking any nutrients. Chili peppers need nitrogen, phosphorus, and potassium. These are the three main nutrients in fertilizer. You can use a balanced fertilizer, which contains all three nutrients. Or you can use a fertilizer that is specifically designed for vegetables. Follow the instructions on the fertilizer package. Apply the fertilizer at the recommended rate. You can also use organic fertilizers like compost or manure. These are slow-release fertilizers that provide nutrients over time. Fertilize your chili pepper plants regularly for the best results.
Fun Fact or Stat: Some chili peppers are hotter than pepper spray!
Transplanting Chili Pepper Seedlings Outdoors
Moving your plants outside is important when you grow chili peppers seeds. Once the weather is warm enough, it’s time to transplant your chili pepper seedlings outdoors. But don’t just put them straight into the garden. You need to harden them off first. This means gradually exposing them to the outdoor conditions. Start by putting them outside for a few hours each day. Increase the amount of time each day. After about a week, they should be ready to stay outside all the time. Choose a cloudy day to transplant them. This will help prevent them from getting sunburned. Dig a hole that is big enough for the root ball. Gently remove the seedling from its pot. Place it in the hole and fill it with soil. Water the plant well. Space the plants about 18-24 inches apart. Mulch around the plants to help retain moisture.
- Harden off seedlings before transplanting.
- Choose a cloudy day for transplanting.
- Dig a hole large enough for the root ball.
- Water well after transplanting.
- Space plants 18-24 inches apart.
Protect your young plants from pests. Slugs and snails can be a problem. You can use slug bait or other methods to control them. Watch out for aphids. These tiny insects can suck the sap from the plants. You can spray them with insecticidal soap. Keep an eye on the weather. If there is a chance of frost, cover the plants. This will protect them from the cold. With a little care, your chili pepper seedlings will thrive in your garden. You’ll be harvesting delicious peppers in no time!
What is “hardening off?”
What does “hardening off” mean when you grow chili peppers seeds? Hardening off is the process of gradually exposing your seedlings to the outdoor conditions. Seedlings that have been growing indoors are used to a protected environment. They are not used to the sun, wind, and temperature changes. If you put them straight into the garden, they can get shocked. This can stunt their growth or even kill them. Hardening off helps them adjust to the outdoor conditions. Start by putting them outside for a few hours each day. Choose a sheltered spot that is out of direct sunlight and wind. Gradually increase the amount of time they spend outside each day. After about a week, they should be ready to stay outside all the time. Hardening off is an important step in transplanting chili pepper seedlings.
How do I avoid transplant shock?
How can you avoid transplant shock when you move your plants? Transplant shock is when a plant gets stressed from being moved. It can happen when you transplant seedlings from indoors to outdoors. The plant might wilt or stop growing for a while. To avoid transplant shock, harden off your seedlings first. This will help them get used to the outdoor conditions. Choose a cloudy day to transplant them. This will prevent them from getting sunburned. Water the plants well before and after transplanting. This will help them stay hydrated. Add some compost to the planting hole. This will give them a boost of nutrients. Handle the seedlings gently. Avoid damaging the roots. With a little care, you can minimize transplant shock.
What if there is a late frost?
What should you do if there is a late frost after you grow chili peppers seeds and transplant them? A late frost can damage or even kill your chili pepper plants. If there is a chance of frost, you need to protect them. Cover the plants with blankets or sheets. This will insulate them from the cold. You can also use row covers. These are lightweight fabrics that protect plants from frost. Make sure the covers extend all the way to the ground. You can also water the plants before the frost. Wet soil stays warmer than dry soil. If the plants do get frosted, don’t give up on them. Wait to see if they recover. Sometimes they will bounce back. Protecting your plants from frost will help you have a successful chili pepper harvest.
Fun Fact or Stat: Chili peppers are a good source of vitamins A and C!
Caring for Your Chili Pepper Plants
Taking good care of your plants is important when you grow chili peppers seeds. Once your chili pepper plants are in the garden, they need regular care. Water them regularly, especially during dry spells. Chili peppers need about 1 inch of water per week. Water deeply, so the water reaches the roots. Avoid watering the leaves, as this can lead to diseases. Fertilize the plants every few weeks. Use a fertilizer that is high in phosphorus. This will help them produce more peppers. Keep the area around the plants free of weeds. Weeds can steal nutrients and water from your chili pepper plants. Mulch around the plants to help suppress weeds. Watch out for pests and diseases. If you see any problems, take action quickly. With proper care, your chili pepper plants will thrive.
- Water regularly and deeply.
- Fertilize every few weeks.
- Keep the area weed-free.
- Mulch around the plants.
- Watch for pests and diseases.
Support your plants as they grow. Chili pepper plants can get tall and heavy. They may need support to prevent them from falling over. You can use stakes or cages to support them. Tie the plants to the stakes with soft twine. This will help them stay upright. Prune your plants to encourage more peppers. Remove any dead or yellow leaves. You can also pinch off the tips of the branches. This will encourage the plants to branch out. Harvest your peppers when they are ripe. The color will depend on the variety. Some peppers turn red, while others turn yellow or orange. Pick the peppers carefully, so you don’t damage the plant. Enjoy your homegrown chili peppers!
How much water do they need?
How much water do chili pepper plants need? They need about 1 inch of water per week. This is especially important during hot, dry weather. Water deeply, so the water reaches the roots. You can use a watering can or a hose to water them. Avoid watering the leaves, as this can lead to diseases. Check the soil regularly to see if it’s dry. Stick your finger into the soil. If the top inch feels dry, it’s time to water. You can also use a moisture meter to check the soil moisture. Overwatering can be just as bad as underwatering. Too much water can cause the roots to rot. Make sure the soil is well-draining. This will help prevent overwatering.
How do I prevent pests?
How can you prevent pests from attacking your chili pepper plants? There are several things you can do. Start by keeping your garden clean. Remove any dead leaves or weeds. These can provide a hiding place for pests. Inspect your plants regularly for signs of pests. Look for aphids, spider mites, and other insects. If you see any pests, take action quickly. You can spray the plants with insecticidal soap. This is a safe and effective way to control many pests. You can also use neem oil. Neem oil is a natural insecticide that is made from the neem tree. Attract beneficial insects to your garden. These insects eat pests. Ladybugs and lacewings are good examples. You can buy them online or at your local garden store. Companion planting can also help prevent pests. Plant herbs like basil and rosemary near your chili pepper plants. These herbs can repel pests.
Should I prune my plants?
Should you prune your chili pepper plants? Pruning can help your plants grow better and produce more peppers. Remove any dead or yellow leaves. These leaves are not helping the plant. They are just taking up energy. You can also prune the lower branches. This will improve air circulation around the plant. It will also help prevent diseases. Pinch off the tips of the branches. This will encourage the plant to branch out. More branches mean more places for peppers to grow. Don’t prune too much at once. This can stress the plant. Prune a little bit at a time. Use sharp, clean pruning shears. This will help prevent the spread of diseases. Pruning is not essential, but it can help your chili pepper plants thrive.
Fun Fact or Stat: Eating chili peppers can release endorphins, which have a mood-boosting effect!
Harvesting and Storing Chili Peppers
Picking your peppers is the fun part when you grow chili peppers seeds. Knowing when to harvest your chili peppers is important. The color of the pepper will tell you when it’s ripe. Some peppers turn red, while others turn yellow or orange. The seed packet will tell you what color to look for. The pepper should also be firm to the touch. If it’s soft, it’s probably overripe. Use scissors or pruning shears to harvest the peppers. Cut the stem just above the pepper. Be careful not to damage the plant. Wear gloves when harvesting hot peppers. The capsaicin can irritate your skin. Once you’ve harvested your peppers, you need to store them properly. This will help them last longer. You can store them in the refrigerator, freezer, or pantry.
| Storage Method | Pros | Cons | Best For |
|---|---|---|---|
| Refrigerator | Easy, keeps peppers fresh for a week or two. | Peppers can shrivel if not stored properly. | Short-term storage and using fresh. |
| Freezer | Long-term storage, preserves flavor well. | Peppers become soft when thawed. | Long-term storage for cooking later. |
| Pantry (Dried) | Very long-term storage, intensifies flavor. | Requires drying process, can lose some nutrients. | Making chili powders and dried spices. |
| Pickling | Adds unique flavor, long shelf life. | Requires pickling process, changes texture. | Adding to salads and sandwiches. |
You can dry your chili peppers. This is a great way to store them for a long time. You can use a dehydrator or an oven to dry them. String the peppers together and hang them in a dry place. This is a traditional way to dry chili peppers. You can also pickle your chili peppers. This is another way to preserve them. Pickled peppers are delicious in salads and sandwiches. You can also make chili powder from your dried peppers. Grind them up in a spice grinder. Store the chili powder in an airtight container. Enjoy your homegrown chili peppers all year long!
How do I know when they are ripe?
How do you know when your chili peppers are ripe? The color is the best indicator. The color will depend on the variety of pepper. Some peppers turn red when they are ripe. Others turn yellow, orange, or even purple. Check the seed packet or online to find out what color your peppers should be. The pepper should also be firm to the touch. If it’s soft, it’s probably overripe. You can also taste a small piece of the pepper. If it tastes good, it’s probably ripe. Be careful when tasting hot peppers. Start with a very small piece. Remember to wear gloves when harvesting hot peppers. The capsaicin can irritate your skin.
Can I freeze chili peppers?
Can you freeze chili peppers? Yes, you can! Freezing is a great way to store chili peppers for a long time. Wash the peppers and dry them thoroughly. You can freeze them whole or chopped. If you freeze them whole, you can easily chop them later. Place the peppers in a freezer bag or container. Remove as much air as possible. This will help prevent freezer burn. Label the bag with the date. Frozen chili peppers will last for several months. When you’re ready to use them, you can add them directly to your cooking. You don’t need to thaw them first. Frozen chili peppers will be softer than fresh peppers. But they will still add flavor to your dishes.
What can I make with them?
What can you make with your homegrown chili peppers? The possibilities are endless! You can make salsa, chili, hot sauce, and many other dishes. You can also add them to soups, stews, and stir-fries. Use them to spice up tacos, burritos, and enchiladas. You can also make chili oil. This is a great way to add flavor to your cooking. Dry your chili peppers and grind them into chili powder. You can use chili powder to season meats, vegetables, and sauces. Pickle your chili peppers and add them to salads and sandwiches. You can also give them away as gifts. Share your homegrown chili peppers with your friends and family. They will love them!
Fun Fact or Stat: Chili peppers are used in traditional medicine to relieve pain and inflammation!
Summary
Growing chili peppers seeds can be a fun and rewarding experience. Start by choosing the right seeds for your taste and climate. Start the seeds indoors 6-8 weeks before the last frost. Use a seed starting mix and provide warmth and light. Transplant the seedlings outdoors after the weather warms up. Choose a sunny spot with well-draining soil. Water the plants regularly and fertilize them every few weeks. Watch out for pests and diseases. Harvest the peppers when they are ripe.
You can store your chili peppers in the refrigerator, freezer, or pantry. You can also dry them or pickle them. Use your homegrown chili peppers to make salsa, chili, hot sauce, and many other dishes. With a little care, you can enjoy fresh chili peppers all season long. Growing chili peppers from seeds is a great way to add some spice to your life!
Conclusion
Now you know how to grow chili peppers seeds. It is easy to start your own chili pepper garden. Choose the right seeds and give them plenty of sun. Water them well and watch them grow. You will have lots of spicy peppers. Enjoy your homegrown chilies in your favorite recipes. Growing your own food is fun and rewarding!
Frequently Asked Questions
Question No 1: How long does it take to grow chili peppers from seeds?
Answer: It takes about 6-8 weeks to start chili pepper seeds indoors. After transplanting them outdoors, it can take another 60-90 days for the peppers to mature. The exact time depends on the variety of pepper and the growing conditions. Some peppers mature faster than others. Make sure to check the seed packet for specific information. Providing the right amount of sunlight, water, and fertilizer will help your plants grow faster. With a little patience, you’ll be harvesting your own chili peppers in no time!
Question No 2: Can I grow chili peppers in containers?
Answer: Yes, you can definitely grow chili peppers in containers! This is a great option if you don’t have a lot of space in your garden. Choose a container that is at least 12 inches in diameter. Make sure it has drainage holes. Use a good quality potting mix. Place the container in a sunny spot that gets at least 6-8 hours of sunlight per day. Water the plants regularly and fertilize them every few weeks. You may need to water them more often than plants in the ground. Container plants tend to dry out faster. With proper care, you can grow chili peppers seeds successfully in containers.
Question No 3: What are some common problems when growing chili peppers?
Answer: Some common problems when grow chili peppers seeds include pests, diseases, and nutrient deficiencies. Aphids, spider mites, and whiteflies can attack your plants. You can control them with insecticidal soap or neem oil. Blossom end rot is a common disease that causes the peppers to rot at the bottom. This is usually caused by a calcium deficiency. You can prevent it by adding calcium to the soil. Yellow leaves can be a sign of a nutrient deficiency. Fertilize your plants regularly to prevent this. With a little attention, you can overcome these problems and have a successful chili pepper harvest.
Question No 4: How do I make my chili peppers hotter?
Answer: If you want to make your chili peppers hotter, there are a few things you can do. Stress the plants by withholding water. This will cause them to produce more capsaicin, the chemical that makes them hot. Make sure the plants get plenty of sunlight. Sunlight helps them produce more capsaicin. Add Epsom salts to the soil. Epsom salts contain magnesium, which can help increase the heat. Choose a variety of chili pepper that is known for being hot. Some varieties are naturally hotter than others. With these tips, you can grow chili peppers seeds and have extra-spicy peppers!
Question No 5: Can I save seeds from my chili peppers to plant next year?
Answer: Yes, you can save seeds from your chili peppers to plant next year. Choose peppers that are fully ripe and healthy. Cut the peppers open and remove the seeds. Spread the seeds out on a paper towel to dry. Let them dry for several days. Once they are dry, store them in an airtight container in a cool, dark place. Label the container with the date and variety of pepper. The seeds should be viable for several years. Keep in mind that chili peppers can cross-pollinate. If you grow chili peppers seeds from different varieties, the seeds may not produce the same type of pepper as the parent plant.
Question No 6: What are some good companion plants for chili peppers?
Answer: Companion planting is a great way to improve your chili pepper garden. Basil is a good companion plant for chili peppers. It repels pests and improves the flavor of the peppers. Marigolds also repel pests. They attract beneficial insects to your garden. Onions and garlic can help deter pests as well. Carrots can help improve the soil drainage. Plant these companions near your chili pepper plants. This will help them grow better and produce more
