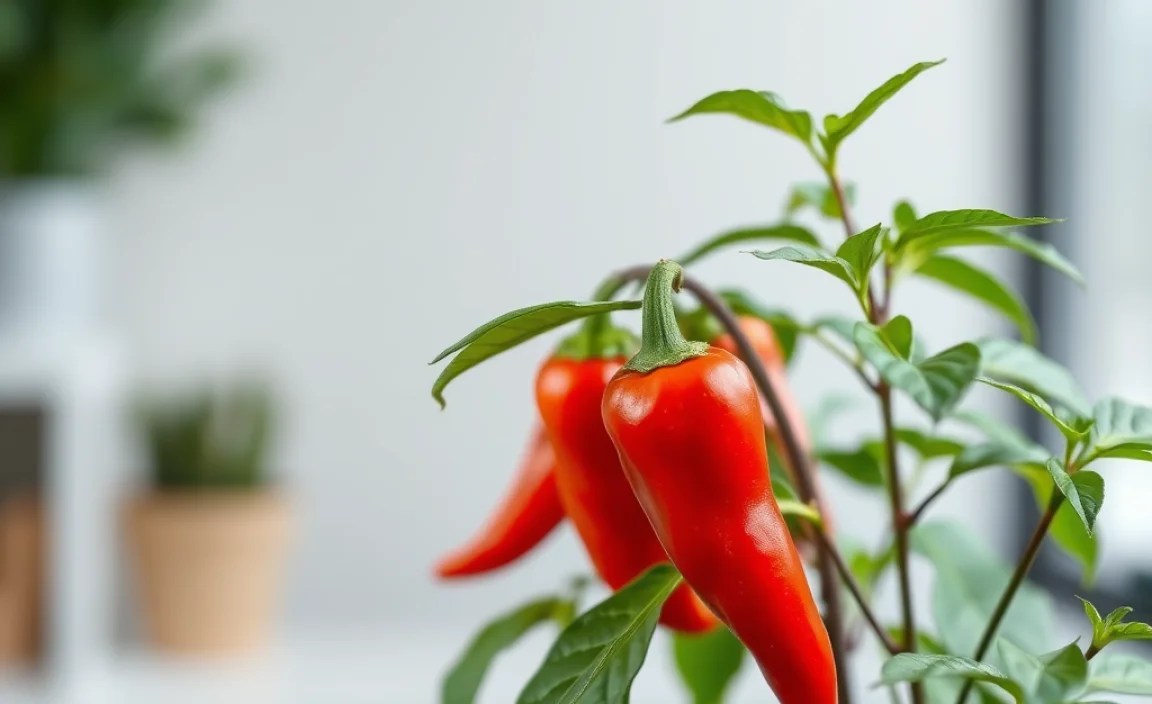
Do you like spicy food? Have you ever thought about where chili peppers come from? You can actually grow chili plants at home. It is easier than you might think!
Growing your own chilies can be a fun project. You get to watch them grow from tiny seeds. Then, you can use them in your favorite recipes. Imagine the taste of a dish with your own fresh chilies.
Chili plants need sunshine and water. With a little care, you can have lots of chilies. Let’s learn how to grow chili plants. Get ready for a spicy adventure!
Key Takeaways
- Starting with the right soil and pot makes a big difference to grow chili plants.
- Water chili plants regularly, keeping the soil moist but not soggy.
- Provide plenty of sunlight; chili plants need at least six hours each day.
- Choose the right type of chili for your climate and taste preferences.
- Protect your plants from pests and diseases for a healthy harvest.

Choosing the Right Chili to Grow
Before you grow chili plants, think about what kind of chilies you like. Some chilies are mild, and others are very hot. Jalapeños are good for a little spice. Habaneros are much hotter. Consider your climate too. Some chilies grow better in warm weather. Others can handle cooler temperatures. Do some research to find the perfect chili for you. This will make your growing experience more fun. You will also enjoy the chilies you harvest. Think about what you will use them for. This helps you pick the best variety.
- Jalapeños are good for beginners.
- Habaneros are very spicy.
- Bell peppers are not spicy at all.
- Serrano peppers are hotter than jalapeños.
- Cayenne peppers are good for drying.
Choosing the right chili matters a lot. If you pick one that is too hard to grow, you might get sad. If you pick one that you don’t like the taste of, you won’t use them. Talk to someone at a garden store. They can help you decide. Think about how much space you have too. Some chili plants get very big. Others stay small. Make sure you have enough room for them to grow. Starting with the right chili is the first step to success.
Fun Fact or Stat: There are over 4,000 different types of chili peppers in the world!
What is the Scoville Scale?
Have you ever heard of the Scoville scale? It measures how hot a chili pepper is. The scale was invented by a pharmacist named Wilbur Scoville. He wanted to know how spicy different peppers were. The Scoville scale uses Scoville Heat Units (SHU). Bell peppers have 0 SHU. Habaneros can have over 100,000 SHU. The higher the number, the hotter the chili. People use the Scoville scale to compare chilies. It helps them know what to expect. When you grow chili plants, you might want to check their SHU. This will help you choose the right ones for your taste.
How to Pick the Right Heat Level?
Picking the right heat level is important. Do you like mild, medium, or hot chilies? Think about what you will use them for. Mild chilies are good for stuffing. Medium chilies are good for salsa. Hot chilies are good for adding a kick to dishes. If you are not sure, start with a mild chili. You can always add more heat later. It is better to start small and work your way up. Ask your family what they like. This can help you choose the right chilies to grow. Growing your own chilies lets you control the heat.
Do Some Chilies Need More Sun Than Others?
Yes, some chilies need more sun than others. Most chili plants need at least six hours of sun each day. Some varieties, like habaneros, love lots of sun. They will grow best in a sunny spot. Other varieties can handle a little shade. Check the information for your specific chili. Make sure they get enough sunlight. If they don’t, they might not produce many chilies. Sunlight helps them grow strong and healthy. If you live in a cloudy place, you might need to use grow lights. These lights can help your chili plants get the sun they need.

Starting Your Chili Plants from Seeds
Starting from seeds is a fun way to grow chili plants. You can start seeds indoors before the weather gets warm. This gives your plants a head start. You will need seed starting trays and soil. Plant the seeds about ¼ inch deep. Keep the soil moist, but not too wet. Put the trays in a warm place. The seeds should sprout in a week or two. Once they have a few leaves, you can move them to bigger pots. Be careful when you move them. They are very delicate. Starting from seeds takes time, but it is rewarding.
- Use seed starting trays.
- Plant seeds ¼ inch deep.
- Keep soil moist and warm.
- Move seedlings to bigger pots.
- Handle seedlings with care.
- Label each variety of chili.
Make sure you use good quality seeds. You can buy seeds online or at a garden store. Read the reviews before you buy them. This can help you find the best seeds. Some seeds are easier to grow than others. If you are a beginner, choose easy-to-grow varieties. Don’t forget to label your seeds. This will help you remember what you planted. It is easy to forget when you have lots of different chilies. Starting from seeds is a great way to learn about plants.
Fun Fact or Stat: Chili seeds can stay viable for up to five years if stored properly!
What Kind of Soil Do Chili Seeds Need?
Chili seeds need light, well-draining soil. Seed starting mix is a good choice. It is made for starting seeds. Don’t use soil from your garden. It might be too heavy. It might also have diseases. Seed starting mix helps the seeds grow strong roots. The soil should be moist, but not soggy. Soggy soil can cause the seeds to rot. You can buy seed starting mix at a garden store. You can also make your own. Mix peat moss, vermiculite, and perlite. This will give your seeds the perfect start.
How Warm Should the Soil Be?
The soil should be warm for chili seeds to sprout. A temperature of 70-80°F is ideal. You can use a heat mat to warm the soil. Place the heat mat under the seed starting tray. This will help the seeds germinate faster. Don’t let the soil get too hot. This can damage the seeds. Check the soil temperature regularly. You can use a soil thermometer. If you don’t have a heat mat, put the trays in a warm room. A sunny windowsill can also work. Just make sure the soil doesn’t dry out too quickly.
How Long Does it Take for Chili Seeds to Sprout?
It usually takes 1-3 weeks for chili seeds to sprout. Some varieties sprout faster than others. The temperature and moisture of the soil affect how quickly they sprout. Keep the soil consistently moist and warm. Be patient. Don’t give up if they don’t sprout right away. Sometimes it takes a little longer. Once they sprout, they will need plenty of light. Move them to a sunny spot or use grow lights. This will help them grow into strong, healthy plants. Check the seed packet for specific information about your chili variety.

Potting Your Chili Plants
Once your seedlings have a few leaves, it’s time to pot them. This means moving them to bigger pots. Choose pots that are at least 4 inches wide. Make sure the pots have drainage holes. This will help prevent the soil from getting too wet. Use good quality potting soil. Gently remove the seedlings from the seed starting tray. Be careful not to damage the roots. Plant them in the new pots. Water them well. Keep them in a sunny spot. Your plants will now have room to grow chili plants big and strong.
- Choose pots with drainage holes.
- Use good quality potting soil.
- Gently remove seedlings.
- Plant in new pots.
- Water well.
- Keep in a sunny spot.
Potting your chili plants is an important step. It gives them more room to grow. It also provides them with fresh nutrients. Make sure you choose the right size pot. If the pot is too small, the roots will get crowded. If the pot is too big, the soil might stay too wet. Check your plants regularly. If they look like they are outgrowing their pots, move them to bigger ones. This will help them stay healthy and produce lots of chilies. Don’t forget to label the pots.
Fun Fact or Stat: Chili plants can be grown in pots on a balcony or patio!
What Kind of Potting Soil Should I Use?
Use a well-draining potting mix for your chili plants. Look for a mix that contains peat moss, perlite, and vermiculite. These ingredients help the soil drain well. This is important because chili plants don’t like to sit in wet soil. You can also add some compost to the potting mix. Compost provides extra nutrients for your plants. Avoid using garden soil in pots. It can become compacted and doesn’t drain well. A good potting mix will help your chili plants thrive. It will also make it easier to water them properly.
How Big Should the Pots Be?
The size of the pot depends on the type of chili you are growing. Smaller chili varieties can be grown in 1-gallon pots. Larger varieties might need 5-gallon pots or bigger. Make sure the pot is big enough for the roots to grow. If the roots get too crowded, the plant will become stressed. This can affect its growth and the number of chilies it produces. When in doubt, choose a bigger pot. It is better to have too much space than not enough. You can always move the plant to a bigger pot later if needed.
How Often Should I Repot My Chili Plants?
You might need to repot your chili plants as they grow. If you see roots coming out of the drainage holes, it’s time to repot. Gently remove the plant from its pot. If the roots are circling around the inside of the pot, they are root-bound. Choose a pot that is 1-2 inches bigger in diameter. Fill the new pot with fresh potting mix. Plant the chili plant in the new pot. Water it well. Repotting gives your chili plants more room to grow and access to fresh nutrients.

Caring for Your Chili Plants
Caring for your chili plants is important for a good harvest. Water them regularly. They need about an inch of water per week. Don’t let the soil dry out completely. But don’t overwater them either. Overwatering can cause root rot. Fertilize them every few weeks. Use a fertilizer that is high in phosphorus. This will help them produce more chilies. Keep an eye out for pests. Aphids and spider mites can damage your plants. You can use insecticidal soap to get rid of them. With proper care, you can grow chili plants that produce lots of delicious chilies.
| Care Aspect | Details |
|---|---|
| Watering | 1 inch per week, avoid overwatering |
| Fertilizing | High phosphorus fertilizer every few weeks |
| Pest Control | Check for aphids and spider mites, use insecticidal soap |
| Sunlight | At least 6 hours of direct sunlight per day |
- Water regularly, about 1 inch per week.
- Fertilize every few weeks.
- Check for pests.
- Provide plenty of sunlight.
- Prune to encourage growth.
Don’t forget to prune your chili plants. Pruning helps them grow bushier. It also encourages them to produce more chilies. Use clean scissors or pruning shears. Cut off any dead or yellow leaves. You can also trim the tips of the branches. This will encourage new growth. Pruning is especially important for young plants. It helps them develop a strong structure. With a little bit of care, your chili plants will thrive. You will be rewarded with a bountiful harvest of spicy chilies.
Fun Fact or Stat: Chili plants can live for several years if properly cared for!
How Much Sunlight Do Chili Plants Need?
Chili plants need at least six hours of direct sunlight per day. The more sun they get, the better. Sunlight helps them grow strong and produce lots of chilies. If you don’t have a sunny spot in your garden, you can use grow lights. Place the grow lights close to the plants. Make sure they get enough light each day. Rotate the plants regularly. This will ensure that all sides get equal sunlight. Lack of sunlight can cause the plants to become leggy and weak. It can also reduce the number of chilies they produce.
How Often Should I Water My Chili Plants?
Water your chili plants when the top inch of soil feels dry. This is usually about once a week. But it depends on the weather and the type of soil. Check the soil regularly. If it is dry, water the plants. Water deeply, until the water drains out of the bottom of the pot. Avoid watering the leaves. This can cause fungal diseases. Overwatering is just as bad as underwatering. It can cause root rot. If the leaves turn yellow and droop, you might be overwatering. Adjust your watering schedule as needed.
What Kind of Fertilizer Should I Use?
Use a fertilizer that is high in phosphorus for your chili plants. Phosphorus helps them produce more chilies. Look for a fertilizer with an NPK ratio of 5-10-5 or 10-20-10. NPK stands for nitrogen, phosphorus, and potassium. These are the three main nutrients that plants need. Follow the instructions on the fertilizer label. Don’t over-fertilize. This can damage the plants. You can also use organic fertilizers, such as compost tea or fish emulsion. These are gentle and provide a slow release of nutrients.
Dealing with Pests and Diseases
Pests and diseases can be a problem when you grow chili plants. Aphids, spider mites, and whiteflies are common pests. They can suck the sap from the leaves. This can weaken the plants. Fungal diseases, such as powdery mildew, can also affect chili plants. Check your plants regularly for signs of pests or diseases. If you see any, take action right away. You can use insecticidal soap or neem oil to control pests. For fungal diseases, use a fungicide. Good air circulation can also help prevent diseases.
- Check plants regularly for pests.
- Use insecticidal soap or neem oil.
- Use a fungicide for diseases.
- Provide good air circulation.
- Remove infected leaves.
- Keep the garden clean.
Prevention is the best way to deal with pests and diseases. Keep your garden clean. Remove any dead leaves or debris. This will help prevent pests and diseases from spreading. Water your plants in the morning. This will give the leaves time to dry before nightfall. Avoid overcrowding your plants. This will improve air circulation. If you have a serious infestation, you might need to use stronger pesticides or fungicides. But try to use these as a last resort. Always follow the instructions on the label.
Fun Fact or Stat: Companion planting with herbs like basil can help deter pests from chili plants!
How Do I Identify Common Pests?
Aphids are small, soft-bodied insects. They can be green, black, or brown. They often cluster on the undersides of leaves. Spider mites are tiny, spider-like creatures. They create webs on the leaves. Whiteflies are small, white, winged insects. They fly up when you disturb the plant. Look closely at your chili plants. Use a magnifying glass if needed. Identifying pests early can help you control them before they cause too much damage. You can also use sticky traps to catch pests.
What are the Signs of Common Diseases?
Powdery mildew looks like a white, powdery coating on the leaves. Leaf spot causes brown or black spots on the leaves. Root rot causes the roots to turn brown and mushy. The leaves might turn yellow and droop. Wilting is when the plant droops or sags. This can be a sign of several different diseases. Check your chili plants regularly for these signs. If you see any, take action right away. Remove infected leaves or plants. Use a fungicide or bactericide if needed.
Are There Natural Ways to Control Pests?
Yes, there are many natural ways to control pests. Insecticidal soap is a safe and effective way to kill aphids, spider mites, and whiteflies. Neem oil is another natural pesticide. It can also help prevent fungal diseases. You can also attract beneficial insects to your garden. Ladybugs, lacewings, and praying mantises eat aphids and other pests. Plant flowers that attract these beneficial insects. You can also use companion planting. Plant herbs like basil or marigolds near your chili plants. These herbs can help deter pests.
Harvesting and Storing Your Chilies
Harvesting is the best part of grow chili plants. You can pick your chilies when they are fully ripe. The color will be bright and even. Use scissors or pruning shears to cut them from the plant. Be careful not to damage the plant. Wear gloves when harvesting hot chilies. The oils can irritate your skin. You can use your chilies fresh or dry them for later use. To dry them, hang them in a warm, dry place. You can also use a dehydrator. Store dried chilies in an airtight container.
- Pick chilies when fully ripe.
- Use scissors or pruning shears.
- Wear gloves when harvesting hot chilies.
- Dry chilies for later use.
- Store dried chilies in an airtight container.
- Use fresh chilies in your favorite recipes.
Harvesting your own chilies is very rewarding. You can use them in all kinds of dishes. Add them to salsa, chili, soups, and stews. You can also make your own hot sauce. Experiment with different chili varieties. Each one has a unique flavor and heat level. Share your harvest with friends and family. They will be impressed that you grew your own chilies. Growing your own food is a great way to connect with nature. It also gives you fresh, healthy ingredients.
Fun Fact or Stat: The color of a chili pepper indicates its ripeness and often its heat level!
How Do I Know When Chilies Are Ripe?
Chilies are ripe when they have reached their mature color. This depends on the variety. Jalapeños are usually green when ripe. Habaneros are orange or red. The chilies should also be firm to the touch. Gently squeeze the chili. If it feels soft, it is probably overripe. Check the seed packet or plant tag for information about the specific variety you are growing. Knowing when to harvest is important for getting the best flavor and heat.
What is the Best Way to Dry Chilies?
There are several ways to dry chilies. You can hang them in a warm, dry place. This is called air-drying. String the chilies together using a needle and thread. Hang them in a well-ventilated area. It can take several weeks for them to dry completely. You can also use a dehydrator. This is a faster method. Follow the instructions on your dehydrator. You can also dry chilies in the oven. Set the oven to a low temperature. Spread the chilies on a baking sheet. Check them regularly to make sure they don’t burn.
How Long Do Dried Chilies Last?
Dried chilies can last for several years if stored properly. Store them in an airtight container in a cool, dark place. Avoid storing them in direct sunlight or near heat. This can cause them to lose their flavor and color. Check the chilies regularly for signs of mold or pests. If you see any, discard them. Properly stored dried chilies can add a spicy kick to your dishes for a long time. You can grind them into chili powder or use them whole.
Summary
Growing your own chili plants is a fun and rewarding experience. You can choose from many different varieties. Start seeds indoors or buy seedlings. Pot your plants in well-draining soil. Water them regularly and provide plenty of sunlight. Protect them from pests and diseases. Harvest your chilies when they are ripe. You can use them fresh or dry them for later use. With a little bit of care, you can grow chili plants and enjoy a bountiful harvest.
Growing chilies is also a great way to learn about plants. You can teach your friends and family about the different varieties. You can also experiment with different recipes. Add your homegrown chilies to your favorite dishes. Share your harvest with others. Growing your own food is a great way to connect with nature and enjoy fresh, healthy ingredients. It also gives you a sense of accomplishment.
Conclusion
Growing chili plants is easier than you think. You can grow them in your garden or in pots. Choose the right chili for your taste and climate. Give them plenty of sunlight and water. Protect them from pests and diseases. You will soon have a bountiful harvest of spicy chilies. Then you can enjoy the fruits (or peppers!) of your labor. Grow chili plants. Enjoy the spice!
Frequently Asked Questions
Question No 1: How long does it take to grow chili plants?
Answer: It takes about 3-4 months to grow chili plants from seeds to harvest. The exact time depends on the variety of chili and the growing conditions. Some varieties mature faster than others. Warm weather and plenty of sunlight can speed up the growing process. Starting seeds indoors can also give your plants a head start. Be patient and enjoy the process. Watching your chili plants grow is very rewarding. You can grow chili plants in a greenhouse if you want to extend the growing season.
Question No 2: What are the easiest chilies to grow?
Answer: Jalapeños are one of the easiest chilies to grow. They are relatively low-maintenance and produce a good yield. Bell peppers are also easy to grow, although they are not spicy. Anaheim peppers are another mild chili that is easy to grow. These varieties are good for beginners. They are more forgiving of mistakes. If you are new to growing chilies, start with one of these easy varieties. You will be more likely to have success. Then you can try growing more challenging varieties.
Question No 3: Can I grow chili plants indoors?
Answer: Yes, you can grow chili plants indoors. You will need a sunny window or grow lights. Choose a pot that is at least 12 inches wide. Use a well-draining potting mix. Water the plants regularly and fertilize them every few weeks. Keep an eye out for pests. Indoor chili plants might not produce as many chilies as outdoor plants. But you can still have a successful harvest. Grow chili plants indoors if you don’t have a garden.
Question No 4: How do I make my chilies hotter?
Answer: The heat of a chili is determined by genetics. But you can influence it to some extent. Stressing the plant can make the chilies hotter. This can be done by withholding water or fertilizer. But be careful not to stress the plant too much. This can reduce the yield. Growing chilies in a hot, sunny location can also increase their heat. Some people believe that adding Epsom salts to the soil can make chilies hotter.
Question No 5: What do I do if my chili plant is not producing chilies?
Answer: There are several reasons why your chili plant might not be producing chilies. It might not be getting enough sunlight. Chili plants need at least six hours of sunlight per day. It might not be getting enough water or fertilizer. It might be too cold. Chili plants need warm temperatures to produce chilies. It might not be getting pollinated. You can hand-pollinate the flowers by using a small brush. Check your plant regularly. Grow chili plants with success by keeping the plants healthy and happy.
Question No 6: Can I save seeds from my chili plants?
Answer: Yes, you can save seeds from your chili plants. Choose chilies that are fully ripe. Cut them open and remove the seeds. Spread the seeds on a paper towel. Let them dry for a week or two. Store the dried seeds in an airtight container in a cool, dark place. Label the container with the variety of chili and the date. You can use these seeds to grow new chili plants next year. Saving seeds is a great way to save money and preserve your favorite varieties.
