Can you grow dill indoors? Yes! Growing dill indoors is surprisingly simple and rewarding. With just a few essential tips on light, soil, water, and care, you can enjoy fresh dill year-round, adding its fragrant, feathery leaves to your culinary creations right from your windowsill. Let EcoPatchy guide you to a successful indoor dill garden.
Ever wished you could snip fresh dill for your salads or fish dishes, even in the dead of winter? Many home cooks dream of having fragrant herbs readily available. But when you picture growing dill, you might imagine sunny outdoor gardens, not a cozy indoor space. The good news is that growing dill indoors is entirely possible and, dare I say, quite easy once you know the right secrets! If you’ve tried before and felt a bit stumped, or if you’re just starting your indoor gardening adventure, don’t worry. Together, we’ll uncover the genius tips that make indoor dill a thriving success. Get ready to transform a sunny spot in your home into your very own dill patch!
Why Grow Dill Indoors? The Delicious Benefits
Bringing dill indoors isn’t just about convenience; it’s about embracing a more sustainable, flavorful lifestyle. Imagine the satisfaction of plucking your own herbs, free from pesticides and plastic packaging. Growing dill indoors means you have a constant supply of this vibrant herb, perfect for jazzing up everything from potato salad to homemade pickles.
- Freshness on Demand: No more last-minute trips to the grocery store. Fresh dill is always at your fingertips.
- Cost Savings: A packet of dill seeds is incredibly inexpensive compared to buying fresh dill bundles regularly.
- Pesticide-Free: You control what goes into your soil and onto your plants, ensuring pure, wholesome herbs.
- A Touch of Green: Indoor plants boost your mood, purify the air, and add a beautiful natural element to your home decor.
- Culinary Versatility: Dill’s bright, slightly anise-like flavor complements a wide range of dishes, from dips and sauces to fish and vegetable preparations.
- Educational Fun: It’s a fantastic project for families, teaching kids about where food comes from and the joy of growing.
Dill Indoors: The Essential Ingredients for Success
Like any plant, dill has its preferences. Understanding these will set you up for a flourishing harvest. Let’s break down exactly what your indoor dill plant needs to thrive.
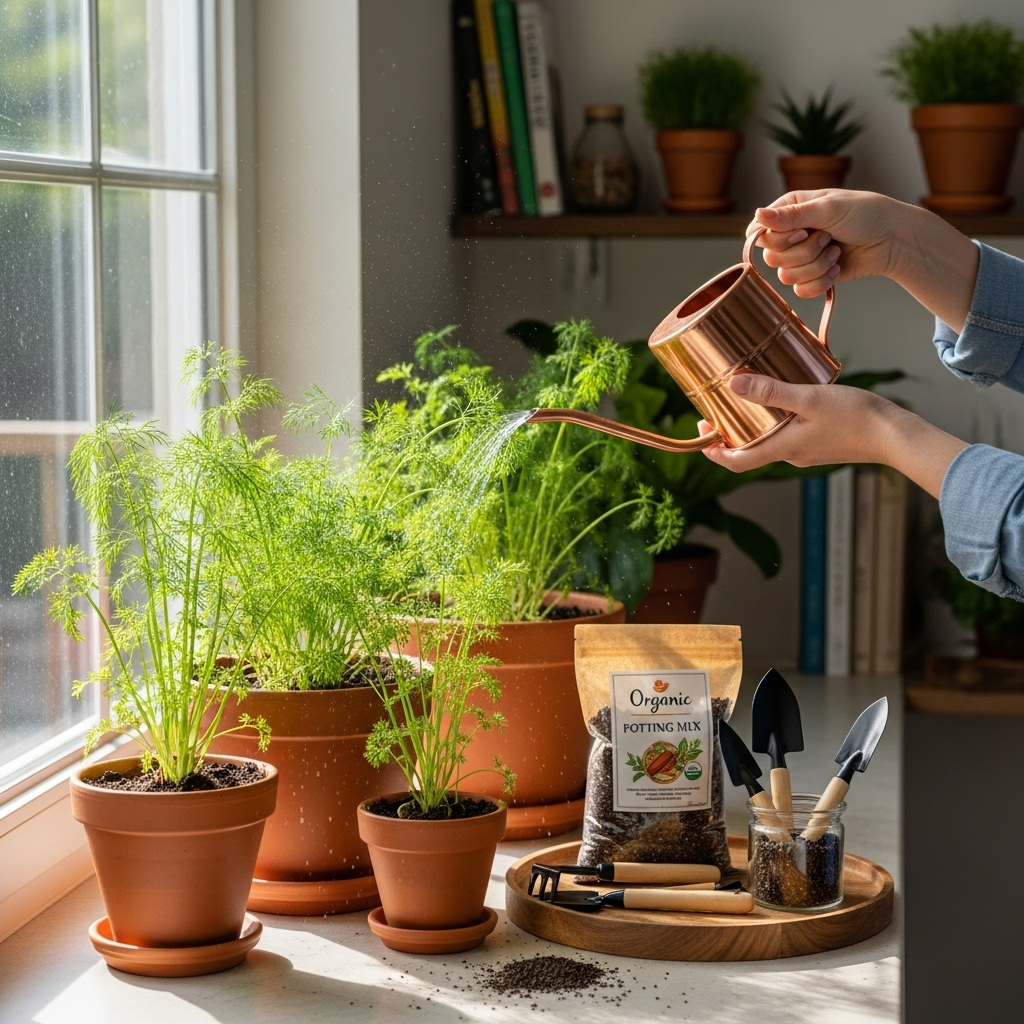
1. Choosing the Right Pot and Soil
The foundation of any successful plant is its home. For dill, this means selecting the right pot and soil mixture.
Pot Selection:
- Size Matters: Dill’s roots can grow surprisingly deep. Opt for pots that are at least 6-8 inches deep. This depth is crucial for healthy root development.
- Drainage is Key: Absolutely ensure your pot has drainage holes at the bottom. Soggy soil is a fast track to root rot, which is a plant’s worst nightmare.
- Material Options: Terracotta pots are great because they breathe and help prevent overwatering. However, any pot with drainage will work. Recycled containers can also be a wonderful eco-friendly option, as long as you add drainage holes yourself.
Soil Mix:
Dill isn’t overly fussy about soil, but it does prefer something well-draining. A good potting mix is your best bet. Avoid using heavy garden soil, as it compacts too easily in containers and can suffocate the roots.
- Use a Quality Potting Mix: Look for a standard, peat-based potting mix.
- Improve Drainage (Optional but Recommended): Mix in a bit of perlite or coarse sand (about 1/4 perlite to 3/4 potting mix) to ensure excellent drainage. This mimics the sandy, well-drained soil dill prefers in the wild.
- Avoid Potting with Stones: Forget the old advice of putting rocks at the bottom of pots. This actually hinders drainage by creating a perched water table. Good soil and drainage holes are all you need.
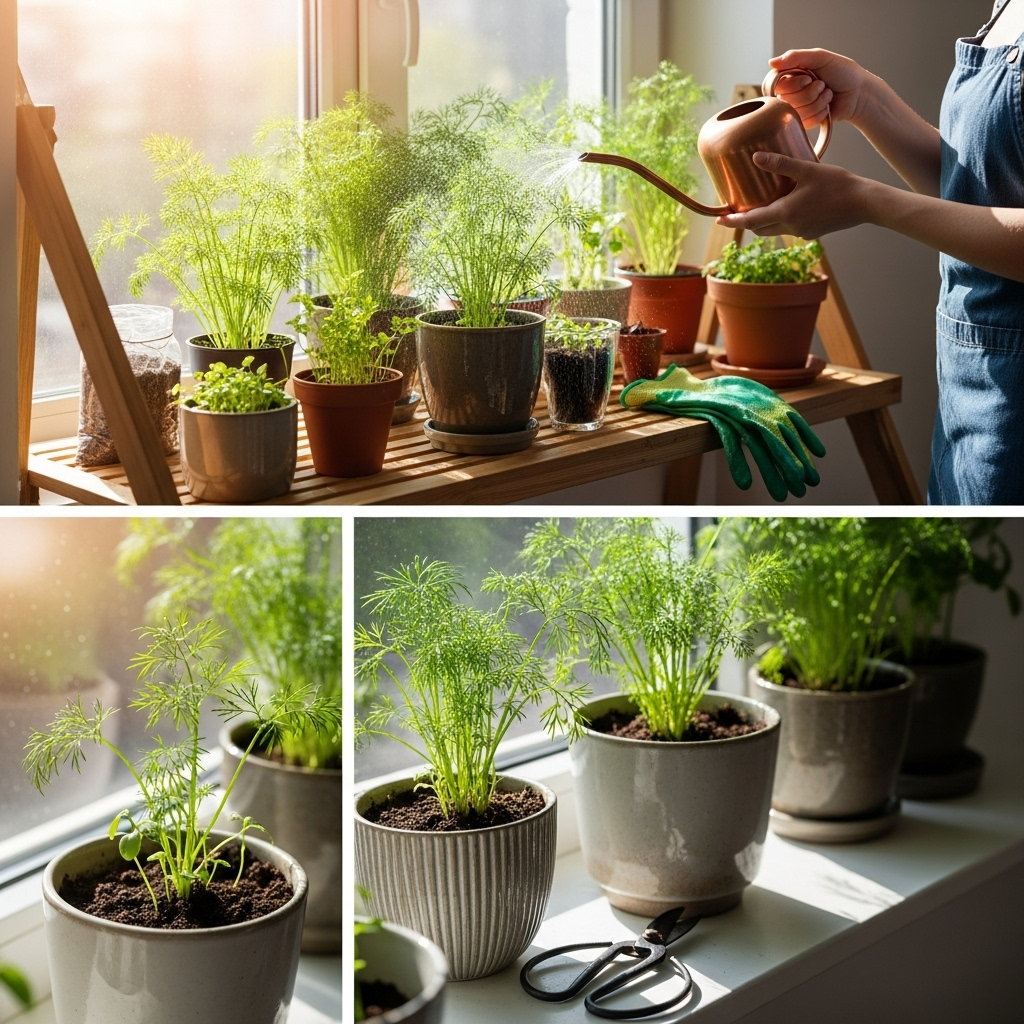
2. Light: The Sunny Secret to Bushy Dill
This is arguably the most critical factor for growing dill indoors. Dill absolutely loves light!
- South-Facing Windows are Gold: The absolute best spot for your dill is a south-facing window in your home. These windows receive the most direct sunlight throughout the day.
- Aim for 6-8 Hours of Light: Dill needs at least 6 to 8 hours of bright, direct sunlight daily. If your window doesn’t provide this much natural light, you’ll likely need supplemental lighting.
- Signs of Insufficient Light: Leggy, thin stems that stretch towards the light, pale leaves, and a tendency for the plant to fall over are all indicators that your dill isn’t getting enough sun.
- Grow Lights to the Rescue: Full-spectrum LED grow lights are a fantastic investment for indoor gardeners. They provide the intense light dill craves and can be positioned to give your plants exactly what they need. You can find user-friendly options from reputable retailers like GrowLight.com for various setups. Position the lights about 6-12 inches above the plants, adjusting as they grow.
- Rotate Your Pots: Don’t forget to rotate your pots every few days. This encourages even growth and prevents your dill from leaning too heavily in one direction, seeking the light.
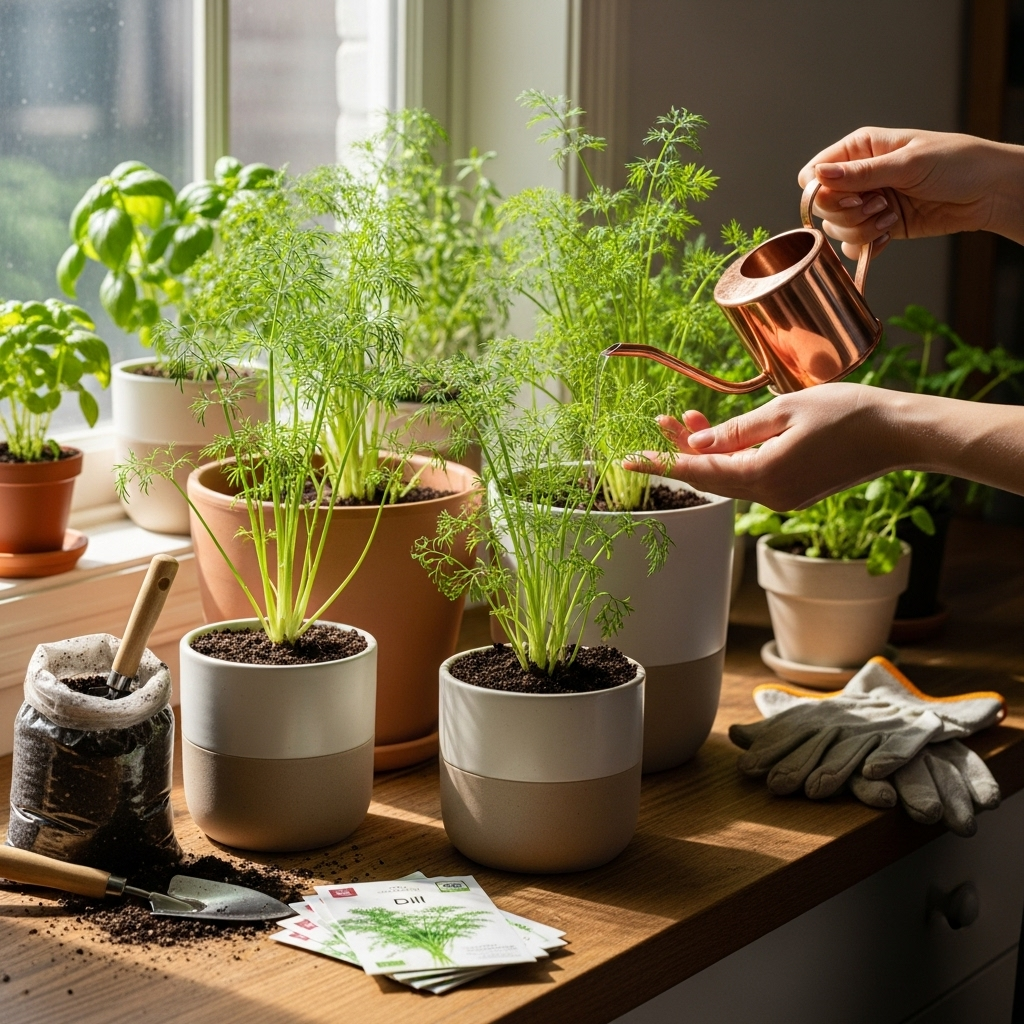
3. Watering: Finding the Perfect Balance
Watering correctly is all about consistency and avoiding extremes. Dill prefers its soil to be consistently moist but never waterlogged.
- Check the Soil Moisture: The best way to know when to water is to feel the soil. Stick your finger about an inch or two into the soil. If it feels dry, it’s time to water. If it feels moist, wait a bit longer.
- Water Thoroughly: When you do water, water until you see water running out of the drainage holes. This ensures that the entire root ball is moistened.
- Empty Saucers: Never let your pot sit in a saucer full of water. This is a surefire way to invite root rot. Dump out any excess water after about 30 minutes.
- Water Quality: If your tap water is heavily treated with chemicals, consider letting it sit out overnight. This allows some of the chlorine to dissipate.
- Seasonal Adjustments: You’ll likely need to water more frequently in warmer, brighter conditions and less frequently during cooler, darker months.
4. Temperature and Humidity
Dill is a fairly adaptable plant, but it does have its preferred conditions.
- Ideal Temperature Range: Dill thrives in average room temperatures, generally between 60-70°F (15-21°C). It can tolerate slightly cooler or warmer temperatures, but extreme fluctuations can stress the plant.
- Humidity: While dill doesn’t have high humidity demands, very dry indoor air, especially during winter when heating systems are running, can sometimes cause issues. If you notice your dill looking a bit droopy or dry despite consistent watering, you can increase humidity by:
- Misting the leaves occasionally (but don’t overdo it, as this can promote fungal issues).
- Placing the pot on a pebble tray filled with water. The evaporating water will create a more humid microclimate around the plant.
- Grouping your dill with other plants.
5. Fertilizing: Feeding Your Growing Herb
Indoor plants, especially those grown in containers, can benefit from occasional feeding. Dill is not a heavy feeder, so less is often more.
- Start with Good Soil: A quality potting mix usually contains enough nutrients to get your dill started.
- Gentle Feeding: Once your dill is established (a few weeks after germination), you can begin feeding it. Use a balanced liquid fertilizer diluted to half or even quarter strength.
- Product Recommendation: A balanced all-purpose liquid fertilizer is suitable. You can find good organic options at your local garden center or from online suppliers.
- Frequency: Fertilize sparingly, perhaps once every 4-6 weeks during the active growing season (spring and summer). Reduce or stop fertilizing in the fall and winter when growth naturally slows.
- Over-fertilizing Warning: Too much fertilizer can lead to weak, leggy growth and can even burn the plant’s roots. It’s better to under-fertilize than over-fertilize.
How to Grow Dill Indoors: Step-by-Step
Ready to get your hands dirty? Growing dill from seed indoors is a rewarding process. Here’s how you do it:
Step 1: Gather Your Supplies
Before you begin, make sure you have everything you need. This makes the planting process smooth and enjoyable.
Essential Tools and Materials:
- Dill seeds (choose a variety suited for containers if available, though most common varieties, like ‘Mammoth’ or ‘Fernleaf’, do well)
- Pots with drainage holes (at least 6-8 inches deep)
- Well-draining potting mix
- Perlite or coarse sand (optional, for drainage)
- Watering can or bottle
- Small trowel or spoon
- Optional: Grow light, fertilizer
Step 2: Sow Your Dill Seeds
Patience is key with dill germination!
- Prepare the Pot: Fill your chosen pot with the prepared potting mix, leaving about an inch of space at the top. Gently water the soil so it’s evenly moist.
- Sow the Seeds: Dill seeds are small. Sprinkle them about 1/4 inch deep into the soil. You can sow several seeds per pot, thinly spacing them if you plan to thin later, or sow them a couple of inches apart if you prefer not to thin. Some gardeners even sow seeds closer together and harvest the thinnings, enjoying baby dill greens.
- Cover and Water Gently: Lightly cover the seeds with soil. Water the surface very gently, perhaps with a spray bottle, to avoid dislodging the seeds.
- Label Your Pot: Always a good idea to label your pot with the plant type and date planted!
Step 3: Germination and Early Growth
This is where the magic begins, but it requires a little patience.
- Ideal Conditions for Germination: Keep the soil consistently moist but not soggy. A temperature between 65-70°F (18-21°C) is ideal. You can place the pot in a warm spot.
- Germination Time: Dill seeds can be slow to germinate. Be patient! It typically takes anywhere from 7 to 21 days for the first sprouts to appear. Don’t give up if you don’t see results within a week.
- First Sprouts: Once you see seedlings emerge, ensure they are getting plenty of light. If you are using a grow light, set it on a timer for about 14-16 hours a day.
- Thinning (If Necessary): If you sowed seeds densely and have multiple seedlings emerging very close together, you may need to thin them. Once the seedlings have a true set of leaves (the second set, appearing after the initial cotyledons), gently pull out the weakest seedlings, leaving the strongest ones spaced about 4-6 inches apart. This gives them room to grow without competing for resources.
Step 4: Ongoing Care for Mature Plants
As your dill grows, continue with the watering, light, and occasional fertilizing as described in the earlier sections.
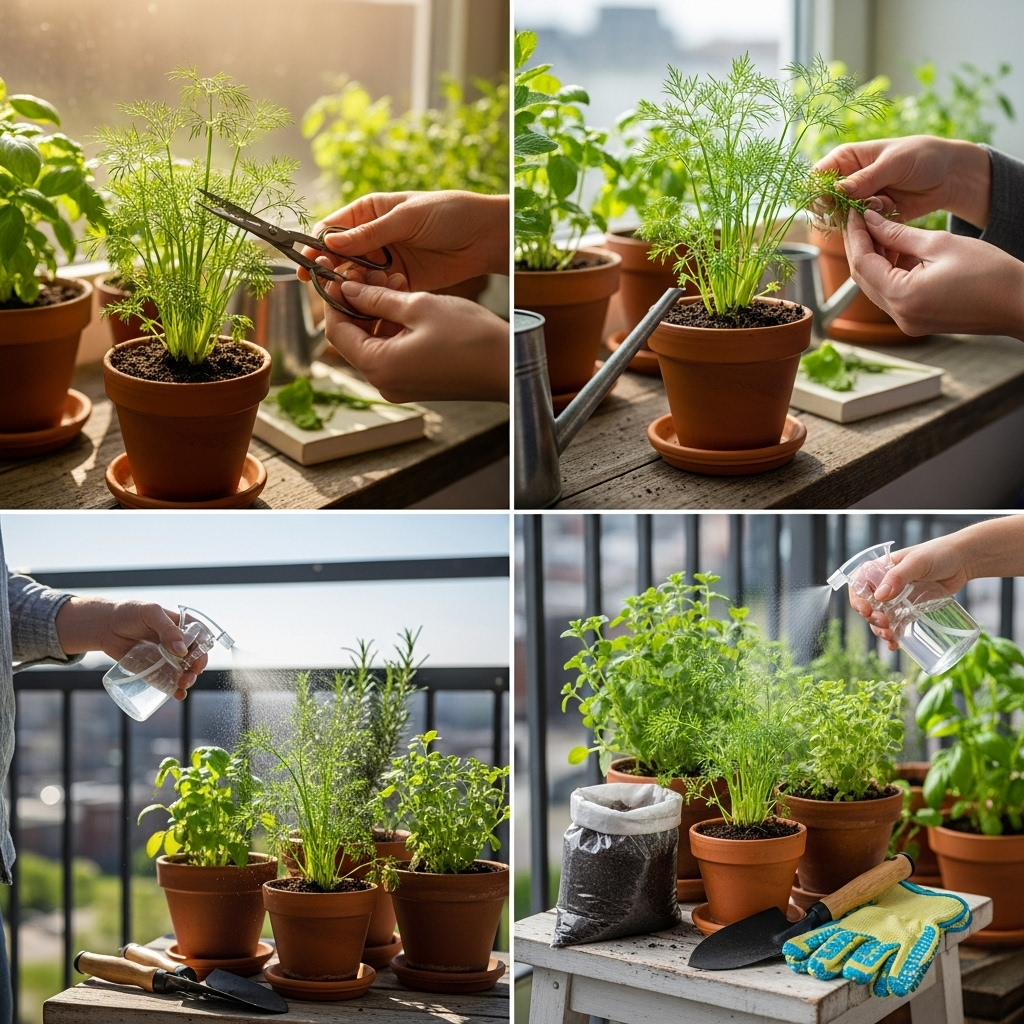
- Harvesting: You can begin harvesting your dill once the plant is about 4-6 inches tall. Snip off leaves as needed using clean scissors or pruners. For the best flavor, harvest in the morning after the dew has dried. Regular harvesting encourages the plant to produce more foliage. Avoid taking more than one-third of the plant at a time to ensure it continues to grow vigorously.
- Support: Tall varieties of dill might need some support as they grow, especially if they flower. A small stake or cage can help keep them upright.
- Flowering (Bolting): Dill is known to bolt, meaning it sends up a flower stalk, especially when stressed by heat, drought, or changes in light. While you can still eat the leaves, their flavor might become more intense and sometimes bitter. If you want to encourage leafy growth, you can pinch off flower stalks as soon as you see them. Interestingly, the flowers are edible and attract beneficial insects, so sometimes it’s nice to let them be!
Troubleshooting Common Indoor Dill Problems
Even with the best intentions, you might encounter a few bumps in the road. Here are solutions to common issues:
- Leggy Plants: This is almost always a sign of insufficient light. Move your plant to a brighter location or invest in a grow light.
- Yellowing Leaves: This can be caused by overwatering (soggy soil leading to root rot) or underwatering (dry, brittle soil). Check the soil moisture and adjust your watering schedule. It could also be a sign of nutrient deficiency if the soil is very old and has been depleted.
- Pests: Indoor dill is less prone to pests than outdoor plants, but aphids or spider mites can sometimes appear. You can often treat them by wiping the leaves with a damp cloth, or by using a horticultural soap spray. Ensure good air circulation to deter pests.
- Dill Not Germinating: Ensure your seeds are fresh, the soil is kept consistently moist, and the temperature is within the germination range.
Dill Varieties for Indoor Growing
While most dill varieties will grow indoors, some are better suited for container life and offer slightly different qualities.
| Variety | Description | Best For |
|---|---|---|
| Fernleaf Dill | Compact and bushy, with finely cut, fern-like foliage. It’s less prone to rapid bolting than other varieties and stays smaller, making it ideal for pots. | Container gardening, continuous harvesting. |
| Mammoth Dill | A classic, tall variety known for producing abundant, flavorful foliage quickly. It can grow quite large, so ensure you have adequate pot depth and potentially support. | Quick harvests, abundant leafy growth. |
| Bouquet Dill | Similar to Mammoth, producing large amounts of feathery leaves and also known for its fragrant flower heads, which are excellent for dill pickles. | General use, pickling. |
| Dukat Dill | Considered slow-bolting, meaning it stays in its leafy stage for longer before flowering. It has a strong aroma and good yields for continuous cutting. | Extended leafy harvest, culinary use. |
Dill vs. Fennel: What’s the Difference?
It’s common for beginners to confuse dill with fennel, as they look quite similar and belong to the same plant family (Apiaceae). However, they have distinct differences in taste, aroma, and growth habits.
| Feature | Dill (Anethum graveolens) | Fennel (Foeniculum vulgare) |
|---|---|---|
| Leaf Shape | Fine, feathery, almost wispy leaves. | Finer, more thread-like leaves, especially on the bulbous variety. |
| Aroma | Fresh, herbaceous, slightly grassy, with notes of anise or licorice but generally milder. | Stronger, distinct licorice or anise scent and flavor. |
| Taste | Bright, slightly tangy, and herbaceous. | Sweet, with a pronounced licorice flavor. |
| Primary Use | Leaves (fresh or dried) for flavoring, seeds for pickling and seasoning. | Bulb (vegetable), stalks, fronds (herb), seeds (spice). |
| Growth Habit | Tends to grow as an annual, often bolting readily. | Can be perennial or biennial, often forms a large bulb at the base (in bulb fennel varieties). |
For indoor herb gardens, dill is generally easier to manage and cultivate purely for its leafy fronds. Fennel, especially bulb fennel, requires more space and specific conditions to develop its bulb.
Frequently Asked Questions About Growing Dill Indoors
Here are some common questions beginner indoor dill growers have:
Q1: How long does it take for dill seeds to sprout indoors?
Dill seeds can be a bit slow! Expect them to sprout anywhere from