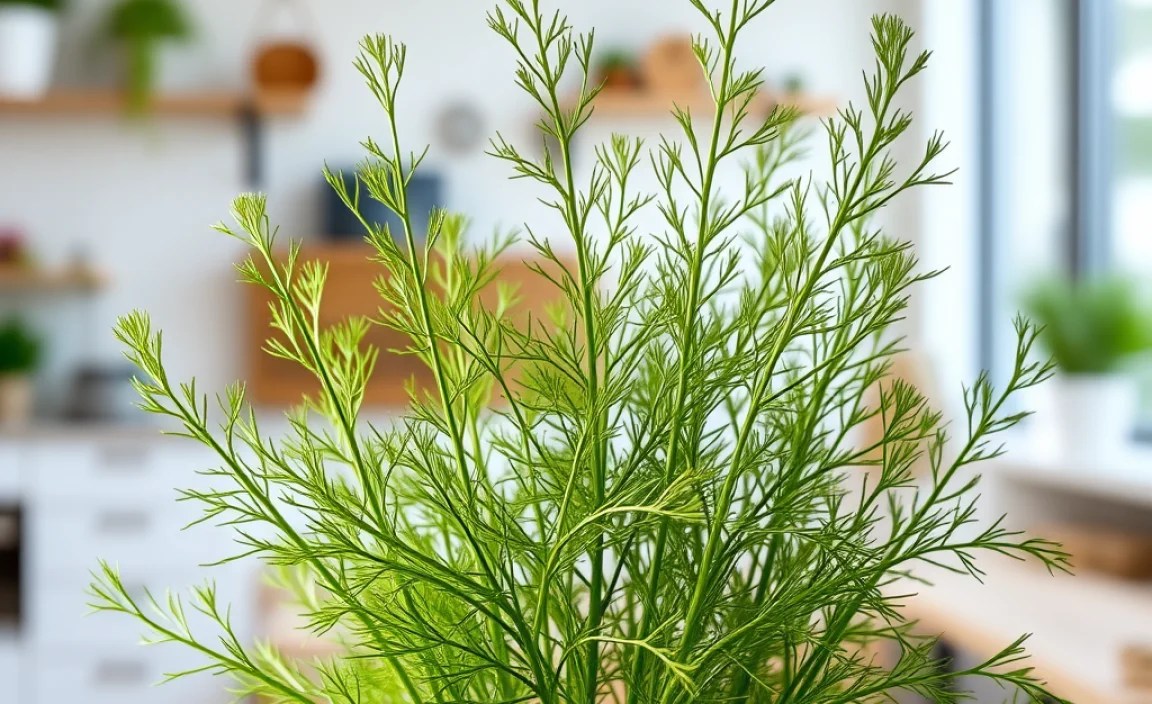
Have you ever wanted fresh herbs in winter? It is easier than you think. You can {grow dill indoors} all year. Imagine adding fresh dill to your favorite dishes. It tastes so much better than dried dill. Let’s learn how to {grow dill indoors}.
Dill is a tasty herb. It’s used in many recipes. It is also easy to care for. With a few simple steps, you can have fresh dill anytime. Are you ready to start your indoor herb garden?
Growing herbs inside can be fun. It adds green to your home. Plus, you have fresh flavors at your fingertips. We will show you how to {grow dill indoors} successfully. Get ready to enjoy the taste of homegrown dill!
Key Takeaways
- You can {grow dill indoors} and enjoy fresh herbs all year long.
- Use well-draining soil and a pot that is at least 6 inches wide.
- Place your dill plant in a sunny spot or use a grow light.
- Water regularly, keeping the soil moist but not soggy.
- Harvest dill leaves often to encourage more growth.

How to Successfully Grow Dill Indoors
Growing dill indoors can be a rewarding experience. Dill brings a fresh, vibrant flavor to many dishes. To successfully {grow dill indoors}, you need to consider a few key factors. These include selecting the right pot, using appropriate soil, and ensuring adequate light. Proper watering and regular harvesting also play vital roles. When you provide the right conditions, your dill plant will thrive. This will give you a constant supply of fresh herbs for your culinary adventures. Imagine snipping fresh dill to garnish your salads. Or perhaps adding it to your favorite dips and sauces. With a little effort, you can enjoy the taste of homegrown dill year-round. It is a simple way to elevate your cooking.
- Choose a pot that is at least 6 inches wide.
- Use well-draining potting mix for your dill.
- Place the pot in a sunny window.
- Water the soil when it feels dry to the touch.
- Harvest dill leaves regularly to promote growth.
Dill is a fast-growing herb. It can quickly fill your kitchen with its lovely aroma. To keep your dill plant healthy, make sure it gets enough sunlight. If you don’t have a sunny window, use a grow light. Also, avoid overwatering, which can lead to root rot. Regularly check the soil moisture. Only water when the top inch feels dry. Harvesting the leaves encourages the plant to produce more. It ensures that you have a continuous supply of fresh dill. With proper care, you can {grow dill indoors} and enjoy its flavor in your cooking.
Fun Fact or Stat: Dill has been used for medicinal purposes since ancient times. People believed it could soothe the stomach and help with sleep.
Choosing the Right Dill Variety
Choosing the right dill variety is important for indoor growing. Some varieties are better suited for containers than others. For example, *Fernleaf dill* is a compact variety. It is a good choice for growing indoors. It doesn’t grow as tall as other types. This makes it easier to manage in a smaller space. Other varieties like *Bouquet dill* can also be grown indoors. However, they may require more space and support. Consider the size of your growing area when selecting a dill variety. Do you have a sunny windowsill or a spacious countertop? This will help you choose the best dill for your needs. Remember, the right variety can make {grow dill indoors} much easier.
Best Soil for Indoor Dill
The best soil for indoor dill is well-draining potting mix. Dill plants need soil that doesn’t retain too much water. This can lead to root rot. A good potting mix will provide the right balance of moisture and air. You can also add perlite or vermiculite to improve drainage. These materials help to keep the soil loose and prevent compaction. Avoid using garden soil. It can be too heavy and may contain pests or diseases. Investing in a quality potting mix is essential for healthy dill growth. It provides the nutrients your plant needs to thrive. Using the right soil will help you {grow dill indoors} successfully.
Light Requirements for Dill Plants
Light is crucial for dill plants. They need at least 6 hours of sunlight each day. If you don’t have a sunny window, use a grow light. Place the light about 6-12 inches above the plant. This will provide the necessary light for healthy growth. Without enough light, dill plants can become leggy and weak. They may also produce fewer leaves. A sunny south-facing window is ideal. However, an east- or west-facing window can also work. Rotate the plant regularly to ensure even light exposure. Proper lighting is key to {grow dill indoors} and enjoying a bountiful harvest.
Fun Fact or Stat: Dill is a member of the celery family. It shares characteristics with other herbs like parsley and cilantro.

Best Location to Grow Dill Indoors
Finding the best location to {grow dill indoors} is essential for its health. Dill plants need plenty of sunlight, so a south-facing window is ideal. If you don’t have a south-facing window, an east- or west-facing window can also work. However, you might need to supplement with a grow light. The location should also be free from drafts. Extreme temperatures can stress the plant. A stable environment will help your dill thrive. Consider the humidity levels in your home as well. Dill prefers moderate humidity. If your home is dry, you may need to increase humidity around the plant. A good location can make all the difference in how well your dill grows.
- South-facing windows provide the most sunlight.
- East- or west-facing windows can work with grow lights.
- Avoid placing dill near drafts or vents.
- Maintain moderate humidity levels around the plant.
- Rotate the plant regularly for even light exposure.
When choosing a location, think about the plant’s needs. Dill requires a lot of light to grow strong and healthy. A sunny windowsill is a great option. But if you don’t have one, a grow light is a good alternative. Make sure the light is close enough to the plant to provide adequate illumination. Also, keep an eye on the temperature. Dill prefers temperatures between 60°F and 70°F. Avoid placing the plant near heaters or air conditioners. A stable environment will promote healthy growth. By carefully selecting the location, you can {grow dill indoors} successfully.
Fun Fact or Stat: Dill seeds can be used as a spice. They have a stronger flavor than the leaves and are often used in pickling.
Using Windowsills for Dill
Windowsills are a popular spot to {grow dill indoors}. They offer a convenient and sunny location. South-facing windowsills are best. They provide the most direct sunlight. Make sure the windowsill is wide enough to accommodate your pot. You may need to use a plant stand to raise the pot closer to the light. Also, check for drafts. Cold drafts can harm your dill plant. If the windowsill is drafty, consider moving the plant to a different location. Windowsills can be a great option. But you need to make sure they provide the right conditions for dill to thrive.
Grow Lights for Indoor Dill
Grow lights are a great solution when you {grow dill indoors}. They provide the light that dill needs to grow. There are many types of grow lights available. LED grow lights are energy-efficient and long-lasting. Fluorescent grow lights are another option. They are less expensive but may need to be replaced more often. Place the grow light about 6-12 inches above the plant. This will provide the right amount of light. Use a timer to control the light. Aim for 14-16 hours of light per day. Grow lights can help you grow healthy dill, even without a sunny window.
Managing Temperature for Dill
Managing temperature is important for healthy dill. Dill plants prefer temperatures between 60°F and 70°F. Avoid placing the plant near heaters or air conditioners. These can cause extreme temperature fluctuations. Keep the plant away from drafty windows. Cold drafts can stress the plant and slow its growth. Monitor the temperature regularly. Use a thermometer to ensure it stays within the ideal range. If the temperature is too low, consider moving the plant to a warmer location. Maintaining a stable temperature will help you {grow dill indoors} and enjoy a bountiful harvest.
Fun Fact or Stat: Dill is a self-seeding plant. If you let it flower, it will drop seeds that can sprout and grow new plants.

Watering and Humidity for Indoor Dill
Proper watering and humidity are crucial when you {grow dill indoors}. Dill plants need consistent moisture. But they don’t like to sit in soggy soil. Water the soil when the top inch feels dry to the touch. Use a watering can or a spray bottle to gently moisten the soil. Avoid overwatering, which can lead to root rot. Humidity is also important. Dill prefers moderate humidity levels. If your home is dry, you can increase humidity by misting the plant with water. You can also use a humidifier. Proper watering and humidity will help your dill thrive.
- Water when the top inch of soil feels dry.
- Avoid overwatering to prevent root rot.
- Use a watering can or spray bottle.
- Maintain moderate humidity levels.
- Mist the plant or use a humidifier if needed.
Watering frequency depends on several factors. These include the size of the pot, the type of soil, and the temperature. Check the soil moisture regularly. Stick your finger into the soil to see if it feels dry. If it does, it’s time to water. Water deeply, until the water drains out of the bottom of the pot. This ensures that the roots are getting enough moisture. Empty the saucer under the pot to prevent the plant from sitting in water. Consistent watering and humidity will help you {grow dill indoors} successfully.
Fun Fact or Stat: Dill is often used in Scandinavian cuisine. It’s a popular ingredient in dishes like gravlax and pickled herring.
How Often to Water Dill
Knowing how often to water is key to {grow dill indoors}. Dill plants prefer soil that is consistently moist, but not soggy. Water the plant when the top inch of soil feels dry to the touch. This might be every few days, depending on the environment. Check the soil regularly by sticking your finger into it. Adjust your watering schedule as needed. Overwatering can lead to root rot. Underwatering can cause the plant to wilt. Finding the right balance is essential for healthy dill growth.
Best Time of Day to Water
The best time of day to water dill is in the morning. This gives the plant time to absorb the moisture before the heat of the day. Watering in the evening can leave the soil too wet overnight. This can increase the risk of fungal diseases. Water the plant gently and thoroughly. Avoid getting the leaves wet, as this can also promote fungal growth. Watering in the morning helps the plant stay hydrated throughout the day. This supports healthy growth when you {grow dill indoors}.
Increasing Humidity for Dill
Dill plants prefer moderate humidity. If your home is dry, you may need to increase the humidity around the plant. One way to do this is to mist the plant with water. Use a spray bottle to gently mist the leaves. You can also place a tray of water near the plant. As the water evaporates, it will increase the humidity. Another option is to use a humidifier. Place the humidifier near the plant to maintain a consistent level of humidity. Increasing humidity can help you {grow dill indoors} and keep your dill healthy.
Fun Fact or Stat: Dill oil is used in perfumes and soaps. It has a fresh, herbaceous scent that adds a pleasant aroma.
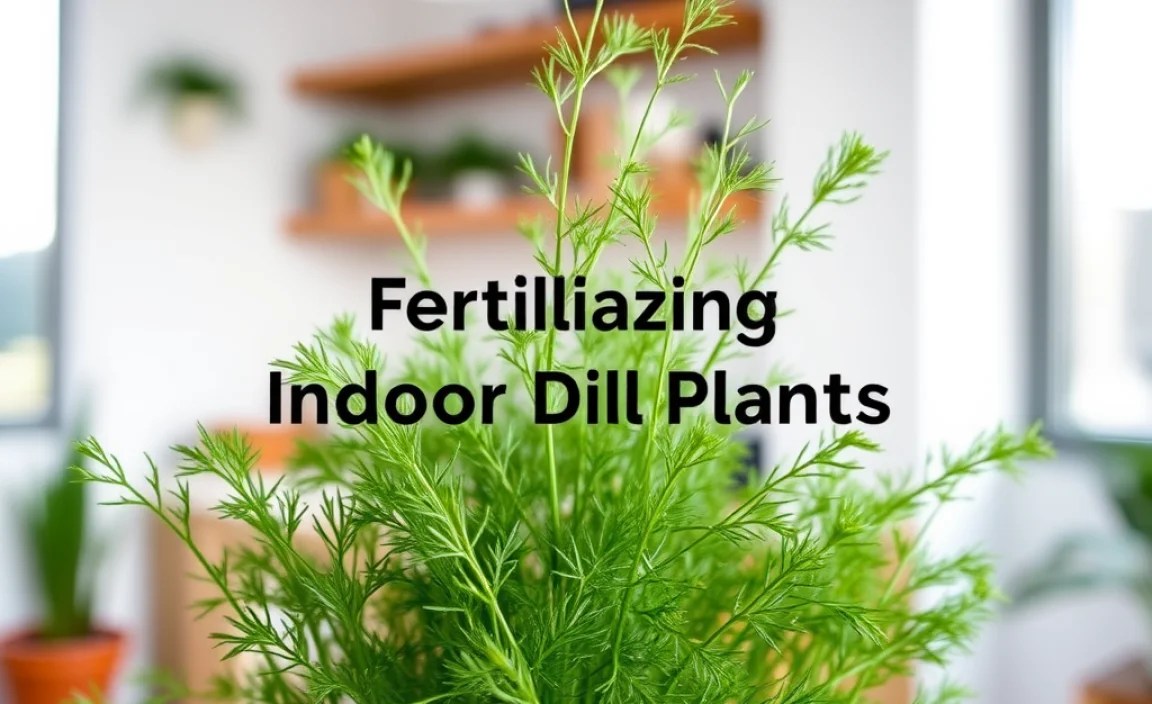
Fertilizing Indoor Dill Plants
Fertilizing is important to {grow dill indoors}. Dill plants need nutrients to thrive. A balanced liquid fertilizer works best. Dilute the fertilizer to half strength. Fertilize every 2-4 weeks during the growing season. The growing season is spring and summer. Avoid over-fertilizing, which can burn the roots. Look for a fertilizer that is specifically designed for herbs. These fertilizers contain the right balance of nutrients. Regular fertilizing will help your dill grow strong and healthy. It will also produce more flavorful leaves.
- Use a balanced liquid fertilizer.
- Dilute the fertilizer to half strength.
- Fertilize every 2-4 weeks during the growing season.
- Avoid over-fertilizing to prevent root burn.
- Choose a fertilizer designed for herbs.
- Fertilizing is not needed in the winter.
When fertilizing, make sure the soil is already moist. This will help prevent root burn. Pour the diluted fertilizer slowly around the base of the plant. Avoid getting the fertilizer on the leaves. If you do, rinse them off with water. Monitor the plant for any signs of nutrient deficiency. Yellowing leaves can indicate a lack of nitrogen. Stunted growth can be a sign of phosphorus deficiency. Adjust your fertilizing schedule as needed. Proper fertilizing will help you {grow dill indoors} and enjoy a bountiful harvest.
Fun Fact or Stat: Dill flowers are edible. They have a milder flavor than the leaves and can be used to garnish salads and other dishes.
Choosing the Right Fertilizer
Choosing the right fertilizer is key for healthy dill. A balanced fertilizer with equal parts nitrogen, phosphorus, and potassium is best. Look for a fertilizer with an N-P-K ratio of 10-10-10 or 20-20-20. Liquid fertilizers are easy to use and distribute evenly. Slow-release fertilizers are another option. They provide a steady supply of nutrients over time. Avoid using fertilizers that are too high in nitrogen. This can promote leafy growth but reduce flavor. The right fertilizer will help you {grow dill indoors} successfully.
How Often to Fertilize Dill
Knowing how often to fertilize is important for indoor dill. Fertilize every 2-4 weeks during the growing season. The growing season is spring and summer. Reduce fertilizing in the fall and winter. Dill plants need less nutrients during these months. Over-fertilizing can harm the plant. It can lead to root burn and other problems. Monitor the plant for signs of nutrient deficiency. Adjust your fertilizing schedule as needed. Proper fertilizing will help you {grow dill indoors} and keep your dill healthy.
Signs of Over-Fertilizing
Over-fertilizing can harm your dill plant. Some signs of over-fertilizing include yellowing leaves, wilting, and stunted growth. The leaves may also develop brown spots or a white crust. If you notice these signs, stop fertilizing immediately. Flush the soil with water to remove excess fertilizer. Allow the soil to dry out before watering again. Reduce the frequency of fertilizing in the future. Over-fertilizing can damage the roots and prevent the plant from absorbing nutrients. Knowing the signs can help you {grow dill indoors} without problems.
Fun Fact or Stat: Dill is a good source of vitamin C and other antioxidants. It can help boost your immune system and protect against disease.
Harvesting Dill Grown Indoors
Harvesting is the fun part when you {grow dill indoors}. You can start harvesting dill leaves when the plant is about 6-8 inches tall. Snip off the leaves with scissors. Cut the stems just above a leaf node. This will encourage the plant to produce more leaves. Harvest regularly to keep the plant productive. You can harvest up to one-third of the plant at a time. Avoid harvesting too much, which can stress the plant. Fresh dill has the best flavor. Use it right away in your favorite recipes.
- Start harvesting when the plant is 6-8 inches tall.
- Snip off leaves with scissors.
- Cut stems just above a leaf node.
- Harvest regularly to encourage growth.
- Use fresh dill for the best flavor.
Harvesting frequency depends on how quickly the plant is growing. Check the plant regularly. Harvest whenever the leaves are large enough to use. You can also harvest the flowers. Dill flowers have a milder flavor than the leaves. They can be used to garnish salads and other dishes. If you want to save the seeds, let the flowers dry on the plant. Then, collect the seeds and store them in an airtight container. Harvesting properly will help you {grow dill indoors} and enjoy a continuous supply of fresh herbs.
Fun Fact or Stat: Dill pickles get their flavor from dill seeds and dill fronds. They are a popular snack and condiment.
When to Start Harvesting
Knowing when to start harvesting is key to {grow dill indoors}. You can start harvesting when the plant is about 6-8 inches tall. The leaves should be fully developed and have a strong aroma. Avoid harvesting too early. The leaves may not have enough flavor. Also, avoid harvesting too late. The leaves may become tough and bitter. Harvesting at the right time will ensure that you get the best flavor from your dill. Regular harvesting also encourages the plant to produce more leaves.
How to Harvest Dill Leaves
Harvesting dill leaves is easy. Use a pair of scissors or pruning shears. Snip off the leaves with a clean cut. Cut the stems just above a leaf node. This will encourage the plant to produce new growth. Avoid pulling the leaves off. This can damage the plant. Harvest the leaves in the morning. The essential oils are more concentrated at this time of day. This will give you the best flavor. Harvesting properly will help you {grow dill indoors} and enjoy a continuous supply of fresh herbs.
Storing Freshly Harvested Dill
Storing freshly harvested dill will help you keep it fresh. You can store dill in the refrigerator for up to a week. Wrap the dill in a damp paper towel. Place it in a plastic bag or container. You can also freeze dill. Chop the dill and place it in ice cube trays. Fill the trays with water or olive oil. Freeze until solid. Then, transfer the cubes to a freezer bag. Frozen dill can be stored for several months. Storing dill properly will help you {grow dill indoors} and enjoy its flavor all year long.
Fun Fact or Stat: Dill is a symbol of good luck in some cultures. People often give dill to friends and family as a gift.
Common Problems When Growing Dill Indoors
Even when you try your best, you might face problems when you {grow dill indoors}. One common issue is pests. Aphids and spider mites can infest dill plants. Check your plant regularly for signs of infestation. Another problem is fungal diseases. Overwatering and poor air circulation can promote fungal growth. Make sure the soil is well-draining. Provide adequate air circulation around the plant. Root rot is another common problem. It is caused by overwatering. Avoid overwatering and allow the soil to dry out between waterings.
- Watch out for pests like aphids and spider mites.
- Prevent fungal diseases by providing good air flow.
- Avoid overwatering to prevent root rot.
- Provide well-draining soil.
- Check your plant regularly for problems.
- Take action quickly to address issues.
Addressing problems quickly is important. If you notice pests, treat the plant with insecticidal soap. Follow the instructions on the label. If you see signs of fungal disease, remove the affected leaves. Improve air circulation around the plant. If you suspect root rot, repot the plant in fresh soil. Make sure the new pot has drainage holes. By addressing problems promptly, you can {grow dill indoors} successfully.
| Problem | Cause | Solution |
|---|---|---|
| Aphids | Pests that suck sap | Spray with insecticidal soap |
| Spider Mites | Tiny pests that create webs | Increase humidity and spray with miticide |
| Fungal Diseases | Overwatering, poor air flow | Remove infected leaves, improve air flow |
| Root Rot | Overwatering | Repot in fresh soil, reduce watering |
Fun Fact or Stat: Dill is a natural insect repellent. Planting dill near other plants can help protect them from pests.
Dealing with Pests
Dealing with pests is important to {grow dill indoors}. Aphids and spider mites are common pests that can infest dill plants. Aphids are small, soft-bodied insects that suck sap from the leaves. Spider mites are tiny pests that create webs on the plant. Check your plant regularly for signs of infestation. If you notice pests, treat the plant with insecticidal soap. You can also try spraying the plant with water to dislodge the pests. Regular monitoring and prompt action will help you keep your dill plant healthy.
Preventing Fungal Diseases
Preventing fungal diseases is key to {grow dill indoors}. Overwatering and poor air circulation can promote fungal growth. Make sure the soil is well-draining. Provide adequate air circulation around the plant. Avoid getting the leaves wet when watering. If you notice signs of fungal disease, remove the affected leaves. You can also try spraying the plant with a fungicide. Proper watering and good air circulation will help you prevent fungal diseases.
Recognizing and Treating Root Rot
Recognizing and treating root rot is crucial when you {grow dill indoors}. Root rot is caused by overwatering. The roots become waterlogged and start to rot. Signs of root rot include yellowing leaves, wilting, and stunted growth. The roots may also appear brown and mushy. If you suspect root rot, repot the plant in fresh soil. Remove any affected roots. Make sure the new pot has drainage holes. Reduce watering and allow the soil to dry out between waterings.
Fun Fact or Stat: Dill is used in traditional medicine to treat digestive problems and other ailments. It has anti-inflammatory and antioxidant properties.
Summary
Growing dill indoors is a simple way to have fresh herbs all year round. Dill adds flavor to many dishes. You can easily {grow dill indoors} with the right conditions. Choose a sunny spot or use a grow light. Plant dill in well-draining soil. Water regularly, keeping the soil moist. Harvest the leaves often to encourage growth.
Watch out for common problems like pests and diseases. Address these issues quickly. With proper care, you can {grow dill indoors} and enjoy fresh dill anytime. Growing herbs indoors is fun and rewarding. It brings fresh flavors to your kitchen.
Conclusion
Growing dill indoors is a rewarding experience. You can enjoy fresh, flavorful herbs year-round. Remember to provide plenty of sunlight or use a grow light. Water consistently and harvest regularly. By following these simple tips, you can {grow dill indoors} successfully. Enjoy the fresh taste of homegrown dill in your favorite recipes.
Frequently Asked Questions
Question No 1: What is the best way to {grow dill indoors}?
Answer: To {grow dill indoors} successfully, start with a pot that is at least 6 inches wide and deep. Use a well-draining potting mix to ensure the roots don’t get waterlogged. Place the pot in a sunny location, such as a south-facing window, where it can receive at least 6 hours of sunlight per day. If you don’t have enough natural light, supplement with a grow light. Water the dill regularly, keeping the soil moist but not soggy. Harvest the leaves frequently to encourage new growth. With these steps, you can enjoy fresh dill year-round.
Question No 2: How much sunlight does indoor dill need?
Answer: Indoor dill needs at least 6 hours of direct sunlight per day to thrive. A south-facing window is an ideal spot, as it provides the most sunlight. If you don’t have a sunny window, you can use a grow light to supplement the light. Place the grow light about 6-12 inches above the plant. Use a timer to ensure the plant receives 14-16 hours of light per day. Without enough light, dill plants can become leggy and produce fewer leaves. Proper lighting is essential for healthy growth and a bountiful harvest. So, make sure your dill gets plenty of light to {grow dill indoors} effectively.
Question No 3: How often should I water my indoor dill plant?
Answer: You should water your indoor dill plant when the top inch of soil feels dry to the touch. The frequency of watering depends on several factors. These include the size of the pot, the type of soil, and the temperature and humidity of your home. Check the soil moisture regularly by sticking your finger into it. Water deeply, until the water drains out of the bottom of the pot. Avoid overwatering, which can lead to root rot. Empty the saucer under the pot to prevent the plant from sitting in water. Consistent watering is key to {grow dill indoors} successfully.
Question No 4: What kind of soil is best for growing dill indoors?
Answer: The best kind of soil for growing dill indoors is a well-draining potting mix. Dill plants need soil that retains moisture but doesn’t become waterlogged. A good potting mix will provide the right balance of moisture and air. You can also add perlite or vermiculite to improve drainage. Avoid using garden soil, as it can be too heavy and may contain pests or diseases. A high-quality potting mix is essential for healthy dill growth. It provides the nutrients your plant needs to thrive when you {grow dill indoors}.
Question No 5: How do I harvest dill leaves from my indoor plant?
Answer: You can start harvesting dill leaves when the plant is about 6-8 inches tall. Use a pair of scissors or pruning shears to snip off the leaves. Cut the stems just above a leaf node. This will encourage the plant to produce more leaves. Harvest regularly to keep the plant productive. You can harvest up to one-third of the plant at a time. Avoid harvesting too much, which can stress the plant. Fresh dill has the best flavor. Use it right away in your favorite recipes. Harvesting properly will help you {grow dill indoors} effectively and enjoy a continuous supply of fresh herbs.
Question No 6: What are some common problems when growing dill indoors and how can I fix them?
Answer: Some common problems when you {grow dill indoors} include pests, fungal diseases, and root rot. Aphids and spider mites can infest dill plants. Treat them with insecticidal soap. Overwatering and poor air circulation can promote fungal growth. Ensure well-draining soil and good air flow. Root rot is caused by overwatering. Repot the plant in fresh soil and reduce watering. Check your plant regularly for these problems and take action quickly to address them. This will help you keep your dill plant healthy and thriving.
