Herb Spiral Garden: Genius, Essential for Flavorful, Space-Saving Growth! Build a beautiful, productive herb spiral garden with simple steps, creating microclimates for diverse herbs, maximizing your growing space, and adding an elegant focal point to any garden. Perfect for beginners!
Dreaming of fresh herbs for your kitchen but worried about garden space? You’re not alone! Many of us wish we could snip fragrant basil or zesty mint straight from our backyards, but think it requires a sprawling plot. It can feel frustrating when you picture an bountiful herb garden but your space is limited, or you’re just starting out and don’t know where to begin. What if I told you there’s a way to grow a lot of herbs in a small footprint, while also making your garden look incredibly stylish? It’s true! Get ready to discover the amazing herb spiral garden. We’ll walk through exactly how to build one, turning that gardening dream into a delicious reality.
The Herb Spiral Garden: A Genius Design for Any Space
The herb spiral garden, also known as a herb tower or herb spiral, is a truly inspired piece of garden design. At its heart, it’s a clever way to create multiple microclimates within a single structure, allowing you to grow a wide variety of herbs that have different needs, all in one compact and visually stunning form. Think of it as a vertical garden that’s specifically designed for herbs, maximizing your growing potential without taking up much ground space. This makes it an almost perfect solution for small yards, patios, or even balconies (with some adjustments, of course!).
Why is it so genius? It’s all about understanding how water and sun interact on a sloped surface. The structure itself encourages water to flow from the top down, creating different moisture levels as it cascades. This means herbs that love drier conditions can thrive at the top, while those that prefer more moisture can settle happily at the base. Plus, the upward spiral design means you can grow more plants in less area, significantly boosting your harvest potential. It’s an eco-friendly, efficient, and beautiful way to grow your own culinary and medicinal herbs.
Why an Herb Spiral is Essential for Your Garden
For any gardener, especially beginners, an herb spiral is more than just a pretty feature; it’s an essential tool for success. Here’s why:
- Space Efficiency: This is the big one! A spiral garden allows you to grow a substantial amount of herbs vertically, making it ideal for even the smallest of gardens. You can easily fit 15-20 different herb plants in a single spiral.
- Microclimate Creation: The unique shape naturally creates different zones for moisture and sun exposure. This means you can cater to the specific needs of various herbs simultaneously – from sun-loving rosemary to moisture-loving mint.
- Water Management: The design channels water efficiently. Water poured at the top trickles down, hydrating the lower sections, which helps prevent overwatering of some plants and underwatering of others. It’s smart watering built right in!
- Accessibility: The raised design means less bending over, making planting, weeding, and harvesting much easier on your back.
- Pest and Disease Reduction: Good air circulation, inherent in the spiral design, helps reduce the risk of fungal diseases. Also, by keeping plants happier with their ideal conditions, they are generally more resistant to pests.
- Aesthetic Appeal: Let’s be honest, an herb spiral looks fantastic! It’s a beautiful focal point that adds structure and charm to any garden space, blending functionality with garden art.
- Beginner Friendly: While it looks impressive, building a herb spiral is a very achievable DIY project for beginners. The logic behind its function is simple, making it easy to understand and maintain.
Understanding the Microclimates
The true magic of the herb spiral lies in the distinct microclimates it creates. By understanding these zones, you can place your herbs for optimal growth. Imagine the spiral as a continuum of conditions:
1. The Very Top (Dry, Sunny):
- This area receives the most direct sun and drains the fastest.
- Ideal for herbs that love arid conditions and hate “wet feet.”
- Examples: Rosemary, Thyme, Sage, Lavender, Oregano, Marjoram.
2. The Upper Mid-Slope (Moderately Dry to Moderate Moisture):
- Still gets good sun, but retains a little more moisture than the very top.
- A versatile zone for many popular culinary herbs.
- Examples: Parsley, Chives, Dill, Cilantro, Tarragon, Fennel.
3. The Lower Mid-Slope (Moist, Shaded or Partial Sun):
- This section holds moisture better, especially if it’s partially shaded by the structure or surrounding plants.
- Good for herbs that like consistent moisture but still need good drainage.
- Examples: Basil, Mint (though mint can be invasive, so be mindful!), Lemon Balm, Lovage.
4. The Very Bottom / Well (Wet, Shaded):
- This is the coolest, dampest zone. It often collects the most water.
- Perfect for moisture-loving herbs and sometimes a small pool feature.
- Examples: Mint (again, be aware of its spreading nature!), Watercress, Sorrel.
By strategically placing your herbs according to their light and water needs, you create a thriving ecosystem where each plant can flourish. This thoughtful placement is the key to a successful herb spiral.
Types of Herb Spiral Gardens
Herb spirals can be built from a variety of materials, each offering a different aesthetic and requiring slightly different construction techniques. Here are some popular options:
1. Stone or Brick Herb Spirals
These are classic and durable. They offer a more permanent and robust structure. Stones can be sourced naturally or purchased from landscaping suppliers. Bricks provide a uniform look.
- Pros: Very durable, excellent heat retention, can create a beautiful, substantial garden feature.
- Cons: Can be labor-intensive to build, requires more skill and potentially mortar for stability, can be more expensive depending on materials.
2. Timber or Railway Sleeper Herb Spirals
Using wood allows for a more rustic or natural look. Treated timber or reclaimed railway sleepers (ensure they are safe and not heavily creosoted if growing edibles) can be used to form the spiral walls.
- Pros: Relatively easy to assemble, provides a natural aesthetic, can be cost-effective if using reclaimed materials.
- Cons: Wood will eventually degrade over time, especially in contact with soil and moisture. Requires good drainage to prolong its life.
3. Gabion Herb Spirals (Wire Cages Filled with Rocks)
Gabions are wire mesh cages filled with rocks or other durable materials. They offer a modern, industrial look and excellent drainage.
- Pros: Very long-lasting, excellent drainage, unique modern aesthetic, relatively simple construction (though heavy).
- Cons: Can be expensive due to wire mesh and rock fill, heavy to move into place, can be a more challenging DIY if assembling cages yourself.
4. Recycled Material Herb Spirals
Creativity is key here! You can use old tires stacked and filled, broken concrete pieces (urbanite gardening), old roofing tiles, or even repurposed pallets. This is the most eco-friendly and budget-conscious option.
- Pros: Extremely budget-friendly, environmentally friendly, unique and creative.
- Cons: Durability can vary greatly, aesthetics might be less uniform, ensuring soil containment can be a challenge.
The choice often comes down to your budget, available materials, desired aesthetic, and DIY comfort level. For beginners, timber or a well-constructed stone spiral without mortar (dry-stacking) are often good starting points.
Building Your Own Herb Spiral Garden: A Step-by-Step Guide
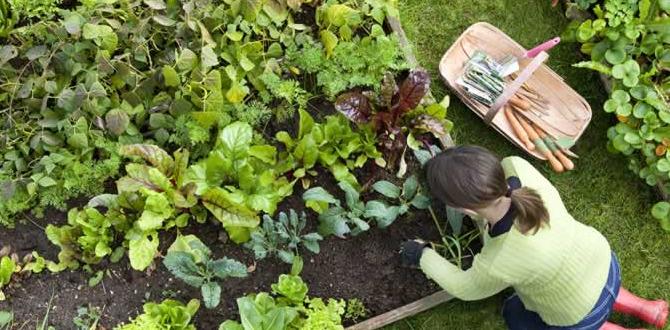
Ready to get your hands dirty? Building an herb spiral is a rewarding project. Here’s how to do it:
Materials You’ll Need:
The exact materials will depend on the type of spiral you choose, but here’s a general list:
- Structural Material: Stones, bricks, timber, gabion cages, or sturdy recycled materials.
- Base Material: Gravel or rubble for drainage at the bottom and potentially within the structure.
- Soil: A good quality compost and soil mix. You can amend with sand for drier areas.
- Landscape Fabric (Optional but Recommended): To line some sections and prevent soil wash-out, especially with stone or gabion spirals.
- Tools: Shovel, spade, wheelbarrow, level, tape measure, gloves, tamper (optional), string or hose to mark out the spiral shape.
Step-by-Step Construction:
Step 1: Choose Your Location
Select a spot that gets at least 6-8 hours of sunlight per day for most culinary herbs. Ensure it’s accessible for watering and harvesting, and has good drainage. A level spot is ideal to start, though you can build into a slight slope if needed.
Step 2: Design and Mark the Spiral
The standard diameter for a functional herb spiral is around 4-6 feet (1.2-1.8 meters). You want it wide enough to hold soil and accommodate plants but not so large that it’s unmanageable. Use a piece of string tied to a central stake, or a garden hose, to draw out a 2-3 foot wide spiral shape on the ground. The outer edge should be higher than the inner edge, creating the slope.
Step 3: Lay the Foundation and Drainage
Dig down a few inches within your marked spiral area. Lay a base layer of gravel or rubble (about 2-4 inches) for excellent drainage, especially in the central well area. This is crucial for preventing waterlogged roots at the base.
Step 4: Build the Walls
This is the most labor-intensive part. Start building the spiral walls outwards and upwards.
For Stone/Brick: Stack your materials, ensuring each layer is stable. You can dry-stack them or use mortar for a more permanent build. Aim for a height of about 18-24 inches at the back (outer) wall, sloping down to almost ground level at the front (inner) edge.
For Timber: Cut logs or planks to form the spiral. Secure them either by driving stakes into the ground on the inside and outside of the wall, or by using corner brackets. Ensure the wood is treated for ground contact if you want it to last.
For Gabions: Assemble your wire cages and fill them with rocks. If building free-form, you’ll need to carefully shape the rocks within the spiral to create retaining walls.
For Recycled Materials: Stack and secure your chosen items, ensuring they form a stable, contained spiral shape.
As you build, your spiral will naturally take shape, with the outer wall being the highest and the inner wall gradually becoming lower. Aim for a gentle, consistent slope.
Step 5: Line with Landscape Fabric (Optional but Recommended for Stone/Gabion)
If using stones or gabions, consider lining the inside of the walls (but not the very base where drainage is key) with landscape fabric. This helps retain the soil within the spiral walls and prevents it from washing out through gaps, especially in very permeable structures like gabions or loosely stacked stone.
Step 6: Fill with Soil
Now for the fun part! Fill the spiral with your prepared soil mix. Begin at the bottom well and work your way up. Leave about 2-3 inches from the top of the walls. Ensure the soil is well-distributed across the entire spiral surface. For the drier zones at the top, you can mix in extra sand or grit to improve drainage.
Referencing expert guides on garden construction can be helpful. For instance, the Royal Horticultural Society (RHS) offers excellent advice on building raised beds, many principles of which apply to sturdy wall construction for a spiral.
Step 7: Plant Your Herbs!
Now, arrange your chosen herbs according to the microclimates you understand. Plant them at the appropriate levels of the spiral, from the dry, sunny top to the moister, shadier base.
Tip: Before planting, lay out your herbs on the spiral surface to visualize their placement. Consider their mature size and spread!
Choosing Herbs for Your Spiral Garden
The beauty of the herb spiral is its ability to host a diverse range of herbs. Here’s a guide to selecting herbs for each zone. Remember to group plants with similar needs!
Herbs for the Top (Sunny & Dry Zones)
These herbs love well-drained soil and plenty of sun. They are often Mediterranean in origin.
- Rosemary: Needs excellent drainage; becomes woody and can tolerate drier conditions.
- Thyme: Low growing and drought-tolerant once established.
- Sage: Prefers drier conditions and ample sun.
- Lavender: Thrives in hot, dry, well-drained locations.
- Oregano: Hardy and drought-tolerant, loves warm, sunny spots.
- Marjoram: Similar to oregano, prefers good drainage.
Herbs for the Mid-Slopes (Moderate Sun & Moisture)
This is where you can plant many of your workhorse culinary herbs that appreciate consistent moisture but still need good airflow.
- Parsley (Flat-leaf & Curly): Benefits from consistent moisture but good drainage.
- Chives: Easy to grow, prefers moderate moisture and sun.
- Dill: Can get tall, likes sun and moderate moisture.
- Cilantro: Prefers cooler weather and more consistent moisture; can bolt in intense heat.
- Tarragon: Enjoys good drainage but consistent moisture.
- Fennel: Needs sun and moderate moisture; can become quite large.
- Anise Hyssop: Drought tolerant once established, attracts pollinators.
Herbs for the Bottom / Well (Shadier & Moist Zones)
These herbs can handle more shade and appreciate staying consistently moist. Be cautious with mint as it can be very invasive and might need containment even within the dampest part of the spiral!
- Mint: Extremely vigorous and moisture-loving. Consider planting it in a pot sunk into the spiral’s base to control its spread.
- Lemon Balm: Likes moisture and can tolerate some shade; related to mint, so keep an eye on it.
- Lovage: A tall, celery-flavored herb that likes consistent moisture.
- Sorrel: A leafy green herb that prefers moist soil and partial shade.
- Chamomile: Likes consistent moisture but good drainage.
Table: Herb Placement by Zone
| Zone | Conditions | Suggested Herbs |
|---|---|---|
| Top (Peak) | Sunniest, Dries Out Fastest | Rosemary, Thyme, Sage, Lavender, Oregano, Marjoram |
| Upper Mid-Slope | Good Sun, Moderate Moisture | Parsley, Chives, Dill, Tarragon, Fennel, Anise Hyssop |
| Lower Mid-Slope | Partial Shade, Moist Soil | Basil, Cilantro, Lemon Balm, Lovage, Sorrel |
| Bottom Well | Shadiest, Wettest | Mint (contained), Watercress (can establish in damp soil) |
When planning your planting, also consider companion planting. For example, basil is said to improve the flavor of tomatoes and repel flies, but is often grown in the moister, warmer sections. Researching individual herb needs further ensures they’ll thrive.
Maintenance and Care for Your Herb Spiral
Once your herb spiral is built and planted, it’s relatively low maintenance, but a little care goes a long way:
- Watering: Water at the top of the spiral. The water will naturally filter down. For the lower, moister sections, you may need to water less frequently or not at all, especially after rain. Check soil moisture levels by sticking your finger an inch or two into the soil.
- Weeding: Weeds can still appear, so occasional weeding is necessary. It’s easier to remove small weeds before they compete with your herbs for resources.
- Fertilizing: Most herbs don’t need much fertilizer,