Have you ever tripped on stairs outside? It can be scary! A good railing can stop falls. Do you know how to build outdoor railing for stairs? It might sound hard. But with help, you can make your stairs safer. Let’s learn about building a strong railing.
Key Takeaways
- Building outdoor stair railings improves safety and prevents accidents.
- Choose weather-resistant materials like treated wood or metal for durability.
- Accurate measurements are key to ensure the railing fits the stairs properly.
- Properly installed posts provide the needed strength for a stable railing.
- Learning how to build outdoor railing for stairs adds value to your home.
How to Plan an Outdoor Railing Project

Planning is the first step in any project. It is very important when you want to learn how to build outdoor railing for stairs. First, check local building codes. Codes tell you what is allowed. They also keep everyone safe. Think about the design you want. Do you want wood or metal? How high should the railing be? Draw a picture of your plan. Measure your stairs very carefully. Write down all the numbers. This will help you buy the right amount of materials. Getting it right early on prevents problems later. Planning saves time and money.
- Check local building codes for railing height.
- Choose the right material for your railing.
- Draw a detailed plan of your railing.
- Measure your stairs very carefully.
- Write down all the measurements.
- Buy the correct amount of materials.
Think about what tools you will need. You might need a saw, a drill, and a level. Safety is very important. Wear safety glasses and gloves. Ask an adult to help you. Building a railing takes time. Do not rush. Take breaks when you need them. Following your plan will make the job easier. A good plan means a safe and strong railing. A well-planned railing will look great and last a long time. Now you are ready to gather your materials and start building. Remember, safety first!
Why Are Building Codes Important?
Have you ever wondered why there are rules for building things? Building codes are like a set of instructions. They make sure buildings are safe. They cover things like how high a railing should be. They also say what materials to use. Codes protect people from getting hurt. Imagine if everyone built things however they wanted. Some buildings might fall down. Railings might be too weak. Building codes help prevent these problems. They are there to keep you and your family safe. So, always check the codes before you build anything.
How Do I Choose the Right Materials?
Choosing the right materials is very important. The materials must be strong and last a long time. Wood is a popular choice. But not all wood is the same. Treated wood is best for outdoors. It can handle rain and sun. Metal is another good choice. It is very strong. But it can get hot in the sun. Think about how the railing will look with your house. Choose materials that match. Pick colors that you like. The right materials will make your railing look great and last for years.
What Tools Will I Need?
Having the right tools makes the job easier. You will need a saw to cut the wood or metal. A drill is needed to make holes. A level makes sure everything is straight. A measuring tape helps you measure correctly. A hammer is good for pounding things in. Safety glasses protect your eyes. Gloves protect your hands. Ask an adult to help you use the tools. Using the right tools makes the job safer and faster. Make sure you have all the tools before you start.
Fun Fact or Stat: The average stair railing height is between 34 and 38 inches. This height helps most people hold on comfortably.
Preparing the Stair Posts for Railing
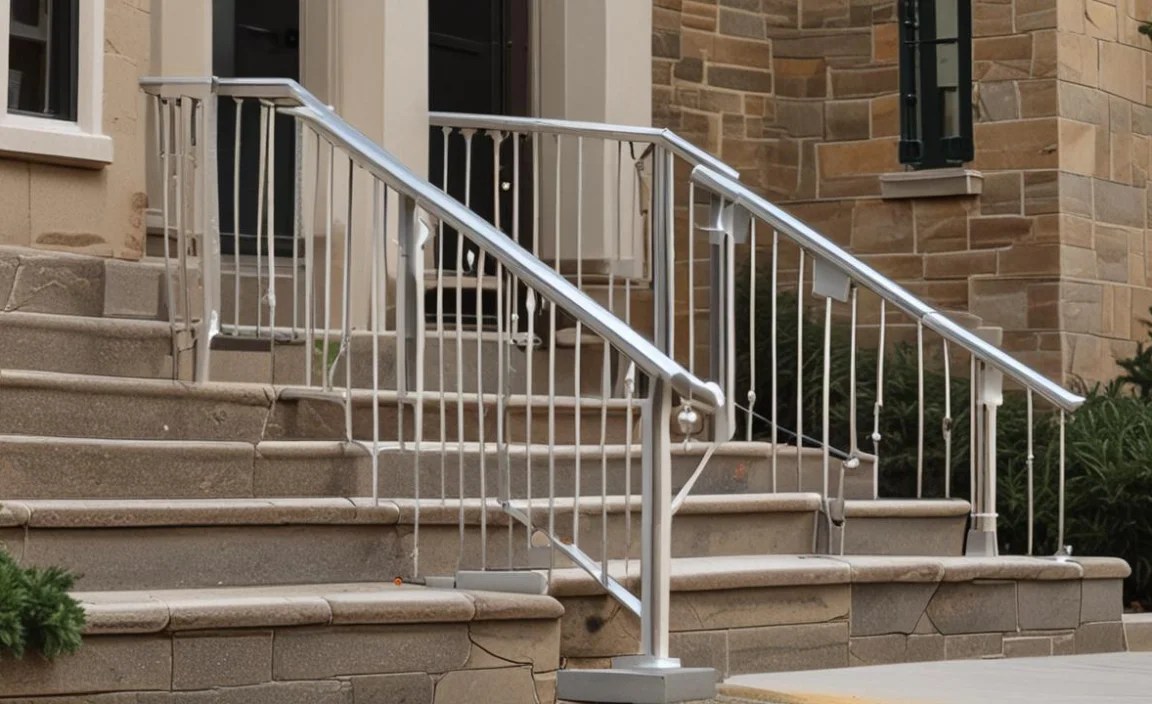
The stair posts are the backbone of your railing. They need to be very strong. First, decide where to put the posts. Usually, you will want one at the top and bottom of the stairs. You might need more if the stairs are long. Dig holes for the posts. The holes should be deep enough to hold the posts steady. Put the posts in the holes. Use concrete to hold them in place. Make sure the posts are straight up and down. Use a level to check. Let the concrete dry completely before you continue. This could take a day or two. Strong posts make a safe railing. Now you are ready to attach the railing to the posts.
- Decide where the posts will go.
- Dig deep holes for the posts.
- Use concrete to hold the posts in place.
- Make sure the posts are straight.
- Let the concrete dry completely.
- Check the posts are secure.
Think about the size of the posts. Bigger posts are stronger. Choose posts that look good with your house. You can paint or stain the posts to match your railing. Make sure the posts are smooth. Sand them down if needed. Sharp edges can be dangerous. Protecting the posts from the weather is important. You can use special paint or sealant. This will help them last longer. Taking the time to prepare the posts correctly makes your railing safer and more beautiful. Always double-check that the posts are firmly in the ground before moving forward.
How Deep Should the Post Holes Be?
The depth of the post holes is important. If the holes are not deep enough, the posts can wobble. A good rule is to make the holes at least one-third the length of the post. For example, if the post is 3 feet tall, the hole should be 1 foot deep. In colder places, you might need deeper holes. This is because the ground can freeze and push the posts up. Check with your local building codes. They might have rules about how deep the holes should be. Deeper holes make stronger railings.
What Kind of Concrete Should I Use?
There are different kinds of concrete. Some concrete is mixed with water. You just add water and stir. Other concrete is already mixed. It costs more, but it is easier to use. Choose concrete that is made for outdoor use. This kind of concrete can handle rain and snow. Make sure you follow the instructions on the bag. Adding too much or too little water can make the concrete weak. Strong concrete keeps your posts in place.
How Do I Make Sure the Posts Are Straight?
Making sure the posts are straight is very important. If the posts are crooked, the railing will look bad. Use a level to check if the posts are straight. A level has a bubble in it. When the bubble is in the middle, the post is straight. You can also use a plumb bob. A plumb bob is a weight on a string. It shows you what is straight up and down. Adjust the posts until they are straight. Hold them in place while the concrete dries. Straight posts make a better railing.
Fun Fact or Stat: Concrete takes about 24 to 48 hours to set but can take up to 28 days to fully cure and reach its maximum strength.
Cutting Railing Pieces to the Right Size

Cutting the railing pieces is a key step. Accurate cuts will make your railing look professional. Measure each piece carefully. Use a measuring tape and mark the wood or metal. Use a saw to cut along the lines. Cut slowly and carefully. A straight cut is important. If you make a mistake, you can always cut another piece. But it is better to measure twice and cut once. After cutting, smooth the edges with sandpaper. This will prevent splinters. Now you are ready to attach the pieces to the posts. Remember to follow your plan.
- Measure each railing piece carefully.
- Mark the wood or metal before cutting.
- Cut slowly and carefully along the lines.
- Make sure the cuts are straight.
- Smooth the edges with sandpaper.
- Double-check measurements.
Think about the angles of your cuts. Some pieces might need to be cut at an angle. This is especially true for stairs that are not straight. Use a protractor to measure the angles. A miter saw can help you make accurate angled cuts. Wear safety glasses when you are cutting. Metal can create sparks. Wood can create sawdust. Both can hurt your eyes. Ask an adult to help you with the cutting. They can show you how to use the tools safely. Accurate cuts make a strong and beautiful railing.
What Kind of Saw Should I Use?
There are many kinds of saws. A hand saw is good for small cuts. A circular saw is faster for long cuts. A miter saw is best for angled cuts. A jigsaw can cut curves. Choose the right saw for the job. Make sure the blade is sharp. A dull blade is dangerous. It can slip and cause an accident. Ask an adult to show you how to use the saw safely. Always wear safety glasses and gloves when using a saw. The right saw makes cutting easier.
How Do I Measure Angles Accurately?
Measuring angles can be tricky. A protractor is a tool that measures angles. Place the protractor on the angle. Line up the bottom edge with one side of the angle. Read the number where the other side of the angle crosses the protractor. This is the angle in degrees. You can also use a bevel gauge. A bevel gauge copies the angle. Then you can transfer the angle to your wood or metal. Accurate angles make your railing look professional.
What If I Make a Mistake?
Everyone makes mistakes. If you cut a piece too short, don’t worry. You can always cut another piece. If you cut a piece at the wrong angle, you can try to fix it. Sometimes you can sand it down. Other times you need to start over. Don’t get discouraged. Learning takes time. Ask an adult for help. They might have some good ideas. The important thing is to learn from your mistakes. Even experts make mistakes sometimes.
Fun Fact or Stat: A miter saw can cut angles up to 45 degrees, making it perfect for creating angled railing pieces.
Attaching the Railing to the Posts
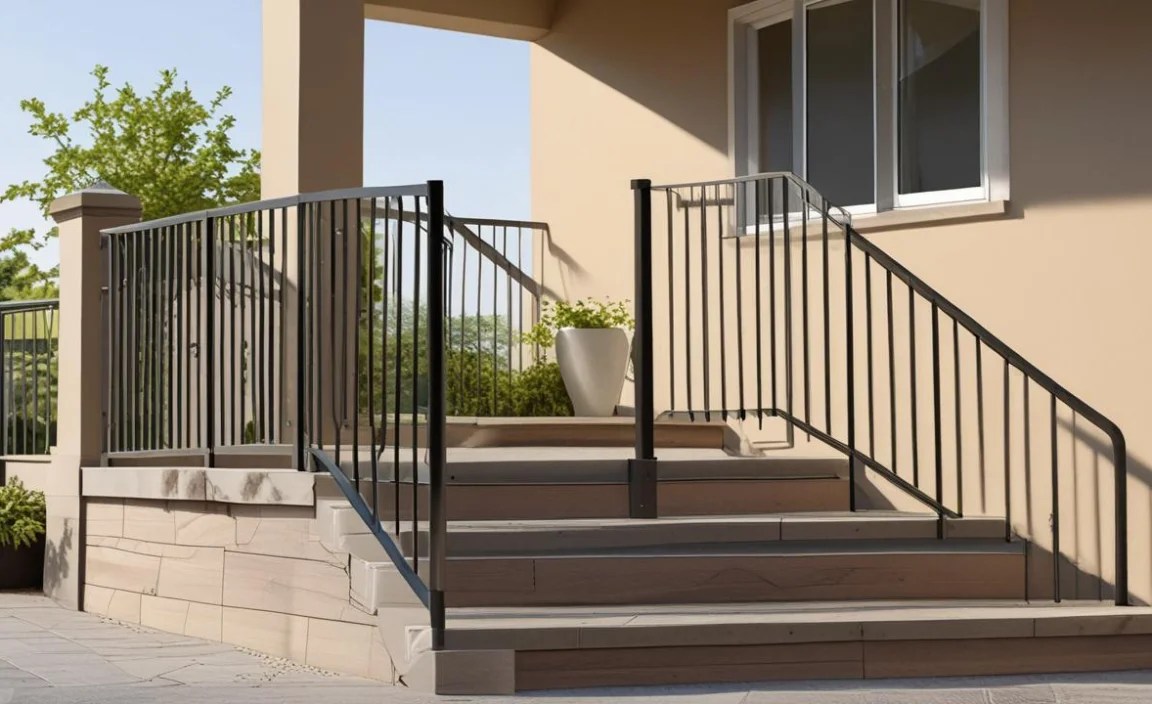
Now it’s time to put everything together. Attaching the railing to the posts makes your railing strong. Use screws or bolts to attach the railing. Screws are good for wood. Bolts are better for metal. Make sure the screws or bolts are long enough. They need to go through the railing and into the post. Use a drill to make pilot holes. Pilot holes make it easier to drive in the screws. They also prevent the wood from splitting. Tighten the screws or bolts. But don’t tighten them too much. You don’t want to strip the threads. Check that the railing is secure. It should not wobble. Now your railing is starting to take shape.
- Use screws or bolts to attach the railing.
- Make sure the screws or bolts are long enough.
- Drill pilot holes before screwing.
- Tighten the screws or bolts securely.
- Check that the railing does not wobble.
- Use the right screws for the material.
Think about the spacing between the railing pieces. The spaces should be small enough to prevent someone from falling through. Building codes might have rules about the maximum spacing. You can use spacers to make sure the spaces are even. Spacers are small blocks of wood or plastic. They help you keep the same distance between each piece. Check the alignment of the railing. It should be straight and level. Adjust the railing as needed. A well-attached railing is a safe railing. It will protect you and your family from falls.
Why Are Pilot Holes Important?
Pilot holes are small holes that you drill before putting in screws. They make it easier to drive in the screws. They also prevent the wood from splitting. When you drive a screw into wood without a pilot hole, the wood can crack. This makes the screw weaker. Pilot holes also help you put the screw in the right place. They guide the screw straight. Pilot holes are especially important for hard woods. Always drill pilot holes before screwing.
How Tight Should I Tighten the Screws?
Tightening the screws just right is important. If you don’t tighten them enough, the railing will be wobbly. If you tighten them too much, you can strip the threads. Stripped threads mean the screw won’t hold. Tighten the screws until they are snug. Then give them a little bit more turn. Stop when you feel resistance. Don’t force it. Check the screw head. It should be flush with the surface of the wood or metal. If it is sticking out, tighten it a little more. If it is sunk in, you tightened it too much.
What If the Railing Still Wobbles?
If the railing still wobbles after you attach it, check the posts. Make sure the posts are firmly in the ground. If the posts are wobbly, you need to add more concrete. You can also add braces to the posts. Braces are pieces of wood or metal that support the posts. Attach the braces to the posts and to the stairs. This will make the posts stronger. Check the connections between the railing and the posts. Make sure the screws or bolts are tight. If all else fails, ask an adult for help. They might have some good ideas.
Fun Fact or Stat: Using a power drill with adjustable clutch settings can help prevent over-tightening screws.
Adding Finishing Touches to Your Railing

Finishing touches make your railing look great. Sand down any rough edges. Use sandpaper to smooth the wood or metal. Fill any holes with wood filler. Wood filler is a paste that fills in holes. Let the wood filler dry. Then sand it smooth. Paint or stain the railing. Choose a color that you like. Use a primer before painting. Primer helps the paint stick better. Apply several coats of paint or stain. Let each coat dry before applying the next. Add decorative caps to the posts. Caps protect the posts from the weather. They also make the railing look nicer. Now your railing is complete. Enjoy your beautiful and safe outdoor railing.
- Sand down any rough edges.
- Fill holes with wood filler.
- Paint or stain the railing.
- Use a primer before painting.
- Add decorative caps to the posts.
- Clean up the work area.
Think about the hardware you use. Choose hardware that matches the style of your railing. Stainless steel hardware is a good choice. It is strong and does not rust. Check the railing regularly. Look for any signs of damage. Repair any damage quickly. This will help your railing last longer. A well-maintained railing is a safe railing. It will protect you and your family for years to come. Remember, how to build outdoor railing for stairs is a valuable skill.
Why Is Sanding Important?
Sanding is important because it makes the surface smooth. A smooth surface is easier to paint or stain. It also prevents splinters. Rough edges can be dangerous. They can cut your skin. Sanding removes these rough edges. Use different grades of sandpaper. Start with a rough grade to remove big bumps. Then use a finer grade to smooth the surface. Sand in the direction of the wood grain. This will prevent scratches. Sanding makes your railing look professional.
What Kind of Paint or Stain Should I Use?
Choose paint or stain that is made for outdoor use. Outdoor paint and stain can handle rain and sun. They also protect the wood from insects. There are different kinds of paint. Latex paint is easy to clean up. Oil-based paint is more durable. There are also different kinds of stain. Solid stain covers the wood completely. Semi-transparent stain lets some of the wood grain show through. Choose the paint or stain that you like best. Follow the instructions on the can. Proper paint or stain extends the life of your railing.
How Often Should I Check My Railing?
You should check your railing at least once a year. Look for any signs of damage. Check the posts. Make sure they are still firmly in the ground. Check the railing pieces. Make sure they are still securely attached. Look for any cracks or rot. Repair any damage quickly. You can also clean the railing. Use soap and water to remove dirt and grime. This will help your railing look its best. Regular checks help keep your railing safe.
Fun Fact or Stat: Adding a UV protectant clear coat over your paint or stain can extend its life by up to two years.
Maintaining Your Outdoor Stair Railing
Taking care of your outdoor railing is important. It helps it last longer. Check the railing every year. Look for loose screws or cracks. Tighten any loose screws. Fix any cracks right away. Clean the railing with soap and water. This removes dirt and grime. You can also use a special cleaner for wood or metal. Apply a new coat of paint or stain every few years. This protects the railing from the weather. Clear away any leaves or snow around the railing. This prevents rot and rust. A well-maintained railing is a safe railing. It will keep you and your family safe for years to come.
- Check the railing every year for damage.
- Tighten loose screws and fix cracks.
- Clean the railing with soap and water.
- Apply new paint or stain regularly.
- Clear away leaves and snow.
- Replace damaged parts.
Think about the climate where you live. If you live in a place with a lot of rain or snow, you need to take extra care of your railing. Use materials that are resistant to water and rust. Apply a sealant to protect the wood from moisture. Check the railing more often for damage. If you live in a place with a lot of sun, you need to protect the railing from fading. Use paint or stain that is resistant to UV rays. A little maintenance can go a long way. It will help your railing look great and last for many years.
What Are Signs of Railing Damage?
There are several signs of railing damage. Look for loose screws or bolts. Check for cracks in the wood or metal. Look for rot or rust. Feel the railing. If it feels wobbly, it is damaged. Check the posts. Make sure they are still firmly in the ground. If you see any of these signs, you need to repair the railing right away. Ignoring the damage can make it worse. It can also be dangerous. A damaged railing is not a safe railing.
How Do I Prevent Rot and Rust?
Rot and rust can damage your railing. To prevent rot, use treated wood. Treated wood is resistant to moisture. Apply a sealant to the wood. This will protect it from water. Keep the railing clean and dry. Clear away any leaves or snow. To prevent rust, use stainless steel hardware. Stainless steel does not rust. Apply a rust-resistant paint to metal railings. Keep the railing clean and dry. Preventing rot and rust extends the life of your railing.
When Should I Replace My Railing?
You should replace your railing when it is no longer safe. If the railing is severely damaged, it needs to be replaced. If the posts are rotting or rusting, they need to be replaced. If the railing is wobbly, it needs to be replaced. It is better to replace a railing than to risk an accident. A new railing will make your stairs safer. It will also improve the look of your home. Replacing a railing is a big job, but it is worth it for your safety.
Fun Fact or Stat: Regular maintenance can extend the lifespan of your outdoor railing by 5 to 10 years.
Railing Material Comparison
| Material | Pros | Cons | Cost |
|---|---|---|---|
| Wood | Classic look, easy to work with | Requires regular maintenance, prone to rot | Moderate |
| Metal (Steel) | Strong, durable, modern look | Can rust, gets hot in sun | High |
| Aluminum | Lightweight, rust-resistant | Less strong than steel, can dent | Moderate to High |
| Composite | Low maintenance, weather-resistant | Can look less natural, more expensive | High |
| Vinyl | Very low maintenance, affordable | Can become brittle, limited styles | Low to Moderate |
Summary
Building an outdoor railing for stairs might seem hard. However, you can do it with the right tools and plans. First, plan your project and get the right materials. Next, prepare the stair posts. Be sure they are strong. Then, cut the railing pieces to the right size. Make sure they fit well. After that, attach the railing to the posts. Make sure everything is secure. Finally, add finishing touches to make your railing look great. Don’t forget to maintain your railing. This keeps it safe and looking good for years. Learning how to build outdoor railing for stairs can protect your friends and family.
Conclusion
Building an outdoor stair railing is a great project. You can improve the safety and look of your home. Remember to plan carefully. Use the right materials and tools. Follow the steps carefully. Take your time and ask for help if you need it. With some effort, you can build a beautiful and safe railing. Now you know how to build outdoor railing for stairs. Enjoy your new railing!
Frequently Asked Questions
Question No 1: Why is it important to have an outdoor railing for stairs?
Answer: Having an outdoor railing for stairs is very important for safety. Railings help prevent falls. This is especially important for kids and older people. Railings also make it easier to walk up and down stairs. They give you something to hold onto. In the winter, railings can help you avoid slipping on ice or snow. A good railing makes your stairs safer for everyone. Knowing how to build outdoor railing for stairs can give you peace of mind.
Question No 2: What kind of wood should I use for an outdoor railing?
Answer: When building an outdoor railing, it’s best to use wood that can handle the weather. Treated lumber is a great choice. It resists rot and insects. Cedar and redwood are also good options. These woods naturally resist decay. Avoid using untreated wood. It will rot quickly when exposed to rain and sun. Make sure the wood is smooth. Sand it down to prevent splinters. Choosing the right wood will make your railing last longer. Remember to seal the wood to protect it. When considering how to build outdoor railing for stairs, wood selection is key.
Question No 3: How high should an outdoor railing be?
Answer: Most building codes require railings to be between 34 and 38 inches high. Measure from the top of the stair to the top of the railing. This height is comfortable for most adults. It also prevents children from climbing over the railing. Check your local building codes. They might have specific rules about railing height. A railing that is too low or too high can be dangerous. Make sure your railing meets the code requirements. Knowing the right height is important when learning how to build outdoor railing for stairs.
Question No 4: How do I make sure my railing is strong and stable?
Answer: To make sure your railing is strong, start with strong posts. Dig deep holes for the posts. Use concrete to hold them in place. Make sure the posts are straight. Use strong screws or bolts to attach the railing to the posts. Check the railing regularly for loose screws or cracks. Repair any damage right away. A strong railing will not wobble or move. It will support your weight. Proper installation is key to a stable railing. Consider these factors when thinking about how to build outdoor railing for stairs.
Question No 5: Can I paint or stain my outdoor railing?
Answer: Yes, you can paint or stain your outdoor railing. Painting or staining protects the wood from the weather. It also makes the railing look nicer. Use paint or stain that is made for outdoor use. Apply a primer before painting. This helps the paint stick better. Apply several coats of paint or stain. Let each coat dry before applying the next. Choose a color that you like. A well-painted or stained railing will last longer and look great. Deciding on the finish is part of learning how to build outdoor railing for stairs.
Question No 6: How do I clean my outdoor railing?
Answer: Cleaning your outdoor railing is easy. Use soap and water to remove dirt and grime. You can also use a special cleaner for wood or metal. Rinse the railing with a hose. Let it dry completely. Avoid using harsh chemicals. They can damage the railing. Clean your railing regularly. This will help it look its best and last longer. Regular cleaning is an important part of knowing how to build outdoor railing for stairs and keep it looking good.
