To successfully care for lavender indooors, provide it with at least 6-8 hours of direct sunlight daily, use well-draining soil in a pot with drainage holes, water sparingly only when the soil is dry to the touch, ensure good air circulation, and fertilize lightly.
Dreaming of that lovely scent and beautiful purple blooms filling your home? Bringing lavender indoors can be a wonderful way to enjoy its charm year-round. However, many beginners find themselves struggling to keep their indoor lavender happy and healthy. It’s a common frustration when beautiful plants don’t thrive, but don’t you worry! You can absolutely cultivate a flourishing lavender plant right in your home with a little know-how.
This guide is here to simplify everything. We’ll walk through each essential step, from finding the perfect spot to watering just right, so you can nurture your lavender plant and enjoy its fragrant beauty. Get ready to bring a touch of the Mediterranean sunshine indoors!
Why Grow Lavender Indoors?
Lavender (Lavandula) is often thought of as an outdoor garden star, but its appeal can easily extend inside. Bringing lavender indoors offers a unique set of benefits that align perfectly with a cozy, sustainable home:
- Year-Round Fragrance: Enjoy the calming scent without waiting for the growing season. A well-cared-for indoor plant can release its aroma consistently.
- A Touch of Natural Beauty: The delicate purple blooms and silvery-green foliage add a serene aesthetic to any room.
- Stress Relief: The aroma of lavender is well-known for its therapeutic properties, promoting relaxation and reducing stress. Having it nearby can create a more tranquil living space.
- Herbal Uses: Fresh lavender can be used in potpourri, sachets, or even culinary creations (ensure you use edible varieties and proper handling).
- Connection to Nature: Nurturing a living plant indoors fosters a connection with the natural world, which can be incredibly rewarding, especially for urban dwellers or those with limited outdoor space.
- Eco-Friendly Living: Growing your own herbs indoors aligns with sustainable practices by reducing the need for transported goods and promoting self-sufficiency.
Choosing the Right Lavender for Indoors
While not all lavender varieties are equally suited for indoor life, some are more adaptable than others. The key is to look for smaller, more compact varieties that can tolerate slightly less intense conditions than their outdoor counterparts. Here are a few excellent choices:
- Munstead Dwarf: A popular English lavender variety known for its compact growth and early blooming. It’s a hardy option that can adapt well to containers.
- Hidcote Blue: Another compact English lavender, Hidcote offers deep purple blooms and a wonderful fragrance. It’s also relatively forgiving for indoor conditions.
- Lady: A French lavender variety that is naturally smaller and bushier, making it a good candidate for pot culture indoors.
When shopping for your indoor lavender, look for plants that appear healthy and vigorous. Check the leaves for pests and ensure the soil isn’t waterlogged. A healthy start is crucial for success!
Essential Growing Conditions for Indoor Lavender
This is where we get to the heart of caring for your lavender plant indoors. These plants have specific needs that mimic their Mediterranean origins: lots of sun, excellent drainage, and good airflow. Meeting these requirements is the most critical step for success.
1. Sunlight: The More, The Merrier!
Lavender absolutely adores sunshine. For indoor growing, this means finding the brightest spot in your home. Aim for a south-facing or west-facing window where your plant can receive at least 6 to 8 hours of direct sunlight per day. If your home doesn’t naturally offer this much light, don’t despair!
- Supplement with Grow Lights: A full-spectrum LED grow light can be a game-changer. Place it about 6-10 inches above the plant and run it for 12-14 hours a day. This ensures your lavender gets the intense light it craves, even on cloudy days or in darker homes. Visit the Old Farmer’s Almanac for a great overview of grow light options.
- Rotate Your Plant: Turn your pot regularly (e.g., a quarter turn every few days) so all sides of the plant get adequate light exposure. This prevents leggy growth and promotes a more balanced shape.
2. Soil: Drainage is King!
Lavender is native to rocky, arid regions, so it absolutely detests having “wet feet.” Soggy soil is a fast track to root rot, which is one of the most common reasons indoor lavender fails. The perfect soil mix is gritty and fast-draining.
- Ideal Potting Mix: Start with a high-quality potting mix formulated for cacti and succulents, or create your own. A good DIY blend involves mixing equal parts potting soil, perlite, and coarse sand.
- Avoid Heavy Garden Soil: Never use dense garden soil in pots, as it retains too much moisture and compacts easily, hindering drainage and air circulation.
- Adding Amendments: You can also add horticultural grit or small gravel to your potting mix to further improve drainage.
3. Watering: Less is More
This is probably the most counter-intuitive aspect for many new plant parents! Overwatering is the enemy of lavender. It’s far better to err on the side of underwatering.
- When to Water: Always check the soil moisture before watering. Stick your finger about an inch or two into the soil. If it feels dry, it’s time to water. If there’s any hint of moisture, wait longer.
- How to Water: When you do water, water thoroughly until water drains from the bottom of the pot. This ensures all the roots get a drink. Then, discard any excess water that collects in the saucer.
- Frequency Varies: Watering frequency will depend on humidity levels, light exposure, and the size of your pot. In warmer, brighter conditions, you might water every 1-2 weeks. In cooler, less bright spots, it could be every 3-4 weeks.
- Signs of Underwatering: Drooping leaves, though this can also be a sign of overwatering, so always check the soil first.
- Signs of Overwatering: Yellowing leaves, wilting, and the soil staying wet for days.
4. Potting and Drainage
The pot you choose for your lavender is just as important as the soil. Good drainage is non-negotiable.
- Drainage Holes: Ensure your pot has at least one drainage hole, preferably more. If you fall in love with a decorative pot that lacks holes, you can use it as a cachepot. Place your lavender in a plastic nursery pot with drainage holes inside the decorative pot. This allows you to easily remove the inner pot to water and discard excess water.
- Pot Material: Terracotta pots are excellent for lavender. They are porous, which allows the soil to dry out more quickly and promotes better air circulation to the roots. Plastic pots retain moisture longer, so be extra vigilant with watering if you use them.
- Pot Size: Start with a pot that is only slightly larger than the plant’s root ball. Don’t overpot; a pot that’s too large can hold too much soil and moisture, increasing the risk of root rot. You can repot your lavender into a slightly larger container (about 2 inches wider) every couple of years as it grows.
5. Air Circulation and Ventilation
Lavender thrives in airy environments. Stagnant air can encourage fungal diseases, especially in the humid conditions often found indoors.
- Placement: Avoid placing your lavender in cramped, stuffy corners. Position it where air can move freely around it.
- Open Windows: On pleasant days, open windows to allow fresh air to circulate through your home.
- Fans: If your home is particularly humid or lacks airflow, consider using a small, oscillating fan on a low setting for a few hours a day to gently move the air around your plant.
6. Temperature and Humidity
Lavender prefers moderate temperatures and relatively low humidity, reflecting its native habitat.
- Ideal Temperature: Most indoor environments are suitable, but lavender generally prefers temperatures between 65-70°F (18-21°C) during the day and slightly cooler at night. Avoid extreme fluctuations.
- Humidity: This is where indoor growing can be tricky. Homes, especially in winter with heating systems, can be very dry, which lavender tolerates well. However, excessively high humidity can be problematic. If your home is naturally humid, ensure excellent air circulation.
Caring for Your Indoor Lavender: A Step-by-Step Approach
Now that we’ve covered the essential conditions, let’s break down the ongoing care into simple, manageable steps.
Step 1: Repotting (When Necessary)
Young lavender plants often come in small nursery pots. You’ll need to repot them into a larger container with appropriate soil within a few weeks of purchase or when they become root-bound.
Materials:
- New pot (1-2 inches larger in diameter than the current pot, with drainage holes)
- Well-draining potting mix (as described above)
- Gloves (optional)
- Trowel or small shovel
Process:
- Water the Plant: Water your lavender a day or two before repotting to ensure the soil is moist, which helps the plant slide out more easily.
- Prepare the New Pot: Add a layer of your well-draining potting mix to the bottom of the new pot.
- Remove from Old Pot: Gently tip the current pot on its side or upside down while supporting the base of the plant with your hand. Tap the bottom of the pot to loosen it, or gently squeeze the sides if it’s plastic. Carefully slide the plant out. If it’s very stuck, you might need to run a thin knife around the inside edge.
- Inspect Roots: Gently tease apart any tightly bound roots. If the roots are circling the pot densely, you can make a few shallow vertical cuts on the root ball with a clean knife to encourage outward growth.
- Position the Plant: Place the lavender plant in the new pot so that the top of the root ball is about an inch below the rim of the pot.
- Fill with Soil: Fill in the space around the root ball with your fresh potting mix, gently firming it down to eliminate air pockets.
- Water In: Water thoroughly until water drains from the bottom.
- Initial Placement: Place the repotted plant in its ideal sunny location. Avoid direct, intense sunlight for the first week or two after repotting to allow it to adjust.
Step 2: Watering Routine
As discussed, this is critical. Aim for a schedule that prioritizes checking soil moisture over a strict calendar.
How to Check for Dryness:
- Finger Test: Insert your finger 1-2 inches into the soil. If it feels dry, water.
- Weight of the Pot: Get to know how heavy your pot feels when watered versus when it’s dry. A dry pot will feel significantly lighter.
- Moisture Meter: A simple soil moisture meter can be helpful for beginners.
Watering Best Practices:
- Water deeply until it runs from the drainage holes.
- Empty the saucer so the pot isn’t sitting in water.
- Water in the morning if possible, allowing any excess moisture to evaporate during the day.
Step 3: Feeding Your Lavender (Fertilizing)
Lavender isn’t a heavy feeder. In fact, too much fertilizer can lead to lush foliage at the expense of blooms and can make the plant more susceptible to pests and diseases.
- When to Fertilize: Feed your lavender sparingly, typically only once in the early spring as new growth appears.
- What to Use: Opt for a balanced liquid fertilizer diluted to half strength, or a fertilizer formulated for herbs or flowering plants. A light application of compost can also be beneficial for potted plants.
- Avoid Over-fertilizing: Over-fertilizing can cause ‘leggy’ growth and reduce fragrance.
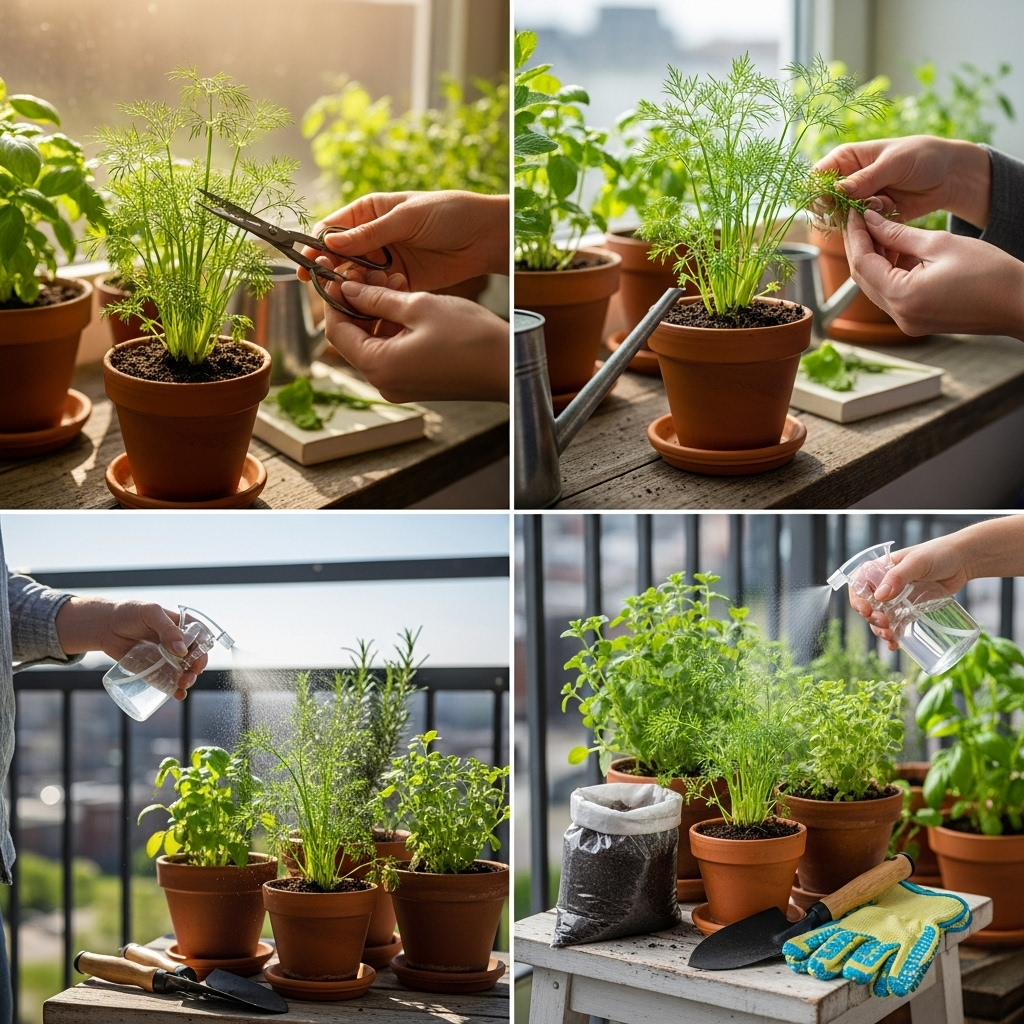
Step 4: Pruning for Health and Shape
Regular pruning is essential for maintaining a compact shape, encouraging more blooms, and preventing the plant from becoming straggly.
- When to Prune: The best time for a good prune is after the main flowering period has finished. You can also do a lighter trim in early spring to shape the plant. Deadhead spent flowers throughout the season.
- How to Prune:
- Deadheading: Snip off faded flower spikes just above a set of leaves. This encourages the plant to produce more flowers.
- Light Trimming: Throughout the growing season, you can lightly trim sprigs to maintain shape and encourage bushiness. Aim to cut back to just above a leaf node.
- Annual Pruning: After flowering, prune back about one-third of the plant’s growth, making sure not to cut into the old, woody stems. Always leave some green foliage. Pruning too hard into old wood can kill the plant. The goal is to create a rounded, bushy plant.
Step 5: Dealing with Pests and Diseases
Indoor lavender is generally quite hardy, but it can occasionally attract common houseplant pests. Overwatering is the main culprit for diseases.
- Common Pests:
- Aphids: Small, green or black insects that cluster on new growth. They can be washed off with a strong spray of water from a hose or wiped off with a damp cloth. Use insecticidal soap if the infestation is severe.
- Spider Mites: Tiny pests that create fine webbing on leaves. They thrive in dry conditions. Increase humidity around the plant and use insecticidal soap or neem oil.
- Whiteflies: Small, white, moth-like insects that fly up when disturbed. They are often found on the undersides of leaves. Treat with insecticidal soap or neem oil.
- Common Diseases:
- Root Rot: Caused by overwatering and poor drainage. Signs include yellowing leaves, wilting, and a mushy stem base. Prevention is key! If caught early, you may be able to save the plant by repotting it in fresh, dry soil and adjusting your watering habits.
- Fungal Leaf Spot: Appears as spots on leaves, often due to poor air circulation and high humidity. Improve airflow and avoid wetting the foliage when watering. Remove affected leaves.
For more detailed guidance on pest and disease management, the Virginia Cooperative Extension offers comprehensive resources on common plant problems.
Troubleshooting Common Indoor Lavender Problems
Even with the best care, you might encounter a few bumps in the road. Here’s how to address them:
| Problem | Possible Causes | Solutions |
|---|---|---|
| Yellowing Leaves | Overwatering, poor drainage, or sometimes underwatering. | Check soil moisture. If wet, reduce watering and ensure excellent drainage. If dry, water thoroughly. Repot if drainage is a persistent issue. |
| Drooping or Wilting | Overwatering (roots are drowning) or underwatering (plant is thirsty). | Always check soil moisture first. If very wet, symptoms are likely from overwatering. If very dry, water deeply. |
| No Blooms | Insufficient sunlight, over-fertilizing, or plant is too young/stressed. | Ensure at least 6-8 hours of direct sun. Reduce or cease fertilizing. Be patient; established plants will bloom. |
| Leggy, Sparse Growth | Insufficient light, lack of pruning. | Move to a brighter location or use a grow light. Prune back regularly to encourage bushiness. |
| Brown, Crispy Leaf Tips | Low humidity, overwatering (causing root stress), or excessive salt build-up from fertilizer. | Increase humidity slightly if possible (but avoid mists that can cause fungal issues). Ensure proper watering and drainage. Flush the soil by watering heavily until water drains freely for a few minutes to wash out excess salts. |
Harvesting Indoor Lavender
Enjoy