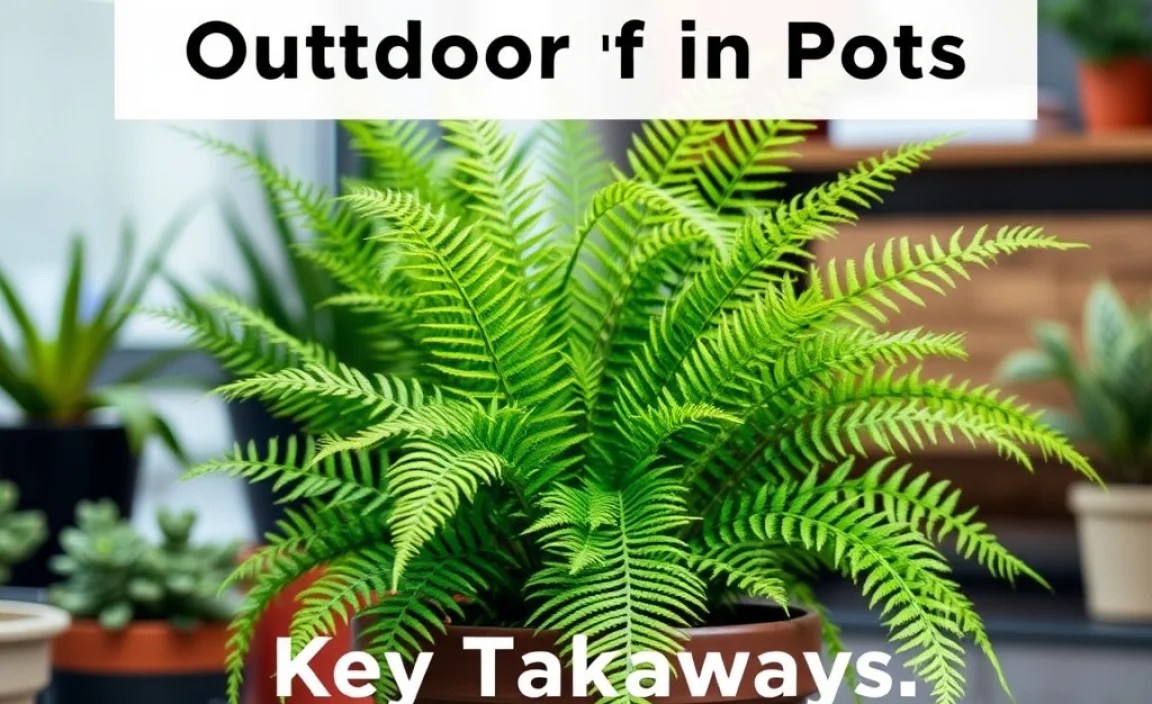
Do you love the look of lush green ferns? Do you want to bring nature to your porch? Many people think ferns are hard to grow. But with the right care, they can thrive in pots outside! Learning how to care for outdoor ferns in pots is easier than you might think. Let’s explore the secrets to happy, healthy ferns.
Key Takeaways
- Consistent watering is key for ferns. Keep their soil moist.
- Choose the right pot with good drainage. This prevents root rot.
- Provide shade or filtered sunlight. Too much sun can burn ferns.
- Fertilize lightly during the growing season. Use a balanced fertilizer.
- Knowing how to care for outdoor ferns in pots ensures healthy growth.

Choosing the Right Pot for Outdoor Ferns
Picking the correct pot is super important. It affects your fern’s health. The pot must have good drainage. This stops the roots from getting too wet. Too much water can cause root rot. Root rot can kill your fern. Choose a pot that is big enough. The fern’s roots need room to grow. Plastic, terracotta, and resin pots all work. Each has its own good and bad points. Make sure the pot fits your outdoor space. Also, think about how heavy the pot will be when it’s full of soil and water.
- Pick pots with drainage holes.
- Bigger pots hold more water.
- Terracotta pots dry out faster.
- Plastic pots retain moisture well.
- Resin pots are lightweight and durable.
Think about the size of your fern when you pick a pot. Small ferns do well in smaller pots. Bigger ferns need bigger pots. If the pot is too small, the fern will get root-bound. This means the roots are all tangled up. Then, the fern cannot get enough water or food. If the pot is too big, the soil stays wet for too long. This can also cause root rot. It is important to repot your fern as it grows. This gives it fresh soil and more room for its roots. Repotting helps your fern stay healthy and happy. Always use a pot that is the right size for your fern.
What Size Pot Do Ferns Need?
Have you ever wondered why some ferns look so much bigger and healthier than others? A big part of it comes down to the pot size. Ferns need enough room for their roots to spread out and grow. If the pot is too small, the roots get cramped. This stops the fern from getting the water and nutrients it needs. A good rule of thumb is to choose a pot that is at least two inches wider than the fern’s root ball. This gives the roots room to grow without the pot being too big. Remember, happy roots mean a happy fern!
Do Drainage Holes Really Matter?
Imagine wearing wet socks all day. It’s not comfortable, right? Ferns feel the same way when their roots are constantly wet. That’s why drainage holes are so important. They let extra water drain out of the pot. This prevents the soil from getting soggy. Soggy soil can lead to root rot. Root rot is a disease that can kill your fern. Make sure your pot has plenty of drainage holes. Your fern will thank you for it with lots of green growth!
Terracotta vs. Plastic: Which Is Better?
Choosing between terracotta and plastic pots can feel like a tough decision. Terracotta pots are made of clay. They are porous, which means they let air and water pass through. This helps the soil dry out faster. Plastic pots, on the other hand, hold moisture better. This can be good if you tend to forget to water your plants. However, it can also lead to overwatering. Think about your watering habits and the climate you live in. This will help you choose the best pot for your fern.
Fun Fact or Stat: Did you know that some ferns can live for over 100 years with proper care?

Best Soil for Outdoor Ferns in Pots
The soil you use is key for healthy ferns. Ferns like soil that holds moisture well. But it should also drain easily. A mix of peat moss, perlite, and compost works great. Peat moss helps hold water. Perlite helps with drainage. Compost adds nutrients. Avoid using garden soil in pots. It can get too compact. Compact soil does not let air reach the roots. You can also buy special potting mixes for ferns. These mixes have the right balance of nutrients and drainage. Good soil helps your fern grow strong and healthy.
- Use a well-draining potting mix.
- Add peat moss to hold moisture.
- Perlite improves drainage.
- Compost provides nutrients.
- Avoid heavy garden soil.
- Repot ferns every 1-2 years.
Good soil is more than just dirt. It’s a home for your fern’s roots. The right soil gives the roots the air, water, and food they need. Think of it like this: if you don’t eat healthy food, you don’t feel good. It’s the same for ferns! Poor soil can lead to yellow leaves and slow growth. Choosing the right soil is one of the best things you can do for your fern. It sets the stage for a happy and healthy plant. Remember to check the soil often. If it feels dry, it’s time to water!
Why Is Drainage So Important?
Imagine trying to breathe with a pillow over your face. That’s what it’s like for fern roots in soggy soil! Roots need air to survive. When soil is too wet, the air spaces fill with water. This suffocates the roots. Drainage helps get rid of extra water. This lets air into the soil. Good drainage prevents root rot. Root rot is a serious problem that can kill your fern. Make sure your potting mix drains well. Your fern will breathe easier and grow better.
What Is Peat Moss, and Why Use It?
Peat moss is like a sponge for your fern’s soil. It’s made from dead plants that have broken down over time. Peat moss can hold a lot of water. This helps keep the soil moist between waterings. It also helps to loosen the soil. This lets air reach the roots. Peat moss is a great addition to your potting mix. It helps create the perfect environment for your fern to thrive. Just remember to wet it before you mix it in. Dry peat moss can be hard to get wet.
Can I Make My Own Potting Mix?
Making your own potting mix can be a fun and rewarding project. It lets you customize the mix to your fern’s needs. A simple mix for ferns includes equal parts of peat moss, perlite, and compost. You can also add a little bit of sand to improve drainage. Mix everything together well. Then, you’re ready to pot your fern. Making your own mix saves money. It also ensures that your fern gets the best possible start.
Fun Fact or Stat: The best time to repot a fern is in the spring, when it’s starting to grow again!

Watering Needs for Outdoor Ferns in Pots
Water is very important for ferns. Ferns love moist soil. Do not let the soil dry out completely. Check the soil often. Stick your finger in the soil. If it feels dry, it’s time to water. Water deeply until water comes out of the drainage holes. This makes sure the roots get enough water. Water more often in hot, dry weather. Water less often in cool, wet weather. Overwatering can be as bad as underwatering. It can cause root rot. Finding the right balance is key for healthy ferns.
| Watering Frequency | Weather Condition | Soil Moisture | Action |
|---|---|---|---|
| Daily | Hot and dry | Dry to the touch | Water deeply |
| Every other day | Warm and sunny | Slightly moist | Check soil, water if needed |
| Twice a week | Cool and cloudy | Moist | Hold off on watering |
| Once a week | Cold and rainy | Very moist | No watering needed |
- Keep soil consistently moist.
- Water deeply when soil is dry.
- Check soil moisture regularly.
- Avoid letting ferns dry out.
- Reduce watering in cooler months.
Think of watering like giving your fern a drink. You don’t want to give it too much or too little. You want to give it just the right amount. Ferns like their soil to be moist, but not soggy. Soggy soil can cause the roots to rot. Dry soil can cause the leaves to turn brown and crispy. The best way to water is to check the soil often. Stick your finger in the soil. If it feels dry, it’s time to water. Water slowly and deeply, until the water drains out of the bottom of the pot. This ensures that the roots get a good drink.
How Can I Tell If I’m Overwatering?
Overwatering is a common mistake that even experienced gardeners make. The signs of overwatering can be tricky to spot. Look for yellowing leaves, especially on the lower parts of the plant. The soil might also be constantly wet and have a bad smell. If you suspect overwatering, stop watering right away. Let the soil dry out a bit before watering again. Make sure your pot has good drainage. This will help prevent overwatering in the future. Remember, it’s better to underwater than to overwater!
What Is the Best Time of Day to Water?
The time of day you water your fern can make a difference. Watering in the morning is usually best. This gives the leaves time to dry out during the day. Wet leaves can lead to fungal problems. Watering in the evening can leave the leaves wet all night. This increases the risk of disease. If you have to water in the evening, try to avoid getting the leaves wet. Focus on watering the soil instead. Your fern will appreciate the extra care.
Can I Use Tap Water on My Ferns?
Tap water is fine for most ferns. However, some tap water contains chemicals that can harm sensitive plants. If your tap water is heavily chlorinated, let it sit out overnight before using it. This will allow the chlorine to evaporate. Rainwater is also a great option for watering ferns. It’s naturally soft and free of chemicals. If you’re not sure about your tap water, test it or use filtered water. Your fern will thank you for the clean, pure water.
Fun Fact or Stat: Ferns help clean the air by removing toxins. They make your home healthier!

Sunlight Requirements for Outdoor Ferns
Ferns do not like direct sunlight. They grow best in shade or filtered light. Too much sun can burn their leaves. Find a spot on your porch or patio that is shady. A spot under a tree is also good. If you don’t have a shady spot, you can use shade cloth. Shade cloth blocks some of the sunlight. This protects your fern. Watch your fern for signs of too much sun. These signs include yellow or brown leaves. Move your fern to a shadier spot if you see these signs. The right amount of light is key for healthy ferns.
- Provide shade or filtered light.
- Avoid direct sunlight.
- East-facing spots are often good.
- Use shade cloth if needed.
- Watch for signs of sun damage.
Sunlight is like food for plants. But too much sunlight can be like too much food. It can make them sick! Ferns are like forest plants. They grow under the shade of trees. They are used to getting dappled sunlight. Dappled sunlight is sunlight that is filtered through leaves. This is why they don’t like direct sunlight. Direct sunlight can scorch their leaves. It’s important to find a spot that gives your fern the right amount of light. This will help it grow strong and healthy. Pay attention to how the light changes throughout the day. This will help you find the perfect spot.
What Does “Filtered Light” Mean?
“Filtered light” sounds fancy, but it’s really just light that has been softened. Think of sunlight shining through a thin curtain. The curtain blocks some of the light, making it less intense. This is what filtered light is like. You can create filtered light by placing your fern under a tree. The leaves of the tree will filter the sunlight. You can also use shade cloth. Shade cloth is a special fabric that blocks some of the sunlight. Filtered light provides the right amount of light. It helps your fern grow without getting burned.
Can Ferns Grow Indoors?
Yes, many ferns can grow indoors. However, they need the right conditions. Indoor ferns need bright, indirect light. They also need high humidity. You can increase humidity by misting your fern regularly. You can also place it on a tray of pebbles filled with water. Make sure the pot is not sitting directly in the water. Some good indoor ferns include Boston ferns, maidenhair ferns, and staghorn ferns. With the right care, you can enjoy the beauty of ferns indoors.
What If My Fern Isn’t Getting Enough Light?
If your fern isn’t getting enough light, it might look pale or leggy. Leggy means that the stems are long and thin, with few leaves. The leaves might also be smaller than usual. If you see these signs, try moving your fern to a brighter spot. Just be careful not to put it in direct sunlight. You can also use a grow light. Grow lights provide artificial light that helps plants grow. A grow light can be a great solution if you don’t have enough natural light.
Fun Fact or Stat: Some ferns can grow up to 10 feet tall in the wild!
Fertilizing Outdoor Ferns in Pots
Ferns need food to grow. Fertilizing gives them the nutrients they need. Use a balanced fertilizer. A balanced fertilizer has equal amounts of nitrogen, phosphorus, and potassium. Fertilize during the growing season. The growing season is spring and summer. Fertilize every 4-6 weeks. Do not over-fertilize. Too much fertilizer can burn the roots. Follow the instructions on the fertilizer label. Water your fern after fertilizing. This helps the fertilizer reach the roots. Fertilizing helps your fern stay green and healthy.
- Fertilize during growing season.
- Use a balanced fertilizer.
- Fertilize every 4-6 weeks.
- Follow fertilizer instructions.
- Water after fertilizing.
Think of fertilizer as vitamins for your fern. Just like you need vitamins to stay healthy, ferns need fertilizer to grow strong. Fertilizer provides the essential nutrients that ferns need. These nutrients help them produce lush, green leaves. However, too much fertilizer can be harmful. It can burn the roots and damage the plant. That’s why it’s important to use a balanced fertilizer and follow the instructions carefully. When you fertilize correctly, you’re giving your fern the boost it needs to thrive. It will reward you with beautiful, vibrant growth.
What Does “Balanced Fertilizer” Mean?
A “balanced fertilizer” is a fertilizer that contains equal amounts of nitrogen (N), phosphorus (P), and potassium (K). These three nutrients are essential for plant growth. Nitrogen helps plants grow green leaves. Phosphorus helps with root development. Potassium helps with overall plant health. A balanced fertilizer is often labeled as 10-10-10 or 20-20-20. These numbers represent the percentage of each nutrient in the fertilizer. Using a balanced fertilizer ensures that your fern gets all the nutrients it needs in the right proportions.
Can I Use Organic Fertilizer?
Yes, you can use organic fertilizer on your ferns. Organic fertilizers are made from natural materials. These materials include compost, manure, and bone meal. Organic fertilizers release nutrients slowly over time. This is less likely to burn the roots. They also improve the soil structure. Some good organic fertilizers for ferns include compost tea and fish emulsion. Just be sure to follow the instructions on the label. Organic fertilizers are a great way to feed your ferns naturally.
What Are the Signs of Over-Fertilizing?
Over-fertilizing can cause several problems for your fern. The leaves might turn yellow or brown, especially around the edges. The tips of the leaves might also look burned. You might also see a white crust on the soil surface. If you see these signs, stop fertilizing right away. Flush the soil with water to remove excess fertilizer. To do this, water the pot thoroughly until water runs out of the bottom. Then, let the soil dry out a bit before fertilizing again. Be more careful with the amount of fertilizer you use in the future.
Fun Fact or Stat: Ferns have been around for over 360 million years. They are older than dinosaurs!
Protecting Outdoor Ferns from Pests and Diseases
Ferns can sometimes get pests or diseases. Pests are small bugs that eat plants. Common fern pests include aphids and spider mites. Diseases are caused by fungi or bacteria. They can make the fern sick. Check your fern regularly for pests and diseases. Look for small bugs on the leaves. Look for spots or discoloration. If you find pests, wash the fern with soapy water. You can also use insecticidal soap. If you find a disease, remove the affected leaves. Use a fungicide if needed. Keeping your fern healthy helps prevent pests and diseases.
- Check for pests regularly.
- Wash off pests with soapy water.
- Remove diseased leaves.
- Use fungicide if needed.
- Keep ferns healthy.
Protecting your fern from pests and diseases is like protecting yourself from germs. You want to keep your fern healthy and strong so it can fight off any problems. One of the best ways to protect your fern is to inspect it regularly. Look closely at the leaves and stems for any signs of trouble. If you catch problems early, they are much easier to treat. Also, make sure your fern has good air circulation. This helps prevent fungal diseases. A healthy fern is a happy fern. It will bring you joy for years to come.
What Are Common Fern Pests?
Several pests can bother ferns. Aphids are small, soft-bodied insects that suck sap from plants. They can cause the leaves to curl and distort. Spider mites are tiny pests that spin webs on the leaves. They cause the leaves to look speckled and yellow. Scale insects are small, armored pests that attach themselves to the stems and leaves. They suck sap from the plant. Mealybugs are white, cottony pests that hide in the crevices of the plant. They also suck sap. Knowing these pests helps you identify and treat them quickly.
How Can I Prevent Diseases?
Preventing diseases is easier than curing them. Good air circulation is key. Make sure your fern has plenty of space around it. This allows air to flow freely. Avoid overwatering. Wet leaves and soil create a breeding ground for fungi. Remove any dead or decaying leaves. These can harbor disease. Water your fern in the morning. This gives the leaves time to dry out during the day. By following these tips, you can keep your fern healthy and disease-free.
Are Homemade Remedies Effective?
Homemade remedies can be effective for treating some fern pests and diseases. A simple solution of soapy water can kill aphids and spider mites. Mix a tablespoon of mild dish soap with a quart of water. Spray the solution on the affected areas. Neem oil is a natural insecticide and fungicide. It can be used to treat a variety of pests and diseases. Horticultural oil is another effective treatment. It smothers pests and prevents them from breathing. Always test homemade remedies on a small area first. This ensures that they don’t damage the plant.
Fun Fact or Stat: Some ferns are edible and are used in salads and other dishes!
Summary
How to care for outdoor ferns in pots involves several key steps. First, choose the right pot. Make sure it has good drainage. Use a well-draining potting mix. Water regularly to keep the soil moist. Provide shade or filtered sunlight. Fertilize lightly during the growing season. Watch out for pests and diseases. By following these simple steps, you can enjoy beautiful, healthy ferns on your porch or patio.
Remember, ferns are like people. They need the right environment to thrive. Give them the care they need. They will reward you with lush, green foliage. Learning how to care for outdoor ferns in pots is not difficult. It just takes a little bit of attention and effort. With the right care, your ferns will be the envy of all your neighbors.
Conclusion
Ferns add beauty to any outdoor space. They are easy to grow in pots with the right care. Make sure to water them often. Use well-draining soil. Protect them from direct sunlight. Fertilize them lightly. Watch for pests. How to care for outdoor ferns in pots ensures they stay healthy. With a little effort, you can enjoy these lovely plants. They will thrive on your porch or patio.
Frequently Asked Questions
Question No 1: How often should I water my outdoor ferns in pots?
Answer: Watering depends on the weather. Check the soil often. If the top inch of soil feels dry, water your fern. Water deeply until water drains out of the bottom of the pot. In hot, dry weather, you may need to water daily. In cooler, wetter weather, you may only need to water once or twice a week. Avoid letting the soil dry out completely. Consistent moisture is key for healthy ferns. This is crucial when thinking about how to care for outdoor ferns in pots. Proper watering helps prevent brown, crispy leaves.
Question No 2: What kind of sunlight do outdoor ferns need?
Answer: Ferns prefer shade or filtered sunlight. Direct sunlight can scorch their delicate leaves. Find a spot on your porch or patio that gets morning sun only. Or a spot that is shaded during the hottest part of the day. An east-facing location is often ideal. If you don’t have a naturally shady spot, use shade cloth. This will block some of the sunlight. Watch your fern for signs of too much sun. These signs include yellow or brown leaves. Adjust the location as needed to provide the right amount of light. This is a key part of how to care for outdoor ferns in pots.
Question No 3: What is the best soil for outdoor ferns in pots?
Answer: Ferns need well-draining soil that also retains moisture. A mix of peat moss, perlite, and compost works well. Peat moss helps hold water. Perlite improves drainage. Compost adds nutrients. Avoid using heavy garden soil, as it can become compacted and not drain well. You can also buy potting mixes specifically designed for ferns. These mixes have the right balance of nutrients and drainage. Good soil is essential for healthy root growth. Knowing this makes understanding how to care for outdoor ferns in pots easier.
Question No 4: How often should I fertilize my outdoor ferns in pots?
Answer: Fertilize your ferns during the growing season. This is spring and summer. Use a balanced fertilizer. A balanced fertilizer has equal amounts of nitrogen, phosphorus, and potassium. Fertilize every 4-6 weeks. Follow the instructions on the fertilizer label. Do not over-fertilize. Too much fertilizer can burn the roots. Water your fern after fertilizing to help the fertilizer reach the roots. Proper fertilizing helps your fern stay green and healthy. This is a vital aspect of how to care for outdoor ferns in pots.
Question No 5: How do I protect my outdoor ferns from pests?
Answer: Check your ferns regularly for pests. Common fern pests include aphids, spider mites, and mealybugs. If you find pests, wash the fern with soapy water. You can also use insecticidal soap or neem oil. These are natural and effective treatments. Make sure to treat all parts of the plant, including the undersides of the leaves. Keeping your fern healthy and providing good air circulation also helps prevent pests. Knowing these tips is key to how to care for outdoor ferns in pots effectively.
Question No 6: How do I know if my fern is getting too much sun?
Answer: Signs of too much sun include yellow or brown leaves. The leaves might also look dry and crispy. If you notice these signs, move your fern to a shadier location. You can also use shade cloth to protect it from the sun. Ferns prefer shade or filtered sunlight. Direct sunlight can scorch their delicate leaves. Adjust the location as needed to provide the right amount of light. Spotting these signs is part of how to care for outdoor ferns in pots. It ensures the fern lives a long life.
