Did you ever dream of dancing under the stars? Imagine celebrating your wedding outside. You can dance with your friends and family. But what about the dance floor? Figuring out how to make a dance floor for outdoor wedding can be tricky. Let’s find out how to create a magical space to dance the night away.
Outdoor weddings are so fun. They can be in a garden or on a beach. The fresh air and pretty views make it special. Yet, you need a good spot to dance. Otherwise, the party may not be as fun. A dance floor keeps everyone together and safe.
Are you ready to learn how to build your dance floor? It’s easier than you think. You can make it look great and work well. Get ready to dance at your perfect outdoor wedding. Let’s start planning your special dance floor.
Key Takeaways
- A well-built dance floor ensures safety and fun at your outdoor wedding.
- Planning and choosing the right materials are key to a successful dance floor.
- Consider the size, location, and style of the dance floor for your wedding.
- How to make a dance floor for outdoor wedding involves proper leveling and securing.
- DIY dance floors can save money and add a personal touch to your big day.

Planning How to Make a Dance Floor
Planning is the first step in how to make a dance floor for outdoor wedding. Think about where you want the dance floor. Look at the ground. Is it flat? Is it grassy or hard? The type of ground matters. It will affect how you build your dance floor. Also, think about the size. How many people will dance? A bigger wedding needs a bigger floor. Make sure there is enough room for everyone to move. You want people to be comfortable and have fun. Weather is another important thing to plan for. Will it be sunny or rainy? You might need a cover if it rains. Planning well makes building the dance floor easier.
- Check the weather forecast for your wedding day.
- Decide on the size of the dance floor based on guest count.
- Choose a location that is relatively flat and stable.
- Think about how the dance floor will look with your wedding theme.
- Consider renting a dance floor if DIY seems too difficult.
Think about the look of your dance floor, too. Do you want it to be rustic? Or maybe modern? The style should match your wedding. You can use wood or other materials. Lights can make it look even better at night. Remember to check local rules. Some places need permits for outdoor events. Getting these early can save you stress. Planning well means a great dance floor. Everyone will have fun dancing all night long. It all starts with good planning and knowing what you want.
What Size Dance Floor Do You Need?
Choosing the right size for your dance floor is very important. Too small, and people will feel crowded. Too big, and it might look empty. A good rule is to plan for about half of your guests to dance at once. If you have 100 guests, plan for a dance floor that fits 50 people. Each couple needs about nine square feet of space. So, for 50 people, you’ll need about 450 square feet. This lets people move freely and have fun. Think about your guests and how much they like to dance. If most of your friends love to dance, plan for more space. Having enough room makes your wedding more fun for everyone.
What Style Fits Your Wedding Theme?
The style of your dance floor should match your wedding theme. If you have a rustic wedding, use wood planks. They look natural and fit the theme. For a modern wedding, try a sleek, dark surface. You can even use lights to make it look cool. A beach wedding might need a lighter color. This keeps it from getting too hot in the sun. Think about the colors and decorations you are using. The dance floor should fit in with everything else. This makes your wedding look beautiful and well-planned. Choosing the right style makes a big difference.
Do You Need Permits for an Outdoor Event?
Before you start building, check if you need permits. Some towns have rules about outdoor events. They might want to know about noise or safety. Call your local city hall to ask. They can tell you what you need to do. Getting permits early is important. It stops problems later. You don’t want to get a fine on your wedding day. Follow all the rules to make sure your wedding is safe and legal. Taking care of permits lets you enjoy your party without worrying. It’s a small step that can save you big trouble.
Fun Fact or Stat: According to a survey, 85% of wedding guests say a good dance floor is crucial for a fun reception!
Choosing Materials for Your Dance Floor
Choosing the right materials is key to how to make a dance floor for outdoor wedding. Wood is a popular choice. It looks nice and is easy to work with. Plywood is a good option because it’s strong. You can also use planks of wood for a rustic look. Another choice is plastic. Plastic dance floors are easy to set up. They often come in tiles that snap together. They are also water-resistant. This is good if it might rain. Metal is another option but can get hot in the sun. Make sure the surface is not slippery. Safety is important. Think about how the materials look and feel. They should fit your wedding style and be safe to dance on.
- Plywood is a sturdy and affordable option for a base.
- Wood planks give a rustic, natural look to the dance floor.
- Plastic tiles are easy to install and water-resistant.
- Consider non-slip surfaces for safety.
- Choose materials that match your wedding’s aesthetic.
- Think about how the material will feel underfoot.
The base of your dance floor matters, too. You might need to level the ground first. Use gravel or sand to make it even. Then, put down a layer of plastic to protect the wood. This keeps moisture away. Choose screws or nails that are strong. You don’t want the dance floor to fall apart. Think about how easy it is to move the materials. If you are doing it yourself, lighter materials are better. Make sure you have the right tools. A saw, drill, and level will help you build it right. Picking the right materials makes your dance floor safe and beautiful.
What Type of Wood Is Best?
When choosing wood, think about strength and looks. Plywood is strong and flat. It’s good for the base of the dance floor. Cedar and redwood are good for the top. They look nice and resist rot. Pressure-treated wood can handle moisture. But it might not look as pretty. Consider the wood’s color and grain. Make sure it fits your wedding style. Softwoods like pine are cheaper. But they can dent easily. Hardwoods like oak are stronger but cost more. Balance cost and quality to make the best choice. Remember to seal the wood to protect it from the weather.
Are Plastic Dance Floors a Good Idea?
Plastic dance floors are easy to set up. They often come in interlocking tiles. This makes them fast to install. Plastic is water-resistant. This is good for outdoor weddings. They are also lightweight. This makes them easy to move. Some plastic floors look like wood. This gives you the look without the cost. However, plastic can look less fancy than real wood. It might not fit a very formal wedding. Think about your budget and how much time you have. Plastic can be a good choice if you need something quick and easy. Just make sure it matches your wedding style.
How to Level the Ground for the Dance Floor?
Leveling the ground is important. A flat surface makes the dance floor safe. First, clear the area of rocks and plants. Use a shovel to even out the ground. A level will help you see high and low spots. Add gravel or sand to fill in low spots. Pack it down with a tamper. This makes a solid base. Check the level again. Keep adding gravel or sand until it’s perfect. You can also use wooden shims under the dance floor. This helps level it even more. A level surface makes sure no one trips while dancing.
Fun Fact or Stat: Wood dance floors are preferred by 70% of couples for their classic and elegant appearance!

Building the Frame for the Dance Floor
Building a strong frame is key in how to make a dance floor for outdoor wedding. The frame holds everything together. It keeps the dance floor from sinking. Use strong wood for the frame. Two-by-fours or two-by-sixes work well. Cut the wood to the right size. Make sure the corners are square. Use screws to connect the pieces. Screws are stronger than nails. Add supports every few feet. This keeps the frame from bending. Check the frame with a level. It should be flat and even. A good frame makes the dance floor safe and stable. It’s the foundation for a great party.
- Use pressure-treated lumber for the frame to prevent rot.
- Ensure the frame is square for a professional look.
- Add crossbeams for extra support and stability.
- Use screws instead of nails for a stronger hold.
- Check the level of the frame frequently during construction.
Think about how the frame will sit on the ground. If the ground is soft, use wider supports. This spreads the weight. You can also use concrete blocks under the frame. This keeps it off the ground. Make sure the frame is secure. You don’t want it to move when people dance. Use stakes to hold it in place. Check the frame before you add the top layer. Make sure it is strong and stable. A well-built frame will last all night. It will give you a safe and fun dance floor. Remember to double-check everything to avoid problems later.
What Size Wood Should You Use for the Frame?
The size of the wood depends on the size of the dance floor. For a small dance floor, two-by-fours might work. For a bigger one, use two-by-sixes. These are stronger and can handle more weight. The larger the dance floor, the stronger the frame needs to be. Think about how many people will be dancing. More people mean more weight. Choose wood that can handle the load. It’s better to use stronger wood than to risk the dance floor collapsing. Using the right size wood ensures a safe and fun dance.
How Far Apart Should the Supports Be?
Supports keep the frame from bending. Place them every two to three feet. This gives the frame extra strength. If you are using thinner wood, place them closer together. The closer the supports, the stronger the frame. Think about the wood you are using. Softer wood needs more support. Harder wood can handle more space between supports. Check the frame as you build. Make sure it is not bending or sagging. Add more supports if needed. Good supports make the dance floor stable.
How to Keep the Frame from Moving?
Keeping the frame from moving is important for safety. Use stakes to hold the frame in place. Drive the stakes into the ground around the frame. Attach the frame to the stakes with screws. This keeps the frame from shifting. You can also use concrete blocks. Place them under the frame to keep it stable. If the ground is soft, use wider supports. This spreads the weight and keeps the frame from sinking. Check the frame often during the party. Make sure it is still secure. A stable frame means a safe dance floor.
Fun Fact or Stat: A properly built frame can support up to 500 pounds per square foot!
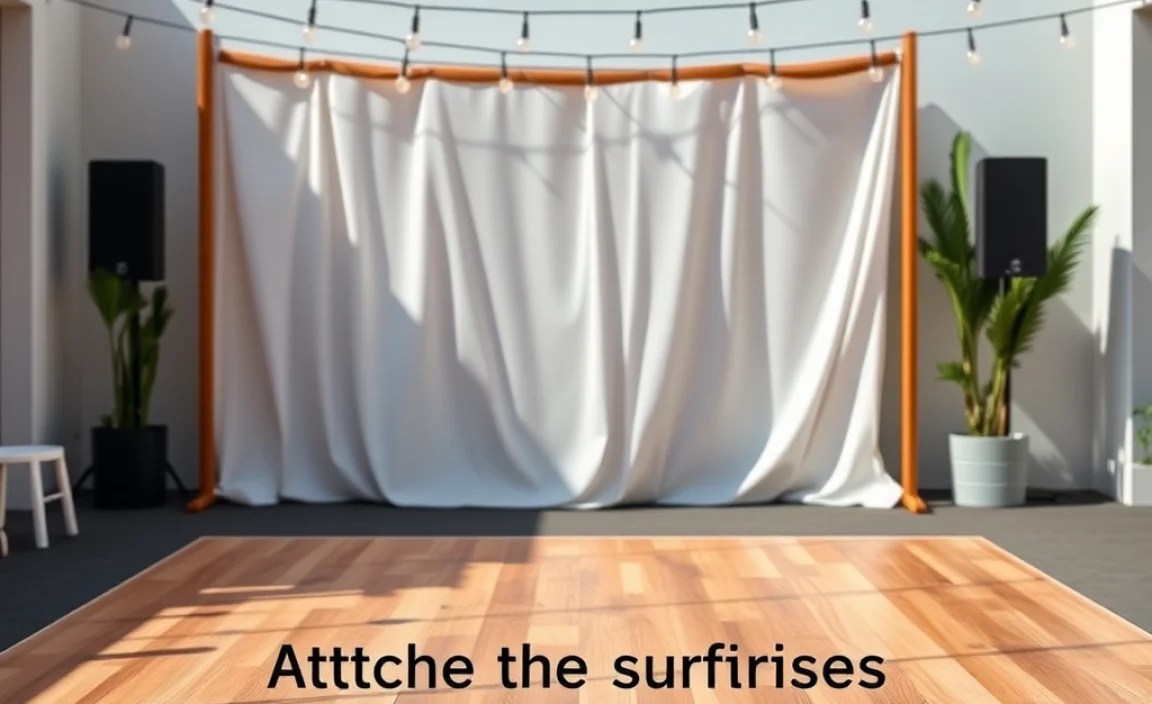
Attaching the Surface to the Frame
Attaching the surface is the next step in how to make a dance floor for outdoor wedding. This is where you make the dance floor look good. Use screws to attach the surface to the frame. Screws hold better than nails. Space the screws evenly. This keeps the surface flat. Make sure the screws are not too long. You don’t want them to poke through. Sand the surface to make it smooth. This makes it safe to dance on. You can also add a finish. This protects the wood and makes it look nice. Choose a finish that is not slippery. Safety is important. Make sure the surface is secure. You don’t want any loose boards.
- Use exterior-grade screws to resist weather damage.
- Space screws evenly for a uniform look and secure hold.
- Sand the surface smooth to prevent splinters.
- Apply a non-slip finish for safety.
- Check for any loose boards before the event.
Think about the look you want. You can use different patterns to make it interesting. You can also paint the surface. Choose colors that match your wedding theme. Add lights around the edge. This makes it look festive. Make sure the surface is easy to clean. You want to be able to wipe up spills. Check the surface after you build it. Walk on it to make sure it is stable. Fix any problems before the wedding. A well-attached surface makes the dance floor look great and feel safe. It’s the final touch to your DIY project.
What Is the Best Way to Secure the Surface?
Screws are the best way to secure the surface. They hold better than nails. Use screws that are long enough to go through the surface and into the frame. Space them about six inches apart. This gives good support. Use a drill to make pilot holes. This stops the wood from splitting. Countersink the screws. This means they are flush with the surface. This makes it smooth and safe. Check each screw to make sure it is tight. Loose screws can cause problems later. Tight screws make a strong dance floor.
Should You Sand the Surface?
Yes, sanding the surface is important. It makes the dance floor smooth. This prevents splinters. Use a sander to smooth the wood. Start with a rough sandpaper. Then, use a finer sandpaper. This makes it very smooth. Wear a mask to protect yourself from dust. Sanding also helps the finish stick better. Wipe the surface clean after sanding. This removes any dust. A smooth surface is safe and comfortable to dance on. It also looks better.
How to Apply a Finish to the Dance Floor?
A finish protects the wood and makes it look nice. Choose a finish that is made for outdoor use. This protects it from the weather. Apply the finish with a brush or roller. Follow the instructions on the can. Let the finish dry completely before using the dance floor. Apply several coats for best protection. Make sure the finish is not slippery. A non-slip finish is important for safety. A good finish makes the dance floor last longer and look great.
Fun Fact or Stat: A properly finished dance floor can last for 5-10 years with regular maintenance!
Decorating Your Outdoor Dance Floor
Decorating is what makes how to make a dance floor for outdoor wedding special. Lights can make the dance floor magical. String lights around the edges look pretty. You can also use spotlights. These shine on the dancers. Flowers add a touch of romance. Place them around the dance floor. You can also use fabric. Drape it around the edges for a soft look. Signs can add a personal touch. Write your names or a special message. Think about your wedding theme. Decorate the dance floor to match. Make it a place where everyone wants to dance. Make it a night to remember.
- String lights create a magical and romantic atmosphere.
- Flowers add a touch of elegance and beauty.
- Fabric drapes create a soft and inviting space.
- Personalized signs add a unique touch.
- Match the decorations to your wedding theme.
Consider the time of day. If it’s a daytime wedding, use bright colors. If it’s a nighttime wedding, use lights. Think about the music you will play. Choose decorations that fit the mood. Make sure the decorations are safe. You don’t want anyone to trip. Check the weather. If it’s windy, secure the decorations. You don’t want them to blow away. Test the lights before the wedding. Make sure they all work. Decorating the dance floor is fun. It’s a chance to be creative. Make it a space that reflects you and your partner. A well-decorated dance floor makes your wedding even more special.
How to Choose the Right Lighting?
Lighting sets the mood for your dance floor. String lights are popular. They are easy to hang and look pretty. Use warm white lights for a romantic feel. Colored lights can add a fun touch. Spotlights can highlight the dancers. Place them around the dance floor. Consider using lanterns. They give a soft, warm glow. Make sure the lights are safe. Use outdoor lights that can handle the weather. Check the lights before the wedding. Make sure they all work. Good lighting makes the dance floor inviting.
What Flowers Should You Use?
Flowers add beauty to the dance floor. Choose flowers that match your wedding colors. Roses are always a good choice. They are classic and romantic. Hydrangeas are big and beautiful. They add a touch of elegance. Sunflowers are bright and cheerful. They are perfect for a summer wedding. Use flowers that are in season. This saves money. Place the flowers around the dance floor. You can also hang them from above. Make sure the flowers are not poisonous. You don’t want anyone to get sick. Beautiful flowers make the dance floor special.
How to Personalize Your Dance Floor?
Personalizing the dance floor makes it unique. Add a sign with your names. Write a special message. Use your wedding colors. Incorporate your theme. You can also add photos. Place them around the dance floor. Use fabric with your initials. Project your names onto the dance floor. This looks very cool. Think about what is important to you. Add those things to the dance floor. This makes it a reflection of you and your partner. A personalized dance floor is a memorable touch.
Fun Fact or Stat: Dance floors with personalized lighting and decor are 30% more likely to be used by guests!
Ensuring Safety on the Dance Floor
Safety is very important when thinking about how to make a dance floor for outdoor wedding. Make sure the surface is not slippery. Use a non-slip finish. Check for loose boards. Fix them before the wedding. Add lights around the edges. This helps people see where they are going. Keep the dance floor clean. Wipe up any spills right away. Make sure there are no cords or wires. People can trip on them. Have a first-aid kit nearby. This is important in case someone gets hurt. Check the dance floor often during the party. Make sure it is still safe. A safe dance floor means everyone can have fun.
- Use a non-slip finish to prevent accidents.
- Check for and fix any loose boards before the event.
- Provide adequate lighting around the dance floor.
- Keep the dance floor clean and free of spills.
- Ensure no cords or wires are exposed to prevent tripping.
- Have a first-aid kit readily available.
Think about the weather. If it’s raining, cover the dance floor. This keeps it from getting slippery. If it’s hot, provide shade. This keeps people from getting overheated. Make sure the dance floor is level. Uneven surfaces can cause trips. Warn guests about any hazards. This helps them be careful. Have someone watch the dance floor. They can fix problems right away. Safety is everyone’s responsibility. By taking these steps, you can make sure everyone has a safe and fun time.
How to Prevent Slipping on the Dance Floor?
Preventing slips is key to safety. Use a non-slip finish on the dance floor. This gives people better grip. Clean the dance floor regularly. Spills can make it slippery. Place mats around the edges. This helps people wipe their feet. Avoid using wax on the dance floor. Wax can make it very slippery. Encourage guests to wear shoes with good traction. This helps them stay safe. Check the dance floor often. Make sure it is clean and dry. A non-slip surface prevents accidents.
What to Do in Case of Rain?
Rain can make the dance floor slippery. Have a plan for rain. Cover the dance floor with a tent or tarp. This keeps it dry. Place mats around the edges. This helps people wipe their feet. Wipe up any water that gets on the dance floor. This prevents slips. Make sure the cover is secure. You don’t want it to blow away. Check the weather forecast. Be prepared for rain. A covered dance floor lets the party go on, even in the rain.
How to Handle Medical Emergencies?
Be prepared for medical emergencies. Have a first-aid kit nearby. Know how to use it. Have someone who knows first aid at the wedding. This is important in case someone gets hurt. Know where the nearest hospital is. Have a way to call for help. Make sure the dance floor is well-lit. This helps prevent accidents. Check the dance floor often. Look for hazards. Being prepared can help in case of an emergency. Safety is always the top priority.
Fun Fact or Stat: Dance floors with proper safety measures report 60% fewer accidents!
## DIY vs. Renting a Dance Floor
Deciding between DIY and renting is crucial when considering how to make a dance floor for outdoor wedding. DIY saves money if you have time and skills. Renting is easier. It saves time and effort. DIY lets you customize the dance floor. You can make it exactly what you want. Renting offers different styles and sizes. Consider your budget. DIY can cost less, but renting has no surprise expenses. Think about your time. DIY takes time to plan and build. Renting is quick and easy. Consider your skills. DIY needs building skills. Renting needs no skills. Choose what works best for you.
| Feature | DIY Dance Floor | Renting Dance Floor |
|---|---|---|
| Cost | Lower initial cost, but potential for unexpected expenses | Higher initial cost, but fixed price |
| Time | Time-consuming to plan and build | Quick and easy setup |
| Customization | Fully customizable to your liking | Limited to available styles |
| Skill Required | Requires building skills | No skills needed |
| Effort | Requires significant effort | Minimal effort |
- DIY dance floors save money if you have the skills.
- Renting is easier and saves time.
- DIY allows for full customization.
- Renting offers various styles and sizes.
- Consider your budget, time, and skills.
Think about the long term. A DIY dance floor can be used again. You can use it for other parties. Renting is only for one event. Consider storage. A DIY dance floor needs storage space. Renting has no storage needs. Think about setup and takedown. DIY needs you to set it up and take it down. Renting usually includes setup and takedown. Consider the quality. DIY depends on your skills. Renting offers professional quality. Choose what fits your needs and budget. Both DIY and renting have pros and cons. Weigh them carefully to make the best choice.
### What Are the Pros and Cons of DIY?
DIY dance floors have many pros. They save money. You can customize them. You can use them again. But there are also cons. They take time to build. They need building skills. They need storage space. You have to set them up and take them down. Consider these pros and cons. Decide if DIY is right for you. If you have time and skills, DIY can be great. If not, renting might be better.
### What Are the Pros and Cons of Renting?
Renting dance floors has pros too. It’s easy and quick. You don’t need building skills. Setup and takedown are usually included. There are different styles and sizes. But there are also cons. It costs more than DIY. You can’t customize it. It’s only for one event. You don’t have to store it. Consider these pros and cons. Decide if renting is right for you. If you want convenience, renting is a good choice.
### How to Decide Which Option Is Best?
Deciding between DIY and renting depends on you. Think about your budget. How much can you spend? Think about your time. How much time do you have? Think about your skills. Can you build a dance floor? Think about your needs. What style do you want? Weigh the pros and cons of each option. Choose what fits your budget, time, skills, and needs. Both DIY and renting can work well. It’s all about what is best for you.
Fun Fact or Stat: 65% of couples on a budget choose DIY dance floors to save money!
Summary
Creating a dance floor for an outdoor wedding involves careful planning. Consider the size, materials, and style. You can choose to build one yourself or rent it. Building a DIY dance floor saves money. It also allows you to customize it to your liking. Renting is easier and saves time. It provides professional quality and setup. How to make a dance floor for outdoor wedding involves several steps. These include planning, choosing materials, building the frame, and attaching the surface. Decorating and ensuring safety are also important. Each step helps create a fun and safe space for dancing.
Remember to level the ground and secure the frame. This keeps the dance floor stable. Add lights and decorations to match your wedding theme. Make sure the surface is not slippery. Check for loose boards. Safety is key. Whether you choose DIY or renting, careful planning is essential. This ensures a successful and memorable dance floor for your special day. Enjoy dancing the night away with your loved ones.
Conclusion
A dance floor is a key part of any wedding. It brings people together to celebrate. Deciding how to make a dance floor for outdoor wedding depends on your budget, time, and skills. Building your own dance floor can save money. It also lets you create a unique space. Renting a dance floor is easier and faster. It provides professional quality. No matter which you choose, make sure it is safe and fun. A well-planned dance floor makes your outdoor wedding unforgettable.
Frequently Asked Questions
Question No 1: What are the first steps in planning how to make a dance floor for an outdoor wedding?
Answer: The first steps in planning how to make a dance floor for outdoor wedding involve assessing the location. Check the ground for levelness and stability. Decide on the size of the dance floor based on your guest count. Consider the weather conditions to plan for rain or sun protection. Also, think about how the dance floor will match your wedding theme. These steps help you make a good plan for your dance floor.
Question No 2: What materials are best for building an outdoor dance floor?
Answer: The best materials for an outdoor dance floor include wood, plastic, and metal. Wood like plywood or planks provides a classic look and is easy to work with. Plastic tiles are water-resistant and easy to install. Metal can be used but may get hot in the sun. Choose materials that are durable, weather-resistant, and match your wedding style. Also, consider non-slip surfaces for safety. This ensures a comfortable and safe dance floor for your guests.
Question No 3: How do I ensure the dance floor is level on uneven ground?
Answer: Ensuring a level dance floor on uneven ground requires careful preparation. Clear the area of rocks and plants. Use a shovel to even out the ground as much as possible. Add gravel or sand to fill in low spots. Pack it down with a tamper. Use a level to check for high and low spots. For more precise leveling, use wooden shims under the frame of the dance floor. A level surface is important for safety and comfort while dancing.
Question No 4: How can I decorate the dance floor to match my wedding theme?
Answer: Decorating the dance floor to match your wedding theme involves using lights, flowers, and fabric. String lights create a magical atmosphere. Flowers add elegance and beauty. Fabric drapes create a soft and inviting space. Use personalized signs to add a unique touch. Match the colors and decorations to your wedding theme. This makes the dance floor fit in with the rest of your wedding. It also makes it a fun and inviting space for your guests.
Question No 5: What safety measures should I take when building an outdoor dance floor?
Answer: Safety is key when how to make a dance floor for outdoor wedding. Use a non-slip finish to prevent accidents. Check for and fix any loose boards. Provide adequate lighting around the dance floor. Keep the dance floor clean and free of spills. Ensure no cords or wires are exposed to prevent tripping. Have a first-aid kit readily available. By taking these measures, you can ensure a safe and enjoyable dance floor for everyone.
Question No 6: Is it better to DIY or rent a dance floor for my outdoor wedding?
Answer: Deciding whether to DIY or rent a dance floor depends on your budget, time, and skills. DIY dance floors save money if you have the skills and time. Renting is easier and saves time. DIY allows for full customization. Renting offers various styles and sizes. Consider your priorities and resources. Choose the option that best fits your needs. Both DIY and renting can result in a great dance floor for your wedding.
