Have you ever found a cool rock outside? Did you want to make it even cooler? You can learn how to paint a rock for outdoors. It is a fun and easy craft. You can make colorful art. You can decorate your garden or share them with friends.
Painting rocks is a great way to be creative. It also helps you explore nature. What will you paint on your rock? Let’s find out how to paint a rock for outdoors!
Painting rocks can bring joy to others. Imagine hiding painted rocks in your neighborhood. Someone might find your rock and smile. It is like a little treasure hunt. Are you ready to start your rock painting adventure?
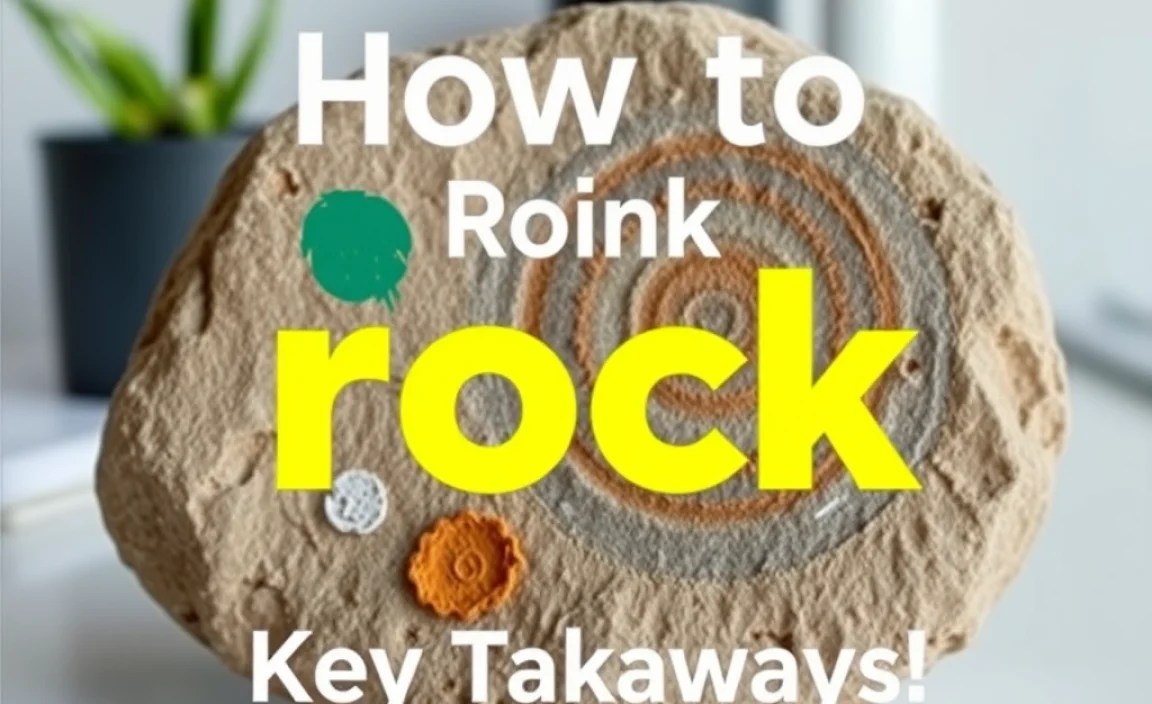
Key Takeaways
- Always use non-toxic paints and sealers to protect the environment.
- Sealing your painted rock is key to protecting it from the weather.
- Acrylic paints work best for how to paint a rock for outdoors.
- Find smooth, flat rocks to make painting easier and more fun.
- Preparing your rocks before painting ensures the best results.

How to Find the Best Rocks to Paint
Finding the right rock is the first step. Look for smooth, flat rocks. These are easier to paint. Rough rocks can be hard to work with. You can find rocks in your backyard. You can also find them near rivers or streams. Make sure it is okay to take rocks from these places. Always be careful when you are near water. Ask a grown-up to help you. The best rocks are not too big and not too small. They should fit comfortably in your hand. Clean the rocks before you start painting. This will help the paint stick better. Have fun on your rock hunt!
- Look for smooth surfaces.
- Choose flat rocks.
- Avoid crumbly rocks.
- Collect various sizes.
- Make sure the rocks are clean.
Think of your rock as a tiny canvas. Just like an artist needs a good canvas, you need a good rock. A smooth surface will make your painting look much better. Flat rocks are easier to paint on because they won’t roll around. If the rock is too rough, the paint might not stick well. Collect a few different sizes so you have options. Cleaning the rocks is very important. Dirt and dust can stop the paint from sticking. Use soap and water to clean them. Then, let them dry completely before you start. Now you are ready to paint!
What Size Rock is Best?
What size rock should you pick? It depends on what you want to paint. Smaller rocks are good for simple designs. Bigger rocks are great for more detailed pictures. If you are just starting, try a medium-sized rock. This will give you enough space to practice. Think about what you want to paint before you choose your rock. A small ladybug would look cute on a tiny rock. A big, colorful flower would look better on a larger rock. Have fun experimenting with different sizes. Remember, there is no right or wrong answer. It is all about what you like!
Where Can You Find Rocks?
Where can you find the perfect rocks? Your backyard might be a good place to start. Parks and nature trails sometimes have rocks too. Riverbeds and beaches are also great spots. Always ask permission before taking rocks from private property. Be respectful of nature. Only take a few rocks so there are plenty left for others. Remember to wash your hands after handling rocks. Rocks can have dirt and germs on them. Make it a fun adventure! Go on a rock hunt with your family or friends.
Is it Okay to Take Rocks?
Is it okay to take rocks from nature? It is important to be respectful of the environment. Some places do not allow you to take rocks. This helps protect the natural habitat. Always check the rules before you start collecting. If you are on private property, ask the owner for permission. Explain that you want to use the rocks for painting. Most people will be happy to let you take a few. Be mindful of the impact you are having. Only take what you need. Leave the area as you found it. This helps keep nature beautiful for everyone.
Fun Fact or Stat: Did you know that some rocks are millions of years old? These rocks can tell us stories about the Earth’s history.

How to Prepare Rocks for Painting
Before you start painting, you need to prep your rocks. Clean them with soap and water. This removes dirt and grime. Let them dry completely. If the rock is very smooth, you can lightly sand it. This helps the paint stick better. You can also use a primer. Primer is like a base coat for paint. It helps the colors show up better. White primer works well for most colors. Let the primer dry before you start painting. Now your rock is ready for its makeover! Taking these steps will make your painted rocks last longer.
- Wash rocks with soap and water.
- Let rocks dry completely.
- Sand smooth rocks lightly.
- Apply a primer for better adhesion.
- Allow primer to dry thoroughly.
Preparing your rocks is like getting ready for a big art project. Imagine you are painting a wall. You would clean the wall first, right? It is the same with rocks. Washing them removes anything that could stop the paint from sticking. Drying them is also important. Paint doesn’t like to stick to wet surfaces. Sanding smooth rocks is like making the surface a little rougher. This gives the paint something to grab onto. Primer is like a superhero for paint. It helps the colors pop and makes the paint last longer. Taking the time to prep your rocks will make a big difference in the end!
Why is Cleaning Important?
Why is cleaning your rocks so important? Think about it like this: If you were going to paint a dirty car, the paint wouldn’t stick very well, would it? The same goes for rocks. Dirt, dust, and grime can create a barrier between the paint and the rock. This can cause the paint to chip or peel off easily. Cleaning the rocks removes these barriers, allowing the paint to bond directly to the rock surface. This results in a more durable and longer-lasting paint job. So, take a few minutes to give your rocks a good scrub before you start painting. It’s a small step that makes a big difference!
What Kind of Primer Should You Use?
What kind of primer should you use on your rocks? A basic acrylic primer works great. You can find it at most craft stores. White primer is a good choice for most projects. It helps the colors show up bright and true. If you are using dark colors, you might want to use a gray primer. This can help the dark colors cover the rock better. Apply the primer in a thin, even coat. Let it dry completely before you start painting. Follow the instructions on the primer can for best results. A good primer will make your painted rocks look amazing!
How Long Should Rocks Dry?
How long should you let your rocks dry? This depends on the weather and the size of the rock. In general, it is best to let them dry for at least a few hours. If the weather is humid, it might take longer. You can speed up the drying process by using a fan. Make sure the rocks are completely dry before you start painting. Even a little bit of moisture can cause problems. The paint might not stick well, or it could bubble. Be patient and let the rocks dry thoroughly. Your painted rocks will thank you!
Fun Fact or Stat: Some artists use special rock tumblers to make rocks extra smooth before painting them!

Choosing the Right Paints for Outdoor Rocks
Choosing the right paints is key. Acrylic paints are best for outdoor rocks. They are waterproof and durable. Look for paints that are labeled “outdoor” or “weather-resistant.” These paints will last longer in the sun and rain. Avoid using watercolors or tempera paints. These paints will wash away easily. You can find acrylic paints at most craft stores. Choose a variety of colors to make your rocks fun and colorful. Remember to use non-toxic paints, especially if kids are helping. Have fun creating your outdoor masterpieces!
- Use acrylic paints.
- Choose outdoor or weather-resistant paints.
- Avoid watercolors and tempera paints.
- Select a variety of colors.
- Ensure paints are non-toxic.
Think of your paints as the magic that brings your rocks to life. Just like a chef needs the right ingredients, you need the right paints. Acrylic paints are like the superheroes of the paint world. They are strong and can stand up to the weather. Outdoor paints are even tougher. They are made to resist fading and chipping. Watercolors and tempera paints are better for indoor projects. They are not designed to be outside. Choose colors that make you happy. Bright colors are great for outdoor rocks. Make sure the paints are safe for everyone to use. Now you are ready to create some amazing rock art!
Why are Acrylic Paints Best?
Why are acrylic paints the best choice for painting rocks? Acrylic paints are water-based. They dry quickly and form a tough, waterproof layer. This makes them perfect for outdoor use. They are also very versatile. You can use them on many different surfaces. Acrylic paints come in a wide range of colors. You can mix them to create even more colors. They are also easy to clean up with soap and water. For how to paint a rock for outdoors, acrylics are a winner!
What About Paint Pens?
What about using paint pens on rocks? Paint pens are a great option for adding fine details to your painted rocks. They are easy to control and come in a variety of colors. Look for paint pens that are specifically designed for use on rocks or other outdoor surfaces. These pens usually contain acrylic paint. They will be more durable and weather-resistant. Practice using the paint pens on a piece of paper before you use them on your rocks. This will help you get a feel for how they work. Paint pens can add a lot of personality to your rock art!
Are Non-Toxic Paints Important?
Are non-toxic paints really important? Yes, they are! Non-toxic paints are safe for you, your kids, and the environment. They do not contain harmful chemicals. This means they are less likely to cause allergic reactions or other health problems. When you are choosing paints, look for labels that say “non-toxic” or “AP approved.” These paints have been tested and found to be safe. Using non-toxic paints is a responsible choice. It helps protect everyone and everything around you.
Fun Fact or Stat: The oldest known paintings are cave paintings made with natural pigments like charcoal and ochre!

Easy Painting Techniques for Rock Art
There are many easy painting techniques. Start with a base coat. This helps the colors stand out. Use a sponge to create interesting textures. Dot painting is another fun technique. Use a Q-tip or the end of a paintbrush to make dots. You can create patterns or pictures with dots. Stencils are great for making shapes. You can buy stencils or make your own. Let each layer of paint dry before adding another. This will prevent smudging. Have fun experimenting with different techniques. The possibilities are endless!
- Apply a base coat first.
- Use sponges for textures.
- Try dot painting with Q-tips.
- Use stencils for shapes.
- Let each layer dry.
Painting techniques are like secret ingredients in a recipe. They can take your rock art from good to amazing. A base coat is like the foundation of a house. It helps everything else stay in place. Sponges can create a cool, textured look. Dot painting is like making tiny little stars on your rock. Stencils help you make perfect shapes. Letting each layer dry is like giving your art a chance to breathe. Experimenting with different techniques is like trying new things. You might discover a new favorite way to paint rocks. The most important thing is to have fun and be creative!
What is Dot Painting?
What exactly is dot painting? Dot painting is a technique where you use dots of paint to create a picture. You can use different sizes of dots and different colors. The dots can be close together or far apart. You can use a Q-tip, the end of a paintbrush, or even a toothpick to make the dots. Dot painting is a great way to add detail to your rock art. It is also a very relaxing and meditative activity. Try creating a mandala or a flower using dot painting techniques.
How to Use Stencils?
How do you use stencils for rock painting? First, choose a stencil that you like. You can buy stencils at craft stores or make your own out of paper or cardboard. Place the stencil on the rock and hold it firmly in place. Use a paintbrush or a sponge to apply the paint over the stencil. Be careful not to use too much paint, or it might bleed under the stencil. Gently remove the stencil and let the paint dry. Stencils are a great way to create precise shapes and designs on your rocks.
Why Use a Base Coat?
Why should you use a base coat when painting rocks? A base coat helps to create a smooth and even surface for your paint. It also helps the colors stand out more. A light-colored base coat is best for bright colors. A dark-colored base coat is good for dark colors. You can use white, gray, or black paint as a base coat. Let the base coat dry completely before you start painting your design. A good base coat will make your rock art look more professional and polished.
Fun Fact or Stat: Some artists use toothpicks to create intricate dot patterns on their painted rocks!
Sealing Painted Rocks for Outdoor Use
Sealing your painted rocks is very important. This protects them from the weather. Use a clear acrylic sealer. You can find it at most craft stores. Spray the sealer evenly over the rock. Let it dry completely. You may need to apply two or three coats. This will give your rocks extra protection. Sealing your rocks will help them last longer. They will stay beautiful for years to come. Make sure to seal all sides of the rock. This includes the bottom. Now your rocks are ready to brave the elements!
| Sealer Type | Pros | Cons | Best For |
|---|---|---|---|
| Acrylic Spray | Easy to apply, dries quickly | Can be uneven, may need multiple coats | Beginners, quick projects |
| Polyurethane Varnish | Very durable, water-resistant | Takes longer to dry, can be glossy | High-traffic areas, long-lasting protection |
| Epoxy Resin | Extremely durable, glossy finish | More difficult to apply, requires mixing | Professional results, high-end projects |
| Mod Podge Outdoor | Easy to find, water-resistant | Not as durable as other options, can be tacky | Simple projects, light use |
- Use a clear acrylic sealer.
- Spray evenly over the rock.
- Apply two or three coats.
- Seal all sides of the rock.
- Let each coat dry completely.
Think of sealer as a raincoat for your painted rocks. It protects them from the rain, sun, and wind. Without sealer, your paint could fade or chip. Sealer helps your rocks stay vibrant and colorful. Spraying the sealer evenly is like giving your rock a nice, even coat of protection. Multiple coats will make the protection even stronger. Sealing all sides of the rock ensures that every part is protected. Letting each coat dry completely is important. This allows the sealer to form a strong bond. Now your rocks are ready for anything Mother Nature throws their way!
Why is Sealing Important?
Why is sealing your painted rocks so important? Imagine you spent hours painting a beautiful picture on a rock. Then, you put it outside and it rains. Without sealer, the paint could wash away or fade. Sealer creates a protective layer that keeps the paint safe from the elements. It also helps to prevent scratches and chips. Sealing your rocks is like giving them a shield. It ensures that your hard work will last for a long time. So, don’t skip this important step!
How to Apply Sealer?
How do you apply sealer to your painted rocks? First, make sure your rocks are completely dry. Choose a well-ventilated area to work in. This will help prevent you from breathing in too many fumes. Hold the can of sealer about 10-12 inches away from the rock. Spray the sealer in a smooth, even motion. Overlap each pass slightly to ensure full coverage. Avoid spraying too much sealer in one spot, as this can cause drips. Let the sealer dry completely before applying another coat. Follow the instructions on the can for best results.
What Type of Sealer is Best?
What type of sealer is best for painted rocks? A clear acrylic sealer is a great choice. It is durable, water-resistant, and easy to find. You can buy it at most craft stores. Look for a sealer that is specifically designed for outdoor use. This will provide the best protection against the elements. Some sealers come in a spray can, while others are applied with a brush. Choose the type that you are most comfortable using. Make sure to read the label carefully and follow the instructions.
Fun Fact or Stat: Some sealers contain UV protectants to help prevent fading from the sun!
Creative Ideas for Painting Outdoor Rocks
There are so many creative ideas for painting outdoor rocks! You can paint animals, flowers, or insects. You can paint inspirational words or quotes. You can paint funny faces or cartoon characters. You can paint geometric patterns or abstract designs. You can even paint miniature landscapes. Think about what you love and let your imagination run wild. Look for inspiration in nature, books, or online. The possibilities are endless. Have fun creating your own unique rock art!
- Paint animals and insects.
- Write inspirational quotes.
- Create funny faces.
- Paint geometric patterns.
- Design miniature landscapes.
- Draw your favorite cartoon characters.
Creative ideas are like the spark that ignites your imagination. They can turn a plain rock into a work of art. Think about your favorite things. Do you love animals? Paint a cute cat or a playful dog. Do you enjoy spending time in nature? Paint a beautiful flower or a colorful butterfly. Do you like to make people laugh? Paint a silly face or a funny joke. Look around you for inspiration. Nature is full of amazing shapes, colors, and patterns. Books and online resources can also provide ideas. Don’t be afraid to experiment and try new things. The most important thing is to have fun and express yourself!
What About Painting Animals?
What are some fun animal ideas for painting rocks? You could paint a ladybug, a bumblebee, or a butterfly. These are all colorful and easy to create. You could also paint a cat, a dog, or a bird. These are a bit more challenging, but they can be very rewarding. Use different colors and patterns to make your animals unique. Add details like eyes, noses, and whiskers. You can even paint a whole zoo of animals on your rocks!
Can You Paint Landscapes?
Can you paint a landscape on a rock? Absolutely! Painting a landscape on a rock can be a fun and creative way to capture the beauty of nature. You can paint a mountain scene, a beach scene, or a forest scene. Use different shades of green, blue, and brown to create depth and dimension. Add details like trees, clouds, and water. You can even paint a tiny house or a small animal in your landscape. Let your imagination run wild and create a miniature world on your rock.
What Kind of Quotes Can You Paint?
What kind of inspirational quotes can you paint on rocks? You can paint quotes about love, happiness, or friendship. You can paint quotes about nature, peace, or strength. Choose quotes that resonate with you and that you think will inspire others. Keep the quotes short and simple. Use a clear and easy-to-read font. You can paint the quotes in different colors and styles. Add decorative elements like flowers, hearts, or stars. Your inspirational rocks will spread positivity and joy wherever they go.
Fun Fact or Stat: Some people leave painted rocks in parks for others to find, creating a fun surprise!
Displaying Your Painted Rocks Outdoors
Now that you have painted your rocks, it’s time to show them off! You can display them in your garden, on your porch, or along a walkway. You can hide them in parks or other public places for others to find. This is a fun way to spread joy and surprise. Make sure you have permission before placing rocks on private property. You can also use your painted rocks as decorations for parties or events. Get creative and have fun with it! Your painted rocks will add a touch of color and whimsy to any outdoor space.
- Place them in your garden.
- Display them on your porch.
- Line a walkway with them.
- Hide them in public places.
- Use them for decorations.
Displaying your painted rocks is like sharing your art with the world. It’s a way to brighten up your surroundings and bring a smile to people’s faces. You can create a rock garden in your backyard. Place your painted rocks among the plants and flowers. You can also line your walkway with painted rocks. This will add a touch of color and personality to your home. Hiding painted rocks in public places is a fun way to surprise and delight others. Just make sure you have permission before placing rocks on private property. Your painted rocks will add a touch of magic to any outdoor space.
How to Protect Rocks on Display?
How can you protect your painted rocks when they are on display outdoors? Even with sealer, the elements can still take a toll over time. Consider placing your rocks in areas that are sheltered from direct sunlight and heavy rain. You can also bring them indoors during extreme weather conditions. This will help to prolong their lifespan and keep them looking their best. Regularly check your rocks for any signs of damage, such as chips or cracks. If you notice any damage, you can touch them up with paint and sealer.
What About Hiding Rocks?
What should you keep in mind when hiding painted rocks for others to find? Hiding painted rocks can be a fun and rewarding activity. But it’s important to be responsible and respectful. Avoid hiding rocks in places that could be dangerous, such as near roads or in areas with heavy machinery. Do not hide rocks in places that are environmentally sensitive, such as nature preserves or protected areas. Make sure you have permission before hiding rocks on private property. Encourage finders to re-hide the rocks after they have enjoyed them. This will keep the fun going and spread the joy to others.
Are There Rules for Rock Hiding?
Are there any rules or guidelines for hiding painted rocks? While there are no official rules, there are some common courtesies that are generally followed. Avoid hiding rocks in places that could be disrespectful, such as cemeteries or memorials. Do not hide rocks in places that could be offensive, such as near religious symbols or political signs. Be mindful of the impact you are having on the environment. Do not disturb plants or animals when hiding rocks. Encourage finders to share pictures of their finds online. This will help to connect with other rock painters and spread the word about this fun activity.
Fun Fact or Stat: The painted rock hiding trend has become a global phenomenon, with groups and communities all over the world participating!
Summary
Painting rocks is a fun and easy craft for all ages. It allows you to express your creativity and connect with nature. To get started, find smooth, flat rocks. Clean them and let them dry. Use acrylic paints to create your designs. Seal your painted rocks with a clear acrylic sealer. This will protect them from the weather. There are many creative ideas for painting rocks. You can paint animals, flowers, quotes, or patterns. Display your painted rocks in your garden or hide them for others to find. Learning how to paint a rock for outdoors can be a rewarding hobby.
Remember to use non-toxic paints and sealers. This is important for your health and the environment. Have fun experimenting with different techniques and colors. Let your imagination run wild and create your own unique rock art. Whether you are a beginner or an experienced artist, painting rocks is a great way to relax and de-stress. It’s also a fun way to spend time with family and friends. So grab some rocks, paints, and brushes, and get ready to create some colorful masterpieces!
Conclusion
Painting rocks is a simple yet rewarding activity. It brings joy and creativity to people of all ages. You can create unique art. You can also share kindness with your community. Finding the right rocks, preparing them well, and using quality paints are key. Sealing your painted rocks ensures they last. Display them proudly or hide them for others. How to paint a rock for outdoors is a fun way to express yourself. It also brightens the world around you. So, grab some rocks and start painting!
Frequently Asked Questions
Question No 1: What kind of rocks are best for painting?
Answer: The best rocks for painting are smooth and flat. These rocks provide an even surface for the paint to adhere to. River rocks are often a good choice because they are naturally smooth. Avoid rocks that are crumbly or have a lot of texture. These can be difficult to paint and the paint may not stick well. Look for rocks that are comfortable to hold in your hand. This will make it easier to paint them. Remember to clean the rocks thoroughly before you start painting. This will remove any dirt or debris that could interfere with the paint.
Question No 2: What kind of paint should I use for outdoor rocks?
Answer: For painting rocks that will be displayed outdoors, acrylic paints are the best choice. Acrylic paints are water-based and dry quickly. They form a durable, waterproof layer that can withstand the elements. Look for acrylic paints that are specifically labeled as “outdoor” or “weather-resistant.” These paints are designed to resist fading, chipping, and cracking. Avoid using watercolors or tempera paints, as these will wash away easily in the rain. You can find acrylic paints at most craft stores in a wide range of colors.
Question No 3: How do I prepare the rocks before painting them?
Answer: Preparing the rocks properly is essential for ensuring that the paint adheres well and lasts longer. Start by washing the rocks with soap and water to remove any dirt, dust, or debris. Use a scrub brush to clean them thoroughly. Rinse the rocks with clean water and let them dry completely. If the rocks are very smooth, you can lightly sand them with fine-grit sandpaper. This will create a slightly rougher surface that the paint can grip onto. You can also apply a primer to the rocks before painting. This will help the colors stand out and provide an even base for your designs. Make sure the primer is fully dry before you begin painting.
Question No 4: Do I need to seal the painted rocks?
Answer: Yes, sealing your painted rocks is highly recommended, especially if they will be displayed outdoors. Sealing the rocks protects the paint from the weather and helps to prevent fading, chipping, and cracking. Use a clear acrylic sealer that is specifically designed for outdoor use. You can find these sealers at most craft stores. Apply the sealer evenly over the entire surface of the rock, including the bottom. Let the first coat dry completely before applying a second coat. Two or three coats of sealer will provide maximum protection. Sealing is a crucial step in how to paint a rock for outdoors.
Question No 5: What are some creative ideas for painting rocks?
Answer: The possibilities for painting rocks are endless! You can paint animals, insects, flowers, landscapes, or abstract designs. You can write inspirational quotes, funny jokes, or personalized messages. You can create geometric patterns, mandalas, or dot art. You can even paint miniature scenes from your favorite books or movies. Look for inspiration in nature, online, or in your own imagination. Don’t be afraid to experiment with different colors, techniques, and styles. The most important thing is to have fun and express your creativity. Consider themes relevant to holidays, seasons, or local events.
Question No 6: Where can I display my painted rocks?
Answer: You can display your painted rocks in a variety of places, both indoors and outdoors. In your garden, you can place them among the plants and flowers. Along a walkway, they can add a touch of color and whimsy. On your porch or patio, they can create a welcoming and inviting atmosphere. You can also hide them in parks or other public places for others to find. This is a fun way to spread joy and surprise. Just make sure you have permission before placing rocks on private property. When thinking about how to paint a rock for outdoors, consider where you plan to display it. This will influence your design choices.
