Do you want to grow yummy veggies or pretty flowers? You do not need to spend lots of money. There are many ways to find inexpensive containers for gardening. You can even use things you already have! Let’s learn how to make a garden without breaking the bank.
Gardening is a fun way to learn about nature. It can also give you healthy food. But getting started can seem costly. What if I told you it doesn’t have to be? We can find cheap or free containers. Then, we can grow our own little green space.
Inexpensive containers for gardening are all around us. We just need to know where to look. From old tires to plastic bottles, the options are endless. Let’s discover some cool ideas together. Get ready to get your hands dirty and have fun!
Key Takeaways
- Inexpensive containers for gardening let you grow plants on a budget.
- Repurpose household items like plastic bottles or old tires as planters.
- Thrift stores and garage sales often have cheap pots and containers.
- Consider DIY projects such as building your own wooden planters.
- Proper drainage and sunlight are key for healthy container gardens.
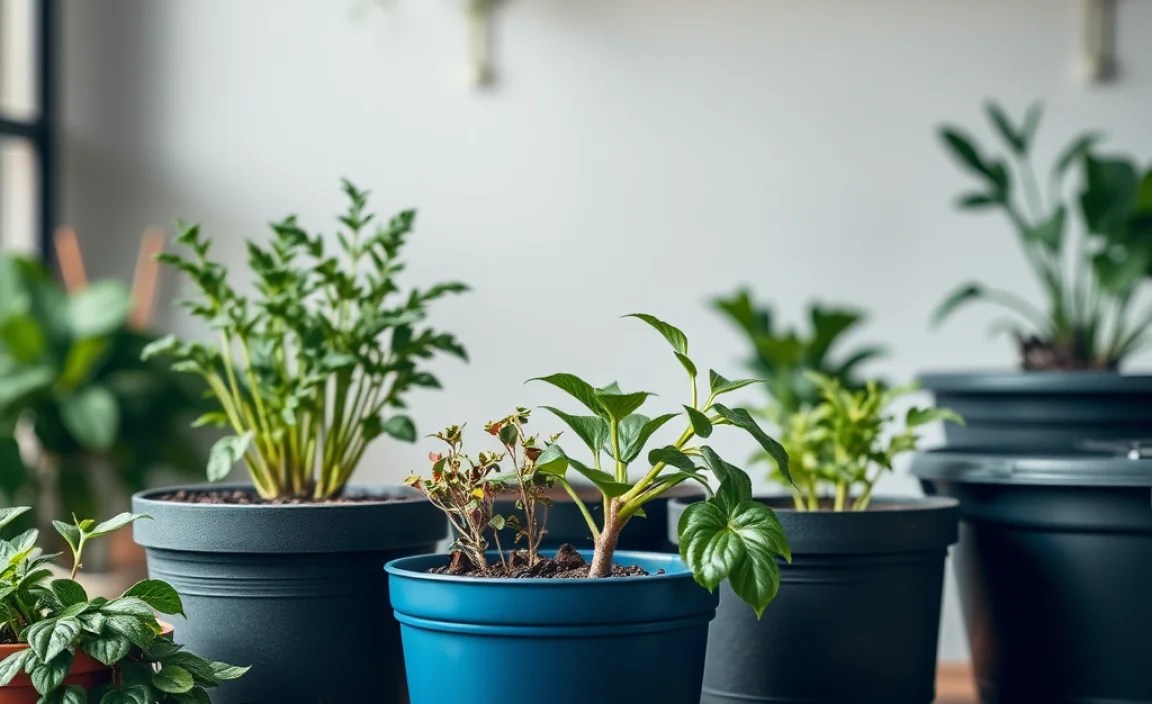
Finding Inexpensive Gardening Containers
Starting a garden doesn’t mean spending lots of money on fancy pots. Many inexpensive containers for gardening work just as well. Think about what you already have at home. Old buckets, plastic bins, and even worn-out shoes can become planters. The key is to make sure they have holes for water to drain. You can drill holes in plastic or metal. For fabric, make sure the material breathes. Check your local thrift stores and garage sales too. People often sell used pots for very little money. Don’t be afraid to get creative. An old wagon or wheelbarrow can make a unique garden bed. With a little imagination, you can turn trash into treasure. Remember to clean your containers before planting. This will help keep your plants healthy and happy.
- Old buckets can be great planters.
- Plastic bins are cheap and easy to find.
- Thrift stores sell used pots.
- Garage sales have many deals.
- Old wagons make unique gardens.
Once you have your inexpensive containers for gardening, think about location. Most plants need sunlight to grow. Place your containers where they will get at least six hours of sun each day. Make sure the area is easy to water. You don’t want to have to carry heavy watering cans too far. Grouping your containers together can also help. This creates a microclimate that keeps plants warm. Remember to choose the right soil for your plants. Some plants like soil that drains quickly. Others prefer soil that holds more water. With a little planning, your container garden will thrive. You’ll have fresh veggies and beautiful flowers in no time.
Fun Fact or Stat: Recycling old containers saves money and reduces waste in landfills, helping the environment!
Where can I find cheap containers?
Looking for inexpensive containers for gardening can be like a treasure hunt. Have you checked your own garage or basement lately? You might be surprised at what you find. Empty coffee cans, yogurt containers, and even old toys can be repurposed. Just make sure to clean them well and add drainage holes. Ask your neighbors if they have any unwanted pots or containers. They might be happy to give them away. Local nurseries sometimes have sales on damaged or slightly imperfect pots. These can be a great deal if you don’t mind a few scratches. Remember, the most important thing is that the container holds soil and drains well. Don’t worry about fancy designs. Your plants will look beautiful no matter what the container looks like.
How do I add drainage?
Why is drainage so important for inexpensive containers for gardening? Plants need water, but too much water can hurt them. When water sits in the container, it can rot the roots. This is why drainage holes are so important. You can easily add drainage to most containers. For plastic, use a drill to make several holes in the bottom. For metal, you might need a stronger drill bit. If you’re using a container without a bottom, like an old tire, drainage is already taken care of. You can also add a layer of gravel or rocks to the bottom of the container. This helps water drain away from the roots. Make sure the drainage holes are not blocked by soil. You can use a piece of screen or landscape fabric to cover the holes. This will keep the soil in place while still allowing water to drain.
What about free containers?
Imagine getting all your inexpensive containers for gardening for free! It’s easier than you think. Many grocery stores and restaurants throw away large plastic buckets. These buckets are often used for food items like frosting or pickles. Ask if you can have some of their empty buckets. They are usually happy to give them away. Construction sites often have leftover materials. Things like concrete blocks or wooden pallets can be used to build raised garden beds. Check online marketplaces like Craigslist or Facebook Marketplace. People often give away unwanted items for free. You might find someone getting rid of a whole set of pots. With a little effort, you can find plenty of free containers for your garden. This means more money for plants and seeds!

DIY Planters for Budget Gardening
Making your own planters is a fun and inexpensive containers for gardening. You can use materials you have around the house. Old wood pallets can be turned into raised garden beds. Simply nail or screw the pallets together to form a box. Line the inside with landscape fabric to hold the soil. Plastic bottles can be cut in half and used as small pots. Decorate them with paint or markers to make them look pretty. Concrete blocks can be stacked to create a simple and modern planter. You can even use old tires. Paint them bright colors and stack them to make a unique garden. The possibilities are endless. DIY planters let you customize your garden to fit your style and space. They also save you money and reduce waste.
- Pallets make great raised beds.
- Plastic bottles can be small pots.
- Concrete blocks are modern planters.
- Old tires add color to gardens.
- DIY saves money and reduces waste.
When making DIY inexpensive containers for gardening, think about the size of your plants. Small plants like herbs and flowers can grow in small containers. Larger plants like tomatoes and peppers need bigger containers. Make sure your planters are sturdy enough to hold the weight of the soil and plants. Use weather-resistant materials if you plan to keep your planters outside. Consider adding a self-watering system to your DIY planters. This can be as simple as placing a water-filled bottle upside down in the soil. The bottle will slowly release water as the soil dries out. With a little creativity and effort, you can create beautiful and functional DIY planters that will last for years. Your plants will thank you.
Fun Fact or Stat: DIY planters can be painted to match your house, adding curb appeal while growing plants!
Pallet Planters: A Simple Project
Have you ever seen old wooden pallets lying around? These can become amazing and inexpensive containers for gardening. Pallet planters are easy to make and add a rustic touch to your garden. First, find a pallet that is in good condition. Make sure the wood is not rotten or treated with harmful chemicals. Clean the pallet thoroughly with soap and water. Then, decide how you want to arrange the pallet. You can leave it whole and plant in the spaces between the slats. Or you can take it apart and build a raised garden bed. Line the inside of the pallet with landscape fabric to hold the soil. Fill it with a good quality potting mix. Now you’re ready to plant your favorite flowers, herbs, or vegetables. Pallet planters are a great way to recycle and create a beautiful garden on a budget.
Bottle Planters: Recycling Fun
Do you drink lots of soda or juice? Don’t throw those plastic bottles away! They can become cute and inexpensive containers for gardening. Bottle planters are a fun way to recycle and teach kids about gardening. Simply cut the bottle in half and clean it out. You can paint the bottle or decorate it with markers. Make sure to poke holes in the bottom for drainage. Fill the bottle with soil and plant your seeds or seedlings. You can hang the bottle planters from a fence or balcony. Or you can place them on a windowsill. Bottle planters are perfect for small plants like herbs, succulents, or flowers. They are also a great way to start seeds indoors. So next time you finish a bottle, think about turning it into a planter!
Tire Planters: A Colorful Idea
Old tires might seem like trash, but they can be transformed into vibrant and inexpensive containers for gardening. Tire planters are a creative way to recycle and add a pop of color to your garden. First, find some old tires. You can often get them for free from tire shops. Clean the tires thoroughly with soap and water. Then, paint them with bright, weather-resistant paint. Let the paint dry completely. You can stack the tires to create a taller planter. Or you can cut them in half to make two smaller planters. Fill the tires with soil and plant your favorite flowers or vegetables. Tire planters are durable and can withstand all kinds of weather. They are also a great way to keep tires out of landfills. So get creative and turn those old tires into something beautiful!
Repurposing Household Items as Planters
Look around your home. You can find many inexpensive containers for gardening. Old teacups, colanders, and even boots can become unique planters. The key is to think outside the box. A leaky watering can makes a charming home for succulents. An old dresser drawer can be transformed into a mini garden bed. Just line it with plastic to protect the wood. Even egg cartons can be used to start seeds. The possibilities are endless. Repurposing household items not only saves you money. It also adds character to your garden. It’s a fun way to express your creativity. Plus, you’re giving new life to things that would otherwise be thrown away.
- Old teacups are cute planters.
- Colanders provide great drainage.
- Boots add a quirky touch.
- Dressers can be mini gardens.
- Egg cartons start seeds easily.
Before using any household item as an inexpensive containers for gardening, clean it well. Remove any dirt or residue. Make sure to add drainage holes if needed. Some items, like metal containers, can get hot in the sun. Be careful when choosing plants for these containers. Plants that like dry conditions, like succulents, are a good choice. For items that don’t have drainage, you can create a false bottom. Place a layer of gravel or rocks at the bottom of the container. This will help keep the roots from sitting in water. With a little imagination, you can turn ordinary household items into extraordinary planters.
Fun Fact or Stat: Repurposing items reduces waste and shows creativity, making your garden unique!
Teacups and Teapots: Tiny Gardens
Imagine tiny flowers blooming from a delicate teacup. Teacups and teapots make charming and inexpensive containers for gardening. They are perfect for small plants like succulents, herbs, or miniature violets. Choose teacups and teapots that you no longer use or find them at thrift stores. Clean them well and make sure there are no cracks. Add a layer of gravel to the bottom for drainage. Then, fill the teacup or teapot with potting mix. Plant your chosen plant and water gently. Place your teacup garden on a windowsill or shelf where it will get plenty of light. Teacups and teapots add a touch of whimsy to any garden. They also make great gifts for plant lovers.
Shoe Planters: A Step Up
Old shoes can find new life as quirky and inexpensive containers for gardening. Shoe planters are a fun way to recycle and add a unique touch to your garden. Choose shoes that are no longer wearable, like old sneakers or boots. Clean the shoes well and make sure they are dry. Poke holes in the bottom for drainage. You can also line the inside of the shoe with plastic to protect it from moisture. Fill the shoe with potting mix and plant your favorite flowers or herbs. Place your shoe planter on a porch, patio, or in the garden. Shoe planters are sure to be a conversation starter. They are also a great way to express your personality.
Colander Planters: Easy Drainage
Colanders are kitchen tools designed for draining water. This makes them perfect and inexpensive containers for gardening! Colander planters provide excellent drainage for plants that don’t like to sit in water. Choose a colander that you no longer use or find one at a thrift store. Clean the colander well and make sure there are no holes or cracks. Line the inside of the colander with landscape fabric to prevent the soil from falling through. Fill the colander with potting mix and plant your chosen plants. Colander planters are ideal for herbs, succulents, and other plants that need well-drained soil. Place your colander planter on a sunny porch or patio. You’ll have a beautiful and functional garden in no time.
Using Food Containers for Seedlings
Starting seeds indoors can give your garden a head start. You don’t need to buy special trays. Many inexpensive containers for gardening are in your kitchen. Yogurt cups, egg cartons, and plastic takeout containers work great. Just make sure to clean them well. Poke holes in the bottom for drainage. Fill them with seed-starting mix. Plant your seeds and water gently. Place the containers in a warm, sunny spot. Once the seedlings are big enough, you can transplant them to larger pots. Using food containers is a cheap and easy way to start seeds. It’s also a great way to recycle and reduce waste.
- Yogurt cups are small and handy.
- Egg cartons hold many seeds.
- Takeout containers are often free.
- Clean containers before planting.
- Recycle and reduce waste easily.
When using inexpensive containers for gardening, remember to label them. This helps you keep track of what you planted. You can use popsicle sticks or small pieces of paper. Write the name of the plant and the date you planted it. Keep the soil moist but not too wet. Overwatering can cause the seeds to rot. Once the seedlings emerge, make sure they get enough light. If you don’t have a sunny window, you can use a grow light. Rotate the containers regularly to prevent the seedlings from leaning towards the light. With a little care, you’ll have healthy seedlings ready to transplant to your garden.
Fun Fact or Stat: Starting seeds indoors extends the growing season, giving you more time to enjoy your harvest!
Egg Cartons: Seed-Starting Champs
Egg cartons are perfect for starting seeds indoors. They are small, convenient, and often free. You can use cardboard or plastic egg cartons. Cardboard cartons are biodegradable. This means you can plant the whole carton in the ground. Plastic cartons can be reused many times. To use an egg carton as a seed starter, first, poke a small hole in the bottom of each compartment for drainage. Fill each compartment with seed-starting mix. Plant one or two seeds in each compartment. Water gently and place the egg carton in a warm, sunny spot. Keep the soil moist until the seeds germinate. Once the seedlings are big enough, you can transplant them to larger pots or directly into your garden. Egg cartons make seed starting easy and fun!
Yogurt Cups: Small and Convenient
Yogurt cups are another great option for starting seeds. They are the right size for small seedlings. They are also easy to find and often free. To use yogurt cups as seed starters, first, wash them thoroughly with soap and water. Poke holes in the bottom for drainage. Fill the cups with seed-starting mix. Plant your seeds and water gently. Place the yogurt cups in a tray or container to catch any excess water. Keep the soil moist and provide plenty of light. Once the seedlings are big enough, you can transplant them to larger pots or directly into your garden. Yogurt cups are a simple and effective way to start seeds indoors.
Takeout Containers: Reusing Plastic
Plastic takeout containers are often thrown away after one use. But they can be repurposed as inexpensive containers for gardening. These containers are usually waterproof and have lids. This makes them ideal for starting seeds. To use a takeout container as a seed starter, first, wash it thoroughly with soap and water. Poke holes in the bottom for drainage. Fill the container with seed-starting mix. Plant your seeds and water gently. Place the lid on the container to create a humid environment. This helps the seeds germinate faster. Once the seedlings emerge, remove the lid and provide plenty of light. Takeout containers are a great way to recycle and start seeds indoors.
Creative Container Gardening Ideas
Container gardening lets you grow plants in small spaces. You can use almost anything as an inexpensive containers for gardening. An old wheelbarrow can become a charming herb garden. A stack of colorful crates can be transformed into a vertical garden. Even an old suitcase can be used as a planter. The key is to be creative and think outside the box. Container gardens are perfect for balconies, patios, and small yards. They allow you to grow flowers, vegetables, and herbs even if you don’t have a lot of space. Plus, they add beauty and personality to your outdoor living area.
- Wheelbarrows make rustic gardens.
- Crates create vertical gardens.
- Suitcases add vintage charm.
- Container gardens suit small spaces.
- Be creative with your containers.
When planning your container garden, consider the size and type of plants you want to grow. Tall plants look great in large containers. Trailing plants look beautiful cascading over the edges of a pot. Choose plants that complement each other in color and texture. Group plants with similar watering needs together. This makes it easier to care for your container garden. Don’t be afraid to experiment with different combinations of plants and containers. Container gardening is all about having fun and expressing your creativity. With a little imagination, you can create a stunning container garden that will be the envy of your neighbors.
Fun Fact or Stat: Container gardens can be moved to follow the sun, ensuring your plants get the light they need!
Vertical Gardens: Growing Up
Do you have limited space but still want a lush garden? Vertical gardens are the answer! They allow you to grow plants upwards, maximizing your growing area. You can use many inexpensive containers for gardening to create a vertical garden. Hanging baskets, wall planters, and stacked crates are all great options. Choose plants that are well-suited for vertical growth, such as trailing vines, herbs, and strawberries. Make sure your vertical garden gets plenty of sunlight and water. Vertical gardens add beauty and interest to any outdoor space. They are also a great way to grow fresh herbs and vegetables right outside your door.
Hanging Baskets: Elevated Beauty
Hanging baskets are a classic way to add color and beauty to your porch, patio, or balcony. They are also a great way to save space. You can buy hanging baskets at most garden centers. Or you can make your own using inexpensive containers for gardening. Old buckets, plastic bowls, and even woven baskets can be transformed into hanging planters. Just make sure to add drainage holes. Choose plants that trail or cascade, such as petunias, impatiens, and ivy geraniums. Hang your baskets in a sunny spot and water regularly. Hanging baskets are a simple and elegant way to brighten up your outdoor living area.
Table: Container Material Comparison
| Material | Cost | Durability | Drainage | Aesthetics |
|---|---|---|---|---|
| Plastic | Low | Medium | Good (if drilled) | Modern, varied |
| Terracotta | Medium | Medium | Excellent | Classic, earthy |
| Wood | Medium | Low (untreated) | Good | Rustic, natural |
| Metal | Medium to High | High | Good (if drilled) | Industrial, sleek |
| Recycled Items | Free | Varies | Varies (needs holes) | Unique, eclectic |
Suitcase Planters: Vintage Charm
Old suitcases can be transformed into unique and charming planters. Suitcase planters add a touch of vintage style to any garden. Choose a suitcase that is no longer used for travel. Line the inside with plastic to protect it from moisture. Add a layer of gravel to the bottom for drainage. Fill the suitcase with potting mix and plant your favorite flowers, herbs, or vegetables. Place your suitcase planter on a porch, patio, or in the garden. Suitcase planters are sure to be a conversation starter. They are also a great way to recycle and add character to your outdoor space.
Maintaining Your Container Garden
Once you have your inexpensive containers for gardening, you need to take care of them. Watering is very important. Container plants dry out faster than plants in the ground. Check the soil every day. Water when the top inch feels dry. Fertilizing is also important. Container plants need nutrients to grow. Use a balanced fertilizer every few weeks. Make sure your plants get enough sunlight. Most plants need at least six hours of sun per day. Protect your plants from pests and diseases. Check them regularly for signs of trouble. With a little care, your container garden will thrive.
- Water plants regularly.
- Fertilize every few weeks.
- Ensure enough sunlight.
- Check for pests often.
- Keep plants healthy.
Choose the right soil for your inexpensive containers for gardening. Potting mix is best for containers. It is lightweight and drains well. Don’t use garden soil in containers. It can become compacted and prevent drainage. Repot your plants as they grow. This gives them fresh soil and more room to spread their roots. Prune your plants regularly to keep them healthy and attractive. Remove any dead or dying leaves and flowers. With proper care and maintenance, your container garden will bring you joy for many years to come.
Fun Fact or Stat: Regular maintenance helps container gardens produce more flowers and vegetables, increasing your harvest!
Watering Wisely: How Much?
How much water do your container plants need? It depends on the type of plant, the size of the container, and the weather. Some plants like to be kept moist at all times. Others prefer to dry out between waterings. Check the soil regularly to determine when to water. Stick your finger into the soil. If the top inch feels dry, it’s time to water. Water deeply until the water drains out of the bottom of the container. Avoid watering the leaves, as this can lead to fungal diseases. Water in the morning or evening to prevent water from evaporating too quickly. With a little practice, you’ll become a watering expert.
Fertilizing Frequently: What to Use?
Container plants need regular fertilizing to stay healthy and productive. Choose a fertilizer that is specifically formulated for container plants. You can use a liquid fertilizer or a slow-release granular fertilizer. Liquid fertilizers are easy to apply. Simply mix them with water and pour them over the soil. Slow-release fertilizers release nutrients gradually over time. Follow the instructions on the fertilizer package carefully. Over-fertilizing can burn the roots of your plants. Fertilize every few weeks during the growing season. This will ensure that your plants have the nutrients they need to thrive.
Pest Control: Natural Solutions
Pests can be a problem in container gardens. But you don’t have to use harsh chemicals to get rid of them. There are many natural solutions that are safe for your plants and the environment. One popular method is to spray your plants with insecticidal soap. This kills many common pests, such as aphids, spider mites, and whiteflies. Another option is to use neem oil. Neem oil is a natural insecticide and fungicide. You can also attract beneficial insects to your garden. Ladybugs, lacewings, and praying mantises are all natural predators of common garden pests. By using natural pest control methods, you can keep your container garden healthy and pest-free.
Summary
Creating a beautiful garden does not require spending a lot of money. Inexpensive containers for gardening are readily available. You can repurpose household items, find deals at thrift stores, or make your own planters. The key is to be creative and resourceful. Remember to provide proper drainage, sunlight, and nutrients for your plants. With a little effort and imagination, you can have a thriving garden. Container gardening is a fun and rewarding way to grow flowers, vegetables, and herbs. It’s also a great way to connect with nature and enjoy the beauty of the outdoors. So get started today and create your own little oasis.
Conclusion
Gardening can be fun for everyone. You do not need to spend lots of money. Using inexpensive containers for gardening is easy. Look around your home for items you can reuse. Get creative and build your own planters. With a little effort, you can grow a beautiful garden. Enjoy fresh vegetables and pretty flowers. Gardening is a great way to learn and have fun!
Frequently Asked Questions
Question No 1: What are some good inexpensive containers for gardening?
Answer: There are many inexpensive containers for gardening that you can use. Consider repurposing items you already have at home. Old buckets, plastic bins, and even old tires can become great planters. Thrift stores and garage sales are also good places to find cheap pots and containers. You can also make your own planters out of wood pallets or plastic bottles. The possibilities are endless. Just make sure the container has drainage holes and is large enough for the plants you want to grow. With a little creativity, you can find plenty of affordable options.
Question No 2: How do I make sure my containers have good drainage?
Answer: Good drainage is essential for healthy container plants. Without proper drainage, the roots can rot. This can kill your plants. Make sure your containers have drainage holes in the bottom. You can drill holes in plastic or metal containers. For fabric containers, the material should provide enough drainage. You can also add a layer of gravel or rocks to the bottom of the container. This helps water drain away from the roots. Avoid using saucers under your containers. These can trap water and prevent drainage. Elevate your containers slightly to allow water to flow freely.
Question No 3: What kind of soil should I use in my containers?
Answer: It’s best to use a potting mix in your containers. Potting mix is lightweight and drains well. It also contains nutrients that plants need to grow. Avoid using garden soil in containers. Garden soil can become compacted and prevent drainage. This can suffocate the roots of your plants. You can buy potting mix at most garden centers. Or you can make your own by mixing peat moss, perlite, and vermiculite. Choose a potting mix that is specifically formulated for container plants. This will ensure that your plants have the best possible growing conditions. Do not use soil from the ground in inexpensive containers for gardening.
Question No 4: How often should I water my container plants?
Answer: How often you need to water your container plants depends on several factors. These factors include the type of plant, the size of the container, and the weather. Check the soil regularly to determine when to water. Stick your finger into the soil. If the top inch feels dry, it’s time to water. Water deeply until the water drains out of the bottom of the container. Avoid watering the leaves, as this can lead to fungal diseases. Water in the morning or evening to prevent water from evaporating too quickly. During hot weather, you may need to water your container plants every day.
Question No 5: How do I fertilize my container plants?
Answer: Container plants need regular fertilizing to stay healthy and productive. Because the inexpensive containers for gardening often have limited space, plants rely on you for nutrients. Choose a fertilizer that is specifically formulated for container plants. You can use a liquid fertilizer or a slow-release granular fertilizer. Liquid fertilizers are easy to apply. Simply mix them with water and pour them over the soil. Slow-release fertilizers release nutrients gradually over time. Follow the instructions on the fertilizer package carefully. Over-fertilizing can burn the roots of your plants. Fertilize every few weeks during the growing season. This will ensure that your plants have the nutrients they need to thrive.
Question No 6: How do I protect my container plants from pests?
Answer: Pests can be a problem in container gardens. But you don’t have to use harsh chemicals to get rid of them. There are many natural solutions that are safe for your plants and the environment. One popular method is to spray your plants with insecticidal soap. This kills many common pests, such as aphids, spider mites, and whiteflies. Another option is to use neem oil. Neem oil is a natural insecticide and fungicide. You can also attract beneficial insects to your garden. Ladybugs, lacewings, and praying mantises are all natural predators of common garden pests. Regularly inspect your inexpensive containers for gardening to catch problems early.
