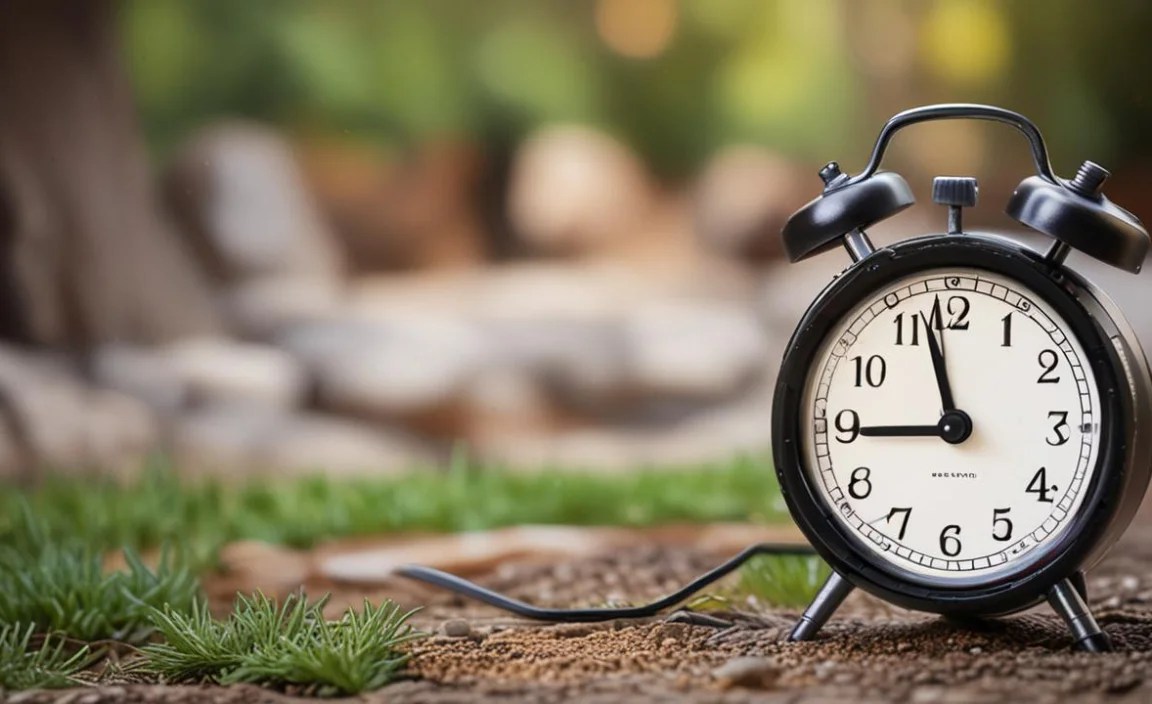
Have you ever seen a house with lights turning on and off? It might seem like magic! But it’s not. It’s likely an outdoor timer doing the work. Timers help us control when things turn on and off. Learning instructions for outdoor timer use can make life easier.
Do you want to save energy and time? Outdoor timers can help. They turn your lights or sprinklers on and off. This happens even when you are not home. Let’s learn how to use them! We will explore instructions for outdoor timer settings together.
Key Takeaways
- Instructions for outdoor timer use include setting the time and choosing on/off times.
- Outdoor timers can automate your garden watering, saving water and time.
- Using timers for lights can make your home look lived-in, even when you’re away.
- Timers help save energy by only running devices when needed.
- Understanding timer settings can lead to a more efficient and secure home.
Understanding Your Outdoor Timer
An outdoor timer is a cool device. It helps you control electrical things outside. This could be lights, sprinklers, or decorations. Timers turn these things on and off at certain times. Think of it like a robot butler for your yard! But how do we make it work? The instructions for outdoor timer units are usually simple. Most timers have a dial or buttons. These let you set the current time. They also let you choose when you want things to turn on or off. Some timers are digital. They have a screen and more options. Other timers are mechanical. They use pins or dials. No matter the type, the goal is the same. It is to make your life easier by automating tasks. Understanding your timer is the first step to using it well.
- Timers control outdoor lights and sprinklers.
- Digital timers have screens and buttons.
- Mechanical timers use dials or pins.
- Timers save energy by automating tasks.
- Knowing your timer type is important.
Imagine you have a garden. You want to water it every day. But you sometimes forget. An outdoor timer can help! You set the timer to turn on the sprinkler each morning. Your plants get water, even if you are busy. This is just one way timers can help. They can also turn on your porch light at night. This makes your home safer. Learning to use timers is like having a superpower. You can control things with time! Instructions for outdoor timer use are not hard. With a little practice, you can master them. Timers are a great tool for any home.
Why Use Timers?
Have you ever left your lights on all day by accident? It wastes energy! Timers can stop this. They turn off lights when you don’t need them. This saves electricity. Saving electricity helps the planet. It also saves you money on your bill! Timers are also great for security. When you are away, timers can turn on lights. This makes it look like someone is home. This can scare away bad guys. Timers can also water your plants. They do this even when you’re on vacation. Using timers is smart. They make life easier and safer. Do you want to be a smart homeowner? Then, learn to use timers! They are a simple way to make a big difference.
Types of Outdoor Timers
Did you know there are different kinds of outdoor timers? Some are digital. They have a screen and buttons. You can set them very precisely. Other timers are mechanical. They use a dial or pins. These are simpler to use. Some timers plug into an outlet. Others need to be wired in. The type of timer you need depends on what you want to control. Lights often use simple plug-in timers. Sprinklers might need a more advanced timer. Think about what you need before you buy a timer. Choose the one that is right for you. The instructions for outdoor timer use will vary based on the type.
Basic Timer Features
Most outdoor timers have some basic features. They let you set the current time. This is important for the timer to work right. They also let you set on and off times. This tells the timer when to turn things on and off. Some timers have a repeat function. This lets you repeat the same schedule every day. Other timers have a random function. This turns things on and off at different times. This can make your home look more lived-in. Some timers also have a manual override. This lets you turn things on or off yourself. Knowing these features helps you use your timer better. Follow the instructions for outdoor timer units closely to learn how to use these features.
Fun Fact or Stat: Did you know that using an outdoor timer for your holiday lights can save up to 40% on your energy bill during the festive season?
How to Set Up a Mechanical Timer
Mechanical timers are easy to use. They have a dial with pins. You push the pins in or pull them out. Pushing a pin in means the timer will be off at that time. Pulling a pin out means the timer will be on. To set the current time, turn the dial. Match the arrow on the timer to the right time. Now, decide when you want things to turn on and off. Push in the pins for the times you want the device off. Leave the pins out for the times you want it on. Plug the timer into an outlet. Then, plug your light or sprinkler into the timer. Your device will now turn on and off based on your settings! Following the instructions for outdoor timer use with a mechanical timer is simple.
- Find the dial and the pins.
- Push pins in for “off” times.
- Pull pins out for “on” times.
- Set the current time on the dial.
- Plug in the timer and device.
Imagine you want your porch light to turn on at 6 PM and off at 6 AM. Find the pins on the timer. Push in all the pins between 6 AM and 6 PM. Leave the other pins out. Set the current time on the dial. Now, plug in your light. It will turn on at 6 PM and off at 6 AM every day. It’s like magic, but it’s just a timer! Mechanical timers are great because they are simple. They don’t need batteries or complicated settings. Just set the pins and go! Always read the instructions for outdoor timer models to understand specific features.
Setting the Current Time
Setting the current time is very important. The timer needs to know what time it is. This helps it turn things on and off at the right times. Look for a dial or a knob on the timer. Turn it until the arrow points to the correct time. Make sure you set the AM and PM correctly. If the time is wrong, the timer will not work right. Some timers have a small clock face. Others use numbers. Follow the instructions for outdoor timer use to set the time correctly. This is the first step to using your timer well. A correct time setting ensures your lights and sprinklers work as planned.
Adjusting On/Off Times
Adjusting the on and off times is easy with a mechanical timer. Each pin represents a certain amount of time. Usually, each pin is 15 minutes or 30 minutes. To turn something on or off, you adjust the pins. Pushing a pin in means the device will be off. Pulling a pin out means it will be on. Think about when you want your lights to turn on. Then, pull out the pins for those times. Think about when you want them to turn off. Then, push in the pins for those times. It’s like setting a mini schedule for your devices. The instructions for outdoor timer units often include a diagram to help you.
Troubleshooting Mechanical Timers
Sometimes, mechanical timers don’t work right. The most common problem is the time is not set correctly. Make sure the arrow points to the correct time. Another problem is the pins are not set right. Check that the pins are pushed in or pulled out correctly. Sometimes, the timer is not plugged in all the way. Make sure it is plugged in tightly. If the timer still doesn’t work, try a different outlet. If nothing works, the timer might be broken. You might need to buy a new one. Following the instructions for outdoor timer use can help prevent problems. Always check the basics first!
Fun Fact or Stat: Mechanical timers were first invented in the early 20th century and were primarily used for industrial purposes before becoming household items.
Using Digital Outdoor Timers

Digital timers are like the smartwatches of outdoor timers. They have a screen and buttons. These timers let you set precise schedules. You can set different on and off times for each day of the week. Some digital timers even have sunrise and sunset settings. This means they turn on lights when it gets dark. They turn them off when it gets light. To set up a digital timer, you usually need to press some buttons. The screen will show you the options. You can set the time, day, and on/off times. Read the instructions for outdoor timer models carefully. Digital timers can do a lot. They can save you even more energy and time!
- Digital timers have screens and buttons.
- You can set precise schedules.
- Some have sunrise/sunset settings.
- Read the instructions carefully.
- They can save more energy.
Let’s say you want your garden lights to turn on at sunset. You can set this up easily with a digital timer. Go to the settings menu. Find the sunrise/sunset option. Choose the option to turn on at sunset. The timer will now automatically adjust the on time. It will change as the sunset time changes throughout the year. This is a super cool feature! Digital timers might seem complicated. But once you learn how to use them, they are very helpful. Remember to keep the instructions for outdoor timer use handy for reference.
Setting the Clock and Date
Setting the clock and date is the first step. The timer needs to know the right time and date. Use the buttons to navigate the menu. Find the clock setting. Use the up and down arrows to set the hour and minute. Then, set the AM or PM. Next, find the date setting. Set the month, day, and year. Make sure everything is correct. If the clock and date are wrong, the timer won’t work right. The instructions for outdoor timer usually have clear steps for this. This is a very important first step.
Programming On/Off Schedules
Programming the on and off schedules is where the magic happens. You can set different schedules for different days. This is great if you have different needs on weekdays and weekends. Use the buttons to create a new program. Set the on time for the first event. Then, set the off time. Choose which days of the week you want the program to run. You can create multiple programs. This lets you control different devices at different times. Read the instructions for outdoor timer use carefully. This will help you understand all the options.
Using Sunrise/Sunset Settings
Sunrise and sunset settings are very useful. They let the timer adjust to the changing daylight hours. Find the sunrise/sunset option in the menu. Choose the option to turn on at sunset or turn off at sunrise. The timer will use its internal clock to figure out the sunrise and sunset times. This means you don’t have to change the settings yourself. The lights will turn on and off automatically. This is a great way to save energy. It also makes your home look more secure. Check the instructions for outdoor timer units to see if your timer has this feature.
Fun Fact or Stat: Some advanced digital timers can be controlled remotely via smartphone apps, allowing you to adjust settings from anywhere in the world.
Choosing the Right Timer for Your Needs
Choosing the right timer is important. Think about what you want to control. Do you want to control lights? Or sprinklers? How many devices do you need to control? Simple lights might only need a basic mechanical timer. More complex systems might need a digital timer. Consider the location of the timer. Will it be exposed to rain or snow? If so, you need a waterproof timer. Think about how easy the timer is to use. If you don’t like complicated settings, choose a simple timer. The instructions for outdoor timer use should be clear and easy to understand. Choosing the right timer will make your life easier.
- Think about what you want to control.
- Consider the location of the timer.
- Choose a waterproof timer if needed.
- Think about how easy it is to use.
- Read the instructions carefully.
Imagine you have a lot of holiday lights. You want them to turn on and off at different times each day. A simple mechanical timer might not be enough. You might need a digital timer. Digital timers can handle complex schedules. They can also control multiple devices. But if you only want to control one porch light, a mechanical timer might be perfect. It’s simple and easy to set up. The key is to think about your needs. Then, choose the timer that best fits those needs. Remember to follow the instructions for outdoor timer settings when you get your timer.
Weather Resistance
Weather resistance is a key factor for outdoor timers. If the timer is outside, it will be exposed to the weather. Rain, snow, and sun can damage the timer. Look for a timer that is labeled as “waterproof” or “weatherproof.” This means it is designed to withstand the elements. Check the instructions for outdoor timer use to see if the timer is suitable for outdoor use. A weather-resistant timer will last longer. It will also work more reliably. Don’t risk using a timer that is not made for outdoor use.
Number of Outlets
The number of outlets is another important thing to consider. How many devices do you want to control? If you only want to control one light, you only need one outlet. But if you want to control multiple lights or sprinklers, you need more outlets. Some timers have two or more outlets. Make sure the timer has enough outlets for your needs. You can also use a power strip with the timer. But make sure the power strip is also rated for outdoor use. The instructions for outdoor timer models will tell you how many outlets it has.
Ease of Programming
How easy is the timer to program? Some timers are very simple to program. Others are more complicated. If you don’t like complicated settings, choose a simple timer. Mechanical timers are usually easier to program than digital timers. But digital timers offer more features. Read the instructions for outdoor timer settings before you buy a timer. This will give you an idea of how easy it is to use. Choose a timer that you feel comfortable programming. This will make your life much easier.
| Feature | Mechanical Timer | Digital Timer |
|---|---|---|
| Ease of Use | Simple | More complex |
| Weather Resistance | Varies | Varies |
| Number of Outlets | Usually one | Often multiple |
| Programming Options | Limited | Extensive |
Fun Fact or Stat: Timers designed for underwater use in ponds or fountains must meet stringent waterproofing standards to ensure safe operation.
Safety Tips for Using Outdoor Timers

Safety is very important when using outdoor timers. Always follow the instructions for outdoor timer models. Make sure the timer is rated for outdoor use. This means it is designed to withstand rain and snow. Never overload the timer. This means plugging in too many devices. Overloading can cause a fire. Check the wattage rating of the timer. Make sure the total wattage of your devices is less than the timer’s rating. Use a ground fault circuit interrupter (GFCI) outlet. This protects you from electric shock. Inspect the timer regularly. Look for damage to the cord or plug. If you see any damage, replace the timer.
- Use a timer rated for outdoor use.
- Do not overload the timer.
- Use a GFCI outlet.
- Inspect the timer regularly.
- Follow all safety instructions.
Imagine you are setting up holiday lights. You want to use an outdoor timer to turn them on and off. First, make sure the timer is rated for outdoor use. It should have a waterproof cover. Next, check the wattage of your lights. The timer should have a wattage rating. Make sure the wattage of the lights is less than the timer’s rating. If it is not, you could overload the timer. This could cause a fire. Always use a GFCI outlet. This will protect you from electric shock. Following these safety tips will help you stay safe.
Checking Wattage Ratings
Checking wattage ratings is crucial for safety. Every electrical device has a wattage rating. This tells you how much power it uses. The outdoor timer also has a wattage rating. This tells you how much power it can handle. Add up the wattage of all the devices you want to plug into the timer. Make sure the total wattage is less than the timer’s rating. If the total wattage is too high, you will overload the timer. This can cause a fire. Always check the wattage ratings before plugging in any devices.
Using GFCI Outlets
Using a GFCI outlet is a smart safety measure. A GFCI outlet protects you from electric shock. It does this by detecting when electricity is leaking. If it detects a leak, it shuts off the power. This can prevent serious injury. Outdoor timers should always be plugged into GFCI outlets. This is especially important in wet locations. GFCI outlets can save lives. They are a simple way to make your home safer. The instructions for outdoor timer models often recommend using a GFCI outlet.
Inspecting for Damage
Inspecting for damage is an important part of maintenance. Check the timer regularly for any signs of damage. Look for cracks in the plastic. Look for frayed or damaged cords. Make sure the plug is in good condition. If you see any damage, do not use the timer. Replace it with a new one. Using a damaged timer can be dangerous. It could cause an electric shock or a fire. Regular inspections can help you prevent accidents. Always follow the safety instructions for outdoor timer units.
Fun Fact or Stat: GFCI outlets can detect electrical leaks as small as 0.005 amps, which is sensitive enough to prevent most electrocutions.
Troubleshooting Common Timer Problems
Sometimes, outdoor timers don’t work right. This can be frustrating. But don’t worry! There are some simple things you can try. First, make sure the timer is plugged in. Check the outlet to see if it is working. Next, check the settings. Make sure the time is set correctly. Make sure the on and off times are correct. If you are using a mechanical timer, check the pins. Make sure they are pushed in or pulled out correctly. If you are using a digital timer, read the instructions for outdoor timer use. Make sure you have programmed the timer correctly. If none of these things work, the timer might be broken.
- Check the power outlet.
- Make sure the time is set correctly.
- Check the on and off times.
- Check the pins on mechanical timers.
- Read the instructions for digital timers.
Imagine your lights are not turning on when they should. You have an outdoor timer, but it’s not working. First, check the outlet. Plug something else into the outlet. Does it work? If not, the problem is with the outlet. If the outlet works, check the timer settings. Make sure the time is correct. Make sure the on and off times are set correctly. If you have a mechanical timer, check the pins. Are they in the right positions? If you have a digital timer, read the instructions for outdoor timer units. You may have made a mistake when programming it. Troubleshooting can take time, but it’s worth it!
Timer Not Turning On
If your timer is not turning on, there are a few things to check. First, make sure the timer is plugged in. Check the outlet to see if it is working. Plug something else into the outlet. If the outlet works, check the timer’s power switch. Make sure it is turned on. If the timer has a battery, make sure the battery is not dead. Replace the battery if needed. If none of these things work, the timer might be broken. Follow the instructions for outdoor timer models to troubleshoot further.
Timer Not Turning Off
If your timer is not turning off, there are other things to check. First, make sure the off time is set correctly. Check the timer’s settings. If you are using a mechanical timer, check the pins. Make sure the pins are pushed in for the off times. If you are using a digital timer, read the instructions for outdoor timer use. Make sure you have programmed the off time correctly. Sometimes, the timer’s internal clock is not working right. Try resetting the timer. If that doesn’t work, the timer might be broken.
Incorrect Time Display
If your timer is showing the wrong time, you need to reset it. For mechanical timers, turn the dial to the correct time. Make sure you set the AM and PM correctly. For digital timers, use the buttons to navigate to the clock setting. Set the hour, minute, and AM/PM. Also, set the date. If the timer keeps showing the wrong time, the battery might be low. Replace the battery. Follow the instructions for outdoor timer settings to set the time correctly.
Summary
Outdoor timers are useful tools. They help you control outdoor devices. This includes lights and sprinklers. They can save you time and energy. There are two main types of timers. These are mechanical and digital. Mechanical timers are simple and easy to use. Digital timers offer more features and precise control. When choosing a timer, consider your needs. Think about the location, the number of outlets, and the ease of programming. Safety is very important. Always follow the instructions for outdoor timer use. Make sure the timer is rated for outdoor use. Use a GFCI outlet. Troubleshoot common problems by checking the power, settings, and pins.
Conclusion
Using an outdoor timer can make your life easier. You can automate your lights and sprinklers. This saves you time and energy. Remember to choose the right timer for your needs. Always follow safety tips. Check the wattage, use a GFCI outlet, and inspect for damage. If you have problems, troubleshoot the timer. With a little practice, you can master the instructions for outdoor timer units and enjoy the benefits of automated outdoor control.
Frequently Asked Questions
Question No 1: How do I know if my timer is waterproof?
Answer: Look for a label on the timer that says “waterproof” or “weatherproof.” This means the timer is designed to withstand rain and snow. Also, check the instructions for outdoor timer use. They should say if the timer is suitable for outdoor use. If you are not sure, it is best to use a timer that is specifically designed for outdoor use. This will help prevent damage and ensure safety. Remember, water and electricity can be dangerous. Always take precautions when using electrical devices outdoors. Using a waterproof timer is a smart choice.
Question No 2: Can I use an indoor timer outdoors?
Answer: No, you should not use an indoor timer outdoors. Indoor timers are not designed to withstand the weather. Rain, snow, and sun can damage the timer. This can create a safety hazard. Always use a timer that is specifically designed for outdoor use. These timers are made with waterproof materials. They also have safety features to protect against electric shock. The instructions for outdoor timer models will always specify if they are for indoor or outdoor use. Using the right timer is important for safety.
Question No 3: How do I set a mechanical timer?
Answer: Setting a mechanical timer is easy. First, find the dial and the pins. The dial has numbers that represent the time. The pins can be pushed in or pulled out. Pushing a pin in means the device will be off at that time. Pulling a pin out means the device will be on. To set the current time, turn the dial. Match the arrow on the timer to the right time. Then, adjust the pins to set the on and off times. The instructions for outdoor timer settings will provide a diagram to help you. It’s like setting a clock with little switches!
Question No 4: How do I set a digital timer?
Answer: Setting a digital timer involves using the buttons and screen. First, find the clock setting. Use the buttons to set the hour, minute, and AM/PM. Then, set the date. Next, create a program. Set the on time for the first event. Then, set the off time. Choose which days of the week you want the program to run. You can create multiple programs. The instructions for outdoor timer units will provide detailed steps. It’s like programming a mini computer for your lights!
Question No 5: What if my timer stops working?
Answer: If your timer stops working, there are a few things to check. First, make sure the timer is plugged in. Check the outlet to see if it is working. Next, check the settings. Make sure the time is set correctly. Make sure the on and off times are correct. If you are using a mechanical timer, check the pins. Make sure they are pushed in or pulled out correctly. If you have a digital timer, read the instructions for outdoor timer models to ensure you have programmed it correctly. If none of these things work, the timer might be broken. You may need to replace it.
Question No 6: Can I use a timer to save energy?
Answer: Yes, you can use a timer to save energy. Timers turn off lights and other devices when you don’t need them. This prevents them from wasting electricity. You can set a timer to turn on your porch light at night. Then, it will turn off automatically in the morning. You can also use a timer to water your garden. This prevents you from overwatering. Saving energy helps the planet. It also saves you money on your electricity bill. Following the instructions for outdoor timer use will help you maximize energy savings.
