Have you ever wished your lights could turn on by themselves? Or maybe your sprinklers could water the grass even when you’re away? That’s where an outdoor timer comes in handy. You can find instructions for stanley outdoor timer online. It’s like having a little robot that controls your outdoor gadgets.
Outdoor timers can make life easier and save energy. They help you automate your yard and garden. But how do these timers work? And how do you set them up? Let’s explore the world of outdoor timers.
Key Takeaways
- Instructions for stanley outdoor timer help you automate your outdoor devices easily.
- Outdoor timers save energy by controlling lights and sprinklers automatically.
- Understanding voltage ratings prevents electrical hazards when using outdoor timers.
- Programming an outdoor timer involves setting schedules for on and off times.
- Regular maintenance ensures your outdoor timer works correctly for a long time.
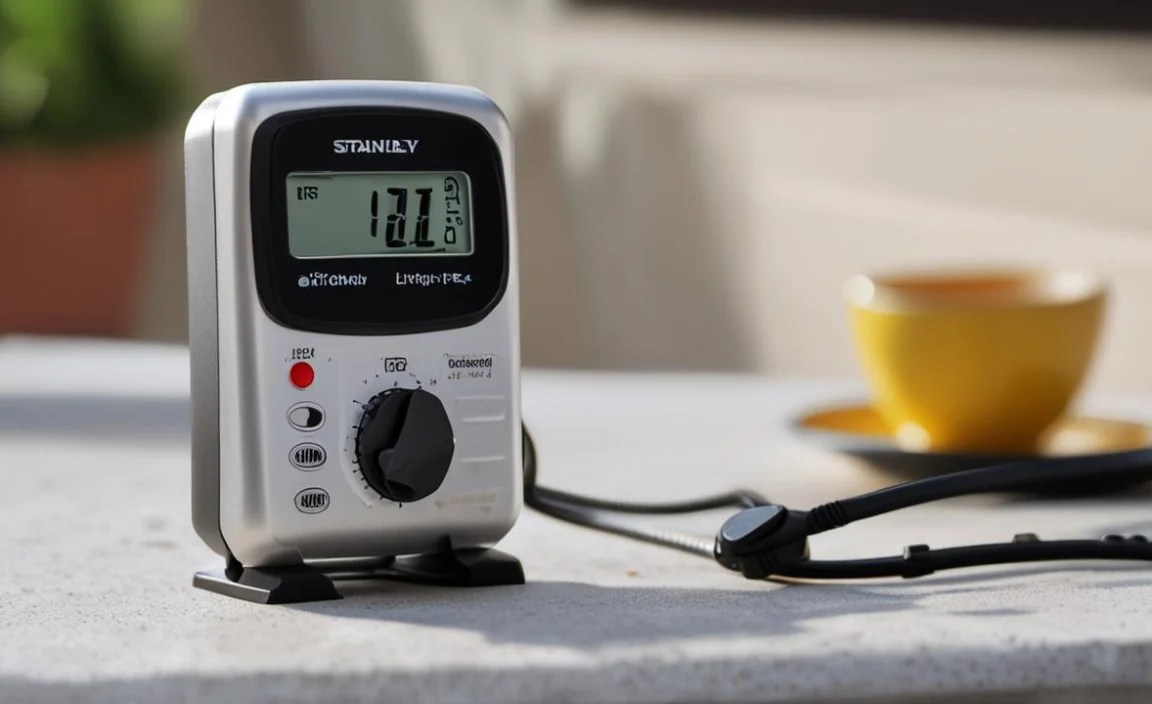
Understanding Stanley Outdoor Timer Basics

Outdoor timers are super useful tools. They can control your holiday lights. They can also manage your garden sprinklers. The instructions for stanley outdoor timer usually explain the parts. These parts include a power switch and settings for when the timer will turn on and off. These settings are important for managing your yard. You can set the timer to water your plants early in the morning. This is the best time to water, so the plants can soak up the water before the sun gets too hot. You can also use the timer to turn on lights at night. This will make your home look nice and help keep you safe. Using the timer is easy once you learn the steps. It is like setting the alarm clock, but instead of waking you up, it turns on your sprinklers.
- Timers help control outdoor devices.
- They can manage lights and sprinklers.
- Timers save energy and time.
- Outdoor timers enhance home security.
- They automate yard and garden tasks.
Outdoor timers are great for people who want to save time. They are also good for those who want to save energy. By using a timer, you don’t have to remember to turn things on and off. This can save you money on your electricity bill. Plus, it’s good for the environment. The instructions for stanley outdoor timer explain how to set different schedules. You can set the timer to turn on the lights only when it’s dark. Or you can set it to water the plants only when they need it. This way, you’re not wasting water or electricity. It’s a smart way to take care of your home and the planet.
Fun Fact or Stat: Did you know that using an outdoor timer for your holiday lights can save up to 40% on your energy bill during the holiday season?
What is Voltage and Why Does it Matter?
Voltage is like the power that flows through the wires. It is what makes your lights shine and your sprinklers spray. Using the wrong voltage can be dangerous. The instructions for stanley outdoor timer usually tell you what voltage the timer needs. If you use too much voltage, it can damage the timer or even cause a fire. If you use too little voltage, the timer won’t work properly. It’s important to check the voltage of your outdoor outlets before you plug in the timer. Make sure it matches what the timer needs. This will keep you safe and make sure your timer works the right way. Always ask an adult for help if you are not sure about voltage.
What are Amps and Why Should I Care?
Amps measure how much electricity a device uses. Each device needs a certain amount of amps to work. If you plug too many devices into one timer, you could overload it. This can cause the timer to stop working or even start a fire. The instructions for stanley outdoor timer list the maximum amps the timer can handle. Check the amps of each device you plan to use with the timer. Add them up to make sure they don’t go over the timer’s limit. This will keep your timer safe and working well. Think of it like having too many friends on a seesaw. If there are too many, it won’t work.
What is Weather Resistance and Why is it Important?
Weather resistance means the timer can handle rain, snow, and sun. Outdoor timers are made to be outside. But not all timers are the same. Some timers are better at handling bad weather than others. The instructions for stanley outdoor timer often talk about weather resistance. Look for timers that are marked as “weatherproof” or “waterproof.” These timers are made to keep water out. This will help the timer last longer. If the timer is not weather-resistant, it could get damaged by the rain. This can make it stop working. So, choose a timer that can handle the weather in your area.
Step-by-Step Guide to Setting Up Your Timer

Setting up your timer might seem hard, but it’s not. The instructions for stanley outdoor timer break it down. First, find a good spot for your timer. It should be close to an outlet. It should also be protected from the weather. Next, plug the timer into the outlet. Then, plug your lights or sprinklers into the timer. Now, you need to set the timer. This usually involves pressing buttons or turning dials. The instructions will show you how to set the on and off times. You can set different times for different days. Once you’ve set the timer, it will automatically turn your lights or sprinklers on and off. It’s like magic, but it’s just a timer doing its job.
- Find a safe and dry spot.
- Plug the timer into an outlet.
- Connect your device to the timer.
- Set the on and off times.
- Test the timer to ensure it works.
- Adjust settings as needed.
Setting up your timer is a great way to automate your outdoor tasks. You won’t have to worry about remembering to turn things on and off. This can save you time and energy. The instructions for stanley outdoor timer also include some tips. They might tell you how to reset the timer. They might also explain how to change the battery. If your timer has a battery, it’s important to change it when it gets low. This will make sure the timer keeps working even when the power goes out. Outdoor timers are very useful. They keep your yard looking great without you having to do all the work yourself. It is a simple way to make your life easier.
Fun Fact or Stat: Did you know that outdoor timers were first invented to automate farm irrigation systems in the early 20th century?
Finding the Right Location
Where you put your timer matters a lot. The best spot is dry and protected. You don’t want the timer to get rained on. Rain can damage the timer and make it stop working. The instructions for stanley outdoor timer might suggest placing it under an eave. An eave is the edge of your roof. This can help keep the timer dry. You also want to make sure the timer is close to an outlet. This will make it easy to plug in. If you have to use an extension cord, make sure it’s an outdoor extension cord. These cords are made to handle the weather. They are safer than indoor cords.
Connecting Devices Safely
Plugging things into the timer is easy. But you need to do it safely. First, make sure the timer is turned off. This will prevent you from getting shocked. The instructions for stanley outdoor timer often say to check the voltage. Make sure the voltage of your device matches the timer. If they don’t match, the device might not work. Or it could even get damaged. Also, don’t plug too many devices into one timer. This can overload the timer. If you’re not sure how to do it safely, ask an adult for help. They can show you the right way to plug things in.
Understanding Timer Settings
Timers have different settings. These settings let you control when things turn on and off. Some timers have simple dials. Others have digital screens. The instructions for stanley outdoor timer explain each setting. You can set the timer to turn on at sunset and turn off at sunrise. This is great for lights. You can also set the timer to water the plants for a certain amount of time. This is good for sprinklers. Some timers even let you set different schedules for different days. This is useful if you want to water the plants more on some days than others.
Programming Your Stanley Timer for Different Schedules

Programming your timer is like telling it what to do. The instructions for stanley outdoor timer will show you how to set different schedules. You can set the timer to turn on the lights every night. Or you can set it to water the plants every morning. You can also set different schedules for different days. For example, you might want to water the plants more on hot days. To do this, you need to understand the timer’s settings. Some timers have dials that you turn. Others have buttons that you press. The instructions will explain what each button or dial does. Once you know how to use the settings, you can create the perfect schedule for your yard.
- Decide on the best schedule for your needs.
- Use the timer’s controls to set on and off times.
- Test your settings to make sure they work.
- Adjust the schedule as needed.
- Consider seasonal changes when programming.
- Document your settings for future reference.
Programming your timer is a great way to customize your yard care. You can make sure your plants get the right amount of water. You can also make sure your lights turn on at the right time. The instructions for stanley outdoor timer might include examples of different schedules. These examples can give you ideas for your own yard. You can also experiment with different settings to see what works best. Just remember to write down your settings. That way, you can easily change them back if you need to. Setting up a timer for outdoor use is a great way to save time, money, and keep your yard looking its best.
Fun Fact or Stat: Some advanced outdoor timers can be programmed via smartphone apps, allowing for remote control and monitoring!
Setting Daily On/Off Times
Setting the daily on and off times is the most basic thing you can do. It lets you control when your lights and sprinklers turn on each day. The instructions for stanley outdoor timer show you how to set these times. You usually need to press a button or turn a dial to set the time. Make sure you set the right time. Otherwise, your lights might turn on too early or too late. You can also set different on and off times for different devices. For example, you might want to turn on the lights at sunset and the sprinklers in the morning.
Creating Weekly Schedules
Weekly schedules give you more control over your timer. You can set different schedules for each day of the week. This is useful if you want to water the plants more on some days than others. The instructions for stanley outdoor timer explain how to create weekly schedules. You usually need to use the timer’s settings to choose which days you want to water the plants. Then, you can set the on and off times for each day. This lets you customize your yard care to meet your specific needs. It is important to understand how the timer works for these settings.
Using Sunrise and Sunset Settings
Some timers have sunrise and sunset settings. These settings automatically adjust the on and off times based on the time of sunrise and sunset. This is great for lights. You don’t have to worry about changing the settings every day. The instructions for stanley outdoor timer explain how to use these settings. You usually just need to choose the sunrise or sunset option. The timer will then figure out the right time to turn on the lights. This is a convenient way to keep your yard well-lit without having to do any extra work.
Troubleshooting Common Timer Problems
Sometimes, timers don’t work the way they should. The instructions for stanley outdoor timer can help you fix common problems. One common problem is that the timer doesn’t turn on or off. This could be because the timer is not plugged in correctly. It could also be because the settings are wrong. Another problem is that the timer turns on and off at the wrong times. This could be because the time is not set correctly. Or it could be because the timer is broken. If you’re having trouble with your timer, read the instructions carefully. They might have the answer to your problem. If not, ask an adult for help.
| Problem | Possible Cause | Solution |
|---|---|---|
| Timer not turning on | Power issue, incorrect settings | Check power cord, verify settings |
| Incorrect on/off times | Wrong time set, programming error | Reset time, reprogram schedule |
| Timer stops working | Overload, weather damage | Reduce load, protect from weather |
| Timer keeps resetting | Battery issues, power surges | Change battery, use surge protector |
Troubleshooting your timer can save you money. You won’t have to buy a new timer if you can fix the old one. The instructions for stanley outdoor timer often have a troubleshooting section. This section lists common problems and how to fix them. It’s a good idea to read this section before you start using the timer. That way, you’ll be prepared if something goes wrong. Also, remember to keep the instructions in a safe place. You might need them again in the future. A working timer is essential to keep your yard looking great, so fix issues quickly.
Fun Fact or Stat: Over 50% of timer problems can be resolved by simply resetting the device and checking the programmed settings!
Timer Not Turning On
What if your timer refuses to turn on? First, check the power. Is the timer plugged in? Is the outlet working? The instructions for stanley outdoor timer suggest testing the outlet. Plug something else into the outlet. If it doesn’t work, the problem is with the outlet. If the outlet works, the problem might be with the timer. Check the timer’s settings. Make sure the timer is set to the “on” position. If the timer still doesn’t turn on, it might be broken.
Incorrect On/Off Times
Sometimes, the timer turns on and off at the wrong times. This can be frustrating. The instructions for stanley outdoor timer explain how to fix this. First, check the time. Is the time set correctly? If not, reset the time. Then, check the on and off times. Are they set correctly? If not, change the settings. Make sure you save the new settings. Otherwise, the timer will still turn on and off at the wrong times. Also, consider if you are using a daylight savings setting. This can cause issues if not set correctly.
Timer Stops Working
If your timer suddenly stops working, don’t panic. The instructions for stanley outdoor timer can help. First, check the load. Are you plugging too many devices into the timer? If so, unplug some devices. This might fix the problem. Next, check the weather. Did it rain recently? If so, the timer might have gotten wet. Let the timer dry out completely. Then, try turning it on again. If the timer still doesn’t work, it might be broken.
Maintaining Your Stanley Outdoor Timer
Taking care of your timer will help it last longer. The instructions for stanley outdoor timer have tips on how to maintain it. One important tip is to keep the timer clean. Wipe it down with a damp cloth regularly. This will remove dirt and dust. Another tip is to protect the timer from the weather. If it’s going to rain, cover the timer with a plastic bag. This will keep it dry. Also, check the timer’s battery regularly. If the battery is low, replace it. This will make sure the timer keeps working even when the power goes out. With proper care, your timer will last for many years.
- Clean the timer regularly.
- Protect it from harsh weather.
- Check and replace the battery.
- Inspect for wear and tear.
- Store it properly during off-season.
- Follow manufacturer’s guidelines for maintenance.
Maintaining your timer is like taking care of a plant. You need to give it the right amount of attention. The instructions for stanley outdoor timer also explain how to store the timer. If you’re not going to use the timer for a while, store it in a dry place. This will prevent it from getting damaged. You should also remove the battery before storing the timer. This will prevent the battery from leaking and damaging the timer. By following these tips, you can keep your timer in good condition for years to come. It is a worthwhile effort to keep your yard automated.
Fun Fact or Stat: Regular maintenance can extend the lifespan of your outdoor timer by up to 50%!
Cleaning and Storage Tips
Cleaning your timer is simple. Just wipe it down with a damp cloth. Don’t use soap or harsh chemicals. These can damage the timer. The instructions for stanley outdoor timer might have specific cleaning instructions. Always follow those instructions. When you’re storing the timer, keep it in a dry place. This will prevent it from getting rusty. You can also put it in a plastic bag to protect it from dust. This will keep it clean and ready to use when you need it.
Battery Replacement Guide
Most timers use batteries to keep track of time. When the battery gets low, the timer might stop working. The instructions for stanley outdoor timer explain how to replace the battery. First, find the battery compartment. It’s usually on the back of the timer. Open the compartment and remove the old battery. Then, put in a new battery. Make sure you put it in the right way. The instructions will show you which way to put it in. Close the compartment and test the timer. It should now be working again.
Weather Protection Strategies
Outdoor timers are made to be outside. But they can still get damaged by the weather. The instructions for stanley outdoor timer suggest protecting the timer from rain and snow. You can cover it with a plastic bag. Or you can put it under an eave. This will help keep it dry. You should also protect the timer from the sun. The sun can fade the plastic and damage the timer. You can put it in a shady spot. This will help it last longer.
Choosing the Right Stanley Timer for Your Needs
There are many different types of outdoor timers. Some timers are simple. They just have a few buttons and dials. Others are more complex. They have digital screens and lots of settings. The instructions for stanley outdoor timer can help you choose the right timer for your needs. Think about what you want to use the timer for. Do you want to control lights? Do you want to control sprinklers? How many devices do you want to control? Once you know what you need, you can start looking for a timer that meets your requirements. You should also consider the timer’s price. Some timers are more expensive than others.
- Consider the number of devices you want to control.
- Think about the types of schedules you need.
- Check the timer’s voltage and amperage ratings.
- Read reviews from other users.
- Compare prices from different retailers.
- Choose a timer with a warranty.
Choosing the right timer is important. You want to make sure it meets your needs. The instructions for stanley outdoor timer also include information about the timer’s features. Some timers have a remote control. This lets you control the timer from inside your house. Other timers have a built-in sensor. This sensor can detect when it’s dark. It can then turn on the lights automatically. These features can make your life easier. But they can also make the timer more expensive. So, think carefully about which features you really need. A good timer will help you automate your yard and save time.
Fun Fact or Stat: The global smart timer market is expected to reach $2.5 billion by 2025, driven by the increasing adoption of smart home devices!
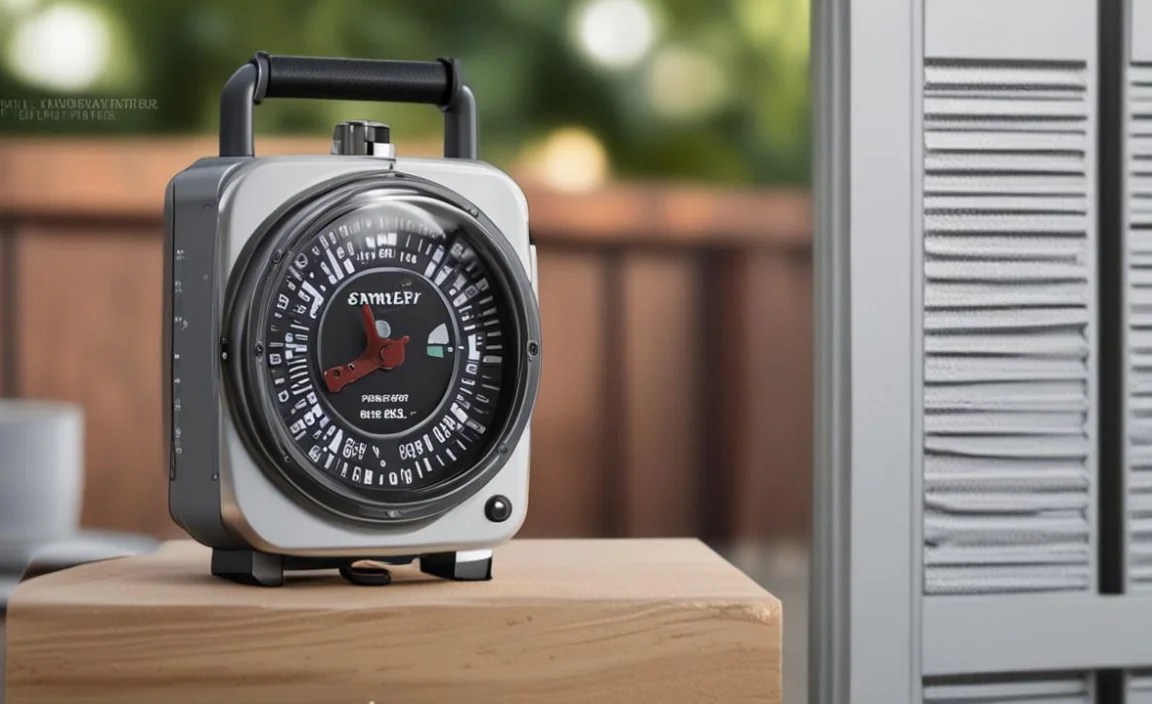
Digital vs. Mechanical Timers
Digital timers have screens and buttons. They let you set precise schedules. The instructions for stanley outdoor timer for digital models explain all the settings. Mechanical timers have dials. They are simpler to use. But they are not as precise. The choice depends on what you need. If you want precise control, choose a digital timer. If you want something simple, choose a mechanical timer. Both types of timers can be useful. Consider the ease of use when buying a new timer.
Considering Your Budget
Timers come in different price ranges. Some are cheap. Others are expensive. The instructions for stanley outdoor timer don’t tell you which one to buy. But they can help you understand the features. Think about how much you’re willing to spend. Then, look for a timer that fits your budget. Don’t just buy the cheapest timer. It might not meet your needs. Read reviews to see what other people think. This can help you make a smart choice. Do not overspend on a timer that has too many features that you will never use.
Reading Customer Reviews
Customer reviews can be very helpful. They tell you what other people think about the timer. The instructions for stanley outdoor timer don’t include reviews. But you can find them online. Look for reviews on websites like Amazon. Read both the good and the bad reviews. This will give you a balanced view of the timer. Pay attention to reviews that talk about the timer’s reliability. You want a timer that will last a long time. If many reviews say the timer breaks easily, don’t buy it.
Summary
Outdoor timers are useful tools for automating your yard and garden. They can control lights and sprinklers. Using the instructions for stanley outdoor timer, you can set up schedules. These schedules tell the timer when to turn devices on and off. You can set different schedules for different days. It is important to choose the right timer. Think about your needs and your budget. It is also important to maintain your timer. Clean it regularly and protect it from the weather. With proper care, your timer will last for many years. This will help you save time and energy.
Conclusion
Outdoor timers make life easier. They automate tasks in your yard and garden. You can control lights and sprinklers without lifting a finger. Setting up a timer might seem tricky at first. But the instructions for stanley outdoor timer make it simple. Choose the right timer, program it correctly, and maintain it well. Then you can enjoy a beautiful, well-managed outdoor space. Outdoor timers can save energy and time. They are a great addition to any home.
Frequently Asked Questions
Question No 1: How do I reset my Stanley outdoor timer?
Answer: Resetting your Stanley outdoor timer is usually simple. First, look for a reset button on the timer. It might be a small button that you need to press with a pen or paperclip. Press and hold the reset button for a few seconds. This should clear the timer’s memory and reset it to its default settings. If you can’t find a reset button, check the instructions for stanley outdoor timer. The instructions will show you how to reset the timer. You might need to unplug the timer and remove the battery. Then, wait a few minutes and plug it back in.
Question No 2: What does “weatherproof” mean for an outdoor timer?
Answer: When an outdoor timer is labeled “weatherproof,” it means it can handle rain, snow, and other outdoor conditions. These timers are made with materials that keep water out. This protects the timer’s internal parts. However, “weatherproof” doesn’t mean the timer can be underwater. It just means it can withstand normal weather conditions. The instructions for stanley outdoor timer often explain the timer’s weather resistance. Look for timers that are specifically designed for outdoor use. They will last longer and work better in bad weather.
Question No 3: How do I change the battery in my Stanley outdoor timer?
Answer: Changing the battery in your Stanley outdoor timer is easy. First, find the battery compartment. It’s usually on the back or side of the timer. Open the compartment using a screwdriver or your fingers. Remove the old battery and replace it with a new one. Make sure you put the new battery in the right way. The instructions for stanley outdoor timer will show you which way to insert the battery. Close the compartment and make sure it’s secure. Test the timer to make sure it’s working.
Question No 4: Can I use an outdoor timer indoors?
Answer: Yes, you can use an outdoor timer indoors. Outdoor timers are made to handle more electricity than indoor timers. This means they can safely control more devices. However, outdoor timers are often bigger and more expensive than indoor timers. So, if you only need to control a few small devices, an indoor timer might be a better choice. But if you want to use the same timer for both indoor and outdoor devices, an outdoor timer is a good option. Always read the instructions for stanley outdoor timer before using it.
Question No 5: What should I do if my timer is not working after a power outage?
Answer: If your timer stops working after a power outage, don’t worry. Most timers have a built-in memory that saves your settings. However, the power outage might have reset the timer. The first thing to do is check the timer’s display. If it’s blank, the timer might need a new battery. If the display is working, check the time and settings. They might need to be reset. The instructions for stanley outdoor timer will show you how to reset the timer. If you can’t fix the problem, ask an adult for help.
Question No 6: How do I prevent my outdoor timer from being stolen?
Answer: Preventing your outdoor timer from being stolen is important. One way to do this is to hide the timer. Put it in a place where it’s not easily seen from the street. You can also use a lockable outdoor box. This will protect the timer from theft and weather. Another way to deter thieves is to install a security camera. The camera will record anyone who comes near the timer. The instructions for stanley outdoor timer don’t cover security, so consider these extra steps for protection. These steps can help keep your timer safe and secure.
