Have you ever wanted to make your walls bloom? You can do it with paint and a little help. What if you could paint giant flowers? It sounds like a fun idea, right? Large flower stencils for outdoor walls can help you. They let you create amazing art outside. Let’s learn how!
Key Takeaways
- Using large flower stencils for outdoor walls is a fun way to decorate.
- Choose durable stencils designed for outdoor use to withstand weather.
- Properly clean your walls before stenciling for the best paint adhesion.
- Experiment with different paint colors for unique and eye-catching floral designs.
- Seal your finished stencil art to protect it from the elements and extend its life.
Finding The Best Flower Stencils

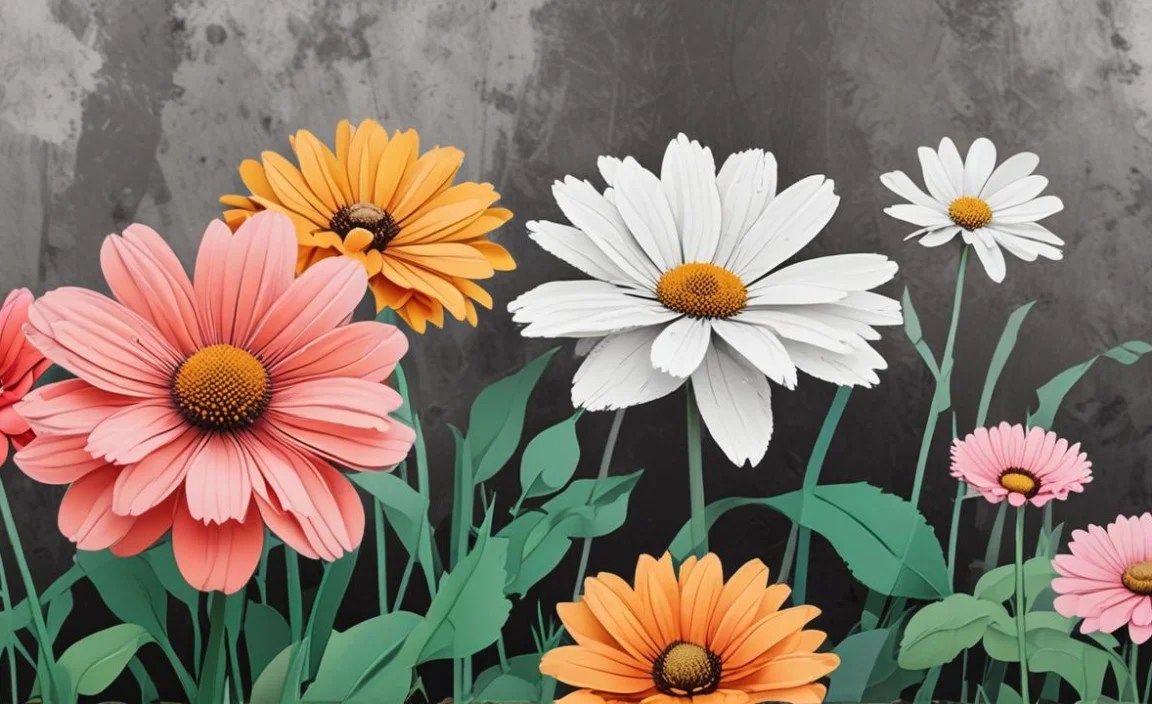
Imagine turning a plain wall into a beautiful garden. You can do this with large flower stencils for outdoor walls. Finding the right stencils is key. Look for stencils made of strong, flexible plastic. These will last longer and are easier to use. Good stencils should have clear, precise cuts. This helps you get clean, crisp lines when you paint. Make sure the stencil is big enough for your wall. You want the flowers to make a statement. Think about the type of flowers you like. Roses, sunflowers, and daisies are all great choices. Choose a stencil that matches your style and the look you want to create. With the right stencil, you can transform any outdoor wall into a work of art.
- Look for durable, reusable stencils.
- Choose a flower design you love.
- Make sure the stencil is the right size.
- Consider the material of the stencil.
- Read reviews to find quality stencils.
Using large flower stencils for outdoor walls is a fun project. It lets you show off your creativity. Remember to take your time and plan your design. Practice on a piece of cardboard first. This helps you get a feel for the stencil. It also lets you test your paint colors. Don’t be afraid to try different techniques. You can use sponges, brushes, or even spray paint. The most important thing is to have fun. Enjoy the process of turning your wall into a floral masterpiece. With a little effort, you can create something truly special.
What Materials Do I Need?
Before you start, gather your supplies. You’ll need your large flower stencils for outdoor walls. You’ll also need outdoor paint that can handle the weather. Pick colors that you love and that go well together. Get some paintbrushes or foam rollers to apply the paint. You’ll need painter’s tape to hold the stencil in place. A level can help you make sure the stencil is straight. Don’t forget a drop cloth to protect the ground from paint splatters. Having all your materials ready will make the project go smoothly. You don’t want to stop in the middle to run to the store!
How Do I Choose the Right Paint?
Choosing the right paint is very important. For large flower stencils for outdoor walls, use outdoor acrylic paint. This paint is made to handle sun, rain, and wind. Look for paint that says “exterior” or “outdoor” on the can. Consider the color of your wall. Choose paint colors that will stand out. Light colors look great on dark walls. Dark colors pop on light walls. You might want to use a primer first. Primer helps the paint stick to the wall better. It also helps the colors look brighter. Ask someone at the paint store for advice. They can help you pick the best paint for your project.
How Do I Prepare the Wall?
Before you start stenciling, you need to prep the wall. Clean the wall with soap and water. Remove any dirt, dust, or cobwebs. Let the wall dry completely. If there is old paint peeling, scrape it off. Smooth the surface as much as you can. Use painter’s tape to protect any areas you don’t want to paint. This could be trim, windows, or doors. If the wall is very rough, consider using a primer. Primer helps the paint stick better and gives you a smoother surface to stencil on. Taking the time to prep the wall will make a big difference in the final result.
Fun Fact or Stat: Did you know that stenciling dates back to prehistoric times? Cave paintings are some of the earliest examples of stencil art!
Preparing Your Outdoor Wall Surface
Getting your wall ready is super important for large flower stencils for outdoor walls. A clean, smooth surface helps the paint stick better. Start by washing the wall. Use a mix of soap and water. Scrub away any dirt, mold, or mildew. Rinse the wall well and let it dry. Next, check for any cracks or holes. Fill them with patching compound. Let the compound dry and then sand it smooth. If the wall has old, peeling paint, scrape it off. You want a nice, even surface. Consider using a primer. Primer helps the paint stick and covers any stains. Choose a primer that is made for outdoor use. This will protect your wall and make your stencil art last longer.
- Clean the wall with soap and water.
- Repair any cracks or holes.
- Remove peeling paint.
- Sand the surface smooth.
- Apply an outdoor primer.
- Let everything dry completely.
When using large flower stencils for outdoor walls, remember that preparation is key. A well-prepared surface makes a big difference. It helps the paint go on smoothly. It also makes the stencil design look cleaner and sharper. Don’t rush this step. Take your time to clean, repair, and prime the wall. It’s worth the effort. A good foundation will make your stencil art look amazing. Plus, it will last longer. You’ll be able to enjoy your beautiful flower wall for years to come.
Why is Cleaning So Important?
Cleaning is a must before stenciling. Imagine trying to paint on a dusty surface. The paint won’t stick well. It might even flake off. Dirt and grime can also mess up the stencil design. They can create uneven lines and blurry edges. Cleaning removes all this. It gives you a clean slate to work with. Soap and water are usually enough. For tough stains, use a mildew cleaner. Always rinse the wall well after cleaning. You don’t want any soap residue left behind. A clean wall is the first step to a beautiful stencil project.
How Do I Repair Cracks and Holes?
Cracks and holes can ruin your stencil design. They create bumps and gaps in the paint. Repairing them is easy. You’ll need patching compound and a putty knife. Apply the compound to the crack or hole. Use the putty knife to smooth it out. Make sure the compound is flush with the wall. Let it dry completely. Then, sand it smooth. This will create a seamless surface for your stencil. For large holes, you might need to use mesh tape. This provides extra support for the patching compound. Repairing cracks and holes will give you a smooth, professional-looking stencil.
What Kind of Primer Should I Use?
Primer is like a superhero for your wall. It helps the paint stick better. It also covers stains and creates a uniform surface. For large flower stencils for outdoor walls, use an outdoor primer. Look for a primer that is made for masonry or concrete. This type of primer can handle the weather. It will also protect your wall from moisture. Apply the primer with a brush or roller. Let it dry completely before you start stenciling. Primer is an extra step, but it’s worth it. It will make your stencil art look better and last longer.
Fun Fact or Stat: Some primers are tinted! A tinted primer can help your topcoat color look even richer and more vibrant.
Applying Large Flower Stencils Correctly
Now comes the fun part: applying the large flower stencils for outdoor walls! First, position the stencil where you want it. Use painter’s tape to hold it in place. Make sure the stencil is flat against the wall. This prevents paint from bleeding underneath. Use a stencil brush or a foam roller to apply the paint. Don’t use too much paint. A thin, even coat is best. Dab the brush or roll the roller over the stencil. Avoid brushing or rolling back and forth. This can push paint under the stencil edges. Let the paint dry slightly before removing the stencil. Peel it off carefully. If you want to add more flowers, repeat the process. Overlap the stencils to create a more natural look.
- Position the stencil carefully.
- Use painter’s tape to secure it.
- Apply paint in thin, even coats.
- Dab or roll the paint, don’t brush.
- Let the paint dry slightly before removing.
- Overlap stencils for a natural look.
Working with large flower stencils for outdoor walls can be tricky at first. Don’t worry if you make mistakes. You can always touch up the paint. Keep a small brush handy for fixing any bleeds or smudges. Practice on a piece of cardboard first. This will help you get a feel for the technique. Experiment with different colors and patterns. You can create a unique and beautiful flower wall. Remember to take your time and have fun. Stenciling is a great way to add personality to your outdoor space.
How Do I Prevent Paint Bleeding?
Paint bleeding is a common problem with stencils. It happens when paint seeps under the edges. To prevent this, use painter’s tape to secure the stencil tightly. Apply the paint in thin layers. Don’t overload your brush or roller. Dab the paint onto the stencil instead of brushing. This helps prevent it from being pushed underneath. You can also use a stencil adhesive. This is a spray that helps the stencil stick to the wall. Apply a light coat of adhesive to the back of the stencil. Let it dry for a few seconds before placing it on the wall.
What’s the Best Way to Apply Paint?
The best way to apply paint to large flower stencils for outdoor walls is with a stencil brush or foam roller. A stencil brush has short, stiff bristles. This allows you to dab the paint into the stencil openings. A foam roller is good for covering large areas quickly. Use a light touch. Don’t press too hard. This can cause the paint to bleed. Apply the paint in thin, even coats. Let each coat dry before applying the next. This will prevent the paint from running or smudging.
How Do I Create an Overlapping Design?
Overlapping stencils can create a beautiful, layered effect. To do this, start by stenciling one flower. Let it dry completely. Then, position the second stencil so that it overlaps the first. Use a different color paint for the second flower. This will make the overlapping areas stand out. You can also use the same color, but in a lighter or darker shade. Experiment with different combinations of colors and patterns. Overlapping stencils can add depth and dimension to your flower wall. It will look like a real garden is growing on your wall.
Fun Fact or Stat: Stencil brushes come in different shapes and sizes. Round brushes are great for creating soft, blended edges, while flat brushes are ideal for sharp, defined lines.
Choosing The Right Paint Colors

Picking the right colors is key for amazing large flower stencils for outdoor walls. Think about the colors of real flowers. What colors make you happy? Do you like bright, bold colors or soft, pastel shades? Consider the color of your wall. Choose colors that will stand out. Light colors pop on dark walls. Dark colors look great on light walls. You can also use a color wheel. This tool helps you find colors that go well together. Complementary colors are opposite each other on the wheel. They create a bold, eye-catching contrast. Analogous colors are next to each other on the wheel. They create a harmonious, blended look. Don’t be afraid to experiment. Try different combinations of colors until you find something you love.
- Think about real flower colors.
- Consider your wall color.
- Use a color wheel for inspiration.
- Choose complementary or analogous colors.
- Experiment with different combinations.
- Test your colors before you start.
Remember, using large flower stencils for outdoor walls is all about having fun. Don’t be afraid to get creative with your color choices. You can use a single color for a simple, elegant look. Or, you can use multiple colors for a vibrant, playful design. You can even add shading and highlights to make the flowers look more realistic. Use a lighter shade of the same color to create highlights. Use a darker shade to create shadows. This will give your flower wall depth and dimension.
How Do I Use a Color Wheel?
A color wheel is a helpful tool for choosing colors. It shows you which colors go well together. Complementary colors are opposite each other on the wheel. For example, blue and orange are complementary colors. They create a strong contrast. Analogous colors are next to each other on the wheel. For example, blue, green, and purple are analogous colors. They create a harmonious blend. You can use a color wheel to create different moods and effects. Warm colors like red, orange, and yellow are energetic and exciting. Cool colors like blue, green, and purple are calming and peaceful.
Should I Use Light or Dark Colors?
The best colors to use depend on your wall color. If you have a dark wall, use light colors. White, yellow, and light pink will pop against a dark background. If you have a light wall, use dark colors. Black, navy blue, and deep red will stand out. You can also use metallic colors like gold or silver. These colors add a touch of glamour and sparkle. Consider the overall look you want to achieve. Do you want a bold, dramatic design or a subtle, understated one?
How Can I Add Shading and Highlights?
Shading and highlights can make your stencil art look more realistic. To add shading, use a darker shade of the same color. Apply it to the edges of the petals or leaves. This will create the illusion of depth. To add highlights, use a lighter shade of the same color. Apply it to the center of the petals or leaves. This will make them look brighter and more vibrant. You can also use a white or cream-colored paint to create highlights. Use a small brush to apply the shading and highlights. Blend the colors together for a seamless look.
Fun Fact or Stat: The psychology of color tells us that certain colors can evoke specific emotions. Blue is often associated with calmness, while yellow can represent happiness and energy.
Sealing and Protecting Your Stencil Art

Once your large flower stencils for outdoor walls are dry, protect them. Sealing your artwork keeps it looking great. It also helps it last longer. Use a clear outdoor sealant. You can find this at any hardware store. Choose a sealant that is made for masonry or concrete. Apply the sealant with a brush or a sprayer. Make sure to cover the entire stenciled area. Let the sealant dry completely. This can take several hours or even a day. Sealing your stencil art will protect it from the weather. It will also make it easier to clean. You can simply wipe it down with a damp cloth.
- Use a clear outdoor sealant.
- Choose a sealant for masonry or concrete.
- Apply the sealant evenly.
- Let the sealant dry completely.
- Clean your stencil art with a damp cloth.
Using large flower stencils for outdoor walls is a great way to add beauty to your outdoor space. Sealing your artwork is an important final step. It will protect your investment and keep your flower wall looking its best for years to come. Reapply the sealant every year or two. This will ensure that your stencil art stays protected from the elements. You can also use a UV-resistant sealant. This will prevent the colors from fading in the sun.
Why is Sealing Important?
Sealing is like putting a raincoat on your artwork. It protects it from rain, sun, and wind. Without a sealant, the paint can fade, crack, or peel. Sealing also makes the artwork easier to clean. Dirt and grime can’t penetrate the sealant layer. This means you can simply wipe it off with a damp cloth. Sealing is especially important for outdoor artwork. The weather can be harsh on paint. A good sealant will extend the life of your stencil art.
How Do I Choose the Right Sealant?
Choosing the right sealant is important. Look for a clear outdoor sealant. This type of sealant is made to handle the weather. It will also protect your artwork from UV rays. Choose a sealant that is compatible with your paint. Some sealants can react with certain types of paint. This can cause the paint to bubble or peel. Read the label carefully before you buy. If you’re not sure which sealant to choose, ask someone at the hardware store for advice.
How Often Should I Reapply Sealant?
You should reapply sealant every year or two. This will ensure that your stencil art stays protected. The frequency depends on the weather in your area. If you live in a place with harsh winters or hot summers, you may need to reapply more often. Check the sealant regularly for signs of wear and tear. If you see any cracks or peeling, it’s time to reapply. Reapplying sealant is a quick and easy way to keep your flower wall looking its best.
Fun Fact or Stat: Some sealants contain UV inhibitors. These help to protect the paint from fading in the sun, keeping your colors vibrant for longer!
Creative Ideas for Outdoor Flower Walls
Large flower stencils for outdoor walls open up a world of creative possibilities! You can create a stunning focal point in your garden. Imagine a wall covered in vibrant sunflowers or delicate roses. You can also use stencils to create a mural. Combine different flower designs and colors. Add vines, leaves, and other elements to create a lush, natural scene. Consider stenciling a border around your patio or deck. This can add a touch of elegance and charm. You can also use stencils to personalize your outdoor furniture. Stencil flowers on your chairs, tables, or planters. This will tie everything together and create a cohesive look.
- Create a flower-covered focal point.
- Design a floral mural with various flowers.
- Stencil a decorative border.
- Personalize your outdoor furniture.
- Add vines, leaves, and other elements.
When using large flower stencils for outdoor walls, let your imagination run wild. Don’t be afraid to try new things. You can use different techniques to create unique effects. Try using a sponge to apply the paint. This will create a textured, dappled look. You can also use a dry brush to create a distressed, vintage look. Experiment with different color combinations. Use metallic paints to add a touch of glamour. Add glitter for a sparkling effect. The possibilities are endless!
Can I Combine Different Flower Designs?
Yes, you can absolutely combine different flower designs! This is a great way to create a unique and personalized look. Choose flowers that complement each other in terms of color and style. For example, you could combine roses with daisies or sunflowers with lavender. Arrange the flowers in a pleasing pattern. You can create a symmetrical design or a more random, organic one. Overlap the flowers to create a sense of depth and dimension.
How Can I Add Vines and Leaves?
Adding vines and leaves can enhance your flower wall. It will make it look more natural and realistic. You can use stencils to create vines and leaves. Or, you can paint them freehand. Use a thin brush to create delicate lines. Choose colors that complement your flowers. Green is a natural choice for leaves. You can also use shades of brown or gray to create a more muted look. Arrange the vines and leaves around the flowers. Let them trail along the edges of the wall.
What About Stenciling on Furniture?
Stenciling on furniture is a fun way to personalize your outdoor space. Choose furniture that is made of wood or metal. Clean the furniture thoroughly before you start. Sand it lightly to create a smooth surface. Apply a primer to help the paint stick. Then, stencil your flower designs onto the furniture. Use outdoor paint that is made to handle the weather. Seal the furniture with a clear outdoor sealant. This will protect the paint and keep your furniture looking great for years to come.
Fun Fact or Stat: Some artists use found objects like leaves and twigs as natural stencils, creating unique and organic patterns on walls and furniture!
Troubleshooting Common Stencil Problems
Even with careful planning, you might face issues using large flower stencils for outdoor walls. Paint bleeding is a common problem. This happens when paint seeps under the stencil. To fix this, use painter’s tape to secure the stencil tightly. Apply the paint in thin layers. Another issue is uneven paint coverage. This can happen if you use too much or too little paint. Use a stencil brush or foam roller to apply the paint evenly. If the stencil moves while you’re painting, it can smudge the design. Use stencil adhesive to keep the stencil in place. If you make a mistake, don’t panic. You can always touch up the paint with a small brush.
| Problem | Cause | Solution |
|---|---|---|
| Paint Bleeding | Paint seeps under the stencil. | Secure stencil with tape, use thin paint layers. |
| Uneven Coverage | Too much or too little paint. | Apply paint evenly with a stencil brush. |
| Stencil Smudging | Stencil moves during painting. | Use stencil adhesive to hold it in place. |
| Mistakes | Accidents happen! | Touch up paint with a small brush. |
Using large flower stencils for outdoor walls can be a rewarding experience. Don’t let a few problems discourage you. With a little patience and practice, you can overcome any challenges. Remember to take your time and enjoy the process. Stenciling is a great way to add personality to your outdoor space. And, with a little troubleshooting, you can create a flower wall that you’ll love for years to come.
What If the Stencil Tears?
If the stencil tears, don’t throw it away! You can often repair it with tape. Use a strong, clear tape like packing tape. Carefully align the torn edges. Tape them together on both sides of the stencil. Make sure the tape is smooth and flat. This will prevent paint from seeping under the edges. If the tear is too big to repair, you may need to buy a new stencil. To prevent tears, handle the stencil with care. Don’t bend it or fold it. Store it flat when you’re not using it.
How Do I Clean the Stencil?
Cleaning the stencil is important. It will keep it in good condition for future projects. Clean the stencil as soon as you’re finished painting. Use soap and water to remove the paint. You can also use a stencil cleaner. This is a special cleaner that is designed to remove paint from stencils. Soak the stencil in warm, soapy water. Use a soft brush to scrub away the paint. Rinse the stencil thoroughly and let it dry completely. Store the stencil flat in a safe place.
What If the Paint is Too Thick?
If the paint is too thick, it can be difficult to apply evenly. It can also clog the stencil openings. To thin the paint, add a small amount of water. Stir it in thoroughly. Add water gradually until the paint is the right consistency. You can also use a paint thinner. This will thin the paint without adding water. Be careful not to add too much thinner. This can make the paint too runny. Test the paint on a piece of cardboard before you start stenciling.
Fun Fact or Stat: Professional stencil artists often use special heat guns to gently warm up the stencil. This helps the paint dry faster and prevents smudging!
Summary
Large flower stencils for outdoor walls can transform your outdoor space. They allow you to create beautiful floral designs on fences, sheds, or any exterior wall. Choosing the right stencils and preparing the wall properly are important first steps. Applying the paint carefully, using the right colors, and sealing the finished artwork will ensure a long-lasting and stunning result. Don’t be afraid to experiment with different techniques and color combinations to create a unique look. With a little creativity and effort, you can turn any plain wall into a vibrant garden.
Conclusion
Using large flower stencils for outdoor walls is an easy and fun way to decorate. You can create beautiful, eye-catching designs. Remember to prepare your wall and choose the right paint. Seal your artwork to protect it from the weather. With these tips, you can create a stunning flower wall that will brighten up your outdoor space for years to come.
Frequently Asked Questions
Question No 1: What kind of paint should I use for outdoor stenciling?
Answer: For outdoor stenciling, you should use exterior acrylic paint. This type of paint is designed to withstand the elements, such as sun, rain, and wind. It is also durable and long-lasting. Look for paint that is specifically labeled for outdoor use. This will ensure that your stencil art will look great for years to come. Consider using a primer first to help the paint stick better to the wall. When using large flower stencils for outdoor walls, choose colors that are fade-resistant. This will prevent them from fading in the sun.
Question No 2: How do I prevent paint from bleeding under the stencil?
Answer: To prevent paint from bleeding under the stencil, make sure to secure the stencil tightly to the wall. Use painter’s tape to hold it in place. Apply the paint in thin, even coats. Avoid using too much paint. This can cause it to seep under the edges of the stencil. Use a stencil brush or foam roller to apply the paint. Dab the paint onto the stencil instead of brushing. You can also use a stencil adhesive. This will help the stencil stick to the wall and prevent paint from bleeding. When working with large flower stencils for outdoor walls, take your time and be careful.
Question No 3: How do I clean my stencils after using them?
Answer: To clean your stencils after using them, rinse them with warm, soapy water. Use a soft brush to scrub away any paint. If the paint is dried on, soak the stencil in warm water for a few minutes. This will help to loosen the paint. You can also use a stencil cleaner to remove stubborn paint. Rinse the stencil thoroughly and let it dry completely before storing it. Proper cleaning will ensure that your stencils will last longer and be ready for your next project. For large flower stencils for outdoor walls, it’s important to clean them gently to avoid damaging the delicate details.
Question No 4: Can I use stencils on textured walls?
Answer: Yes, you can use stencils on textured walls, but it can be more challenging. The texture can make it difficult to get clean, crisp lines. To get the best results, use a stencil brush with short, stiff bristles. Pounce the brush onto the stencil instead of brushing. This will help to push the paint into the texture. You can also use a stencil adhesive to help the stencil stick to the wall. Work in small sections and take your time. With a little patience, you can create beautiful stencil art on textured walls. When working with large flower stencils for outdoor walls, the texture might add a unique look to your design.
Question No 5: How do I seal my stencil art to protect it from the weather?
Answer: To seal your stencil art and protect it from the weather, use a clear outdoor sealant. This type of sealant is designed to protect paint from sun, rain, and wind. Apply the sealant evenly over the entire stenciled area. Let it dry completely before exposing it to the elements. Reapply the sealant every year or two to ensure continued protection. You can find clear outdoor sealants at most hardware stores. Sealing is an important step in preserving your stencil art and keeping it looking its best. Using a sealant with UV protection is ideal for large flower stencils for outdoor walls.
Question No 6: Where can I find large flower stencils for outdoor walls?
Answer: You can find large flower stencils for outdoor walls at many places. Craft stores, online retailers, and hardware stores often carry a selection of stencils. Look for stencils made of durable plastic that can be reused. Consider the size and design of the stencil before you buy it. Make sure it fits your wall and matches your style. You can also find free stencil patterns online and print them out. If you’re feeling creative, you can even make your own stencils using cardboard or acetate sheets. With a little searching, you’ll find the perfect stencils for your project.
