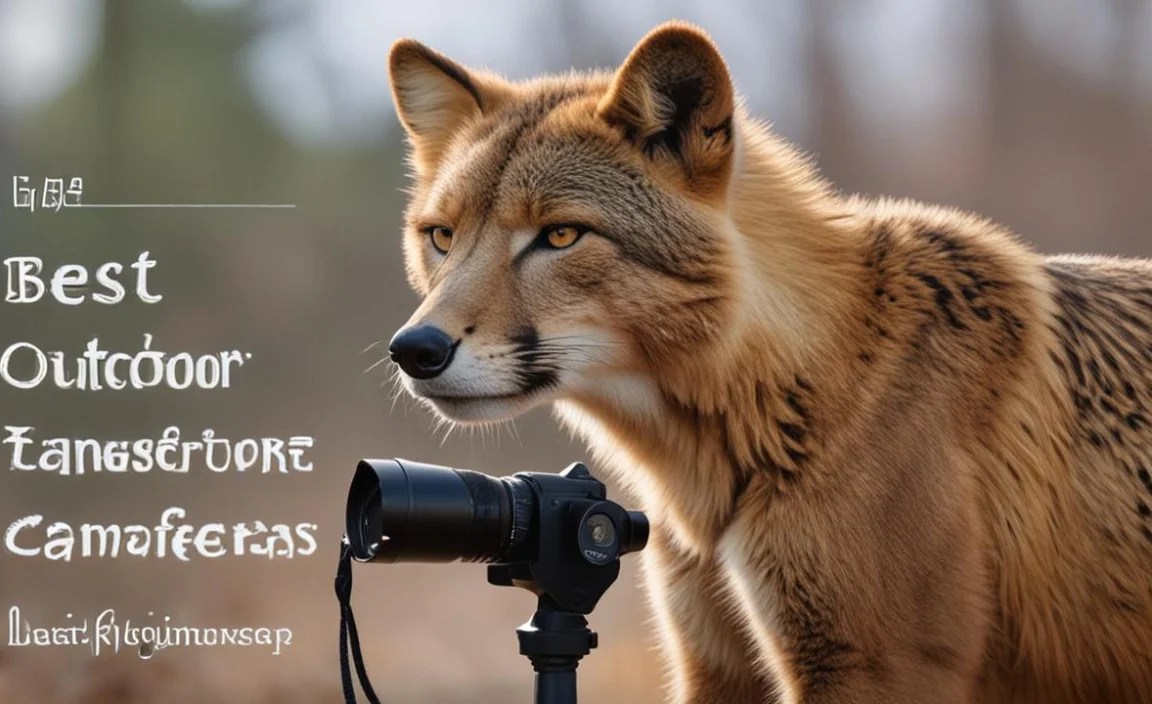
Have you ever wondered what animals do when you are not around? Maybe you are curious about the deer in your backyard. Perhaps you want to see the foxes in the woods. {Outdoor cameras for wildlife} can help you discover the secret lives of animals. They let you watch animals without disturbing them.
{Outdoor cameras for wildlife} are like nature detectives. They record videos and take pictures of animals. You can see what they eat, where they sleep, and how they play. It is like having your own nature show! These cameras are fun and educational. They can teach you a lot about the world around you.
Key Takeaways
- {Outdoor cameras for wildlife} help you observe animals without disturbing them.
- Choose cameras with good battery life for long-term monitoring.
- Look for cameras that can record clear videos both day and night.
- Consider weatherproof cameras to protect them from rain and snow.
- Proper placement is key to capturing the best wildlife footage.
Choosing the Best Outdoor Cameras for Wildlife

Choosing the best {outdoor cameras for wildlife} can feel tricky. There are many options available. You need to think about what you want to see. Consider where you will put the camera. Some cameras are better for forests. Others are better for open fields. Think about the weather in your area. You want a camera that can handle rain and snow. Battery life is also important. You do not want to change batteries every day. Look for cameras with long battery life. Some cameras use solar power. This can be a great option. Image quality is also key. You want clear pictures and videos. Night vision is important for seeing animals at night. Consider a camera with good night vision. Think about your budget. {Outdoor cameras for wildlife} come in different price ranges. Choose one that fits your needs and your budget.
- Think about where you will put the camera.
- Consider the weather in your area.
- Battery life is a very important factor.
- Image quality is essential for clear pictures.
- Night vision helps see animals at night.
Think about the size of the animals you want to see. Smaller animals might need a camera with a close-up lens. Larger animals can be seen with a wider lens. Some cameras have motion sensors. These sensors trigger the camera when an animal walks by. This saves battery life. It also makes it easier to find interesting footage. You can also get cameras that send pictures to your phone. This lets you see what is happening in real-time. Remember to check the camera regularly. Make sure the batteries are charged. Clear any leaves or branches that might block the view. With a little planning, you can capture amazing footage of wildlife.
Fun Fact or Stat: The first trail camera was invented in 1905 by George Shiras III. He used it to photograph wildlife at night!
What is the Camera’s Trigger Speed?
Have you ever tried to take a picture of a fast-moving animal? It can be hard to capture the perfect shot. The trigger speed of your camera is very important. Trigger speed is how fast the camera takes a picture after it senses movement. A faster trigger speed means you are less likely to miss the action. Imagine a deer running past your camera. If the trigger speed is slow, you might only get a picture of its tail. A fast trigger speed will capture the whole deer. Look for cameras with a trigger speed of less than one second. This will help you get clear pictures of moving animals. A fast trigger speed can make a big difference in the quality of your wildlife photos and videos.
Is the Camera Easy to Set Up?
Setting up a new camera can sometimes be confusing. You do not want to spend hours trying to figure it out. Look for {outdoor cameras for wildlife} that are easy to set up. Some cameras have simple instructions and menus. Others have complicated settings. Read reviews to see what other people say about the setup process. Consider a camera with a user-friendly interface. This will make it easier to change settings and view footage. Some cameras come with helpful videos or tutorials. These can guide you through the setup process. A camera that is easy to set up will save you time and frustration. You can start watching wildlife sooner.
Does the Camera Have Good Night Vision?
Many animals are most active at night. If you want to see what they are doing, you need a camera with good night vision. Night vision uses infrared light to see in the dark. Look for cameras with strong infrared lights. These will give you clearer pictures and videos at night. Some cameras have different night vision modes. One mode might be better for close-up shots. Another mode might be better for long-distance shots. Consider a camera that lets you adjust the night vision settings. This will help you get the best possible image quality. Good night vision is essential for capturing the secret lives of nocturnal animals.
Understanding Camera Resolution for Wildlife
Camera resolution is important for image quality. Resolution tells you how many details the camera can capture. It is measured in megapixels (MP). More megapixels mean more detail. A camera with higher resolution will produce sharper images. This is important for identifying animals and seeing their behavior. Think about zooming in on a picture. A high-resolution image will still look clear when you zoom in. A low-resolution image will look blurry. For {outdoor cameras for wildlife}, look for a resolution of at least 12MP. This will give you good image quality. If you want to print your photos, choose a camera with even higher resolution. Remember, higher resolution also means larger file sizes. You might need a bigger memory card.
- Resolution is measured in megapixels (MP).
- More megapixels mean more details.
- Higher resolution gives sharper images.
- Choose at least 12MP for good quality.
- Higher resolution means larger file sizes.
Consider the viewing distance. If you are photographing animals up close, you might not need very high resolution. But if you are photographing animals from far away, higher resolution is important. Think about the type of images you want to capture. If you want to capture fast-moving animals, you might need a camera with a fast shutter speed. Shutter speed is how long the camera’s sensor is exposed to light. A faster shutter speed will freeze the action. This will help you get clear pictures of moving animals. Remember to balance resolution with other features. Battery life, trigger speed, and night vision are also important.
Fun Fact or Stat: The highest resolution camera in the world has 576 megapixels. That is a lot of detail!
What is the Best Resolution for Videos?
Do you want to record videos of wildlife? Video resolution is just as important as photo resolution. The higher the video resolution, the clearer the video will be. Video resolution is measured in pixels. Common video resolutions include 720p, 1080p, and 4K. 720p is good for basic videos. 1080p is better for more detailed videos. 4K is the best for the highest quality videos. For {outdoor cameras for wildlife}, 1080p is a good choice. It provides a good balance of quality and file size. If you have a lot of storage space, you can choose 4K. Remember, higher resolution videos take up more space on your memory card.
Does Resolution Affect Battery Life?
Yes, resolution can affect battery life. Higher resolution images and videos require more processing power. This means the camera uses more energy. If you are using a high-resolution setting, your battery might drain faster. To save battery life, you can lower the resolution. You can also use motion detection. Motion detection only records when an animal is present. This can significantly extend battery life. Consider using rechargeable batteries. This is a more sustainable option. It will also save you money in the long run. Always carry extra batteries with you when you are checking your camera.
How Does Resolution Affect Storage Space?
Higher resolution images and videos take up more storage space. This means you will need a larger memory card. Memory cards are measured in gigabytes (GB). Common sizes include 32GB, 64GB, and 128GB. A 32GB memory card can hold a lot of low-resolution images. But it might not hold many high-resolution videos. If you are planning to record a lot of videos, choose a larger memory card. You can also use a camera that supports cloud storage. This will automatically upload your images and videos to the internet. This frees up space on your memory card. It also keeps your data safe.
Understanding Trigger Speed of Outdoor Cameras

Trigger speed is a key feature of {outdoor cameras for wildlife}. It is how fast the camera takes a photo after sensing movement. A fast trigger speed is important for capturing clear images. Imagine a deer running past your camera. If the trigger speed is slow, you might miss the shot. You might only get a picture of the deer’s tail. A fast trigger speed will capture the whole deer. Look for cameras with a trigger speed of one second or less. Some cameras have trigger speeds as fast as 0.2 seconds. This will help you get clear pictures of moving animals. A slow trigger speed can result in blurry or missed shots.
- Trigger speed is how fast the camera takes a photo.
- A fast trigger speed captures moving animals.
- Look for cameras with a trigger speed of one second or less.
- Slow trigger speeds result in blurry images.
- Fast trigger speeds help catch all the action.
Consider the type of animals you want to photograph. If you are photographing fast-moving animals like birds, a fast trigger speed is essential. If you are photographing slower animals like turtles, a slower trigger speed might be okay. Think about the environment. In areas with a lot of wind, a slow trigger speed might cause the camera to take many pictures of moving branches. This can drain the battery quickly. A fast trigger speed will only capture the animals, not the branches. Remember to test your camera in the field. This will help you understand its trigger speed and how it performs in different conditions.
Fun Fact or Stat: The fastest trigger speed on a trail camera is about 0.1 seconds. That is super fast!
How Does Trigger Speed Affect Image Quality?
Trigger speed can affect image quality. A slow trigger speed can cause blurry images. This is because the animal might move before the camera takes the picture. A fast trigger speed will freeze the action. This will result in a clearer image. Consider the lighting conditions. In low light, a slow trigger speed can result in underexposed images. This is because the camera needs more time to gather light. A fast trigger speed can help you get brighter images in low light. Remember to adjust your camera settings to optimize image quality.
What Causes Slow Trigger Speeds?
Several factors can cause slow trigger speeds. One factor is the camera’s processor. A slower processor takes longer to process the image. This results in a slower trigger speed. Another factor is the memory card. A slow memory card takes longer to save the image. This also results in a slower trigger speed. Battery life can also affect trigger speed. When the battery is low, the camera might slow down its processing speed to conserve energy. This can result in a slower trigger speed. Make sure your camera has a fast processor, a fast memory card, and a fully charged battery.
How Can I Improve Trigger Speed?
There are several things you can do to improve trigger speed. First, use a fast memory card. A fast memory card will save images more quickly. This will improve the trigger speed. Second, make sure your camera has a fully charged battery. A low battery can slow down the camera’s processing speed. Third, reduce the image resolution. Lower resolution images take less time to process. This can improve the trigger speed. Fourth, turn off unnecessary features. Features like image stabilization and HDR can slow down the camera. Turning them off can improve the trigger speed. Finally, consider upgrading to a camera with a faster processor.
Battery Life Considerations for Outdoor Cameras

Battery life is a very important thing to consider. {Outdoor cameras for wildlife} need to run for a long time. You do not want to change batteries every day. Think about how long you want the camera to run. Some cameras can run for months on a single set of batteries. Others only last for a few weeks. Look for cameras with long battery life. Some cameras use solar power. This can be a great option. It can extend the battery life significantly. Consider using rechargeable batteries. This is a more sustainable option. It will also save you money in the long run. Always check the battery level before leaving the camera in the field.
- Long battery life is a critical factor.
- Consider how long you need the camera to run.
- Solar power can extend battery life.
- Rechargeable batteries are a good option.
- Check the battery level before leaving the camera.
Think about the climate. Cold weather can reduce battery life. If you live in a cold climate, choose a camera with a battery that is designed for cold weather. Consider the camera’s settings. High-resolution images and videos use more battery power. Motion detection can save battery power. It only records when an animal is present. Remember to turn off the camera when you are not using it. This will prevent the battery from draining unnecessarily. With a little planning, you can ensure that your camera has enough battery life to capture all the wildlife action.
Fun Fact or Stat: Some trail cameras can run for up to a year on a single set of batteries. That’s amazing!
What Type of Batteries are Best?
Different types of batteries have different lifespans. Alkaline batteries are a common choice. They are relatively inexpensive. However, they do not last as long as other types of batteries. Lithium batteries are a better option for {outdoor cameras for wildlife}. They last longer and perform better in cold weather. Rechargeable batteries are a good choice for saving money and reducing waste. However, they might not last as long as lithium batteries. Consider the pros and cons of each type of battery before making a decision. Choose the type of battery that best meets your needs.
How Does Temperature Affect Battery Life?
Temperature can have a big impact on battery life. Cold weather can significantly reduce battery life. This is because the chemical reactions inside the battery slow down in cold temperatures. Warm weather can also affect battery life. Extreme heat can damage the battery. If you live in an area with extreme temperatures, choose a camera with a battery that is designed for those conditions. You can also insulate the camera to protect it from the elements. This will help extend the battery life.
How Can I Extend Battery Life?
There are several things you can do to extend battery life. First, use high-quality batteries. Lithium batteries last longer than alkaline batteries. Second, reduce the image resolution. Lower resolution images use less battery power. Third, use motion detection. Motion detection only records when an animal is present. This can significantly extend battery life. Fourth, reduce the number of images taken per trigger. Some cameras can take multiple images per trigger. Reducing the number of images can save battery power. Finally, turn off unnecessary features. Features like image stabilization and HDR can drain the battery quickly.
Weatherproofing and Durability of Wildlife Cameras

Weatherproofing and durability are crucial for {outdoor cameras for wildlife}. These cameras are exposed to the elements. Rain, snow, and extreme temperatures can damage the camera. Look for cameras that are designed to withstand these conditions. A weatherproof camera will have a sealed case. This will protect the internal components from water and dust. A durable camera will be made of strong materials. This will help it withstand impacts and other hazards. Consider the environment where you will be using the camera. If you live in an area with harsh weather, choose a camera that is built to last. A good camera should withstand the test of time.
- Weatherproofing protects from rain and snow.
- Durability ensures the camera can withstand impacts.
- Look for cameras with sealed cases.
- Choose cameras made of strong materials.
- Consider the environment where you will use the camera.
Think about the type of animals you are photographing. If you are photographing large animals, the camera might be at risk of being knocked over or damaged. Choose a camera that is sturdy and can withstand some abuse. Consider the mounting options. A secure mount will help protect the camera from being stolen or damaged. Remember to check the camera regularly for signs of wear and tear. Replace any damaged parts promptly. With proper care, your camera can last for many years.
Fun Fact or Stat: Some wildlife cameras are even used underwater to study marine life. That’s how waterproof they are!
What Does Weatherproof Really Mean?
Weatherproof means that the camera is designed to withstand exposure to the elements. This includes rain, snow, and dust. However, weatherproof does not mean waterproof. A weatherproof camera can withstand some moisture, but it cannot be submerged in water. Look for cameras with an IP rating. IP stands for Ingress Protection. The IP rating tells you how well the camera is protected from water and dust. A higher IP rating means better protection. For example, a camera with an IP66 rating is protected from strong jets of water. A camera with an IP67 rating is protected from temporary immersion in water.
What Materials are Most Durable?
The materials used to build the camera affect its durability. Plastic is a common material. It is lightweight and inexpensive. However, it is not as durable as other materials. Metal is a more durable option. It can withstand impacts and extreme temperatures. However, it is heavier and more expensive than plastic. Some cameras are made of composite materials. These materials combine the best qualities of plastic and metal. They are lightweight, durable, and weather-resistant. Consider the materials used to build the camera when making your decision. Choose a camera that is built to last.
How Important is a Good Camera Housing?
The camera housing is very important for protecting the camera. The housing is the outer shell of the camera. It protects the internal components from the elements. A good camera housing will be made of durable materials. It will also be sealed to prevent water and dust from entering. The housing should also be designed to protect the camera from impacts. Consider a camera with a strong and well-designed housing. This will help ensure that your camera lasts for many years. Remember to check the housing regularly for signs of damage. Replace any damaged parts promptly.
Proper Camera Placement for Optimal Wildlife Views
Proper camera placement is key. It helps you capture the best wildlife footage. Think about the animals you want to see. Where do they spend their time? Place the camera in an area where they are likely to be. Consider the angle of the camera. You want to get a clear view of the animals. Avoid placing the camera in direct sunlight. This can cause glare and overexposure. Consider the background. A cluttered background can distract from the subject. Choose a background that is simple and uncluttered. Check the camera regularly to make sure it is still in the right position. Animals can sometimes move or damage the camera.
- Place the camera where animals are likely to be.
- Consider the angle of the camera for a clear view.
- Avoid direct sunlight to prevent glare.
- Choose a simple and uncluttered background.
- Check the camera’s position regularly.
Think about the height of the camera. You want to place the camera at a height that is appropriate for the animals you are photographing. If you are photographing small animals, place the camera closer to the ground. If you are photographing large animals, place the camera higher up. Consider the distance from the camera to the animals. You want to place the camera at a distance that will give you a good view. Too close and the image will be blurry. Too far and the animal will be too small. Remember to be respectful of the animals. Do not place the camera in a way that will disturb them or their habitat.
Fun Fact or Stat: Some researchers use camera traps to estimate animal populations. This helps them understand how wildlife is doing.
What is the Ideal Camera Height?
The ideal camera height depends on the animals you want to photograph. For small animals like squirrels and rabbits, place the camera about one foot off the ground. For medium-sized animals like foxes and raccoons, place the camera about two feet off the ground. For large animals like deer and bears, place the camera about three feet off the ground. These are just general guidelines. You might need to adjust the height based on the specific environment. Experiment with different heights to find what works best for you. Remember to be respectful of the animals and their habitat.
How Do I Choose the Right Angle?
The right angle is important for getting a clear view of the animals. Avoid placing the camera at an angle that is too high or too low. An angle that is too high will only show the tops of the animals. An angle that is too low will only show the ground. Try to place the camera at an angle that is level with the animals. This will give you a clear view of their faces and bodies. Consider the background. You want to choose an angle that has a simple and uncluttered background. This will help the animals stand out in the image.
How Do I Protect the Camera from Theft?
Protecting the camera from theft is important. {Outdoor cameras for wildlife} can be expensive. You do not want to lose your investment. There are several things you can do to protect the camera from theft. First, choose a location that is not easily visible. Place the camera in a secluded area. Second, use a security box. A security box is a metal case that protects the camera from theft and vandalism. Third, use a cable lock. A cable lock is a steel cable that attaches the camera to a tree or other object. This will make it more difficult for someone to steal the camera. Fourth, consider using a camera with GPS tracking. This will allow you to track the camera if it is stolen. Finally, check the camera regularly to make sure it is still in place.
Reviewing and Managing Wildlife Camera Footage
After you have captured some footage, you need to review and manage it. This involves downloading the footage from the camera. Then you can view it on your computer or other device. You can also organize the footage into folders. This makes it easier to find specific clips. Consider using video editing software. This lets you trim the footage, add captions, and create highlight reels. Share your best clips with friends and family. You can also share them on social media. Remember to respect the animals. Do not share footage that is disturbing or harmful to them.
- Download footage from the camera to your computer.
- Organize footage into folders for easy access.
- Use video editing software to trim and enhance clips.
- Share your best clips with friends and family.
- Respect the animals when sharing footage.
Think about the storage space on your computer or device. High-resolution footage can take up a lot of space. Consider using an external hard drive to store your footage. You can also use cloud storage. This will allow you to access your footage from anywhere. Remember to back up your footage regularly. This will protect it from loss or damage. With a little organization, you can easily manage your wildlife camera footage.
Fun Fact or Stat: Some people use wildlife camera footage to create documentaries about local wildlife. How cool is that?
How Do I Download Footage from the Camera?
Downloading footage from the camera is usually easy. Most cameras use an SD card to store footage. To download the footage, simply remove the SD card from the camera. Then insert it into your computer’s SD card reader. Your computer should recognize the SD card as a removable drive. You can then copy the footage from the SD card to your computer. Some cameras can also be connected directly to your computer using a USB cable. This allows you to download the footage without removing the SD card. Refer to your camera’s manual for specific instructions.
What Software Can I Use to Edit Footage?
There are many different software programs you can use to edit footage. Some programs are free. Others require a paid subscription. Some popular free programs include DaVinci Resolve and OpenShot. These programs offer basic editing features. They are good for trimming footage and adding captions. Some popular paid programs include Adobe Premiere Pro and Final Cut Pro. These programs offer more advanced editing features. They are good for creating professional-looking videos. Choose a program that meets your needs and your budget. There are options for all skill levels.
How Do I Share Footage Online?
Sharing footage online is easy. There are many different platforms you can use. Some popular platforms include YouTube, Vimeo, and Facebook. To share footage on YouTube, you need to create a YouTube account. Then you can upload your footage to YouTube. You can also share your YouTube videos on other social media platforms. To share footage on Facebook, you need to create a Facebook account. Then you can upload your footage to Facebook. Remember to be respectful of the animals. Do not share footage that is disturbing or harmful to them. Always follow the platform’s guidelines and policies.
| Camera Feature | Importance | Why It Matters | Example |
|---|---|---|---|
| Resolution | High | Clearer images, more detail | 1080p or higher |
| Trigger Speed | High | Captures fast-moving animals | 0.5 seconds or less |
| Battery Life | High | Longer time between battery changes | Months on a single set |
| Weatherproofing | High | Protects from rain, snow, and dust | IP66 or higher |
| Night Vision | Medium | Allows viewing animals at night | Infrared flash |
Summary
Choosing the right {outdoor cameras for wildlife} involves considering several factors. Resolution, trigger speed, battery life, weatherproofing, and night vision are all important. Higher resolution provides clearer images. Faster trigger speeds capture moving animals. Longer battery life reduces the need for frequent battery changes. Weatherproofing protects the camera from the elements. Good night vision allows you to see animals at night. Proper camera placement is also key. Place the camera in an area where animals are likely to be. Think about the angle of the camera and the background. With a little planning, you can capture amazing footage of wildlife.
Conclusion
{Outdoor cameras for wildlife} are a great way to learn about the animals around you. They let you see what animals do when you are not watching. Choosing the right camera is important. Think about resolution, trigger speed, and battery life. Proper placement is also key. Place the camera in an area where animals are likely to be. With the right camera and placement, you can capture amazing footage of wildlife. Enjoy watching the secret lives of animals!
Frequently Asked Questions
Question No 1: What is the best resolution for {outdoor cameras for wildlife}?
Answer: The best resolution for {outdoor cameras for wildlife} depends on your needs. If you want to print your photos, choose a higher resolution. A resolution of at least 12MP is a good starting point. For videos, 1080p is a good choice. It provides a good balance of quality and file size. Remember that higher resolution images and videos take up more storage space. You might need a larger memory card. Also, using a higher resolution can drain the battery faster. Consider these factors when choosing a resolution.
Question No 2: How important is trigger speed?
Answer: Trigger speed is very important for {outdoor cameras for wildlife}. Trigger speed is how fast the camera takes a picture after sensing movement. A fast trigger speed is important for capturing clear images of moving animals. If the trigger speed is slow, you might miss the shot. Look for cameras with a trigger speed of one second or less. Some cameras have trigger speeds as fast as 0.2 seconds. A slow trigger speed can result in blurry or missed shots. A fast trigger speed will help you get clear pictures of moving animals like deer or birds.
Question No 3: How do I protect my camera from the weather?
Answer: Protecting your camera from the weather is essential. Look for cameras that are weatherproof. Weatherproof cameras have a sealed case. This protects the internal components from water and dust. Check the camera’s IP rating. A higher IP rating means better protection. You can also use a camera housing. A camera housing provides extra protection from the elements. Place the camera in a sheltered location. Avoid placing the camera in direct sunlight or rain. Check the camera regularly for signs of wear and tear.
Question No 4: How do I choose the right location for my camera?
Answer: Choosing the right location for your camera is key to capturing great footage. Think about the animals you want to see. Where do they spend their time? Place the camera in an area where they are likely to be. Consider the angle of the camera. You want to get a clear view of the animals. Avoid placing the camera in direct sunlight. Consider the background. A cluttered background can distract from the subject. Choose a background that is simple and uncluttered. Be respectful of the animals and their habitat. You should also regularly inspect the camera to ensure the batteries are charged.
Question No 5: How can I extend the battery life of my camera?
Answer: Extending the battery life of your camera is important. You do not want to change batteries every day. Use high-quality batteries. Lithium batteries last longer than alkaline batteries. Reduce the image resolution. Lower resolution images use less battery power. Use motion detection. Motion detection only records when an animal is present. Reduce the number of images taken per trigger. Turn off unnecessary features. Check the batteries regularly. These steps help you get the most out of your {outdoor cameras for wildlife}.
Question No 6: What should I do if my camera is stolen?
Answer: If your camera is stolen, report it to the police. Provide them with the camera’s serial number. This can help them recover the camera. If your camera has GPS tracking, use it to track the camera’s location. Contact the platform where you purchased the camera. They might be able to help you track down the thief. File a claim with your insurance company. This can help you recover the cost of the camera. Take steps to prevent future thefts. Use a security box and a cable lock. Place the camera in a less visible location.
