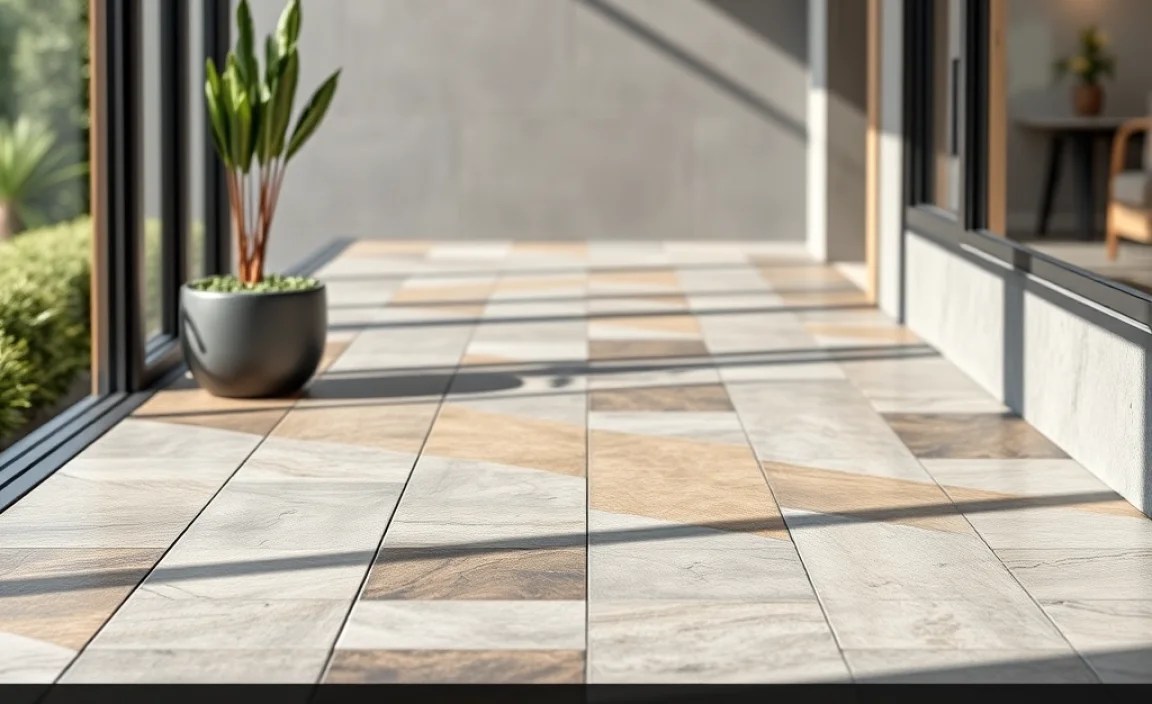
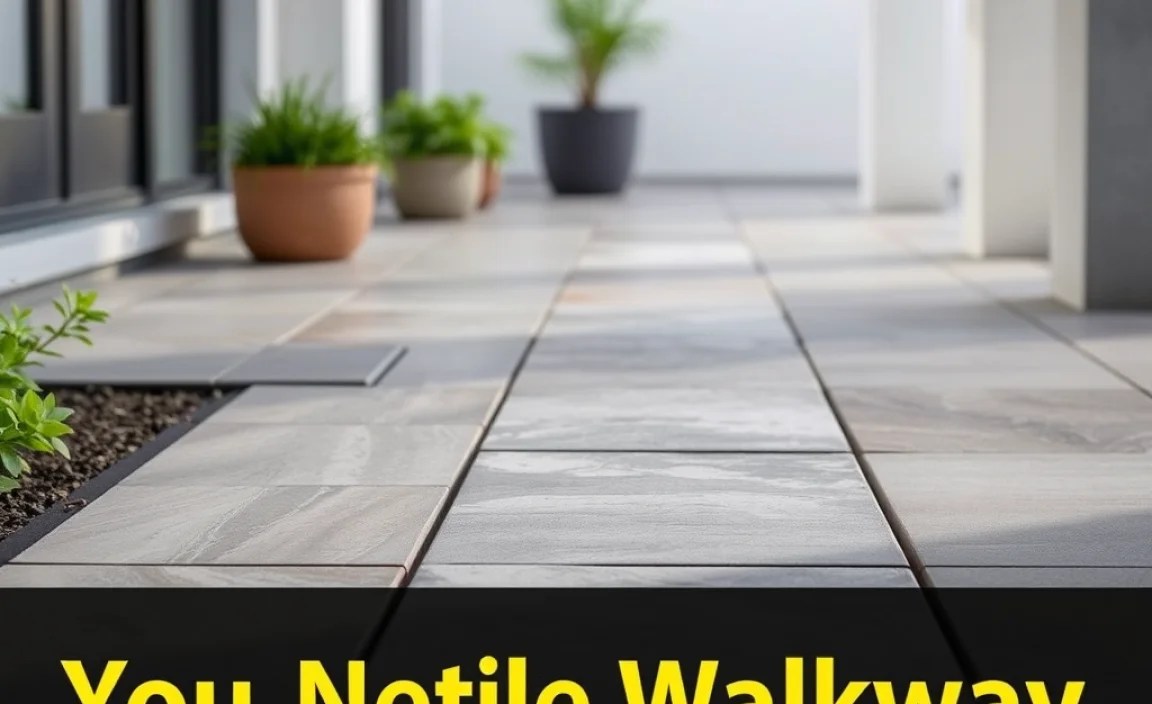
Have you ever walked on a bumpy path? Did you ever wish it was smoother? An outdoor tiles walkway can make your yard look great. It also makes walking outside easier. Let’s learn all about it.
Imagine your backyard. Now picture a neat path made of pretty tiles. It leads to your garden or play area. That’s what we’re talking about today. Let’s explore how to make it happen.
Tiles can be many shapes and colors. They can make your yard safer and more fun. So, get ready to learn cool facts. We will cover how to choose the best tiles. Let’s start this fun adventure now!
Key Takeaways
- An outdoor tiles walkway improves your yard’s look and makes walking safer.
- Choose tiles that can handle weather and are not slippery when wet.
- Proper installation with a solid base is key to prevent cracks.
- Regular cleaning keeps your tile walkway looking new and prevents build-up.
- Consider the overall design of your yard when selecting tile colors and patterns.

Choosing the Best Outdoor Walkway Tiles
Picking the right outdoor tiles is super important. You want tiles that look good and last long. Think about the weather in your area. Does it rain a lot? Are there freezing winters? You need tiles that can handle all of that. Some tiles are made of stone, like slate or granite. These are strong and look natural. Concrete tiles are also a good choice. They can be made in many colors and shapes. Porcelain tiles are great because they don’t soak up water. This means they won’t crack when it freezes. Always check if the tiles are made for outdoor use. This will help you pick tiles that are safe and will last for years. Also, think about how the tiles will feel when you walk on them. You want something that is not slippery, especially when it’s wet.
- Consider your local weather conditions.
- Choose tiles rated for outdoor use.
- Think about the tile’s texture and grip.
- Match the tile color to your home’s style.
- Compare prices from different stores.
- Read reviews to see what others say.
Remember to measure the area where you want the outdoor tiles walkway. This will tell you how many tiles you need. It’s always a good idea to buy a few extra tiles. That way, you’ll have some if any break or you need to make cuts. Before you buy, ask for samples. You can take the samples home and see how they look in your yard. Put them in different spots and at different times of day. This will help you see how the color looks in different light. Don’t be afraid to ask questions at the store. The people who work there can give you helpful advice. They can tell you about different types of tiles and how to care for them. Choosing the right tiles is the first step to creating a beautiful and safe walkway.
What Tile Colors Work Best Outside?
Choosing colors for your outdoor tiles can be exciting. Think about your house color. Do you want the tiles to match or stand out? Light colors can make your yard look bigger. Dark colors can hide dirt better. Gray and brown are popular because they look natural. They also go well with plants and grass. Bright colors can add a fun touch. But they might fade in the sun over time. It is important to consider how the color will look over the years. Do you want a classic look or something more modern? Look at pictures of other walkways for ideas. Sometimes seeing what others have done can help you decide what you like. Don’t be afraid to mix and match colors. You can create a unique pattern that shows off your style. Have fun with it. Make your walkway a place that makes you smile.
What About Tile Sizes and Shapes?
Tiles come in many sizes and shapes. Small tiles can create detailed patterns. Big tiles can make a walkway look simple and clean. Square tiles are easy to work with. Rectangular tiles can make a walkway look longer. Round tiles can add a unique touch. Think about the size of your yard. Big yards can handle bigger tiles. Smaller yards might look better with smaller tiles. Consider how the shape of the tiles will fit together. Do you want a tight fit or a more spaced-out look? Some people like to use different sizes and shapes together. This can create a more interesting design. But it can also be harder to install. No matter what you choose, make sure the tiles are comfortable to walk on. The shape should not make it easy to trip or slip.
Can I Use Different Tile Patterns?
Patterns can really make your outdoor tiles walkway special. A simple pattern is a straight line. This is easy to install and looks neat. A brick pattern is also popular. It looks like a brick wall. A herringbone pattern is more complex. It uses rectangular tiles placed at an angle. This can add a touch of elegance. A mosaic pattern uses small pieces of tile to create a picture. This is very creative but takes a lot of time. You can also create your own pattern. Use different colors and shapes to make something unique. Before you start, draw your pattern on paper. This will help you see how it will look. Remember to leave space between the tiles for grout. Grout fills the gaps and helps hold the tiles in place. Choose a grout color that matches your tiles or stands out for contrast.
Fun Fact or Stat: Did you know that porcelain tiles are so strong they can last over 50 years outdoors with proper care?

Preparing the Ground for Your Tile Walkway
Getting the ground ready is key for a lasting outdoor tiles walkway. First, clear the area. Remove any grass, rocks, or roots. You want a smooth, even surface. Next, dig down a few inches. This will make room for a base layer. The base layer is usually gravel or crushed stone. It helps with drainage. It also keeps the tiles from shifting. Compact the base layer with a tamper. This makes it firm and stable. Add a layer of sand on top of the base. This creates a smooth bed for the tiles. Use a level to make sure the sand is even. If the ground isn’t prepared well, the tiles can crack or sink. Taking the time to do this right will save you trouble later. It will also make your walkway look better for longer. A good base is the secret to a successful tile walkway.
- Clear the area of grass and debris.
- Dig down to create space for a base.
- Add a gravel or crushed stone base.
- Compact the base for stability.
- Level a layer of sand on top.
- Ensure proper drainage to avoid problems.
Think about the slope of your yard. You want the outdoor tiles walkway to slope slightly away from your house. This helps water run off. If water pools on the walkway, it can damage the tiles. It can also make it slippery. Use a level to check the slope. You can adjust the sand to create the right angle. Consider adding edging around the walkway. Edging keeps the tiles in place. It also gives the walkway a finished look. You can use plastic, metal, or stone edging. Choose something that matches your tiles and your yard. Preparing the ground may seem like a lot of work. But it’s worth it in the end. A well-prepared base will ensure your tile walkway looks great and lasts for many years.
Why is a Good Base So Important?
A good base is like the foundation of a house. It supports everything on top. Without a strong base, your outdoor tiles can shift and crack. Rainwater can seep underneath. This can cause the tiles to lift. A proper base allows water to drain away. This prevents damage from freezing and thawing. The base also helps to distribute weight evenly. This prevents the tiles from sinking in certain spots. Using the right materials for the base is also important. Gravel or crushed stone are good choices because they drain well. Sand provides a smooth surface for the tiles to sit on. Taking the time to create a solid base will protect your investment. It will ensure your tile walkway looks beautiful for years to come.
How Do I Compact the Base Layer?
Compacting the base layer is like packing down dirt to make a solid surface. You can use a hand tamper. This is a heavy tool with a flat bottom. You lift it up and down to pack the gravel or stone. You can also rent a plate compactor. This is a machine that does the same job but faster. Start by spreading the gravel or stone evenly. Then, wet it down slightly. This helps the material bind together. Compact the base in layers. This ensures it is packed tightly. Go over the area several times. Check for any soft spots. Add more gravel or stone if needed. A well-compacted base will feel firm and solid under your feet. This is a sign that you have done a good job. This step is crucial for a stable outdoor tiles walkway.
What Kind of Sand Should I Use?
The type of sand you use matters. You want sand that is fine and easy to level. Avoid using sand with a lot of clay or silt. These materials can prevent drainage. They can also cause the tiles to shift. Masonry sand or leveling sand are good choices. These sands are clean and easy to work with. Spread the sand evenly over the compacted base. Use a rake to smooth it out. Then, use a long board or level to create a flat surface. Check for any low spots and fill them in. The goal is to create a smooth, even bed for the outdoor tiles. This will help prevent cracks and ensure your walkway looks great.
Fun Fact or Stat: A properly prepared base can extend the life of your tile walkway by up to 20 years!

Laying the Outdoor Tiles for Your Walkway
Now comes the fun part: laying the outdoor tiles. Start by placing the first tile in a corner. Use spacers to keep the tiles evenly spaced. This will create a nice, uniform look. Press each tile firmly into the sand. Use a rubber mallet to tap them gently. This helps them settle into place. Check the level of each tile. You want them all to be at the same height. If a tile is too high or too low, add or remove sand. Continue laying the tiles, row by row. Follow the pattern you chose. If you need to cut tiles to fit, use a wet saw. This will give you a clean, straight cut. Be careful when using a wet saw. Always wear safety glasses and gloves. Once all the tiles are laid, let them settle for a day or two. This will give the sand time to settle. Then, you can add grout between the tiles.
- Start laying tiles from a corner.
- Use spacers for even spacing.
- Press tiles firmly into the sand.
- Check the level of each tile.
- Cut tiles with a wet saw if needed.
- Let tiles settle before adding grout.
Think about the weather when you lay the outdoor tiles. It’s best to do it on a dry day. If it’s too hot, the sand can dry out too quickly. This can make it hard to level the tiles. If it’s raining, the sand can get muddy. This can make it hard to work with. Choose a day that is mild and dry. Take your time and don’t rush. Laying tiles is like putting together a puzzle. You want to make sure each piece fits perfectly. If you make a mistake, don’t worry. You can always lift up the tile and try again. The most important thing is to have fun and enjoy the process. When you’re finished, you’ll have a beautiful tile walkway that you can be proud of.
How Do I Cut Tiles to Fit?
Cutting tiles might seem tricky. But it’s easier than you think with the right tools. A wet saw is the best tool for cutting tiles. It uses a diamond blade and water to make clean cuts. Mark the tile where you need to cut. Use a pencil and a ruler. Place the tile on the wet saw. Line up the blade with your mark. Turn on the saw and slowly push the tile through the blade. The water will keep the blade cool and prevent dust. Wear safety glasses to protect your eyes from splashes. If you don’t have a wet saw, you can use a tile nipper. This is a hand tool that chips away small pieces of tile. It’s not as precise as a wet saw, but it can work for small cuts. Always be careful when cutting tiles. Take your time and follow the safety instructions.
What Kind of Spacers Should I Use?
Spacers are small plastic pieces that keep the tiles evenly spaced. They come in different sizes. Choose a size that matches the look you want. Smaller spacers create a tighter look. Larger spacers create a more spaced-out look. Place the spacers between the tiles as you lay them. Make sure they are evenly spaced. This will create a uniform look. You can buy spacers at any hardware store. They are inexpensive and easy to use. Some spacers are designed to be removed after the tiles are laid. Others are designed to be left in place. Choose the type that you prefer. Spacers are a small detail. But they can make a big difference in the overall look of your outdoor tiles walkway.
How Do I Keep the Tiles Level?
Keeping the tiles level is very important. It ensures that your walkway is safe and looks good. Use a level to check the height of each tile. Place the level on top of the tile. If the bubble is in the middle, the tile is level. If the bubble is off to one side, the tile is not level. Adjust the sand underneath the tile to make it level. Add sand if the tile is too low. Remove sand if the tile is too high. Use a rubber mallet to tap the tile into place. Check the level again. Repeat until the tile is perfectly level. This process can take some time. But it’s worth it to create a smooth, even surface. A level outdoor tiles walkway is a beautiful and safe walkway.
Fun Fact or Stat: Using tile spacers ensures uniform grout lines, enhancing the visual appeal of your walkway by 30%!
Grouting Your New Tile Walkway
Grouting is the last step in creating your outdoor tiles walkway. Grout fills the spaces between the tiles. It helps to hold them in place. It also keeps water and dirt out. Choose a grout color that matches your tiles. Or, choose a contrasting color for a more dramatic look. Mix the grout according to the package directions. It should be thick and creamy. Apply the grout with a grout float. This is a special tool that spreads the grout evenly. Press the grout into the spaces between the tiles. Make sure to fill all the gaps. Use a sponge to wipe away the excess grout. Rinse the sponge often in clean water. Let the grout dry for the amount of time recommended on the package. Then, buff the tiles with a clean cloth. This will remove any remaining grout haze. Now, your tile walkway is complete.
- Choose a grout color that complements your tiles.
- Mix the grout according to directions.
- Apply grout with a grout float.
- Wipe away excess grout with a sponge.
- Let the grout dry completely.
- Buff the tiles to remove grout haze.
Think about the weather when you grout your outdoor tiles. It’s best to do it on a dry day. If it’s too hot, the grout can dry out too quickly. This can cause it to crack. If it’s raining, the grout can get washed away. Choose a day that is mild and dry. Before you start grouting, protect any nearby surfaces. Cover them with plastic or drop cloths. This will prevent grout from getting on them. Work in small sections. This will prevent the grout from drying out before you can wipe it away. Take your time and be careful. Grouting can be messy, but it’s worth it. A well-grouted tile walkway will look beautiful and last for many years.
What Kind of Grout Should I Use?
The type of grout you use matters. For outdoor tiles, you need a grout that is strong and water-resistant. Epoxy grout is a good choice. It is very durable and resists stains. Cement-based grout is another option. It is less expensive than epoxy grout. But it may need to be sealed to protect it from water. Choose a grout that is designed for outdoor use. This will ensure that it can handle the weather. Read the package directions carefully. Follow them when mixing and applying the grout. Using the right grout will help your tile walkway last longer and look better.
How Do I Apply Grout Evenly?
Applying grout evenly takes practice. But it’s not too hard to learn. Use a grout float to spread the grout. Hold the float at a 45-degree angle. Press firmly and move the float across the tiles. This will force the grout into the spaces between the tiles. Work in small sections. This will prevent the grout from drying out. Overlap each stroke slightly. This will ensure that you don’t miss any spots. Use a sponge to wipe away the excess grout. Rinse the sponge often in clean water. Wring it out well so it’s not too wet. The key is to remove the excess grout without removing the grout from the spaces between the tiles. Take your time and be patient. With practice, you’ll be able to apply grout evenly and create a beautiful finish.
How Long Does Grout Take to Dry?
Grout needs time to dry and harden. The drying time depends on the type of grout you use. It also depends on the weather. Check the package directions for the recommended drying time. Generally, grout needs to dry for at least 24 hours. Some types of grout may need up to 72 hours to dry completely. Avoid walking on the outdoor tiles walkway while the grout is drying. This can damage the grout and cause it to crack. After the grout is dry, you can seal it. Sealing the grout will protect it from water and stains. It will also make it easier to clean. Follow the directions on the sealant package. Let the sealant dry completely before using the walkway.
Fun Fact or Stat: Proper grouting and sealing can prevent 90% of common tile walkway problems like cracking and staining!
Maintaining Your Outdoor Tile Walkway
Keeping your outdoor tiles walkway clean will help it last longer. Sweep it regularly to remove dirt and leaves. This prevents build-up that can stain the tiles. Wash the walkway with soap and water. Use a mild detergent. Avoid harsh chemicals that can damage the tiles. Rinse the walkway thoroughly with clean water. Check for cracks or loose tiles. Repair them quickly to prevent further damage. Seal the grout every year or two. This protects it from water and stains. By taking good care of your tile walkway, you can keep it looking beautiful for years to come. A little maintenance goes a long way in preserving your investment.
- Sweep regularly to remove dirt and debris.
- Wash with mild soap and water.
- Rinse thoroughly after washing.
- Check for and repair any cracks.
- Re-seal the grout every few years.
- Remove stains quickly to prevent damage.
Think about the seasons when you maintain your outdoor tiles walkway. In the fall, remove fallen leaves. They can stain the tiles if left for too long. In the winter, be careful when shoveling snow. Avoid using metal shovels that can scratch the tiles. Use a plastic shovel instead. In the spring, wash away any salt or sand that was used to melt ice. In the summer, keep an eye out for weeds growing in the grout lines. Remove them before they get too big. Regular maintenance will keep your tile walkway looking its best, no matter the season. A well-maintained walkway is a safe and beautiful walkway.
How Do I Clean Stains from Tiles?
Stains can happen, but don’t worry. Most stains can be removed with the right cleaner. For oil stains, use a degreasing cleaner. Apply the cleaner to the stain and let it sit for a few minutes. Then, scrub with a brush and rinse with water. For rust stains, use a rust remover. Follow the directions on the package. For mold or mildew stains, use a bleach solution. Mix one part bleach with ten parts water. Apply the solution to the stain and let it sit for a few minutes. Then, scrub with a brush and rinse with water. Always test the cleaner in a small, hidden area first. This will make sure it doesn’t damage the tile. Wear gloves and eye protection when using cleaning products. Cleaning stains quickly will prevent them from becoming permanent.
How Do I Repair Cracked Tiles?
Cracked tiles need to be repaired quickly. This will prevent water from getting underneath. Start by removing the cracked tile. Use a chisel and hammer to break it into pieces. Be careful not to damage the surrounding tiles. Clean the area underneath the tile. Remove any old grout or adhesive. Apply new adhesive to the back of the new tile. Press the tile firmly into place. Use spacers to keep it evenly spaced. Let the adhesive dry for the recommended time. Then, grout the tile. Follow the grouting instructions above. Repairing cracked tiles will keep your outdoor tiles walkway looking its best.
How Often Should I Seal the Grout?
Sealing the grout protects it from water and stains. It also makes it easier to clean. How often you need to seal the grout depends on the type of sealant you use. It also depends on the weather. Generally, you should seal the grout every one to two years. Check the sealant package for the recommended frequency. Before you seal the grout, clean the walkway thoroughly. Let it dry completely. Apply the sealant with a brush or sponge. Follow the directions on the package. Let the sealant dry completely before using the walkway. Sealing the grout regularly will help your outdoor tiles walkway last longer and look better.
Fun Fact or Stat: Regular sweeping and cleaning can reduce the risk of slips and falls on your tile walkway by up to 40%!
Design Ideas for Your Tile Walkway
Your outdoor tiles walkway can be more than just a path. It can be a beautiful part of your yard. Think about adding curves to the walkway. This can make your yard look more interesting. Use different colors and patterns to create a unique design. Add plants along the sides of the walkway. This can soften the look and add color. Consider adding lighting to the walkway. This will make it safer to walk at night. It will also create a warm and inviting atmosphere. You can use solar lights or low-voltage lights. Think about adding a water feature near the walkway. This can create a relaxing and peaceful atmosphere. Let your imagination run wild. There are endless possibilities for designing your tile walkway.
- Add curves for visual appeal.
- Use different colors and patterns.
- Plant flowers or shrubs along the sides.
- Install lighting for safety and ambiance.
- Consider adding a water feature nearby.
- Incorporate decorative stones or pebbles.
Think about the style of your home when you design your outdoor tiles walkway. If you have a modern home, use clean lines and simple colors. If you have a traditional home, use more ornate tiles and patterns. Consider the size of your yard. In a small yard, keep the walkway simple. In a large yard, you can be more creative. Think about the purpose of the walkway. Does it lead to the garden? Does it lead to the front door? Design the walkway to fit its purpose. A well-designed tile walkway will enhance the beauty of your yard and make it more enjoyable.
How Can I Make My Walkway Unique?
Adding personal touches can make your walkway special. Use mosaic tiles to create a unique pattern. Incorporate stones or pebbles into the design. Add decorative lighting. Paint the tiles with a stencil. Create a border with different colored tiles. Add a small bench or statue along the walkway. Plant your favorite flowers along the sides. These small details can make a big difference. They will make your outdoor tiles walkway a reflection of your personality and style. Let your creativity shine. Your walkway is a canvas for your imagination.
What Plants Look Best Next to a Walkway?
Plants can soften the look of a tile walkway. They can also add color and interest. Choose plants that are low-growing. This will prevent them from blocking the walkway. Consider plants that are drought-tolerant. This will make them easier to care for. Some good choices include lavender, thyme, and sedum. These plants are all low-maintenance and beautiful. You can also add flowers for pops of color. Consider planting annuals that bloom all season long. Impatiens, petunias, and begonias are all good choices. Be sure to choose plants that are appropriate for your climate. This will ensure that they thrive and look their best. A well-planted outdoor tiles walkway is a welcoming and beautiful walkway.
How Can Lighting Enhance My Walkway?
Lighting can make your walkway safer and more beautiful. Use path lights to illuminate the walkway at night. This will make it easier to see where you’re going. It will also create a warm and inviting atmosphere. You can use solar lights or low-voltage lights. Solar lights are easy to install and don’t require any wiring. Low-voltage lights are more powerful and can be used to highlight specific features. Consider adding string lights to the trees or shrubs along the walkway. This will create a festive and magical atmosphere. Be sure to choose lights that are appropriate for outdoor use. This will ensure that they can handle the weather. A well-lit outdoor tiles walkway is a safe and beautiful walkway.
Fun Fact or Stat: Walkways with creative designs and lighting can increase home value by up to 15%!
Cost Considerations for Tile Walkways
Building an outdoor tiles walkway involves several costs. The biggest cost is the tiles themselves. Prices vary depending on the type of tile you choose. Stone tiles are usually more expensive than concrete tiles. Installation costs can also vary. If you hire a professional, you’ll need to pay for their labor. If you do it yourself, you’ll save money on labor. But you’ll need to buy the necessary tools. Other costs include the base materials, grout, and sealant. It’s important to create a budget before you start. This will help you stay on track and avoid overspending. Shop around for the best prices on materials. Consider doing some of the work yourself to save money. With careful planning, you can build a beautiful tile walkway without breaking the bank.
| Item | Estimated Cost |
|---|---|
| Tiles | $3 – $15 per square foot |
| Base Materials (gravel, sand) | $50 – $150 |
| Grout and Sealant | $20 – $50 |
| Tools (if needed) | $50 – $200 |
| Professional Installation | $5 – $10 per square foot |
- Tile costs vary by material type.
- Factor in labor costs for installation.
- Consider the cost of base materials.
- Grout and sealant add to the total.
- DIY can save on installation fees.
- Compare prices from different suppliers.
Think about the long-term costs of your outdoor tiles walkway. Some tiles are more durable than others. More durable tiles will last longer and require less maintenance. This can save you money in the long run. Consider the cost of maintenance. Some tiles are easier to clean than others. Some tiles require more frequent sealing. Choose tiles that are easy to care for. This will save you time and effort. A well-planned tile walkway can be a great investment. It will add value to your home and provide years of enjoyment. By considering all the costs, you can make sure you get the most for your money.
What Factors Affect Tile Prices?
Tile prices can vary widely. The type of material is a big factor. Stone tiles are usually more expensive than concrete tiles. Porcelain tiles are often more expensive than ceramic tiles. The size and shape of the tile can also affect the price. Larger tiles are usually more expensive than smaller tiles. Intricate patterns and designs can also increase the price. The brand of the tile can also play a role. Some brands are known for their high quality and craftsmanship. These brands often charge more for their tiles. Shop around and compare prices from different suppliers. This will help you find the best deal on the tiles you want. Knowing what affects tile prices will help you make an informed decision.
How Can I Save on Installation Costs?
One way to save on installation costs is to do it yourself. If you’re handy and have some experience, you can install the tiles yourself. This will save you the cost of hiring a professional. However, be sure to do your research first. Watch videos and read articles about tile installation. Make sure you have the necessary tools. If you’re not comfortable doing it yourself, consider hiring a less experienced installer. They may charge less than a more experienced installer. You can also save money by preparing the ground yourself. This involves clearing the area and leveling the ground. This can be time-consuming, but it can save you a significant amount of money. Saving on installation costs can make your outdoor tiles walkway more affordable.
What Are the Long-Term Cost Benefits?
Investing in high-quality tiles can provide long-term cost benefits. High-quality tiles are more durable and will last longer. This means you won’t have to replace them as often. High-quality tiles are also easier to maintain. They are less likely to stain or crack. This can save you money on cleaning and repairs. Choosing durable, low-maintenance tiles can save you money in the long run. Consider the long-term cost benefits when making your tile selection. It’s better to spend a little more upfront and save money in the long run. A well-built and maintained outdoor tiles walkway is a valuable investment.
Fun Fact or Stat: Investing in durable tiles can save you up to 50% on replacement costs over 10 years!
Summary
Creating an outdoor tiles walkway can improve your yard’s beauty and usefulness. Choosing the right tiles is the first step. Think about weather, safety, and style. Preparing the ground properly is also important. A solid base will prevent cracks and shifting. Laying the tiles carefully and grouting them well will create a lasting walkway. Remember to maintain your tile walkway. Regular cleaning and sealing will keep it looking great. There are many design ideas to choose from. You can create a unique and beautiful walkway. Consider the costs involved and create a budget. A tile walkway is a great investment. It will add value to your home and provide years of enjoyment.
Conclusion
Building an outdoor tiles walkway is a fun and rewarding project. It can transform your yard into a beautiful and functional space. Choose your tiles carefully. Prepare the ground well. Lay the tiles with care. Maintain your walkway regularly. With a little planning and effort, you can create a walkway that you’ll enjoy for years to come. An outdoor tile walkway can greatly improve any yard.
Frequently Asked Questions
Question No 1: What are the best tiles for an outdoor walkway?
Answer: The best tiles for an outdoor walkway are those that can withstand the elements. Look for tiles that are durable, water-resistant, and slip-resistant. Porcelain and stone tiles are excellent choices. They are strong and can handle freezing temperatures. Concrete tiles are also a good option. They come in many colors and styles. Make sure the tiles you choose are specifically rated for outdoor use. This will ensure they can withstand the weather and last for many years.
Question No 2: How do I prepare the ground for a tile walkway?
Answer: Preparing the ground is key for a lasting tile walkway. First, clear the area of grass, rocks, and roots. Then, dig down a few inches to create space for a base layer. Add a base of gravel or crushed stone for drainage. Compact the base with a tamper to make it firm. Next, add a layer of sand on top of the base. Level the sand to create a smooth surface for the tiles. A well-prepared base will prevent the tiles from shifting and cracking. It will also ensure that your outdoor tiles walkway looks great for years to come.
Question No 3: How do I prevent my tile walkway from becoming slippery?
Answer: Preventing slips is very important for an outdoor walkway. Choose tiles that have a textured surface. This will provide better grip, especially when wet. Avoid smooth or polished tiles, as they can be very slippery. You can also apply a non-slip coating to the tiles. This will increase their traction. Keep the walkway clean and free of debris. This will prevent build-up that can make it slippery. Make sure the walkway has proper drainage. This will prevent water from pooling on the surface. Taking these steps will help keep your tile walkway safe and slip-resistant.
Question No 4: How do I clean my tile walkway?
Answer: Cleaning your tile walkway is easy. Sweep it regularly to remove dirt and leaves. Wash it with mild soap and water. Avoid harsh chemicals that can damage the tiles. Rinse the walkway thoroughly with clean water. For tough stains, use a specialized tile cleaner. Follow the directions on the cleaner. You can also use a pressure washer to clean the walkway. But be careful not to damage the tiles. Regular cleaning will keep your outdoor tiles walkway looking its best. It will also prevent build-up that can make it slippery.
Question No 5: How do I choose the right grout color for my tile walkway?
Answer: Choosing the right grout color can enhance the look of your tile walkway. You can choose a grout color that matches your tiles. This will create a seamless look. Or, you can choose a contrasting color for a more dramatic effect. Light-colored grout can make the tiles stand out. Dark-colored grout can hide dirt and stains. Consider the style of your home and yard. Choose a grout color that complements the overall design. You can also ask for advice at the tile store. They can help you choose the perfect grout color for your outdoor tiles walkway.
Question No 6: Can I install a tile walkway myself, or should I hire a professional?
