Do you have a wooden fence? Maybe a cool treehouse? Wood needs protection outside. Outdoor white paint for wood can help. It makes things look great. It also keeps the wood safe.
Have you ever seen peeling paint? That happens when wood isn’t protected. Rain and sun can hurt the wood. But outdoor white paint for wood stops that. It’s like a superhero for your wood!
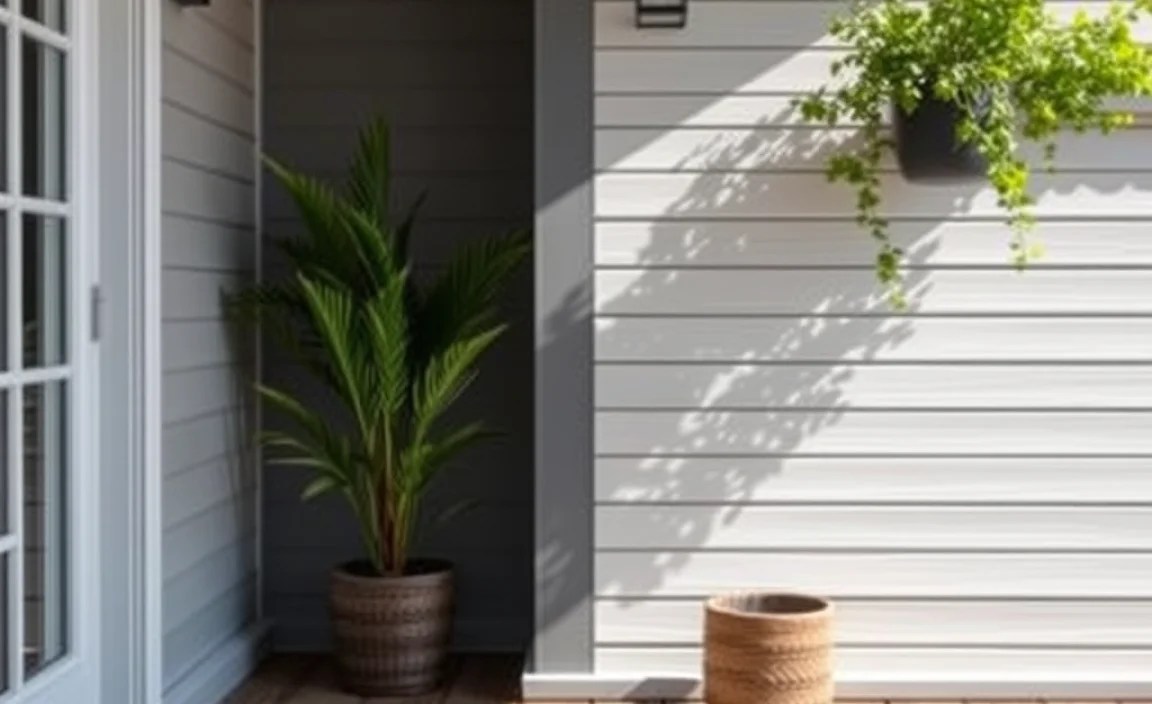
White paint can make your yard look bigger. It reflects sunlight. This brightens up your outdoor space. Plus, it is easy to clean. Are you ready to learn more?
Key Takeaways
- Outdoor white paint for wood protects against weather and looks great.
- Choose paint that is made for outdoor use to last longer.
- Always clean and prep the wood before you start painting.
- Apply multiple thin coats for the best and most durable finish.
- Look for paint with UV protection to prevent fading over time.

Choosing the Right Outdoor White Paint for Wood
Picking the right outdoor white paint for wood is important. There are many types of paint. Some are better for fences. Others are better for furniture. You need to think about what you are painting. Consider how much sun and rain it gets. Some paints are better at blocking sunlight. Some paints are better at keeping out water. Read the labels carefully. Look for words like “exterior” and “UV resistant.” These paints will last longer. They will keep your wood looking nice. Ask someone at the store for help. They can give you advice. They know which paints work best. They can help you find the perfect outdoor white paint for wood for your project.
- Think about what you are painting.
- Consider the weather in your area.
- Read the paint labels carefully.
- Ask for help at the store.
- Choose paint that is UV resistant.
Think about the finish too. Do you want a glossy look? Or do you want a matte look? Glossy paint is shiny and easy to clean. Matte paint is not shiny. It hides scratches better. Outdoor white paint for wood comes in many finishes. Test a small area first. See how you like the look. It is also important to use a good primer. Primer helps the paint stick to the wood. It also protects the wood from stains. Use a primer that is made for outdoor use. This will make your paint job last longer. It is worth spending a little extra time to choose the right paint and primer.
Fun Fact or Stat: The first ready-mixed paint was sold in the United States in the 1860s!
What is the best type of white paint?
Choosing the right type of outdoor white paint for wood can feel tricky. There are many choices. Latex, acrylic, and oil-based paints are common. Latex paints are easy to clean with water. They dry quickly. Acrylic paints are also water-based. They are more durable than latex. Oil-based paints are very durable. But they take longer to dry. They also need special cleaners. For outdoor wood, acrylic or oil-based paints are usually best. They can handle the weather better. Consider the pros and cons of each type. Think about your project and your needs. This will help you pick the best outdoor white paint for wood. What type of paint would work best for your project?
How do I choose the right finish?
The finish of your outdoor white paint for wood matters. It affects how your project looks. It also affects how well it lasts. Glossy finishes are shiny. They are easy to clean. But they show imperfections. Matte finishes are not shiny. They hide imperfections better. Satin finishes are somewhere in between. They have a slight sheen. They are a good choice for many projects. Consider where your project will be. Think about how much cleaning it will need. A glossy finish might be good for a picnic table. A matte finish might be good for a fence. Pick the finish that works best for your needs. Have you thought about how the finish impacts the look of the wood?
How important is primer?
Primer is very important for outdoor white paint for wood. It helps the paint stick to the wood. It also seals the wood. This prevents moisture from getting in. Primer also blocks stains. This keeps the paint looking bright white. Use a primer that is made for outdoor use. Apply one or two coats of primer. Let it dry completely before painting. Some paints have primer built in. These are called “paint and primer in one.” They can save you time. But they might not work as well as separate primer. Taking the time to prime properly will make your paint job last longer. It will also look better. Why skip primer? It protects your project.

Preparing Wood for Outdoor White Paint
Before you start painting, you must prep the wood. Good prep work makes the paint last longer. First, clean the wood. Remove any dirt, dust, or mildew. You can use soap and water. You can also use a special cleaner for wood. Let the wood dry completely. Next, sand the wood. This helps the paint stick better. Use sandpaper to smooth out any rough spots. If there is old paint, scrape it off. Then sand the area smooth. Fill any holes or cracks with wood filler. Let the filler dry. Then sand it smooth. Now the wood is ready for primer. Apply a coat of outdoor white paint for wood primer. Let it dry completely. Now you can start painting. The better you prep the wood, the better your paint job will look.
- Clean the wood thoroughly.
- Sand the wood to smooth it.
- Remove any old paint.
- Fill holes with wood filler.
- Apply a coat of primer.
It is important to work in a well-ventilated area. This means there is fresh air. If you are painting inside, open windows and doors. If you are painting outside, make sure there is a breeze. Wear gloves to protect your hands. Wear a mask to protect your lungs. Follow the instructions on the paint can. Do not paint in direct sunlight. The paint can dry too quickly. This can cause problems. Choose a day that is not too hot or too cold. The ideal temperature for painting is between 60 and 80 degrees Fahrenheit. Preparing the wood properly will ensure a beautiful and long-lasting finish.
Fun Fact or Stat: Sandpaper was first made in China in the 13th century using crushed shells, seeds, and sand!
Why is cleaning so important?
Cleaning the wood is a very important step. It helps the outdoor white paint for wood stick better. Dirt, dust, and mildew can prevent the paint from sticking. Use soap and water to clean the wood. For tough stains, use a special wood cleaner. Rinse the wood well with clean water. Let it dry completely before sanding. If you paint over dirt, the paint will peel. Cleaning ensures a smooth surface. This allows the paint to bond properly. Take the time to clean the wood well. You will be happy with the results. What happens if you skip the cleaning step?
How does sanding help?
Sanding the wood is another important step. It creates a smooth surface for the outdoor white paint for wood. It also helps the paint grip the wood. Use sandpaper to smooth out any rough spots. If there is old paint, sand it down. This will help the new paint blend in. Sanding also removes splinters. Be careful when sanding. Wear a mask to protect your lungs from dust. Use a sanding block or electric sander for large areas. Sanding makes a big difference in the final look. Have you ever felt how smooth sanded wood is?
What kind of wood filler should I use?
If your wood has holes or cracks, use wood filler. This will create a smooth surface for painting. There are many types of wood filler. Choose one that is made for outdoor use. Apply the filler to the holes or cracks. Let it dry completely. Then sand it smooth. Use a putty knife to apply the filler evenly. Do not use too much filler. It can be hard to sand down. After sanding, wipe away any dust. Now your wood is ready for primer and paint. Using wood filler makes your project look professional. What if you don’t fill the holes?

Applying Outdoor White Paint for Wood
Now it is time to apply the outdoor white paint for wood. Stir the paint well before you start. Use a brush, roller, or sprayer to apply the paint. Apply thin, even coats of paint. Let each coat dry completely before applying the next coat. Usually, two coats of paint are enough. But you might need three coats for some colors. Do not apply thick coats of paint. This can cause drips and runs. It can also take longer to dry. Work in a well-ventilated area. Wear gloves and a mask to protect yourself. Clean your brushes and rollers after you are done. Use the right cleaner for your type of paint. Store leftover paint in a cool, dry place. Applying the paint carefully will give you a beautiful finish.
- Stir the paint well.
- Apply thin, even coats.
- Let each coat dry completely.
- Clean your tools after use.
- Store leftover paint properly.
When using a brush, dip it about one-third of the way into the paint. Tap off any excess paint. Use long, smooth strokes to apply the paint. When using a roller, use a paint tray. Roll the roller in the paint to coat it evenly. Use light pressure to apply the paint. When using a sprayer, follow the instructions on the sprayer. Hold the sprayer about 12 inches from the surface. Move the sprayer in a smooth, even motion. Overlap each pass slightly. This will prevent streaks. Remember, patience is key. Taking your time will result in a better paint job. Always follow the manufacturer’s instructions for the best results.
Fun Fact or Stat: The oldest known paintings are cave paintings that are over 40,000 years old!
Brush, roller, or sprayer?
Choosing the right tool for applying outdoor white paint for wood is important. Brushes are good for small areas and detail work. Rollers are good for large, flat surfaces. Sprayers are good for even coverage and hard-to-reach areas. Brushes take more time. Rollers can leave a texture. Sprayers require practice. Consider the size and shape of your project. Think about your experience level. This will help you choose the right tool. What tool do you feel most comfortable using?
How many coats are needed?
The number of coats of outdoor white paint for wood you need depends on a few things. The color of the paint matters. Lighter colors may need more coats. The type of wood matters. Some woods absorb more paint. The quality of the paint matters. Better paint covers better. Usually, two coats are enough. But you might need three coats for some projects. Let each coat dry completely before applying the next coat. This will ensure a smooth, even finish. How can you tell if you need another coat?
How do I avoid drips and runs?
Drips and runs can ruin your paint job. To avoid them, apply thin coats of outdoor white paint for wood. Do not overload your brush or roller. Use even strokes. If you see a drip, brush it out immediately. Work in a well-lit area. This will help you see any drips. If you are using a sprayer, keep the sprayer moving. Do not hold it in one place for too long. If you do get drips, let them dry completely. Then sand them smooth before applying another coat of paint. Patience and careful application are key to avoiding drips.

Best Types of Wood for Outdoor Projects
Choosing the right type of wood is key for outdoor projects. Some woods are better at resisting weather. Cedar and redwood are naturally weather-resistant. They contain oils that protect them from rot. Pressure-treated wood is also a good choice. It has been treated with chemicals to resist rot and insects. Pine is a less expensive option. But it needs to be treated to last outdoors. Hardwoods like oak and maple are strong. But they are not as weather-resistant as cedar or redwood. Consider the climate in your area. Think about how much maintenance you want to do. This will help you choose the best wood for your project. Outdoor white paint for wood can protect many types of wood. But some woods are naturally better.
- Cedar is naturally weather-resistant.
- Redwood is also weather-resistant.
- Pressure-treated wood resists rot.
- Pine needs to be treated.
- Hardwoods are strong but less resistant.
When choosing wood, look for straight, knot-free boards. Knots can weaken the wood. They can also make it harder to paint. Check the wood for cracks or splits. Do not use wood that is damaged. Buy wood from a reputable lumberyard. They can help you choose the right wood for your project. They can also give you advice on how to care for the wood. Remember, the quality of the wood is just as important as the quality of the paint. Investing in good wood will make your project last longer. It will also save you money in the long run. Good wood and a coat of outdoor white paint for wood are a winning combination.
Fun Fact or Stat: The tallest tree in the world is a redwood tree in California, measuring over 379 feet tall!
What makes wood weather-resistant?
Some woods are naturally weather-resistant. This means they can withstand rain, sun, and insects. Cedar and redwood contain oils that protect them. These oils act as a natural preservative. Pressure-treated wood is treated with chemicals. These chemicals make the wood resistant to rot and insects. Other woods, like pine, are not naturally resistant. They need to be treated with preservatives. The type of wood you choose will affect how long your project lasts. Choosing a weather-resistant wood can save you time and money. Have you ever noticed how some wood lasts longer outside?
What is pressure-treated wood?
Pressure-treated wood is wood that has been treated with chemicals. These chemicals protect the wood from rot and insects. The wood is placed in a large tank. The chemicals are forced into the wood under pressure. This process makes the wood very durable. Pressure-treated wood is a good choice for decks, fences, and other outdoor projects. It is important to wear gloves and a mask when working with pressure-treated wood. The chemicals can be harmful. Always follow the manufacturer’s instructions. Is pressure-treated wood the right choice for your project?
What are the pros and cons of different wood types?
| Wood Type | Pros | Cons |
|---|---|---|
| Cedar | Weather-resistant, beautiful color | More expensive |
| Redwood | Weather-resistant, strong | Can be hard to find |
| Pressure-Treated Pine | Affordable, readily available | Chemical treatment, can warp |
| Oak | Strong, durable | Not very weather-resistant, expensive |
| Pine | Inexpensive, easy to work with | Needs treatment, not very strong |
Each type of wood has its own advantages and disadvantages. Cedar and redwood are great choices for outdoor projects. They are naturally weather-resistant and beautiful. But they can be more expensive. Pressure-treated pine is a more affordable option. But it needs to be handled carefully. Oak is strong and durable. But it is not very weather-resistant. Consider your budget and your needs. This will help you choose the best wood for your project. Remember to use outdoor white paint for wood to protect it!
Maintaining Your Painted Wood
Once you have painted your wood, you need to maintain it. This will help it last longer. Clean the wood regularly with soap and water. Remove any dirt, dust, or mildew. Inspect the paint for chips or cracks. Touch up any damaged areas with paint. Reapply a fresh coat of paint every few years. This will protect the wood from the weather. Keep plants and vines away from the wood. They can trap moisture and cause rot. Protect the wood from direct sunlight. Use a UV-resistant paint. This will prevent the paint from fading. Maintaining your painted wood will keep it looking beautiful for years to come. A little bit of care goes a long way. Regular cleaning and touch-ups will extend the life of your outdoor white paint for wood.
- Clean the wood regularly.
- Touch up any damaged areas.
- Reapply paint every few years.
- Keep plants away from the wood.
- Protect from direct sunlight.
If you live in an area with harsh weather, you may need to maintain your painted wood more often. Snow and ice can damage the paint. Extreme heat can cause the paint to peel. Check your painted wood regularly for signs of damage. The sooner you catch a problem, the easier it will be to fix. Use the same type of paint for touch-ups as you used for the original paint job. This will ensure a consistent look. Proper maintenance will protect your investment. It will also keep your outdoor space looking its best. Taking care of your wood will keep it beautiful for a long time.
Fun Fact or Stat: Some paints are designed to last for over 10 years before needing to be reapplied!
How often should I clean the painted wood?
You should clean your painted wood regularly. How often depends on the environment. If you live in a dusty area, clean it more often. If you live in a humid area, clean it more often. A good rule of thumb is to clean it every few months. Use soap and water to clean the wood. A soft brush can help remove dirt. Rinse the wood well with clean water. Regular cleaning prevents dirt and mildew from building up. This helps the paint last longer. Have you checked your painted wood lately?
How do I touch up damaged areas?
If you see chips or cracks in the paint, touch them up. First, clean the area with soap and water. Then, sand the area lightly. This will help the new paint stick better. Apply a thin coat of paint to the damaged area. Use a small brush. Let the paint dry completely. If needed, apply a second coat. Use the same type of paint as the original paint job. This will ensure a consistent look. Touching up damaged areas prevents further damage. It also keeps your painted wood looking its best. What happens if you ignore the damage?
How can I protect the paint from the sun?
The sun can damage paint over time. UV rays can cause the paint to fade. They can also cause the paint to crack. To protect the paint from the sun, use a UV-resistant paint. This type of paint contains chemicals that block UV rays. You can also apply a clear coat of UV-resistant varnish. This will add an extra layer of protection. Keep the wood shaded whenever possible. Plant trees or use awnings to block the sun. Protecting the paint from the sun will help it last longer. What else can you do to protect your paint?
Cost of Outdoor White Paint for Wood Projects
The cost of outdoor white paint for wood projects can vary. It depends on several factors. The type of paint you choose matters. Some paints are more expensive than others. The amount of paint you need matters. Larger projects will require more paint. The cost of supplies matters. Brushes, rollers, and primer all add to the cost. The cost of labor matters. If you hire someone to paint for you, you will need to pay them. You can save money by doing the painting yourself. Shop around for the best prices on paint and supplies. Look for sales and discounts. Plan your project carefully to avoid waste. A little planning can help you stay within your budget. Remember to factor in all the costs when planning your project.
- The type of paint affects the cost.
- The amount of paint needed matters.
- Supplies add to the cost.
- Labor costs can be significant.
- Shop around for the best prices.
It is important to choose a high-quality paint. Cheaper paints may not last as long. They may also require more coats. This can end up costing you more money in the long run. Read reviews and compare prices before you buy. Ask for recommendations from friends or family. A good paint job can increase the value of your home. It can also make your outdoor space more enjoyable. Investing in quality paint is a worthwhile investment. Consider the long-term benefits when making your decision. Saving money now could cost you more later. A great coat of outdoor white paint for wood is worth the cost.
Fun Fact or Stat: The average cost to paint the exterior of a house can range from $1,700 to $4,200!
How much does paint cost?
The cost of outdoor white paint for wood varies. It depends on the brand and quality. A gallon of paint can cost anywhere from $20 to $50. Some specialty paints can cost even more. Consider the size of your project. Buy enough paint to complete the job. It is better to have too much paint than not enough. Leftover paint can be stored for future touch-ups. Shop around for the best prices. Check online retailers and local hardware stores. How much are you willing to spend on paint?
What other supplies do I need?
Besides paint, you will need other supplies. You will need brushes or rollers. You will need a paint tray. You will need sandpaper. You will need wood filler. You will need primer. You will need a drop cloth. You will need gloves and a mask. The cost of these supplies can add up. Buy quality supplies. They will last longer and perform better. Reusable brushes and rollers are a good investment. Protect yourself with gloves and a mask. What supplies do you already have on hand?
How can I save money on my project?
There are several ways to save money on your painting project. Do the painting yourself. This will save you on labor costs. Shop around for the best prices on paint and supplies. Look for sales and discounts. Buy only the amount of paint you need. Avoid wasting paint. Prepare the wood properly. This will help the paint last longer. Proper preparation can save you money in the long run. Consider all your options before you start. Can you think of other ways to save money?
Summary
Outdoor white paint for wood is a great way to protect and beautify your outdoor projects. Choosing the right paint is important. Consider the type of wood, the weather, and the finish you want. Proper preparation is essential. Clean and sand the wood before painting. Use a good primer to help the paint stick. Apply thin, even coats of paint. Let each coat dry completely. Maintain your painted wood regularly. Clean it, touch it up, and reapply paint as needed. Choosing weather-resistant wood can also help. Cedar, redwood, and pressure-treated wood are good choices.
The cost of your project will depend on the type of paint, the amount of paint, and the supplies you need. You can save money by doing the painting yourself. Shop around for the best prices. With a little planning and effort, you can create beautiful and long-lasting outdoor projects. Remember to always follow the manufacturer’s instructions for the best results. A well-painted project can add value and enjoyment to your home. So get started today and transform your outdoor space!
Conclusion
Outdoor white paint for wood protects and beautifies. Choose the right paint for your project. Prepare the wood well before painting. Apply thin, even coats and let them dry. Maintain the painted wood to make it last. With the right paint and proper care, your outdoor wood will look great for years. Enjoy your beautiful, protected wood!
Frequently Asked Questions
Question No 1: What is the best type of outdoor white paint for wood?
Answer: The best type of outdoor white paint for wood is usually an acrylic latex paint. Acrylic latex paints are durable and flexible. They can withstand changes in temperature and humidity. They also resist fading and cracking. Oil-based paints are another option. But they take longer to dry and require special cleaners. Look for paints that are specifically labeled for exterior use. These paints contain additives that protect against mildew and UV damage. Always read the label carefully before you buy.
Question No 2: How do I prepare wood for painting?
Answer: Preparing wood for painting is important for a long-lasting finish. First, clean the wood with soap and water. Remove any dirt, dust, or mildew. Then, sand the wood to create a smooth surface. Use sandpaper to smooth out any rough spots. If there is old paint, scrape it off. Fill any holes or cracks with wood filler. Let the filler dry completely. Then sand it smooth. Finally, apply a coat of primer. Primer helps the paint stick to the wood. It also protects the wood from stains. Let the primer dry completely before painting. Taking the time to prepare the wood properly will result in a better paint job.
Question No 3: How many coats of paint do I need?
Answer: Usually, two coats of outdoor white paint for wood are enough. But you might need three coats for some colors or types of wood. Lighter colors often require more coats. Wood that is very porous may also need more coats. Let each coat dry completely before applying the next coat. This will ensure a smooth, even finish. If you can still see the wood grain after two coats, apply a third coat. Do not apply thick coats of paint. This can cause drips and runs. It is better to apply thin, even coats.
Question No 4: How do I prevent paint from peeling?
Answer: To prevent paint from peeling, proper preparation is key. Make sure the wood is clean and dry before painting. Sand the wood to create a smooth surface. Apply a coat of primer to help the paint stick. Use a high-quality paint that is designed for outdoor use. Apply thin, even coats of paint. Let each coat dry completely before applying the next coat. Avoid painting in direct sunlight or when it is raining. These conditions can affect the paint’s ability to adhere to the wood. Regular maintenance can also help prevent peeling. Clean the wood regularly and touch up any damaged areas.
Question No 5: How do I clean painted wood?
Answer: Cleaning painted wood is easy. Use a mild soap and water solution. Mix a few drops of dish soap into a bucket of warm water. Use a soft cloth or sponge to wash the wood. Rinse the wood with clean water. Dry the wood with a clean towel. Avoid using harsh chemicals or abrasive cleaners. These can damage the paint. For tough stains, try using a mixture of vinegar and water. Test the solution in an inconspicuous area first. Regular cleaning will help keep your outdoor white paint for wood looking its best.
Question No 6: How long will my paint job last?
Answer: The lifespan of your outdoor white paint for wood job depends on several factors. The type of paint, the quality of the preparation, and the weather conditions all play a role. A high-quality paint that is properly applied can last for 5 to 10 years. Regular maintenance can also extend the life of your paint job. Clean the wood regularly and touch up any damaged areas. If you live in an area with harsh weather, you may need to repaint more often. Inspect your painted wood regularly for signs of damage. The sooner you catch a problem, the easier it will be to fix.
