Have you ever made something special with your own hands? Imagine taking a plain clay pot and turning it into a colorful masterpiece! You can paint outdoor pottery and make your garden even prettier.
Painting pottery is super fun and easy to do. It lets you be creative and show off your style. Let’s learn how you can paint outdoor pottery and make amazing art.
Did you know that people have been decorating pottery for thousands of years? Now, it’s your turn to join in the fun. Get ready to paint outdoor pottery that everyone will love.
Key Takeaways
- Painting outdoor pottery lets you create unique decorations for your garden or patio.
- Choose the right type of paint to make your pottery last longer outside.
- Prepare your pottery before painting to help the paint stick better.
- Get creative with colors, patterns, and designs to personalize your pottery.
- Sealing your painted pottery protects it from weather and keeps it looking great.

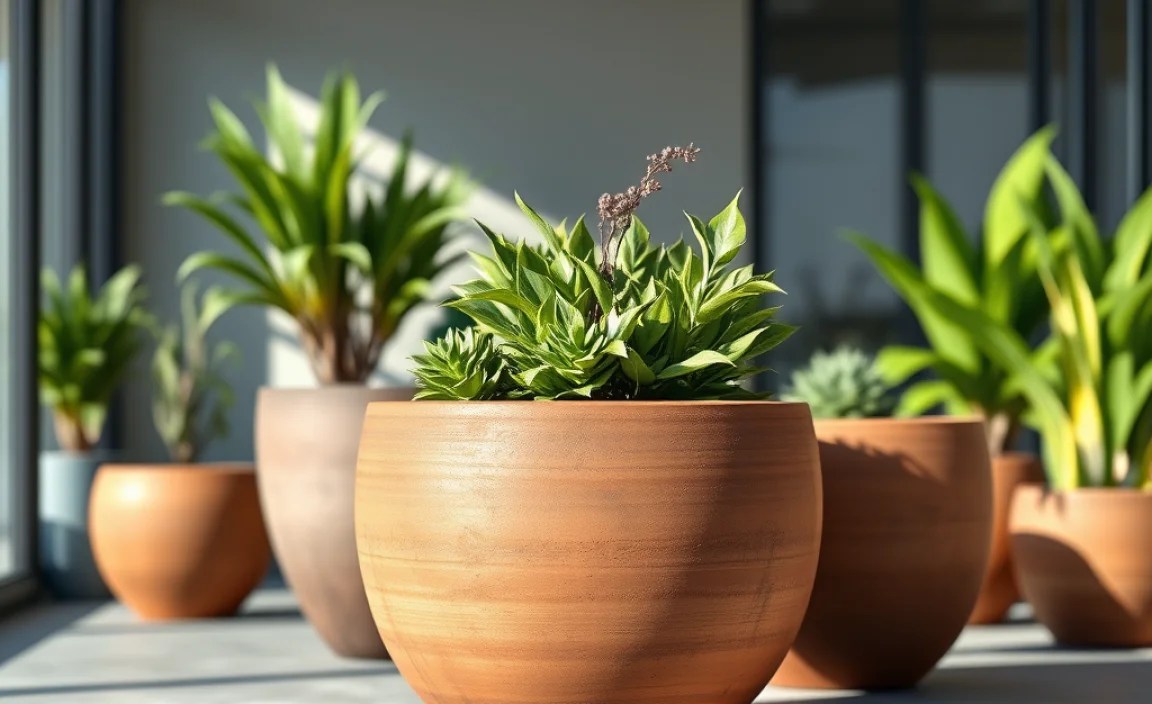
Choosing Pottery for Outdoor Painting
Picking the right pottery is the first step to a great project. You need to think about where you will put your pottery. Will it be in the sun, rain, or snow? Some pottery can handle the weather better than others. Terracotta pots are common for outdoor use. They look nice and are often less expensive. But, terracotta can crack in freezing weather if it isn’t sealed well. You can also find ceramic and resin pots. Ceramic pots are strong, but they can be heavy. Resin pots are light and can look like other materials. Consider the size and shape of the pot, too. A big pot might be good for a large plant. A small pot could be perfect for herbs. The most important thing is to choose pottery that you like and that fits your needs.
- Terracotta pots are a popular choice.
- Ceramic pots are strong and beautiful.
- Resin pots are lightweight and durable.
- Consider the size of your plants.
- Think about where you will put the pottery.
Think about how the pottery feels. Is it smooth or rough? A smooth surface is easier to paint. A rough surface might need more paint. You can also find pottery with interesting designs already on it. These can add a special touch to your project. Before you start painting, make sure the pottery is clean and dry. This will help the paint stick better. Use a brush or cloth to wipe off any dirt or dust. Now you are ready to choose your paints and get creative! You can paint outdoor pottery any way you like. Have fun with it and make something amazing.
Fun Fact or Stat: Did you know that some ancient pottery has been found that is over 20,000 years old?
What type of pottery works best?
Choosing the right pottery makes a big difference. Terracotta is a classic choice because it’s porous. This means it lets air and water move through it. But, this also means it can crack in freezing weather. Ceramic pottery is stronger and less likely to crack. However, it can be heavier and more expensive. Resin pottery is a great option if you want something lightweight and durable. It can also mimic the look of other materials like stone or wood. When picking your pottery, think about the climate where you live. If you live in a place with cold winters, choose pottery that can handle freezing temperatures. Also, consider the size and weight of the pottery. Make sure it’s easy to move around if you need to.
How do I clean the pottery before painting?
Cleaning your pottery before you paint is very important. Dirt and dust can stop the paint from sticking properly. Start by using a brush to wipe off any loose dirt. Then, use a damp cloth to clean the surface. You can use mild soap and water if the pottery is very dirty. Make sure to rinse off all the soap before you let it dry. Let the pottery dry completely before you start painting. This can take a few hours, depending on the weather. If you’re in a hurry, you can use a clean, dry cloth to speed up the drying process. A clean surface will help your paint stick better and make your finished project look amazing.
Should I prime the pottery before painting?
Priming your pottery before you paint can make a big difference. Primer is a special paint that helps the color stick better. It also helps to seal the surface of the pottery. This is especially important for terracotta, which is very porous. Primer creates a smooth surface for your paint. This means your colors will look brighter and more even. Apply a thin coat of primer to the pottery. Let it dry completely before you start painting. You can find primer at most craft stores. Look for a primer that is made for outdoor use. This will help protect your pottery from the weather. Priming is an extra step, but it’s worth it for a long-lasting and beautiful finish.

Selecting the Right Paints for Outdoor Use
Choosing the right paints is key for painting outdoor pottery. Not all paints are made to handle the weather. You need paints that can stand up to sun, rain, and even snow. Acrylic paints are a great choice. They are water-based and easy to use. Look for outdoor acrylic paints. These paints have special ingredients that protect them from fading and cracking. Another option is enamel paints. Enamel paints are very durable and create a hard, glossy finish. However, they can be harder to clean up. Make sure to read the labels on the paints. Look for words like “outdoor,” “weather-resistant,” or “UV-resistant.” These paints will help your pottery look great for a long time. Don’t forget to pick colors that you love! You can use bright colors to make your pottery stand out. Or, you can use softer colors for a more natural look.
- Acrylic paints are easy to use and clean.
- Enamel paints are very durable and glossy.
- Choose paints labeled for outdoor use.
- Consider weather-resistant and UV-resistant paints.
- Pick colors that you love and that match your style.
Before you start painting outdoor pottery, test your paints on a small area. This will let you see how the colors look and how well they stick. You can also use paintbrushes of different sizes. Small brushes are good for details. Big brushes are good for covering large areas. Remember to clean your brushes after each use. This will help them last longer. You can use soap and water to clean acrylic brushes. You might need paint thinner to clean enamel brushes. With the right paints and tools, you can create beautiful and long-lasting designs on your outdoor pottery.
Fun Fact or Stat: Some paints contain tiny glass beads that reflect sunlight and make the colors last longer!
What are the best paint brands for outdoor pottery?
There are many great paint brands for painting outdoor pottery. Some popular choices include DecoArt, Americana, and FolkArt. These brands offer a wide range of outdoor acrylic paints. They are known for their quality and durability. Krylon is another good brand to consider. They make spray paints that are easy to use and provide a smooth finish. When choosing a paint brand, read reviews and compare prices. Look for paints that are specifically designed for outdoor use. These paints will have special ingredients that protect them from the weather. Don’t be afraid to try different brands to find the ones you like best. Every artist has their favorite tools, and paint is no different. Experiment to discover the brands that work best for your style and project needs.
How do I protect painted pottery from fading?
Protecting your painted pottery from fading is very important. The sun’s UV rays can cause colors to fade over time. To prevent this, use paints that are UV-resistant. You can also apply a clear coat of sealant after you finish painting. Look for a sealant that is made for outdoor use. It will create a protective layer that blocks UV rays. Another tip is to place your pottery in a shaded area. This will help to reduce its exposure to the sun. You can also bring your pottery indoors during the winter months. This will protect it from freezing temperatures and harsh weather. With the right care, your painted pottery will stay vibrant and beautiful for years to come.
Can I use spray paint on outdoor pottery?
Yes, you can use spray paint on outdoor pottery! Spray paint is a great option for covering large areas quickly. It can also provide a smooth and even finish. Look for spray paints that are designed for outdoor use. These paints will be more durable and weather-resistant. Before you start spraying, make sure to protect your work area. Cover any surfaces that you don’t want to get paint on. Hold the spray can about 10-12 inches away from the pottery. Use a steady, back-and-forth motion to apply the paint. Avoid spraying too much paint in one spot. This can cause drips and runs. Let the paint dry completely before adding another coat. With a little practice, you can create beautiful and professional-looking results with spray paint.

Preparing Your Pottery for Painting
Getting your pottery ready is key before you start to paint outdoor pottery. A clean and smooth surface will help the paint stick better. First, wash the pottery with soap and water. This will remove any dirt or dust. If there are any rough spots, use sandpaper to smooth them out. You can find sandpaper at most hardware stores. Choose a fine-grit sandpaper for the best results. After sanding, wipe the pottery with a damp cloth to remove any sanding dust. Let the pottery dry completely before you start painting. You can also use a primer to prepare the pottery. Primer is a special paint that helps the color stick better. It also helps to seal the surface of the pottery. Apply a thin coat of primer to the pottery. Let it dry completely before you start painting. A well-prepared surface will make your paint job look amazing.
- Wash the pottery with soap and water.
- Sand any rough spots for a smooth surface.
- Wipe off sanding dust with a damp cloth.
- Let the pottery dry completely before painting.
- Apply a primer for better paint adhesion.
If you are painting outdoor pottery that has already been used, you might need to remove old paint. You can use a paint scraper to remove loose paint. For stubborn paint, you can use a paint remover. Follow the instructions on the paint remover carefully. Wear gloves and eye protection when using paint remover. After removing the old paint, wash the pottery with soap and water. Then, follow the steps above to prepare the surface for painting. Taking the time to prepare your pottery will make a big difference in the final result. Your painted pottery will look more professional and last longer.
Fun Fact or Stat: Some potters use vinegar to clean their pottery before painting because it’s a natural degreaser!
Why is surface preparation so important?
Surface preparation is super important because it helps the paint stick better. Imagine trying to paint on a dusty or oily surface. The paint wouldn’t stick very well, would it? It might peel or flake off easily. That’s why it’s important to clean and prepare the surface before you start painting. A clean surface allows the paint to bond properly. This means your paint job will last longer and look better. Preparing the surface also helps to create a smooth finish. If there are any rough spots or imperfections, the paint will highlight them. Sanding and priming can help to create a smooth and even surface for your paint.
What kind of sandpaper should I use?
Choosing the right sandpaper is important for preparing your pottery. You want to use a sandpaper that is fine enough to smooth the surface without scratching it too much. A fine-grit sandpaper is usually the best choice. Look for sandpaper with a grit number of 220 or higher. The higher the number, the finer the sandpaper. You can find sandpaper at most hardware stores. When sanding, use light pressure and a circular motion. Avoid pressing too hard, as this can damage the pottery. After sanding, wipe the pottery with a damp cloth to remove any sanding dust. This will help the paint stick better and create a smooth finish.
Can I skip priming if I’m using good paint?
Even if you’re using good paint, priming is still a good idea. Primer helps the paint stick better, especially on porous surfaces like terracotta. It also helps to seal the surface and prevent the paint from soaking in too much. This means you’ll use less paint overall. Primer also creates a uniform surface for your paint. This can help to improve the color and coverage. While you can skip priming, it’s generally recommended for the best results. It’s like putting on a base coat of nail polish before applying color. It helps the color to last longer and look better. Priming is an extra step, but it’s worth it for a professional-looking finish.
| Pottery Type | Best Paint | Preparation | Durability |
|---|---|---|---|
| Terracotta | Outdoor Acrylic | Sand, Prime | Moderate |
| Ceramic | Enamel | Clean, Prime | High |
| Resin | Acrylic Spray Paint | Clean | High |
| Plastic | Plastic-Specific Paint | Clean, Light Sanding | Moderate |

Creative Painting Techniques for Pottery
Now comes the fun part: painting outdoor pottery! There are so many ways to get creative with your designs. You can use stencils to create patterns. Stencils are easy to find at craft stores. You can also make your own stencils out of cardboard or plastic. Another fun technique is to use sponges. Dip a sponge in paint and dab it onto the pottery. This creates a textured look. You can also use different colors to create a layered effect. Try using painter’s tape to create stripes or geometric designs. Just tape off the areas you don’t want to paint. Then, paint the exposed areas. Peel off the tape when the paint is dry. You can also use paint markers to add fine details. Paint markers are great for drawing lines and adding small accents. Don’t be afraid to experiment and try new things. The most important thing is to have fun and express your creativity.
- Use stencils for patterns and designs.
- Try sponge painting for a textured look.
- Create stripes with painter’s tape.
- Add fine details with paint markers.
- Experiment with different colors and techniques.
When you paint outdoor pottery, remember to let each layer of paint dry completely before adding another. This will prevent the colors from bleeding together. You can use a hairdryer to speed up the drying process. If you make a mistake, don’t worry! You can always paint over it. Just let the paint dry completely first. You can also use a damp cloth to wipe off wet paint. Remember to protect your work area. Cover your table with newspaper or a drop cloth. Wear old clothes or an apron to protect your clothes from paint. With a little practice, you’ll be creating beautiful and unique designs on your outdoor pottery in no time.
Fun Fact or Stat: Some artists use coffee grounds to add texture to their paint, making it look like real soil!
How can I create a mosaic effect on pottery?
Creating a mosaic effect on pottery is a fun and creative way to add texture and interest. You can use small pieces of tile, glass, or even broken pottery to create your mosaic. Start by drawing a design on your pottery. Then, use glue to attach the mosaic pieces to the surface. You can use a special mosaic glue or a strong craft glue. Once the glue is dry, you can add grout to fill in the spaces between the mosaic pieces. Grout is a paste-like material that comes in different colors. Apply the grout with a sponge or your fingers. Wipe off any excess grout with a damp cloth. Let the grout dry completely before sealing the mosaic. Sealing will protect the mosaic from moisture and dirt.
What are some easy painting ideas for kids?
There are lots of easy painting ideas for kids. One idea is to let them paint their handprints or footprints on the pottery. This is a fun way to create a personalized keepsake. Another idea is to let them use stamps to create patterns. You can use store-bought stamps or make your own out of potatoes or sponges. Kids can also use dotting tools to create dot art. Dotting tools are small sticks with rounded ends. Dip the tools in paint and then dot them onto the pottery. You can also let kids use their imaginations and paint whatever they want. The most important thing is to let them have fun and be creative.
How do I create a crackle finish on pottery?
A crackle finish can add a vintage or rustic look to your painted pottery. To create a crackle finish, you’ll need a special crackle medium. You can find crackle medium at most craft stores. First, paint the pottery with a base coat of your desired color. Let the base coat dry completely. Then, apply a coat of crackle medium. Follow the instructions on the crackle medium carefully. Let the crackle medium dry until it is tacky. Then, apply a top coat of a different color. As the top coat dries, it will start to crack, revealing the base coat underneath. The result is a beautiful crackled finish. Seal the pottery to protect the crackle finish from damage.
Sealing Your Painted Pottery for Protection
Sealing your pottery is the last step in painting outdoor pottery, but it’s a very important one. Sealing protects your paint from the weather. It also helps to prevent fading and chipping. There are different types of sealants you can use. Polyurethane sealants are a good choice for outdoor pottery. They are durable and water-resistant. You can find polyurethane sealants in spray or brush-on form. Another option is acrylic sealants. Acrylic sealants are easy to use and clean up with water. However, they might not be as durable as polyurethane sealants. When applying sealant, make sure the pottery is clean and dry. Apply a thin, even coat of sealant. Let it dry completely before adding another coat. You might need to apply two or three coats of sealant for the best protection. Sealing your painted pottery will help it look great for years to come.
- Choose a sealant made for outdoor use.
- Polyurethane sealants are durable and water-resistant.
- Acrylic sealants are easy to use and clean.
- Apply thin, even coats of sealant.
- Let each coat of sealant dry completely.
Before you seal your paint outdoor pottery, test the sealant on a small, inconspicuous area. This will let you see how the sealant looks and how it affects the paint. Some sealants can change the color of the paint. It’s also a good idea to wear gloves and eye protection when applying sealant. Work in a well-ventilated area. Avoid breathing in the fumes from the sealant. Let the sealant dry completely before placing your pottery outdoors. Follow the manufacturer’s instructions for drying time. With proper sealing, your painted pottery will be protected from the elements and will stay beautiful for a long time.
Fun Fact or Stat: Some sealants contain UV absorbers that help to protect the paint from fading in the sun!
What is the difference between sealant and varnish?
Sealant and varnish are both protective coatings, but they have different properties. Sealant is designed to protect surfaces from moisture and other environmental factors. It is often used on outdoor surfaces like pottery, wood, and concrete. Varnish is designed to provide a hard, glossy finish. It is often used on furniture and other decorative items. Sealant is typically more flexible than varnish. This allows it to expand and contract with the surface it is protecting. Varnish is typically more rigid, which can make it more prone to cracking. When choosing between sealant and varnish, consider the specific needs of your project. If you need to protect a surface from moisture, sealant is the better choice. If you want to add a hard, glossy finish, varnish is the better choice.
How often should I reseal my painted pottery?
How often you should reseal your painted pottery depends on several factors. These include the type of sealant you used, the climate you live in, and how much exposure the pottery gets to the elements. In general, it’s a good idea to reseal your painted pottery every one to two years. If you live in a harsh climate or your pottery is exposed to a lot of sun and rain, you might need to reseal it more often. To check if your pottery needs to be resealed, look for signs of wear and tear. These can include fading, chipping, and cracking. If you notice any of these signs, it’s time to reseal your pottery. Resealing your pottery will help to protect it from the elements and keep it looking its best.
Can I use a sealant that is not specifically for pottery?
It’s generally best to use a sealant that is specifically designed for pottery. These sealants are formulated to adhere properly to the surface of the pottery. They are also designed to be flexible enough to withstand the expansion and contraction of the pottery. If you use a sealant that is not specifically for pottery, it might not adhere properly. It could also crack or peel over time. This could damage your painted pottery and shorten its lifespan. However, there are some general-purpose sealants that can be used on pottery. Look for sealants that are labeled as being suitable for use on porous surfaces. Make sure to test the sealant on a small, inconspicuous area of the pottery before applying it to the entire surface.
Displaying and Caring for Your Pottery
Once you paint outdoor pottery, you want to show it off! Think about where you want to put your beautiful creation. A sunny spot in the garden? On your porch? Maybe even inside your house? Make sure the spot you choose is safe for your pottery. You don’t want it to fall and break! If you put your pottery outside, remember that the weather can affect it. Extreme heat or cold can cause cracks. If you live in a place with freezing winters, bring your pottery inside. This will protect it from the cold. You can also cover your pottery with a tarp to protect it from the rain and snow. Clean your pottery regularly to keep it looking its best. Use a soft cloth and mild soap to wipe off any dirt or dust. Avoid using harsh chemicals or abrasive cleaners. These can damage the paint and sealant. With proper care, your painted pottery will bring you joy for many years to come.
- Choose a safe and suitable display location.
- Protect pottery from extreme weather conditions.
- Bring pottery indoors during freezing winters.
- Clean pottery regularly with a soft cloth and mild soap.
- Avoid harsh chemicals and abrasive cleaners.
When you paint outdoor pottery and display it, think about the plants you put inside. Choose plants that are appropriate for the size of the pot. Make sure the pot has drainage holes so the water can escape. This will prevent the roots from rotting. You can also add a layer of gravel to the bottom of the pot to improve drainage. Water your plants regularly, but don’t overwater them. Overwatering can also cause root rot. Fertilize your plants regularly to keep them healthy and strong. With proper care, your plants will thrive in your beautiful painted pottery.
Fun Fact or Stat: Placing a layer of broken pottery shards at the bottom of a pot can improve drainage and prevent soil from washing out!
How do I prevent my pottery from cracking in the winter?
Preventing your pottery from cracking in the winter is important if you live in a cold climate. The main cause of cracking is the expansion and contraction of water as it freezes and thaws. To prevent this, make sure your pottery is well-drained. This means that water can easily escape from the pot. You can also add a layer of gravel to the bottom of the pot to improve drainage. Another tip is to elevate your pottery off the ground. This will prevent it from sitting in standing water. You can use pot feet or bricks to elevate the pottery. If you live in a very cold climate, it’s best to bring your pottery indoors during the winter months. This will protect it from freezing temperatures and prevent it from cracking.
What are some creative ways to display my painted pottery?
There are many creative ways to display your painted pottery. You can create a tiered display by stacking pots of different sizes on top of each other. This is a great way to showcase a collection of painted pottery. You can also hang your painted pottery from hooks or shelves. This is a good option if you have limited space. Another idea is to create a mosaic wall using painted pottery shards. This is a unique and eye-catching way to display your artwork. You can also use your painted pottery to create a miniature garden. Fill the pots with soil and plants, and then arrange them in a creative way. The possibilities are endless! Let your imagination run wild and create a display that reflects your personal style.
How do I clean my painted pottery without damaging the paint?
Cleaning your painted pottery without damaging the paint is easy if you follow a few simple steps. First, use a soft cloth or brush to remove any loose dirt or dust. Then, mix a small amount of mild soap with warm water. Dip the cloth or brush in the soapy water and gently wipe the surface of the pottery. Avoid using harsh chemicals or abrasive cleaners, as these can damage the paint. Rinse the pottery with clean water to remove any soap residue. Finally, dry the pottery with a soft towel. If you have stubborn stains, you can try using a paste of baking soda and water. Apply the paste to the stain and let it sit for a few minutes. Then, gently scrub the stain with a soft cloth or brush. Rinse the pottery with clean water and dry it with a soft towel.
Summary
Painting outdoor pottery is a fun and easy way to add color and personality to your outdoor spaces. Choosing the right pottery and paints is important for a long-lasting result. Preparing the surface properly ensures that the paint sticks well. Get creative with different painting techniques and designs. Sealing your painted pottery protects it from the weather and prevents fading. Display your pottery in a safe and suitable location. Clean it regularly to keep it looking its best. By following these tips, you can create beautiful and unique outdoor decorations that you’ll enjoy for years to come. It’s a great way to express yourself and add a personal touch to your garden or patio.
Conclusion
You can now paint outdoor pottery! It’s a simple art project that you can do. It lets you show your creative side. Make sure you pick the right paints. Prepare your pottery well. Don’t forget to seal it. Then you can enjoy your colorful pottery for a long time. Have fun and happy painting!
Frequently Asked Questions
Question No 1: What kind of paint should I use for outdoor pottery?
Answer: For painting outdoor pottery, you should use paints that are designed to withstand the elements. Acrylic paints labeled for outdoor use are a great choice. These paints are water-resistant and UV-resistant, which means they won’t fade or crack easily in the sun or rain. Enamel paints are another durable option, providing a hard, glossy finish that can protect your pottery from the weather. Always check the label to make sure the paint is suitable for outdoor use and will adhere well to the surface of your pottery. Using the right type of paint will ensure that your painted pottery stays vibrant and beautiful for a long time.
Question No 2: How do I prepare pottery for painting?
Answer: Preparing your pottery before painting is crucial for ensuring that the paint adheres properly and lasts longer. Start by cleaning the pottery thoroughly with soap and water to remove any dirt, dust, or oils. If there are any rough spots, use fine-grit sandpaper to smooth them out. After sanding, wipe the pottery with a damp cloth to remove any sanding dust. Let the pottery dry completely before you start painting. For terracotta pots, it’s a good idea to apply a primer specifically designed for terracotta. This will help to seal the porous surface and provide a better base for the paint. A well-prepared surface will result in a smoother, more professional-looking paint job.
Question No 3: Do I need to seal my painted pottery?
Answer: Yes, sealing your painted pottery is highly recommended, especially if it will be displayed outdoors. Sealing protects the paint from the elements, such as sun, rain, and snow. It also helps to prevent the paint from fading, chipping, or cracking. Choose a sealant that is specifically designed for outdoor use and is compatible with the type of paint you used. Apply the sealant in thin, even coats, allowing each coat to dry completely before applying the next. You may need to apply two or three coats of sealant for the best protection. Sealing your paint outdoor pottery will help it stay beautiful and vibrant for years to come.
Question No 4: What are some creative painting techniques I can use?
Answer: There are many creative painting techniques you can use to add interest and personality to your pottery. One popular technique is using stencils to create patterns and designs. You can also try sponge painting for a textured look. Simply dip a sponge in paint and dab it onto the pottery. Another fun technique is using painter’s tape to create stripes or geometric designs. You can also use paint markers to add fine details and accents. Experiment with different colors, brushes, and tools to create unique and eye-catching designs. Don’t be afraid to try new things and let your creativity shine!
Question No 5: How do I clean my painted pottery without damaging the paint?
Answer: Cleaning your painted pottery without damaging the paint is easy if you use gentle methods. Start by dusting the pottery with a soft cloth or brush to remove any loose dirt or dust. For more stubborn dirt, mix a small amount of mild soap with warm water. Dip a soft cloth in the soapy water and gently wipe the surface of the pottery. Avoid using harsh chemicals or abrasive cleaners, as these can damage the paint and sealant. Rinse the pottery with clean water and dry it with a soft towel. With proper care, your paint outdoor pottery will stay clean and beautiful for years to come.
Question No 6: How do I protect my painted pottery from cracking in the winter?
Answer: Protecting your painted pottery from cracking in the winter is important if you live in a cold climate. The main cause of cracking is the expansion and contraction of water as it freezes and thaws. To prevent this, make sure your pottery is well-drained. You can also add a layer of gravel to the bottom of the pot to improve drainage. If you live in an area with freezing temperatures, it’s best to bring your paint outdoor pottery indoors during the winter months. This will protect it from the cold and prevent it from cracking. You can also cover your pottery with a tarp to protect it from the rain and snow.
