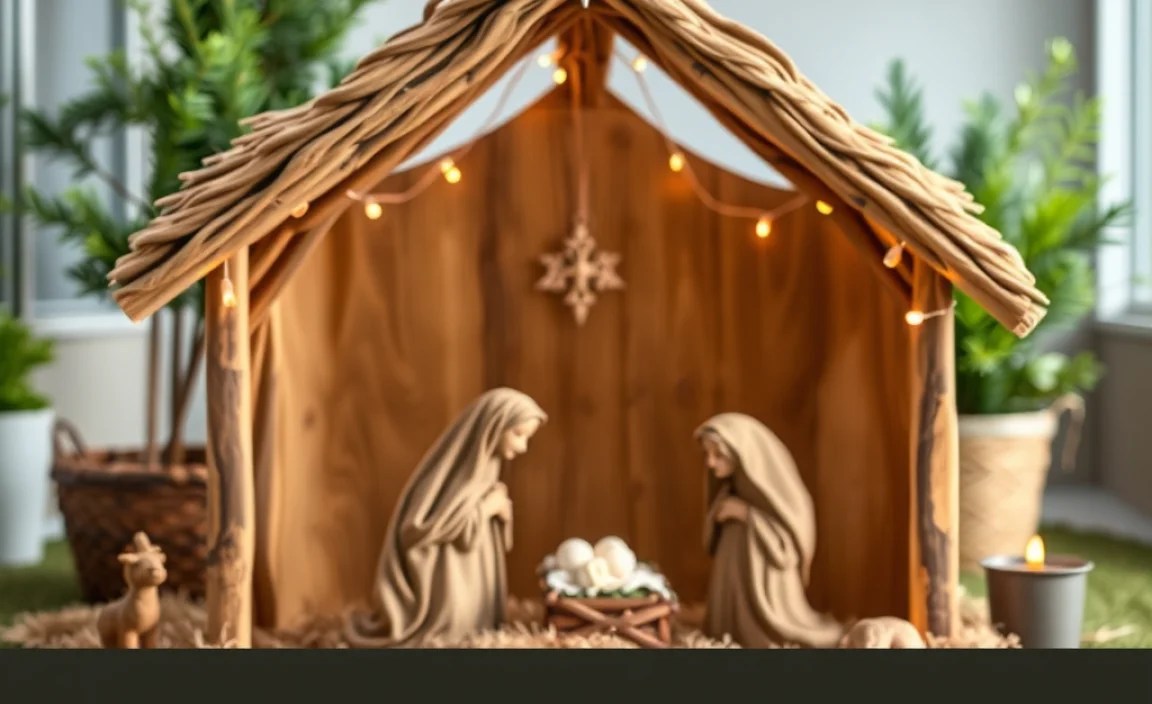
Christmas is coming! Do you love decorating your yard? Many people do! They use lights and figures. Some people even create a special scene. It tells the story of Christmas. Have you ever seen a nativity scene? It shows when Jesus was born. You can make your own! There are many ways to do it. You can even use patterns for outdoor nativity scene. This makes it easy to build one yourself.
Key Takeaways
- Patterns for outdoor nativity scenes let you create a beautiful display.
- Using the right tools makes building easier and more fun.
- Painting and decorating bring your nativity scene to life.
- A well-made nativity scene can last for many years.
- Sharing the story of Christmas brings joy to everyone.

Finding Free Nativity Scene Patterns
Finding the perfect patterns for outdoor nativity scene can be fun. Many websites offer free patterns. These patterns come in different styles and sizes. Some are simple, and some are complex. Look for patterns that match your skill level. You can find patterns online or in books. Some stores that sell craft supplies also have them. Make sure the pattern is easy to understand. Clear instructions are very important. A good pattern will list all the materials you need. It will also show you how to put everything together. This will help you build a beautiful nativity scene for your yard.
- Check websites that offer free craft patterns.
- Look for patterns that match your skill level.
- Read the instructions carefully before you start.
- Make sure you have all the materials you need.
- Ask a friend for help if you get stuck.
Using free patterns for outdoor nativity scene is a great way to save money. Creating a nativity scene is a fun project for the whole family. You can involve your kids in the process. They can help with painting and decorating. Building a nativity scene together creates special memories. It also teaches them about the story of Christmas. Remember to protect your finished nativity scene from the weather. This will help it last longer. You can use a sealant or store it inside during the off-season. Enjoy your beautiful, homemade nativity scene!
What Kind of Patterns Are There?
There are many different kinds of patterns for outdoor nativity scene. Some are very simple. They use basic shapes. Others are more detailed. They include intricate designs. Some patterns are for life-size figures. These can be very impressive in your yard. Other patterns are for smaller figures. These are easier to store and move. You can find patterns that are made from wood. You can also find patterns that use other materials, like plastic or metal. Think about what style you like best. Then choose a pattern that matches that style. Do you like cartoonish or realistic figures? There is a pattern for everyone.
Where Can You Find These Patterns?
Finding patterns for outdoor nativity scene is easier than you think. The internet is a great place to start. Many websites offer free patterns. Just search for “free nativity scene patterns.” You can also check websites that sell craft supplies. They often have patterns available for purchase. Local libraries sometimes have books with craft patterns. Don’t forget to ask friends and family! They might have patterns they can share with you. Once you find a pattern, make sure it is easy to read. The instructions should be clear and simple. This will make your project much easier.
Are Free Patterns Good Quality?
You might wonder if free patterns for outdoor nativity scene are good quality. The answer is, it depends! Some free patterns are excellent. They are well-designed and easy to follow. Others might be poorly made. They could have unclear instructions. Always check the source of the pattern. Look for patterns from reputable websites. Read reviews from other users if possible. If a pattern seems too complicated, choose a simpler one. Remember, you can always adjust a pattern to make it better. Add your own creative touches to make it unique. The most important thing is to have fun!
Fun Fact or Stat: Did you know that the first nativity scenes were created by St. Francis of Assisi in the 13th century?
Choosing the Right Materials
Once you have your patterns for outdoor nativity scene, you need materials. The right materials are key to a lasting nativity scene. Wood is a popular choice. It is strong and can withstand the weather. Plywood is a good option because it is affordable. You can also use cedar or redwood. These woods are naturally resistant to rot. If you choose wood, make sure it is treated. This will protect it from rain and snow. Other materials include plastic and metal. Plastic is lightweight and easy to work with. Metal is very durable but can be more expensive. Consider your budget and skill level when choosing materials. Pick something that will work well for your project.
- Wood is a strong and popular choice.
- Plywood is an affordable wood option.
- Cedar and redwood resist rot naturally.
- Plastic is lightweight and easy to use.
- Metal is durable but can be costly.
- Treat wood to protect it from the weather.
Think about the size of your patterns for outdoor nativity scene when buying materials. Larger figures will need stronger materials. Smaller figures can be made from lighter materials. Don’t forget to buy paint and sealant. Paint will add color and detail to your nativity scene. Choose outdoor paint that is designed to withstand the elements. Sealant will protect the paint from chipping and fading. This will keep your nativity scene looking beautiful for years to come. Also, gather your tools. You will need a saw, drill, and sandpaper. A good set of tools will make the project much easier.
What Kind of Wood Should I Use?
Choosing the right wood for your patterns for outdoor nativity scene is important. Plywood is a common choice. It is affordable and easy to find. However, it can warp if it gets wet. Cedar is a better option if you want something more durable. It is naturally resistant to rot and insects. Redwood is another good choice. It is similar to cedar but can be more expensive. Treated lumber is also an option. It has been chemically treated to resist rot and insects. No matter what type of wood you choose, make sure it is suitable for outdoor use. This will help your nativity scene last longer.
Can I Use Recycled Materials?
Using recycled materials for your patterns for outdoor nativity scene is a great idea. It’s good for the environment! You can use old wood pallets to build the figures. Old fence posts can also be used. Just make sure the wood is clean and free of nails. You can also use recycled plastic. Old plastic containers can be melted down and molded into shapes. Get creative! Look around your house for materials you can reuse. This will save you money and help the planet. Plus, your nativity scene will be unique and special.
How Much Will the Materials Cost?
The cost of materials for your patterns for outdoor nativity scene will vary. It depends on the size and complexity of the project. Wood can be expensive, especially cedar or redwood. Plywood is more affordable. Paint and sealant will also add to the cost. Recycled materials can save you money. Check local hardware stores for prices. Compare prices to find the best deals. Don’t forget to factor in the cost of tools. If you don’t already have them, you may need to buy a saw, drill, and sandpaper. Plan your budget carefully before you start. This will help you avoid surprises.
Fun Fact or Stat: The most common material used for outdoor nativity scenes is wood, accounting for over 70% of displays.
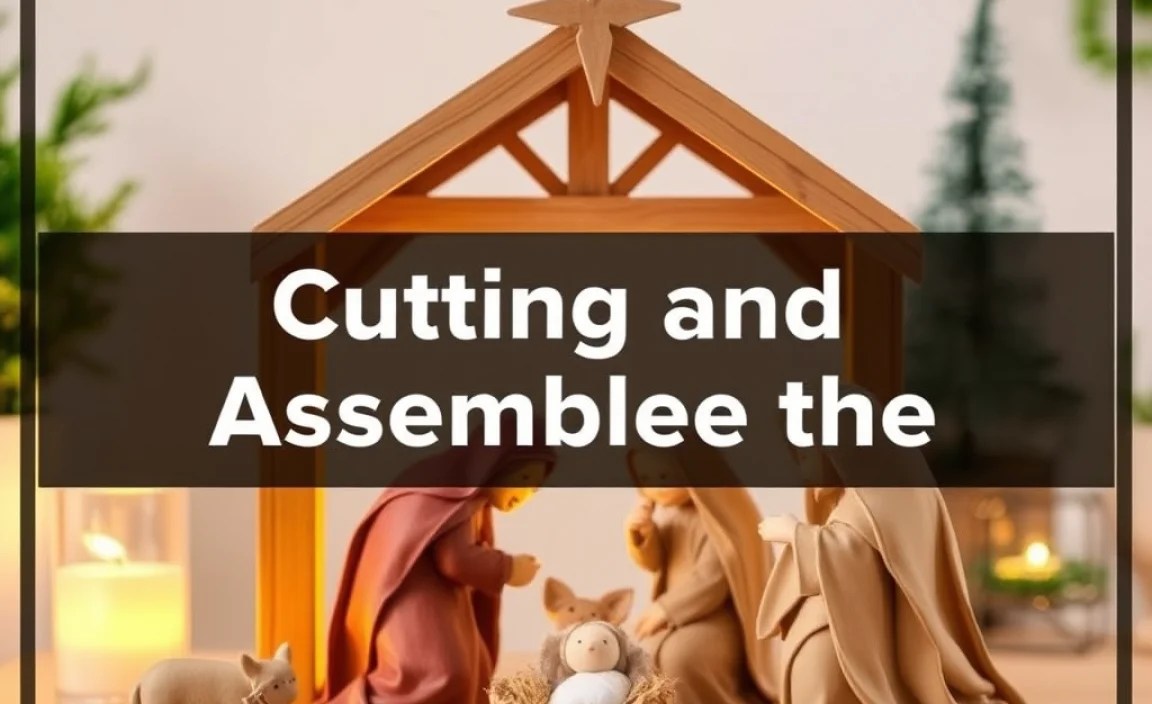
Cutting and Assembling the Figures
Now it’s time to bring your patterns for outdoor nativity scene to life. Cutting and assembling the figures is a key step. Start by tracing the patterns onto your chosen material. Use a pencil or marker to make clear lines. Then, use a saw to cut out the shapes. Be careful when using power tools. Always wear safety glasses and gloves. Once you have cut out all the pieces, it’s time to assemble them. Use screws or nails to join the pieces together. Wood glue can also help to create a strong bond. Follow the instructions in your pattern carefully. This will ensure that your figures are sturdy and well-built.
- Trace the patterns onto your chosen material.
- Use a saw to cut out the shapes carefully.
- Wear safety glasses and gloves when using power tools.
- Use screws or nails to join the pieces together.
- Wood glue can help create a strong bond.
- Follow the pattern instructions closely.
Take your time when cutting and assembling your patterns for outdoor nativity scene. Rushing can lead to mistakes. If you make a mistake, don’t worry. You can usually fix it with wood filler or glue. Sand down any rough edges to make the figures smooth. This will also help the paint adhere better. Consider adding extra support to the figures. This will make them more stable in windy conditions. You can use wooden stakes to anchor them to the ground. Remember to check your local building codes. Some areas have restrictions on the size and placement of outdoor decorations.
What Tools Do I Need?
You will need several tools to work with patterns for outdoor nativity scene. A saw is essential for cutting out the shapes. A jigsaw is a good choice for curved lines. A circular saw is better for straight lines. You will also need a drill for making holes. A screwdriver is needed for attaching pieces together. Sandpaper will help you smooth rough edges. A measuring tape is important for accurate measurements. A pencil or marker is needed for tracing the patterns. Safety glasses and gloves are a must for protecting yourself. Make sure you have all the tools you need before you start. This will make the project go much smoother.
How Can I Make the Figures Sturdier?
Making your nativity scene figures sturdier is important. This will help them withstand the weather. You can use thicker materials. This will make the figures more resistant to bending and breaking. Add extra support to the figures. Use wooden braces or metal brackets to reinforce them. Anchor the figures to the ground. Use stakes or weights to keep them from blowing over. Apply a sealant to protect the wood from moisture. This will prevent rot and decay. Store the figures indoors during the off-season. This will help them last longer. With a little extra care, your nativity scene will stay sturdy for years.
What If I Make a Mistake?
Everyone makes mistakes when working with patterns for outdoor nativity scene. Don’t worry if you mess up! There are ways to fix it. If you cut a piece too short, you can add a small piece of wood to fill the gap. Use wood glue to attach it securely. If you drill a hole in the wrong place, you can fill it with wood filler. Let the filler dry, then sand it smooth. If you accidentally break a piece, you can glue it back together. Use clamps to hold it in place while the glue dries. Remember, mistakes are a part of learning. Don’t get discouraged. Just keep trying, and you will create a beautiful nativity scene.
Fun Fact or Stat: Jigsaws are the most commonly used saw for cutting out the figures in outdoor nativity scenes due to their versatility.

Painting and Decorating Your Nativity Scene
Painting and decorating your patterns for outdoor nativity scene is a fun part. It brings the figures to life. Choose outdoor paint that is designed to withstand the weather. Acrylic paint is a good option. It is durable and comes in many colors. Start by priming the figures. This will help the paint adhere better. Then, apply several coats of paint. Let each coat dry completely before applying the next. Use brushes of different sizes to add details. Consider adding glitter or other embellishments. This will make your nativity scene sparkle. Don’t be afraid to get creative! Let your imagination run wild.
- Choose outdoor paint for durability.
- Acrylic paint is a good choice.
- Prime the figures before painting.
- Apply several coats of paint.
- Use brushes of different sizes for details.
- Add glitter or other embellishments.
Think about the colors you want to use for your patterns for outdoor nativity scene. Traditional colors include blue, gold, and white. You can also use earth tones to create a more natural look. Consider adding details like faces and clothing. Use fine brushes to paint these details carefully. You can also add texture to the figures. Use a sponge or rag to create a stippled effect. Once the paint is dry, apply a sealant. This will protect the paint from chipping and fading. Remember to let the sealant dry completely before placing the figures outside. Enjoy your beautifully painted and decorated nativity scene!
What Colors Should I Use?
Choosing colors for your patterns for outdoor nativity scene can be exciting. Traditional colors are always a good choice. Blue represents heaven. Gold represents royalty. White represents purity. Earth tones can create a natural look. Brown represents the earth. Green represents life. You can also use bright colors for a more festive look. Red, orange, and yellow can add warmth and cheer. Consider the overall style you want to achieve. Do you want a traditional nativity scene or a modern one? Let your personal taste guide your color choices. The most important thing is to have fun and be creative.
How Can I Add Details?
Adding details to your patterns for outdoor nativity scene makes them special. Use fine brushes to paint small details like faces and clothing. You can also use paint markers for precise lines. Consider adding texture to the figures. Use a sponge or rag to create a stippled effect. Glue on small beads or sequins for extra sparkle. Add hair to the figures using yarn or string. Use different colors and textures to create a realistic look. Don’t be afraid to experiment. Try different techniques to see what works best for you. The more details you add, the more unique your nativity scene will be.
How Do I Protect the Paint?
Protecting the paint on your patterns for outdoor nativity scene is important. This will keep it looking beautiful for years. Apply a sealant after the paint is dry. Use a clear, outdoor sealant. This will protect the paint from the weather. Apply several coats of sealant. Let each coat dry completely before applying the next. Store the figures indoors during the off-season. This will prevent the paint from fading in the sun. Clean the figures regularly with a damp cloth. This will remove dirt and grime. Avoid using harsh chemicals or abrasive cleaners. These can damage the paint. With proper care, your painted nativity scene will last for many years.
Fun Fact or Stat: Blue and gold are the most popular colors used in outdoor nativity scenes, representing heaven and royalty.
Lighting and Displaying Your Nativity Scene
Once your patterns for outdoor nativity scene are complete, it’s time to display them. Lighting can make your nativity scene even more beautiful. Use spotlights to highlight the figures. Place the lights strategically to create shadows and depth. Consider using colored lights for a festive look. Blue and gold lights can enhance the traditional colors of the nativity scene. Make sure the lights are designed for outdoor use. They should be waterproof and weather-resistant. Place the figures in a prominent location in your yard. Choose a spot that is visible from the street. This will allow everyone to enjoy your beautiful display.
- Use spotlights to highlight the figures.
- Place lights strategically for shadows.
- Consider using colored lights.
- Make sure lights are for outdoor use.
- Place figures in a visible location.
- Check local rules for decorations.
Think about the arrangement of your patterns for outdoor nativity scene. The manger scene should be the focal point. Place Mary, Joseph, and baby Jesus in the center. The wise men and shepherds can be placed around the manger. Consider adding animals to the scene. Sheep, cows, and donkeys can add a touch of realism. You can also add angels to the display. Place them above the manger to symbolize the heavenly host. Check your local regulations regarding outdoor decorations. Some areas have restrictions on the size and placement of displays. Be respectful of your neighbors and avoid blocking sidewalks or driveways.
What Kind of Lights Should I Use?
Choosing the right lights for your patterns for outdoor nativity scene is important. LED lights are a great option. They are energy-efficient and long-lasting. They also come in a variety of colors. Spotlights can highlight specific figures. Floodlights can illuminate the entire scene. String lights can add a festive touch. Make sure the lights are designed for outdoor use. They should be waterproof and weather-resistant. Use a timer to turn the lights on and off automatically. This will save energy and prolong the life of the lights. Consider using solar-powered lights. These are environmentally friendly and don’t require electricity.
How Can I Protect the Display from Weather?
Protecting your nativity scene from the weather is very important. This will keep it looking beautiful for years to come. Apply a sealant to the figures. This will protect them from rain and snow. Anchor the figures to the ground. Use stakes or weights to keep them from blowing over. Consider building a small shelter for the manger scene. This will protect Mary, Joseph, and baby Jesus from the elements. Store the figures indoors during severe weather. This will prevent damage from wind and ice. Check the display regularly for signs of wear and tear. Repair any damage promptly. With proper care, your nativity scene will withstand the elements.
Where Is the Best Place to Display It?
Choosing the best place to display your patterns for outdoor nativity scene is key. Select a location that is visible from the street. This will allow everyone to enjoy your beautiful display. Make sure the area is well-lit. This will make the nativity scene stand out at night. Avoid placing the display near trees or bushes. These can block the view. Consider the safety of the location. Avoid placing the display in an area where it could be damaged by cars or pedestrians. Be respectful of your neighbors. Avoid blocking sidewalks or driveways. With a little planning, you can find the perfect spot for your nativity scene.
Fun Fact or Stat: LED lights are the most popular choice for lighting outdoor nativity scenes, due to their energy efficiency and long lifespan.
Storing Your Nativity Scene After Christmas
After Christmas, you need to store your patterns for outdoor nativity scene. Proper storage will protect the figures. It will also help them last longer. Clean the figures before storing them. Remove any dirt or debris. Let them dry completely. Wrap each figure individually in bubble wrap or packing paper. This will prevent scratches and damage. Store the figures in a dry, cool place. A garage, basement, or attic are good options. Avoid storing them in a damp or humid environment. This can cause mold and mildew to grow. Label the storage containers clearly. This will make it easier to find the figures next year.
- Clean the figures before storing them.
- Let them dry completely.
- Wrap each figure individually.
- Store in a dry, cool place.
- Avoid damp or humid environments.
- Label the storage containers.
Consider disassembling your patterns for outdoor nativity scene for storage. This will save space. Remove any detachable parts, such as wings or staffs. Wrap these parts separately to protect them. Store the hardware, such as screws and nails, in a small bag. Attach the bag to the storage container. This will prevent you from losing them. Inspect the figures regularly for signs of damage. Repair any damage before storing them. This will prevent it from getting worse. With proper storage, your nativity scene will be ready to display again next Christmas.
How Should I Clean the Figures?
Cleaning your nativity scene figures is easy. Use a soft cloth or brush to remove dust and dirt. For stubborn stains, use a mild soap and water solution. Gently scrub the affected area. Rinse with clean water and let the figures dry completely. Avoid using harsh chemicals or abrasive cleaners. These can damage the paint and finish. Pay special attention to delicate areas, such as faces and clothing. Use a cotton swab to clean these areas carefully. If the figures are made of wood, you can use a wood cleaner to protect them. Follow the instructions on the cleaner carefully. With regular cleaning, your nativity scene will look its best for years to come.
What Kind of Storage Containers Should I Use?
Choosing the right storage containers is important. Plastic bins are a good option. They are durable and protect the figures from moisture. Cardboard boxes can also be used. But they are not as durable as plastic bins. Make sure the containers are large enough to hold the figures without crowding them. This will prevent damage. Line the containers with bubble wrap or packing paper. This will provide extra cushioning. Label the containers clearly. This will make it easier to find the figures next year. Store the containers in a dry, cool place. A garage, basement, or attic are good options.
How Can I Prevent Damage During Storage?
Preventing damage during storage is key. Wrap each figure individually in bubble wrap or packing paper. This will protect them from scratches and bumps. Use plenty of cushioning material. This will prevent the figures from shifting during storage. Avoid stacking heavy items on top of the storage containers. This can crush the figures. Store the containers in a safe place where they won’t be knocked over. Inspect the figures regularly for signs of damage. Repair any damage promptly. With a little care, you can keep your nativity scene safe and sound during storage.
Fun Fact or Stat: Bubble wrap is the most popular material for wrapping nativity scene figures for storage, protecting them from scratches and damage.
Summary
Creating an outdoor nativity scene can be a fun and rewarding project. Using patterns for outdoor nativity scene makes it easier. You can find free patterns online. Choose the right materials, like wood or plastic. Cut and assemble the figures carefully. Paint and decorate them to bring them to life. Add lighting to make your display even more beautiful. Place the figures in a prominent location in your yard. Share the story of Christmas with your neighbors and friends. Remember to store the figures properly after Christmas. This will help them last for many years. With a little effort, you can create a beautiful nativity scene that will bring joy to everyone.
Conclusion
Building your own nativity scene is a great way to celebrate Christmas. It lets you share the story of Jesus with others. Using patterns for outdoor nativity scene makes the project easier and more fun. You can create a beautiful display that will last for years. So gather your materials, find a pattern, and get started. Enjoy the process of creating something special for the holidays. Merry Christmas!
Frequently Asked Questions
Question No 1: Where can I find free patterns for an outdoor nativity scene?
Answer: Finding free patterns for outdoor nativity scene is easier than you might think! Many websites offer free patterns that you can download and print. Some popular sites include craft websites, DIY blogs, and even some church websites. Just search online for “free nativity scene patterns,” and you’ll find a variety of options to choose from. Look for patterns that match your skill level and the materials you plan to use. Remember to read the instructions carefully before you start building. Good luck with your project!
Question No 2: What are the best materials to use for an outdoor nativity scene?
Answer: The best materials for an outdoor nativity scene are those that can withstand the weather. Wood is a popular choice because it is strong and durable. Plywood is an affordable option, but you’ll need to seal it to protect it from moisture. Cedar and redwood are naturally resistant to rot, making them great choices. Plastic is another option. It’s lightweight and easy to work with, but it may not be as durable as wood. Metal can also be used, but it can be more expensive. Choose materials that fit your budget and skill level. Also, protect your patterns for outdoor nativity scene from the elements.
Question No 3: How can I make my outdoor nativity scene more durable?
Answer: To make your outdoor nativity scene more durable, start by using weather-resistant materials. Seal all wood surfaces with a waterproof sealant. This will protect them from rain and snow. Use screws or nails to assemble the figures securely. Add extra support to the figures, especially if they are tall or thin. Anchor the figures to the ground with stakes or weights. This will prevent them from blowing over in the wind. Store the figures indoors during the off-season. This will protect them from the elements. With proper care, your nativity scene will last for many years. You can even reuse your patterns for outdoor nativity scene!
Question No 4: What kind of paint should I use for my outdoor nativity scene?
Answer: When painting your outdoor nativity scene, it’s important to use paint that can withstand the weather. Outdoor acrylic paint is a good choice. It is durable and comes in a variety of colors. Before painting, prime the figures with an outdoor primer. This will help the paint adhere better. Apply several coats of paint, letting each coat dry completely before applying the next. Once the paint is dry, apply a clear sealant. This will protect the paint from chipping and fading. Choose colors that are appropriate for the nativity scene. Traditional colors include blue, gold, and white. You can get some inspiration from looking at patterns for outdoor nativity scene.
Question No 5: How can I light up my outdoor nativity scene?
Answer: Lighting can add a beautiful touch to your outdoor nativity scene. Use spotlights to highlight the figures. Place the lights strategically to create shadows and depth. Consider using colored lights for a festive look. Blue and gold lights can enhance the traditional colors of the nativity scene. Make sure the lights are designed for outdoor use. They should be waterproof and weather-resistant. Use a timer to turn the lights on and off automatically. This will save energy and prolong the life of the lights. Solar-powered lights are an environmentally friendly option. They are also great to use with patterns for outdoor nativity scene.
Question No 6: How should I store my outdoor nativity scene after Christmas?
Answer: Proper storage is key to keeping your outdoor nativity scene in good condition. Clean the figures before storing them. Remove any dirt or debris. Let them dry completely. Wrap each figure individually in bubble wrap or packing paper. This will protect them from scratches and damage. Store the figures in a dry, cool place. A garage, basement, or attic are good options. Avoid storing them in a damp or humid environment. This can cause mold and mildew to grow. Label the storage containers clearly. This will make it easier to find the figures next year. This will help you reuse your patterns for outdoor nativity scene for years to come!
