Have you ever made a pizza outside? It is super fun! But, the pizza dough can be tricky. Do you need special pizza dough for your outdoor pizza oven? Let’s learn how to make the best pizza ever!
Making pizza at home is a great activity. You can invite friends over. You can create your own toppings. The most important part is the dough. The right dough makes the pizza taste amazing. Let’s find out how to make perfect dough.
Imagine the smell of wood-fired pizza. Think about crispy crust and melted cheese. Using an outdoor pizza oven takes practice. The pizza dough is key to success. It needs to be strong and tasty. Let’s get started!
Key Takeaways
- Perfect pizza dough for an outdoor pizza oven needs high gluten for strength.
- Use “00” flour for a soft, chewy crust, ideal for high temperatures.
- Cold fermentation (2-3 days) enhances flavor and improves dough texture.
- Maintain oven temperature between 700-900°F for best cooking results.
- Experiment with hydration levels (60-70%) to adjust dough consistency.
Best Flour for Outdoor Pizza Oven Dough

Choosing the right flour is very important. It makes a big difference in your pizza. Different flours have different strengths. This strength is called gluten. Gluten makes the dough stretchy. Strong dough is needed for outdoor pizza ovens. The high heat cooks the pizza very fast. The dough needs to hold its shape. So, what flour should you use?
- “00” flour makes a soft crust.
- Bread flour has more gluten.
- All-purpose flour can work in a pinch.
- Semolina flour adds a nutty taste.
- Experiment to find your favorite.
“00” flour is a great choice for pizza dough. It is very finely ground. This flour makes a soft and light crust. Bread flour is another good option. It has more gluten than all-purpose flour. This makes the dough stronger and chewier. All-purpose flour can work if you don’t have the others. But, the crust might not be as good. Some people like to mix different flours. Try adding a little semolina flour. It will give your crust a nice, nutty flavor.
Why is “00” Flour Recommended?
Have you ever wondered why chefs love “00” flour? It’s all about the texture. “00” flour is ground very, very finely. This makes the dough smooth. It also helps create a light, airy crust. Imagine biting into a pizza with a delicate, bubbly edge. That’s what “00” flour can do! It absorbs water well. This creates a soft, pliable dough. The high heat of outdoor pizza ovens needs this type of dough. It cooks quickly and evenly.
Can I Mix Different Flours?
Mixing flours can be a fun experiment! Do you like a crispy crust? Try adding some semolina flour. Want a chewier texture? Mix in some bread flour. Each flour adds something unique. The key is to balance the flavors and textures. Think of it like mixing paints. You can create your own special color. With flour, you can create your own special crust. Start with a basic recipe. Then, slowly add different flours. See what you like best!
What About Gluten-Free Flour?
Gluten-free pizza is becoming more popular. Do you have friends who can’t eat gluten? There are many gluten-free flours to choose from. Almond flour, rice flour, and tapioca flour are good options. Making gluten-free dough can be tricky. It doesn’t stretch like regular dough. You might need to add a binder like xanthan gum. This helps hold the dough together. Don’t be afraid to try different recipes. With a little practice, you can make delicious gluten-free pizza!
No matter which flour you choose, always use fresh ingredients. Good flour makes good dough. Good dough makes great pizza. Experiment with different types. Have fun making your own pizza dough for an outdoor pizza oven. Enjoy the delicious results.
Fun Fact or Stat: “00” flour is named for its texture. It is the finest grind of flour available.
Hydration Levels for Pizza Dough Success

Hydration means how much water is in the dough. Getting the right hydration is crucial. Too little water makes the dough dry. Too much water makes it sticky. The perfect hydration level depends on the flour. It also depends on the weather. High humidity might need less water. Dry weather might need more. Most pizza dough recipes use 60-70% hydration. This means 60-70 grams of water for every 100 grams of flour. Start with the recipe. Adjust as needed.
- 60-70% hydration is a good starting point.
- Adjust based on how the dough feels.
- Too dry? Add a little water.
- Too sticky? Add a little flour.
- Use room temperature water.
- Mix water and flour slowly.
When you mix the dough, pay attention to how it feels. If the dough is too dry, it will be hard to work with. It might crack when you stretch it. Add a little water, one tablespoon at a time. Mix it in well before adding more. If the dough is too sticky, it will stick to your hands. It will be hard to shape. Add a little flour, one tablespoon at a time. Mix it in well before adding more. Remember, small changes can make a big difference. Using room temperature water helps the dough come together. Mix the water and flour slowly. This helps the flour absorb the water evenly.
Why Does Hydration Matter?
Have you ever baked cookies? The amount of liquid matters a lot! It’s the same with pizza dough. Hydration affects the texture and taste. More water makes a lighter, airier crust. Less water makes a denser, crispier crust. The water helps develop the gluten. Gluten is what makes the dough stretchy. Experiment with hydration levels. Find what works best for you. Your perfect pizza awaits!
How to Tell if Dough is Too Wet?
Sticky dough can be frustrating. Imagine trying to shape a pizza that sticks to everything! Too much water makes the dough hard to handle. It will cling to your hands and the counter. Don’t panic! Add a little flour, one tablespoon at a time. Knead the dough until it feels smooth and elastic. Over time, you’ll get a feel for the right hydration. Practice makes perfect!
Can I Use Cold Water?
Using cold water can slow down the yeast. Yeast helps the dough rise. Most recipes call for lukewarm or room temperature water. This activates the yeast properly. Cold water might be useful in some cases. For example, if you want to slow down the fermentation. This is called “cold fermentation.” It can develop deeper flavors. But, for most recipes, stick to lukewarm water. It will give you the best results.
Perfect hydration is key to great pizza dough. It takes some practice to get right. Don’t be afraid to experiment. Keep notes on what works and what doesn’t. Soon, you’ll be a pizza-making expert. Enjoy the process and the delicious pizza!
Fun Fact or Stat: Professional pizza makers often adjust hydration by even 1-2% to account for daily weather changes.
Kneading Techniques for Strong Dough

Kneading is like giving the dough a massage. It helps develop the gluten. Gluten makes the dough strong and stretchy. There are different ways to knead dough. You can use your hands. You can use a mixer. Kneading by hand takes practice. But, it helps you feel the dough. You can tell when it’s ready. A mixer makes it easier. But, you need to watch it closely. Over-kneading can make the dough tough. Whether you use your hands or a mixer, the goal is the same. You want a smooth, elastic dough.
- Knead for 8-10 minutes by hand.
- Knead for 5-7 minutes with a mixer.
- The dough should be smooth and elastic.
- Use a floured surface to prevent sticking.
- Don’t over-knead the dough.
To knead by hand, start with a clean, floured surface. Press the dough down with your hands. Then, fold it over. Push it away from you. Turn the dough and repeat. Do this for 8-10 minutes. If using a mixer, use the dough hook attachment. Mix on low speed for 5-7 minutes. Check the dough often. It should be smooth and elastic. If it’s still sticky, add a little flour. If it’s too dry, add a little water. Be careful not to over-knead. This can make the dough tough. Over-kneaded dough will be hard to stretch. It might also be hard to shape. The right amount of kneading makes all the difference.
Why is Kneading Important?
Imagine stretching a rubber band. It needs to be strong enough to pull without breaking. Kneading does the same thing for pizza dough! It develops the gluten. This makes the dough stretchy and strong. Strong dough can hold its shape in the hot oven. It also creates a nice, airy crust. Kneading is a crucial step. Don’t skip it!
How to Tell if Dough is Kneaded Enough?
The windowpane test is a cool trick. Can you see through your dough? After kneading, take a small piece. Gently stretch it between your fingers. If you can stretch it thin enough to see light through it, it’s ready. If it tears easily, it needs more kneading. This test shows how well the gluten has developed. It’s a great way to check your progress!
Can I Over-Knead Dough?
Yes, over-kneading is possible. Imagine stretching that rubber band too much. It will lose its shape! Over-kneaded dough can become tough. It will be hard to stretch and shape. If you’re using a mixer, watch the dough closely. Stop kneading when it’s smooth and elastic. If kneading by hand, pay attention to how it feels. It should be smooth and not too stiff.
Kneading is an art. It takes practice to master. But, with a little patience, you can make perfect dough. Remember to feel the dough. Adjust as needed. Soon, you’ll be kneading like a pro. Your pizza dough for your outdoor pizza oven will be amazing!
Fun Fact or Stat: The word “knead” comes from the Old English word “cnedan,” which means to press or rub.
Fermentation Process for Flavor
Fermentation is when the yeast eats the sugars in the flour. This creates gas. The gas makes the dough rise. Fermentation also develops flavor. There are two main types of fermentation. Bulk fermentation is when the dough rises in one big piece. Proofing is when the dough rises after it’s shaped. Both are important for good pizza dough. Cold fermentation is when you let the dough rise in the fridge. This slows down the process. It also develops more complex flavors.
- Bulk ferment for 1-2 hours at room temperature.
- Proof for 30-60 minutes after shaping.
- Cold ferment for 24-72 hours in the fridge.
- Use a covered bowl to prevent drying.
- Punch down the dough to release air.
- Let the dough come to room temperature before baking.
For bulk fermentation, place the dough in a covered bowl. Let it rise at room temperature for 1-2 hours. The dough should double in size. After it has doubled, punch it down to release the air. Then, shape the dough into balls. For proofing, place the dough balls on a floured surface. Cover them loosely. Let them rise for 30-60 minutes. For cold fermentation, place the dough in the fridge. Let it rise for 24-72 hours. The longer it ferments, the more flavor it will have. Before baking, let the dough come to room temperature. This will make it easier to stretch.
Why is Fermentation Important?
Imagine a loaf of bread without any air bubbles. It would be flat and dense! Fermentation is what gives pizza dough its light, airy texture. The yeast creates bubbles of carbon dioxide. These bubbles make the dough rise. Fermentation also develops complex flavors. It’s like aging cheese or wine. The longer it ferments, the more flavor it has!
How to Cold Ferment Dough?
Cold fermentation is like giving your dough a spa day. It slows down the yeast activity. This allows the flavors to develop slowly. Place the dough in a covered container in the fridge. Let it sit for 24-72 hours. The longer it sits, the more flavor it will have. When you’re ready to bake, take the dough out. Let it come to room temperature. This will make it easier to stretch and shape.
Can I Over-Ferment Dough?
Yes, over-fermentation is possible. Imagine leaving bread dough out for too long. It will collapse! Over-fermented dough can become sour and weak. It might also be sticky and hard to handle. Watch the dough closely during fermentation. If it doubles in size too quickly, punch it down. Then, put it in the fridge to slow down the process. Don’t let it rise for too long at room temperature.
Fermentation is a key step in making great pizza dough for an outdoor pizza oven. It develops flavor and texture. Experiment with different fermentation times. See what works best for you. Enjoy the delicious results!
Fun Fact or Stat: Some pizza makers ferment their dough for up to a week for an incredibly complex flavor.
Shaping Techniques for Perfect Pizzas
Shaping the dough is like sculpting. You’re turning a ball of dough into a pizza. There are different ways to shape dough. You can use your hands. You can use a rolling pin. Using your hands gives you more control. It also preserves the air bubbles. A rolling pin is faster. But, it can flatten the dough. The goal is to create a round, even crust. Avoid tearing the dough. A little practice will make perfect pizzas.
- Use your hands to stretch the dough.
- Avoid using a rolling pin if possible.
- Start from the center and work outwards.
- Create a slightly thicker edge.
- Handle the dough gently.
To shape the dough by hand, start with a floured surface. Gently flatten the dough ball with your fingers. Then, lift the dough and stretch it. Use your knuckles to stretch from the center outwards. Rotate the dough as you stretch. This will help create a round shape. If the dough tears, gently pinch it back together. Avoid using a rolling pin if possible. It can flatten the dough and remove the air bubbles. Create a slightly thicker edge. This will give you a nice crust. Handle the dough gently. It’s delicate. With a little practice, you’ll be shaping pizzas like a pro.
Why is Shaping Important?
Imagine a pizza with a lumpy, uneven crust. It wouldn’t cook evenly! Shaping the dough is important. It creates a uniform thickness. This ensures that the pizza cooks evenly. It also creates a nice shape. A round pizza is more appealing. Proper shaping leads to a better tasting pizza.
How to Avoid Tearing the Dough?
Tearing the dough can be frustrating. It means the dough is too thin or too dry. Make sure your dough is properly hydrated. Let it rest at room temperature before shaping. This will make it more elastic. Handle the dough gently. Avoid stretching it too much at once. If it starts to tear, pinch it back together. Be patient. With practice, you’ll learn how to handle the dough without tearing it.
Can I Use a Rolling Pin?
A rolling pin can be tempting. It’s a quick way to flatten the dough. However, it can also flatten the air bubbles. This results in a denser crust. If you must use a rolling pin, be gentle. Don’t press too hard. Try to stretch the dough by hand first. Then, use the rolling pin to even it out. Remember, the best crusts are shaped by hand.
Shaping is an art. It takes practice and patience. But, with a little effort, you can make perfect pizzas. Remember to handle the dough gently. Avoid tearing it. Create a nice, even crust. Your pizza dough for your outdoor pizza oven will be amazing!
Fun Fact or Stat: Professional pizza makers can shape a pizza in just a few seconds!
Outdoor Pizza Oven Temperature Tips
The temperature of your outdoor pizza oven is very important. It affects how the pizza cooks. Too hot, and the crust will burn. Too cold, and the pizza will be soggy. Most outdoor pizza ovens need to be between 700-900°F. This high heat cooks the pizza quickly. It also creates a crispy crust. Using a pizza stone or steel helps. It holds the heat. It also cooks the pizza evenly. Always use a thermometer to check the temperature.
- Aim for 700-900°F.
- Use a pizza stone or steel.
- Preheat the oven for at least 30 minutes.
- Check the temperature with a thermometer.
- Adjust the fire to maintain the temperature.
To get the right temperature, preheat the oven for at least 30 minutes. Use a pizza stone or steel. This will help hold the heat. Check the temperature with a thermometer. Adjust the fire to maintain the temperature. If the oven is too hot, let the fire die down a bit. If it’s too cold, add more wood. Keep an eye on the pizza while it’s cooking. It should only take a few minutes. Rotate the pizza to ensure even cooking. The right temperature makes all the difference.
Why is Temperature So Important?
Imagine trying to bake a cake in a cold oven. It wouldn’t rise properly! Temperature is crucial for pizza dough. High heat creates a crispy, charred crust. It also melts the cheese perfectly. The right temperature ensures that the pizza cooks quickly. This prevents the toppings from becoming soggy. It’s all about balance!
How to Measure Oven Temperature?
Using a thermometer is the best way to measure the temperature. There are different types of thermometers. Infrared thermometers are quick and easy. They measure the surface temperature. Oven thermometers are placed inside the oven. They give a more accurate reading. Choose a thermometer that works best for you. Check the temperature regularly. Adjust the fire as needed.
What if My Oven is Too Hot?
A too-hot oven can burn the crust. This ruins the pizza. If your oven is too hot, let the fire die down a bit. Remove some of the wood. Open the oven door slightly to release heat. Wait a few minutes for the temperature to drop. Then, try again. Be patient. It takes time to master the temperature.
Getting the temperature right is essential. It might take some practice. But, with a little effort, you can make perfect pizzas. Remember to use a thermometer. Adjust the fire as needed. Your pizza dough for your outdoor pizza oven will taste amazing!
Fun Fact or Stat: Neapolitan pizza must be cooked at 905°F (485°C) for no more than 90 seconds!
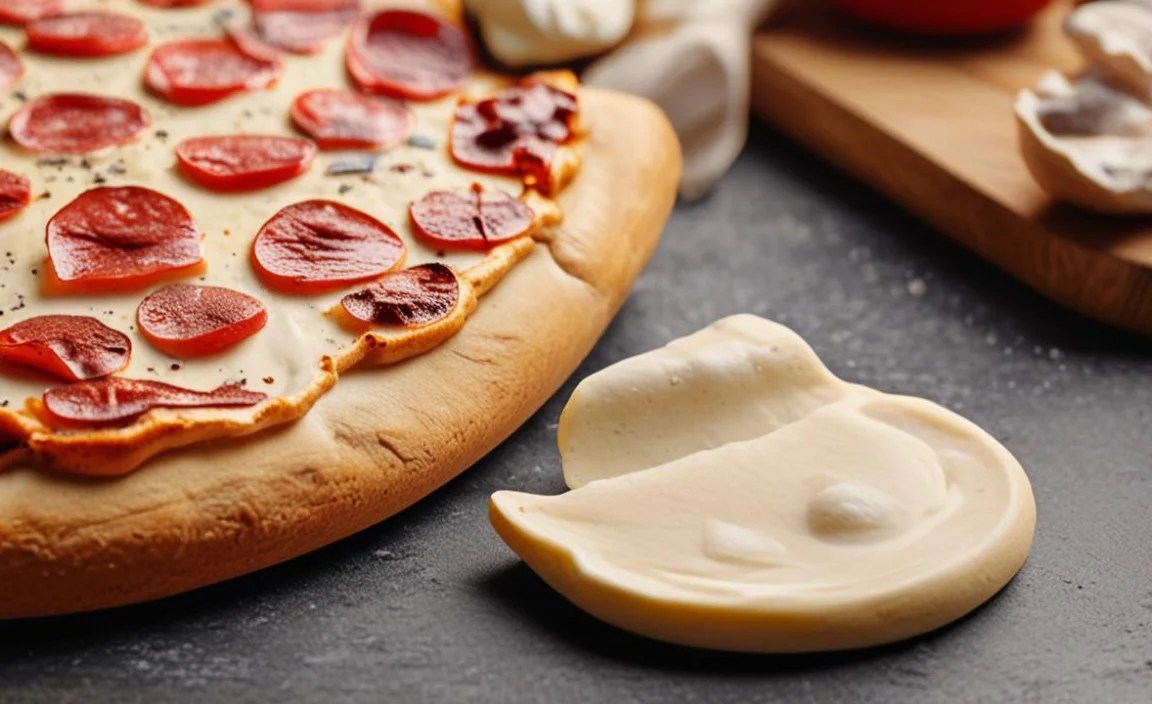
Topping Ideas for Outdoor Pizza Ovens
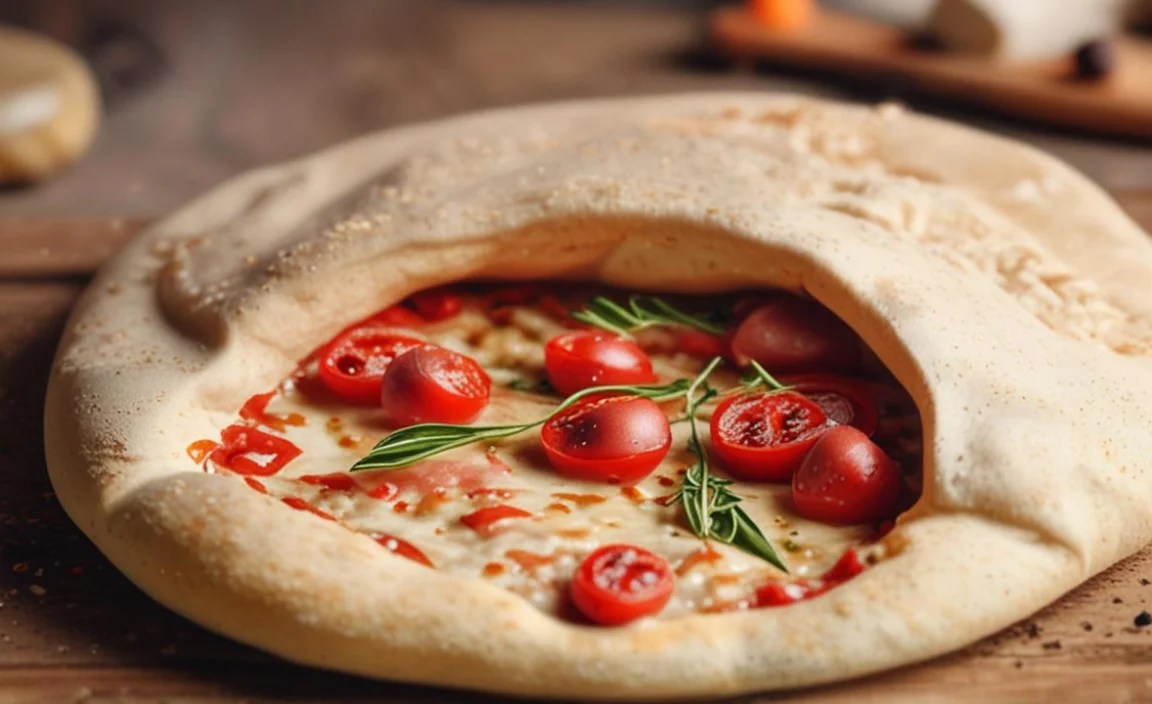
Toppings are what make a pizza special. There are so many different combinations. You can use classic toppings like pepperoni and cheese. You can get creative with vegetables and herbs. Fresh ingredients are always best. They add more flavor. When choosing toppings for an outdoor pizza oven, keep it simple. Too many toppings can make the pizza soggy. Focus on quality over quantity. Less is often more.
- Use fresh ingredients.
- Don’t overload the pizza.
- Consider classic combinations.
- Experiment with different flavors.
- Add toppings after shaping the dough.
Some classic combinations include Margherita (tomato, mozzarella, basil). Pepperoni and mushroom is another favorite. For something different, try roasted vegetables. Add some goat cheese and balsamic glaze. Fresh herbs like basil and oregano add a lot of flavor. Don’t be afraid to experiment. Try different combinations. See what you like best. Add the toppings after shaping the dough. Distribute them evenly. Don’t overload the pizza. Too many toppings can weigh it down. The crust won’t cook properly.
Why are Toppings Important?
Imagine a pizza with just plain dough. It would be boring! Toppings add flavor and texture. They make the pizza exciting. They also add nutrients. Vegetables provide vitamins and minerals. Cheese provides calcium and protein. Toppings are what make each pizza unique.
How to Prevent Soggy Pizza?
Soggy pizza is a disappointment. Too many wet toppings can cause this. Drain any excess liquid from vegetables. Use a light hand with the sauce. Don’t overload the pizza with toppings. Cook the pizza at a high temperature. This will help the crust cook quickly. It will also prevent the toppings from becoming soggy.
What About Unusual Toppings?
Don’t be afraid to get creative with toppings. Try adding grilled pineapple. Add some spicy sausage. Use different types of cheese. Experiment with different sauces. Think outside the box. You might discover a new favorite combination. The possibilities are endless!
Toppings are a fun way to customize your pizza. Use fresh ingredients. Don’t overload the pizza. Experiment with different flavors. Your pizza dough for your outdoor pizza oven will be a masterpiece!
Fun Fact or Stat: The world’s most expensive pizza is topped with white truffles and gold leaf!
Table of Pizza Dough Types
Here’s a comparison of different dough types for your pizza:
| Dough Type | Texture | Flavor | Best For |
|---|---|---|---|
| Neapolitan | Soft, airy | Slightly tangy | High-heat ovens |
| New York Style | Thin, crispy | Savory | Folding and eating |
| Sicilian | Thick, spongy | Rich, buttery | Square pizzas |
| Gluten-Free | Varied, can be dense | Depends on flour blend | Dietary restrictions |
Summary
Making pizza dough for an outdoor pizza oven is a fun and rewarding experience. Choosing the right flour is crucial. “00” flour and bread flour are great options. Hydration levels should be around 60-70%. Kneading develops the gluten. This makes the dough strong. Fermentation develops flavor and texture. Shaping the dough takes practice. The oven temperature should be between 700-900°F. Use fresh toppings and don’t overload the pizza.
Remember to experiment and have fun. Making pizza is an art. It takes time to master. With a little practice, you can make amazing pizzas. Enjoy the process and the delicious results.
Conclusion
Making pizza dough can be easy. Using these steps, your pizza will taste great. You can choose the best flour. You can knead the dough well. You can also add your favorite toppings. Making pizza dough for an outdoor pizza oven is a fun way to make food. You will have fun making pizza with your family and friends.
Frequently Asked Questions
Question No 1: What is the best flour for pizza dough in an outdoor pizza oven?
Answer: “00” flour is often recommended. It creates a light, airy crust. Bread flour is also a good choice. It has a higher gluten content. All-purpose flour can work too. But, the texture might not be as good. For the best pizza dough for your outdoor pizza oven, experiment with “00” and bread flour. You can also add a bit of semolina for a nutty flavor. Remember to use fresh flour for the best results.
Question No 2: How much water should I use in my pizza dough?
Answer: Hydration is key. Most recipes use 60-70% hydration. This means 60-70 grams of water per 100 grams of flour. Start with this ratio. Adjust as needed. If the dough is too dry, add a little water. If it’s too sticky, add a little flour. Room temperature water works best. Mix the water and flour slowly. This helps the flour absorb the water evenly. The right amount of water makes all the difference. Getting the pizza dough for your outdoor pizza oven right will make the best pizza!
Question No 3: How long should I knead my pizza dough?
Answer: Kneading develops the gluten. This makes the dough strong. Knead by hand for 8-10 minutes. Use a mixer for 5-7 minutes. The dough should be smooth and elastic. Use a floured surface to prevent sticking. Don’t over-knead the dough. This can make it tough. The windowpane test can help. Stretch a small piece of dough. If you can see light through it, it’s ready. Make sure you knead the pizza dough for your outdoor pizza oven long enough for a good crust.
Question No 4: What is cold fermentation, and why is it important?
Answer: Cold fermentation is when you let the dough rise in the fridge. This slows down the process. It also develops more complex flavors. Cold ferment for 24-72 hours. The longer it ferments, the more flavor it will have. Before baking, let the dough come to room temperature. This will make it easier to stretch. Cold fermentation is a great way to improve the taste of your pizza dough for your outdoor pizza oven. It’s like aging cheese or wine.
Question No 5: What temperature should my outdoor pizza oven be?
Answer: The ideal temperature is 700-900°F. This high heat cooks the pizza quickly. It also creates a crispy crust. Use a pizza stone or steel. This helps hold the heat. Preheat the oven for at least 30 minutes. Check the temperature with a thermometer. Adjust the fire to maintain the temperature. The right temperature makes all the difference. Make sure you get the best pizza dough for your outdoor pizza oven and the right temperature for amazing results!
Question No 6: How can I prevent my pizza from being soggy?
Answer: Soggy pizza is a common problem. To prevent it, use fresh ingredients. Drain any excess liquid from vegetables. Use a light hand with the sauce. Don’t overload the pizza with toppings. Cook the pizza at a high temperature. This will help the crust cook quickly. It will also prevent the toppings from becoming soggy. Use the perfect pizza dough for your outdoor pizza oven, the right temperature, and toppings for best results!
