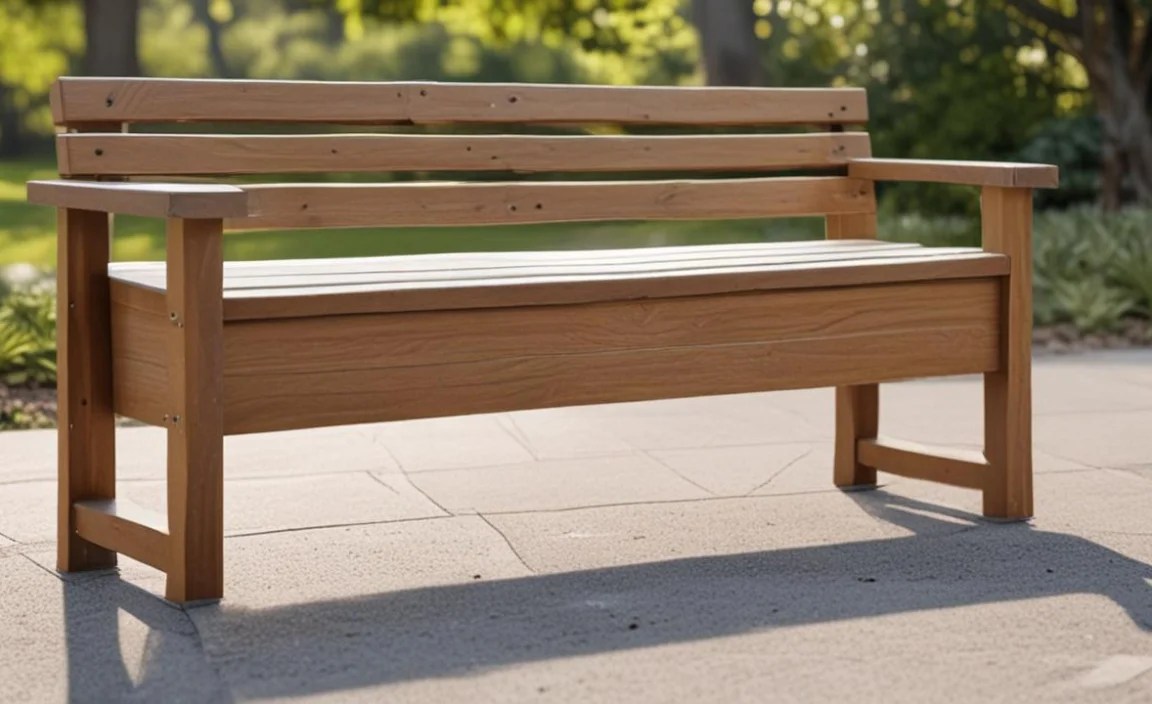
Do you need a place to sit outside? Do you also need more storage? What if you could have both? You can with plans for outdoor bench with storage. These benches are super useful. They give you a comfy spot to relax. Plus, they hold your outdoor stuff. Let’s explore how to build one!
Key Takeaways
- Plans for outdoor bench with storage help you build a bench and add space.
- Building a bench yourself saves money and feels rewarding.
- Outdoor benches with storage keep your yard tidy and organized.
- You can customize your bench to match your style and needs.
- These benches are great for gardens, patios, and porches.
Finding the Right Bench Plan
Finding the right plans for outdoor bench with storage is important. First, think about where you’ll put the bench. Is it for a small balcony or a big backyard? Measure the space carefully. You don’t want a bench that’s too big or too small. Next, decide what you want to store in it. Will it be garden tools, toys, or cushions? This will help you choose the right size and type of storage. Look at different plans online or in books. Some are simple, while others are more complex. Pick one that matches your skill level. Don’t be afraid to ask for help if you need it. Building a bench should be fun, not frustrating!
- Measure your space before choosing a plan.
- Think about what you want to store inside.
- Choose a plan that matches your skills.
- Read reviews of the plans if available.
- Consider the style of your outdoor space.
Once you have a plan, read it carefully. Make sure you understand all the steps. Check the list of materials you’ll need. Do you have all the tools? If not, you might need to borrow or buy them. Before you start cutting wood, double-check your measurements. A mistake now can cause problems later. Take your time and be careful. Building a bench is like solving a puzzle. Each piece needs to fit just right. When you’re finished, you’ll have a beautiful and useful bench. It will be a great place to relax and enjoy the outdoors.
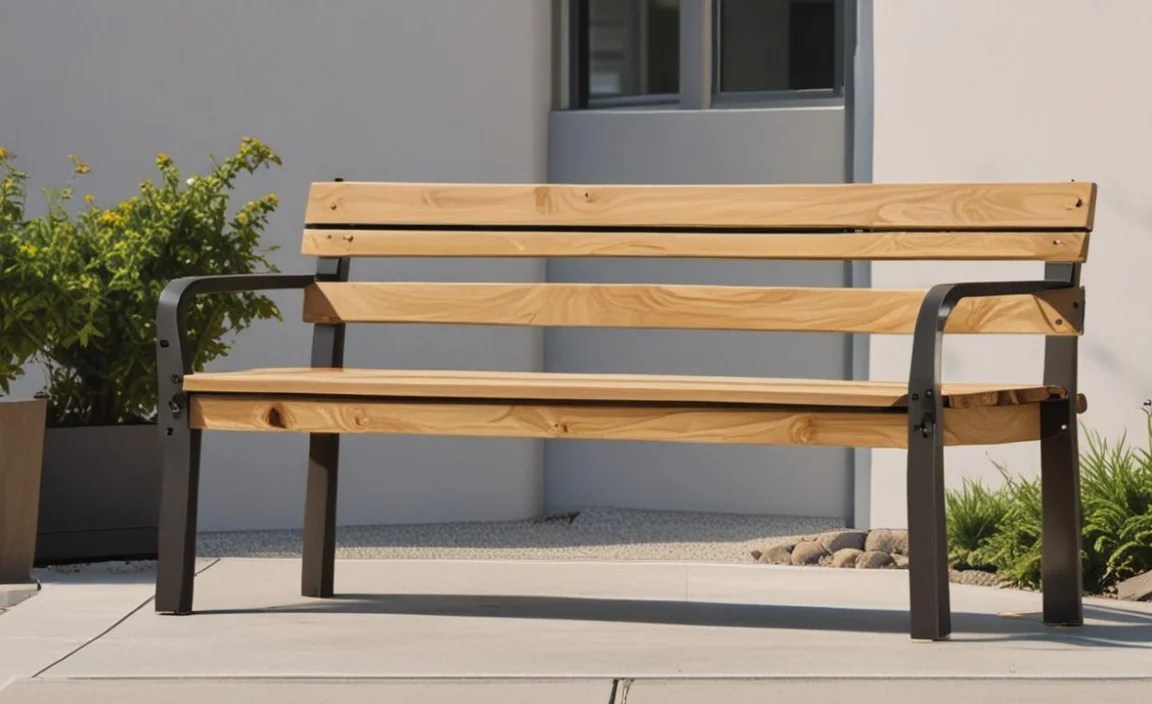
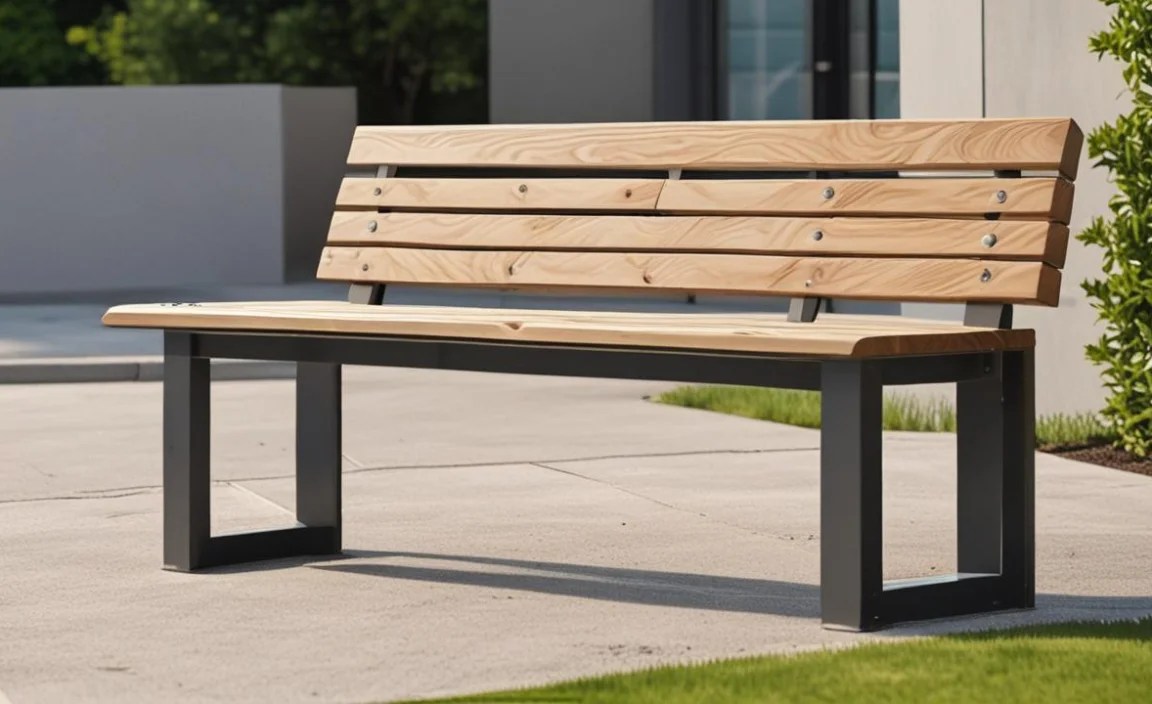
What Style Suits Your Yard?
Think about your yard. What style is it? Is it modern and sleek? Or is it more rustic and cozy? Your bench should match the style of your yard. A modern yard might look good with a simple, clean-lined bench. A rustic yard might look better with a bench made from rough wood. Consider the colors in your yard too. Do you want the bench to blend in or stand out? You can paint or stain the bench to match your color scheme. Remember, the goal is to create a space that you love. Your bench should be a part of that.
How Much Storage Do You Need?
How much stuff do you need to store? This is a very important question. If you have lots of garden tools, you’ll need a big storage space. If you only need to store a few cushions, a smaller space will do. Some benches have one big storage area. Others have smaller compartments. Think about how you want to organize your stuff. Do you want everything in one place? Or do you want to keep things separate? The right storage space will make your bench much more useful.
What Materials Should You Use?
The type of wood you use matters. Some woods are better for outdoor use than others. Cedar and redwood are good choices. They are naturally resistant to rot and insects. Pressure-treated wood is another option. It has been treated to resist decay. Pine is a cheaper option, but it needs to be sealed and protected. Consider the look of the wood too. Do you want a smooth, polished finish? Or do you want a more natural, rustic look? The right materials will make your bench last longer and look better.
Fun Fact or Stat: Did you know that cedar wood is naturally resistant to insects and decay? This makes it a great choice for outdoor furniture!
Gathering Your Tools and Materials

Before you start building, gather all your tools and materials. This will save you time and frustration later. Make a list of everything you need. Check it twice. Common tools include a saw, drill, screwdriver, and measuring tape. You’ll also need safety glasses and gloves. Wood is the main material, of course. Choose the right type of wood for your project. You’ll also need screws, nails, or bolts to hold everything together. Don’t forget sandpaper and a finish to protect the wood. Organization is key. Keep your tools and materials in a safe and accessible place. This will help you work more efficiently and avoid accidents.
- Make a detailed list of tools and materials.
- Gather everything before you start building.
- Wear safety glasses and gloves.
- Keep your workspace clean and organized.
- Double-check your measurements before cutting.
- Store materials properly to avoid damage.
Think about the order in which you’ll need the materials. Put the most frequently used items within easy reach. This will prevent you from constantly searching for things. A well-organized workspace is a safe workspace. Keep cords and tools out of walkways. Clean up sawdust and scraps regularly. When you’re finished for the day, put everything away. This will help you stay organized and prevent accidents. Preparing well makes the building process much smoother. You’ll enjoy the project more, and you’ll be proud of the results.
What Safety Gear Do You Need?
Safety is super important. Always wear safety glasses when cutting or drilling wood. This will protect your eyes from flying debris. Gloves will protect your hands from splinters and rough edges. A dust mask will prevent you from breathing in sawdust. Earplugs can protect your ears from loud noises. If you’re using power tools, read the instructions carefully. Make sure you understand how to use them safely. Never work when you’re tired or distracted. A little bit of safety goes a long way.
How Do You Choose the Right Wood?
Choosing the right wood is key. Softwoods like pine are easy to work with. But they are not as durable as hardwoods. Hardwoods like oak and maple are stronger. But they are also more expensive. Consider the climate where you live. If you live in a wet area, choose a wood that is resistant to rot. Cedar and redwood are good choices. If you live in a dry area, you can use other types of wood. Think about the look of the wood too. Do you want a smooth, even grain? Or do you want a more rustic, natural look?
What Fasteners Should You Use?
Screws, nails, or bolts? Which should you use? Screws are good for holding things together tightly. They are easy to remove if you need to make changes. Nails are faster to use than screws. But they are not as strong. Bolts are the strongest option. They are good for holding heavy pieces of wood together. Consider the size and weight of your project. This will help you choose the right fasteners. Always use fasteners that are designed for outdoor use. They will be resistant to rust and corrosion.
Fun Fact or Stat: Screws provide about twice the holding power of nails! They’re a great choice for a sturdy bench.
Cutting the Wood Accurately

Cutting the wood accurately is very important. It ensures that your bench fits together properly. Use a measuring tape to mark the wood. Double-check your measurements before you cut. A small mistake can throw off the whole project. Use a sharp saw to cut the wood. A dull saw can cause splintering and uneven cuts. Cut slowly and carefully. Follow the lines you marked. If you’re using a power saw, wear safety glasses and earplugs. Practice on scrap wood before you cut the real pieces. This will help you get a feel for the saw. Accurate cuts are the foundation of a well-built bench.
- Use a sharp saw for clean cuts.
- Measure and mark the wood carefully.
- Double-check your measurements before cutting.
- Cut slowly and follow the lines.
- Use safety glasses and earplugs.
- Practice on scrap wood first.
Think about the order in which you’ll cut the pieces. Start with the largest pieces. This will give you more room to work. Cut the smaller pieces last. This will help you avoid mistakes. Label each piece of wood as you cut it. This will help you keep track of everything. A well-organized cutting process will make the assembly process much easier. You’ll be less likely to make mistakes, and you’ll be more efficient. Remember, patience is key. Take your time and focus on accuracy.
How Do You Measure Wood Accurately?
Accuracy starts with measuring. Use a good quality measuring tape. Make sure it’s not bent or damaged. Hold the tape straight and tight. Read the measurements carefully. Don’t guess. Mark the wood with a sharp pencil. A fine-tipped marker can also work. Double-check your measurements before you cut. It’s always better to be safe than sorry. Accurate measurements are the key to a successful project.
What’s the Best Way to Cut Straight Lines?
Straight lines are super important. Use a straight edge as a guide. A level or a long ruler will work. Clamp the straight edge to the wood. This will keep it from moving. Use a saw that is designed for straight cuts. A circular saw or a table saw is a good choice. Cut slowly and carefully. Follow the straight edge. If you’re using a hand saw, use long, smooth strokes. Keep the saw blade aligned with the straight edge.
How Do You Avoid Splintering the Wood?
Splintering is no fun. Use a sharp saw blade. A dull blade is more likely to cause splintering. Cut slowly and carefully. Don’t force the saw. Score the wood before you cut it. This will help prevent splintering. Place masking tape along the cut line. This will also help prevent splintering. If you do get splinters, sand them down with sandpaper. A smooth finish will make your bench look much nicer.
Fun Fact or Stat: Scoring the wood before cutting helps prevent splintering. Use a utility knife to create a shallow groove along the cut line!
Assembling the Bench Frame
Assembling the bench frame is a crucial step. It gives your bench its shape and strength. Follow your plans for outdoor bench with storage closely. Start by laying out the pieces of wood. Make sure they are in the right order. Use screws or bolts to attach the pieces together. Screws are easier to use, but bolts are stronger. Make sure the frame is square. Use a carpenter’s square to check the corners. If the frame is not square, the bench will be wobbly. Tighten all the screws or bolts. The frame should be sturdy and solid. A strong frame is the foundation of a durable bench.
- Lay out the pieces according to the plan.
- Use screws or bolts to attach the pieces.
- Check the corners with a carpenter’s square.
- Make sure the frame is square.
- Tighten all the screws or bolts.
- The frame should be sturdy and solid.
Think about the order in which you assemble the pieces. Start with the main supports. These are the pieces that will bear the most weight. Attach the side pieces next. Then attach the top and bottom pieces. This will create a strong and stable frame. Use clamps to hold the pieces together while you screw or bolt them. This will help you keep everything aligned. A well-assembled frame will make the rest of the project much easier. You’ll be able to build a beautiful and functional bench that will last for years.
How Do You Keep the Frame Square?
A square frame is super important. Use a carpenter’s square to check the corners. The corners should be exactly 90 degrees. If they are not, adjust the pieces until they are. Measure the diagonals of the frame. The diagonals should be the same length. If they are not, the frame is not square. Use clamps to hold the pieces in place while you adjust them. Once the frame is square, tighten all the screws or bolts.
What’s the Best Way to Attach the Pieces?
Screws or bolts? It depends on the project. Screws are easier to use. But bolts are stronger. If you’re using screws, use screws that are designed for wood. They will have a coarse thread that will grip the wood tightly. If you’re using bolts, use washers under the nuts. This will prevent the nuts from digging into the wood. Tighten the screws or bolts firmly. But don’t overtighten them. You could strip the threads or crack the wood.
How Do You Make Sure the Frame Is Level?
A level frame is also important. Use a level to check the top of the frame. The bubble in the level should be in the center. If it’s not, adjust the legs of the frame until it is. You can use shims to level the legs. Shims are thin pieces of wood that you can place under the legs. Once the frame is level, it will be stable and safe to use.
Fun Fact or Stat: The Pythagorean Theorem (a² + b² = c²) can help you ensure your frame is square! Measure the sides and diagonals!
| Feature | Screws | Bolts |
|---|---|---|
| Strength | Good | Excellent |
| Ease of Use | Easy | Moderate |
| Cost | Lower | Higher |
| Removal | Easy | Moderate |
Building the Storage Compartment
Building the storage compartment is next. This is where you’ll keep your outdoor stuff. Measure the inside of the bench frame. Cut the pieces of wood for the storage compartment. Make sure they fit snugly inside the frame. Use screws or nails to attach the pieces together. Create a box-like structure. The bottom of the compartment should be strong enough to hold the weight of your stuff. You can add extra supports if needed. The storage compartment should be easy to access. You can add a lid or a door. Make sure the lid or door fits tightly. This will keep your stuff dry and protected.
- Measure the inside of the bench frame.
- Cut the pieces of wood to fit snugly.
- Use screws or nails to attach the pieces.
- Create a box-like structure.
- Add extra supports if needed.
- Add a lid or a door for easy access.
Think about how you want to organize the storage compartment. Do you want one big open space? Or do you want smaller compartments? You can add dividers to create smaller compartments. This will help you keep your stuff organized. Consider adding a shelf to the compartment. This will give you even more storage space. A well-designed storage compartment will make your bench much more useful. You’ll be able to keep your outdoor stuff organized and protected.
How Do You Make a Strong Bottom?
A strong bottom is super important. The bottom of the storage compartment needs to support the weight of your stuff. Use thick pieces of wood for the bottom. Attach the bottom to the frame with screws or bolts. Add extra supports under the bottom. This will help distribute the weight. You can use 2x4s or 4x4s for the supports. Space the supports evenly. A strong bottom will prevent the storage compartment from sagging or breaking.
Should You Add Dividers or Shelves?
Dividers or shelves? It depends on what you want to store. Dividers are good for separating different types of items. Shelves are good for storing smaller items. Consider the size and shape of your items. This will help you decide whether to add dividers or shelves. You can also add both dividers and shelves. This will give you the most storage options.
How Do You Make a Lid That Fits Tightly?
A tight-fitting lid is very important. It will keep your stuff dry and protected. Measure the opening of the storage compartment. Cut the lid slightly larger than the opening. Use sandpaper to smooth the edges of the lid. Attach hinges to the lid and the frame. The hinges should allow the lid to open and close easily. Add a latch to the lid. This will keep the lid closed securely. A tight-fitting lid will protect your stuff from the weather.
Fun Fact or Stat: Adding a rubber seal around the lid can make your storage compartment even more waterproof!
Adding Finishing Touches and Protection
Adding finishing touches and protection is the final step. This will make your bench look great and last longer. Sand the entire bench. This will smooth out any rough edges or splinters. Use a fine-grit sandpaper for the final sanding. Apply a stain or paint to the bench. This will protect the wood from the weather. Choose a stain or paint that is designed for outdoor use. Apply several coats of stain or paint. Let each coat dry completely before applying the next coat. Add any decorative touches you like. You can add cushions, pillows, or other accessories. Protect your bench from the elements. Cover it with a tarp during the winter. This will help it last for years to come.
- Sand the entire bench smoothly.
- Apply a stain or paint for protection.
- Choose outdoor-rated finishes.
- Apply multiple coats for better protection.
- Add cushions or pillows for comfort.
- Protect the bench during harsh weather.
Think about the overall look you want to achieve. Do you want a rustic look or a modern look? Choose a stain or paint that matches your style. Consider adding a sealant to the bench. This will provide extra protection from the weather. A sealant will also help prevent the wood from cracking or warping. Regular maintenance will keep your bench looking its best. Clean it regularly with soap and water. Reapply stain or paint as needed. With proper care, your bench will last for many years.
What Kind of Stain or Paint Should You Use?
Outdoor stain or paint is a must. Choose a product that is designed for outdoor use. It will be resistant to moisture, sunlight, and mildew. Consider the color of your house and yard. Choose a color that complements your surroundings. You can also choose a clear sealant. This will protect the wood without changing its color. Read the instructions carefully before applying the stain or paint. Follow the manufacturer’s recommendations for best results.
How Do You Protect the Bench from the Weather?
Weather protection is key. Apply a sealant to the bench. This will help protect it from moisture. Cover the bench with a tarp during the winter. This will protect it from snow and ice. Store the bench in a shed or garage if possible. This will provide the best protection from the elements. Regular cleaning will also help protect the bench. Remove any dirt or debris that can damage the wood.
What Decorative Touches Can You Add?
Decorative touches make it personal. Add cushions and pillows for comfort. Choose fabrics that are designed for outdoor use. They will be resistant to fading and mildew. Add potted plants around the bench. This will create a welcoming atmosphere. Hang string lights above the bench. This will create a cozy ambiance. Add a small table next to the bench. This will give you a place to set your drinks and snacks.
Fun Fact or Stat: A coat of marine varnish can provide excellent protection against water damage, especially in coastal areas!
Summary
Plans for outdoor bench with storage are a great way to add seating and storage to your outdoor space. Finding the right plan, gathering your tools and materials, and cutting the wood accurately are important first steps. Assembling the bench frame and building the storage compartment require careful attention to detail. Adding finishing touches and protection will ensure that your bench looks great and lasts for years. Remember to choose the right materials and finishes for outdoor use.
Building your own bench is a rewarding project. You’ll save money, and you’ll have a custom piece of furniture that you can be proud of. Plus, you’ll have extra storage space for your outdoor stuff. Enjoy relaxing on your new bench!
Conclusion
Building an outdoor bench with storage is a fun and useful project. It provides extra seating and valuable storage space. You can customize the bench to match your style and needs. Following plans for outdoor bench with storage carefully ensures a successful build. With a little effort, you can create a beautiful and functional piece of furniture for your outdoor space. Enjoy your new bench!
Frequently Asked Questions
Question No 1: Where can I find good plans for an outdoor bench with storage?
Answer: You can find plans for outdoor bench with storage online. Websites like Pinterest, Etsy, and woodworking forums often have free or paid plans. Home improvement stores sometimes offer free plans or workshops. Libraries and bookstores may have books with woodworking projects. Look for plans that match your skill level and the style you want. Always read reviews or ask for advice before starting a project. This will help you avoid problems and ensure a successful build.
Question No 2: What type of wood is best for an outdoor storage bench?
Answer: The best type of wood for an outdoor storage bench is one that can withstand the elements. Cedar and redwood are naturally resistant to rot and insects. Pressure-treated wood is also a good option. It has been treated to resist decay. Teak is a durable hardwood that is often used for outdoor furniture. Pine is a cheaper option, but it needs to be sealed and protected. Consider the climate where you live. If you live in a wet area, choose a wood that is highly resistant to moisture.
Question No 3: How do I protect my outdoor bench with storage from the weather?
Answer: Protecting your outdoor bench from the weather is important for its longevity. Apply a sealant or stain that is designed for outdoor use. This will help protect the wood from moisture and sunlight. Cover the bench with a tarp during the winter to protect it from snow and ice. Store the bench in a shed or garage if possible. This will provide the best protection from the elements. Clean the bench regularly with soap and water to remove any dirt or debris. Reapply sealant or stain as needed.
Question No 4: What tools do I need to build an outdoor bench with storage?
Answer: To build an outdoor bench with storage, you will need some basic tools. A saw is essential for cutting the wood. A drill is needed for making holes and driving screws. A screwdriver is used for tightening screws. A measuring tape is important for accurate measurements. A carpenter’s square is used for checking corners. Safety glasses and gloves are necessary for protection. A sander will help smooth the wood. Clamps will hold the pieces together while you assemble them.
Question No 5: Can I customize the plans for an outdoor bench with storage?
Answer: Yes, you can definitely customize the plans for outdoor bench with storage. Feel free to adjust the dimensions to fit your space. You can change the style of the bench to match your taste. Add or remove features as needed. For example, you could add a backrest or armrests. You can also customize the storage compartment. Add dividers or shelves to organize your stuff. Choose a different type of wood or finish. Be creative and make the bench your own!
Question No 6: How do I maintain my outdoor bench with storage?
Answer: Maintaining your outdoor bench with storage is easy. Clean it regularly with soap and water. Remove any dirt or debris that can damage the wood. Reapply sealant or stain as needed. Check for loose screws or bolts and tighten them. Inspect the bench for any signs of damage. Repair any cracks or splits in the wood. Cover the bench with a tarp during the winter to protect it from the elements. With proper care, your bench will last for many years. You can keep enjoying your beautiful and functional bench.
