Do you like taking photos? Have you ever wondered how models pose? Taking poses for photo shoots outdoors can be fun. It can also make your pictures look amazing. Let’s learn how to strike a pose.
Taking photos outside is super cool. The sun, trees, and sky make great backgrounds. But knowing how to pose is important. Good poses make your photos even better.
Imagine you are in a park. The sun is shining. You want to take a picture. What pose should you do? Don’t worry. We will show you some awesome poses for photo shoots outdoors. Get ready to smile and have fun.
Key Takeaways
- Knowing great poses for photo shoots outdoors will improve your photos.
- Use natural light to make your skin glow in outdoor pictures.
- Try different angles to find the most flattering poses for photo shoots outdoors.
- Relax and be yourself; your natural smile is always the best.
- Practice your poses in front of a mirror before the photo shoot.
Cool Poses for Outdoor Photo Shoots

Taking photos outside can be a blast. But knowing how to pose can make all the difference. A good pose can show off your personality. It can also make you feel more confident. When thinking about poses for photo shoots outdoors, consider your surroundings. Are you in a park, by the beach, or in a forest? Use the environment to help you create interesting poses. For example, you can lean against a tree or sit on a rock. You can also walk along a path or look out at the view. Think about what makes you feel comfortable and happy. Then, let that shine through in your photos. Remember, the best pose is the one that feels most like you. Don’t be afraid to try new things and have fun. Experiment with different angles, expressions, and movements. You might be surprised at what you discover.
- Stand tall with your shoulders back.
- Look towards the light for a nice glow.
- Try different angles to find your best side.
- Use your hands to frame your face.
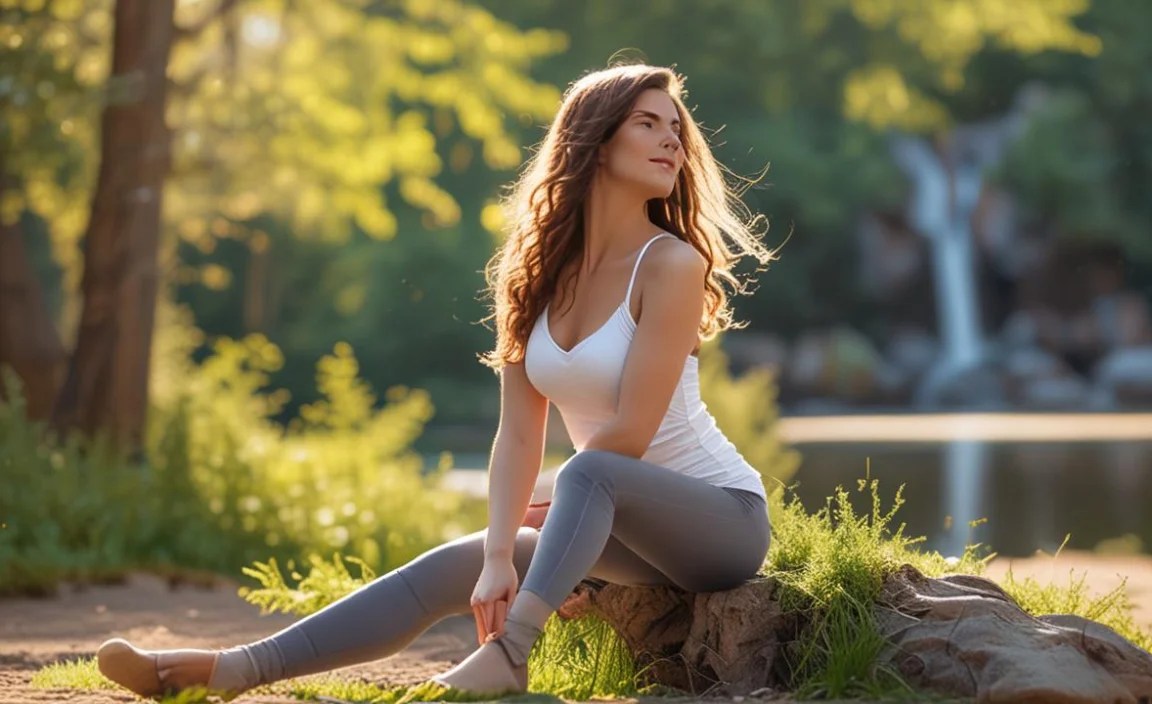
- Lean against a tree for a relaxed look.
- Sit on a rock and look out at the view.
Lighting is key when taking photos outside. The sun can be your best friend or your worst enemy. If the sun is too bright, it can create harsh shadows. It can also make you squint. Try to take photos during the golden hour. This is the hour after sunrise and the hour before sunset. The light is soft and warm during this time. It will make your skin look amazing. If you have to take photos in bright sunlight, find some shade. Stand under a tree or next to a building. This will help to soften the light. Also, pay attention to the background. Make sure there are no distracting elements. A clean background will help to keep the focus on you. Remember, the goal is to create a beautiful and natural-looking photo. With a little bit of planning and practice, you can take amazing photos outside.
Fun Fact or Stat: Did you know that the “golden hour” is often considered the best time for outdoor photography because of the soft, warm light?
How to Use Natural Light
Have you ever noticed how some photos look brighter and more beautiful than others? Often, it’s because of the light. When taking photos outdoors, natural light is your best friend. But how do you use it correctly? First, pay attention to where the sun is. If the sun is behind you, the light will be soft and even on your face. This is great for a classic portrait. If the sun is in front of you, it can create a cool silhouette effect. Just be careful not to look directly at the sun. That can hurt your eyes. You can also use natural light to create interesting shadows. Try standing near a window or a tree to see how the light and shadows play on your face. Remember, the key is to experiment and have fun. The more you practice, the better you will become at using natural light to take amazing photos.
Finding Your Best Angle
Have you ever wondered why some photos of you look better than others? One reason could be the angle. The angle at which you take a photo can make a big difference. Try holding the camera slightly above your head. This can make your face look slimmer. It can also make your eyes look bigger. Avoid taking photos from below. This can make your chin look bigger. Also, pay attention to how you are standing. Standing straight can make you look taller and more confident. Tilting your head slightly can add a touch of playfulness. The best way to find your best angle is to experiment. Take lots of photos from different angles. Then, look at them and see which ones you like best. Don’t be afraid to try new things. You might be surprised at what you discover.
Smiling Naturally for Photos
Do you ever feel awkward when someone tells you to smile for a photo? Many people do. The key is to smile naturally. A fake smile can look forced and unnatural. Think about something that makes you happy. This could be a funny joke, a favorite pet, or a fun memory. Let that feeling shine through in your smile. You can also try laughing. Laughter is contagious and can make your smile look more genuine. Another trick is to relax your face. Tense muscles can make your smile look stiff. Take a deep breath and let your face relax. Remember, the best smile is the one that comes from the heart. Don’t try to force it. Just be yourself and let your natural smile shine through.
Simple Tips for Posing Outdoors
Posing for photos doesn’t have to be hard. There are many simple things you can do. These can make your photos look better. When considering poses for photo shoots outdoors, think about your body. Stand up straight. Keep your shoulders back. This makes you look confident. Don’t slouch. Try putting one foot slightly in front of the other. This can make you look taller. Also, remember to relax your arms. Don’t hold them stiffly at your sides. Bend them slightly. Put your hands in your pockets. Hold a prop like a flower or a book. This will make you look more natural. Most importantly, be yourself. The best photos show your personality. Don’t try to be someone you are not. Just relax and have fun.
- Stand with your weight on one leg.
- Bend your arms slightly for a relaxed look.
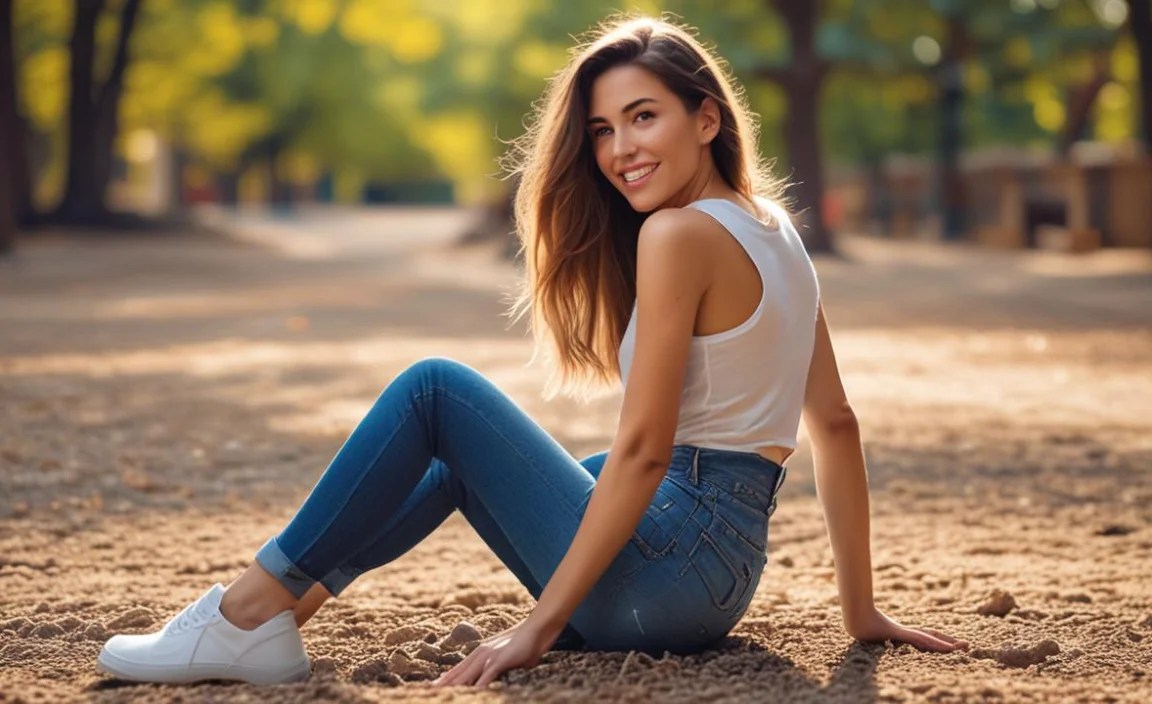
- Look at the camera with a soft smile.
- Turn your body slightly to the side.
- Use your surroundings to your advantage.
One of the best ways to improve your posing is to practice. Stand in front of a mirror. Try different poses. See what looks good and what doesn’t. Pay attention to your posture. Notice how different poses make you feel. Do you feel confident, playful, or relaxed? Choose poses that reflect your personality. You can also look at photos of models and celebrities. Pay attention to how they pose. Try to copy their poses. But don’t just copy them blindly. Adapt them to your own body and style. Remember, the goal is to find poses that make you feel comfortable and confident. The more you practice, the more natural your poses will become. Soon, you will be posing like a pro.
Fun Fact or Stat: Professional models often spend hours practicing poses in front of a mirror to perfect their look!
Practicing in Front of a Mirror
Do you ever feel silly practicing poses in front of a mirror? Don’t! It’s a great way to improve your posing skills. When you practice in front of a mirror, you can see what you look like from different angles. You can experiment with different poses and expressions. You can also identify any awkward or unnatural movements. Start by standing in a relaxed position. Then, try different poses. Pay attention to your posture, your facial expressions, and your body language. Try tilting your head, smiling, or looking off to the side. See how these small changes affect your overall appearance. Remember, the goal is to find poses that make you feel confident and comfortable. The more you practice in front of a mirror, the more natural your poses will become.
Using Props to Enhance Poses
Have you ever wondered how to make your photos more interesting? One way is to use props. Props are objects that you hold or interact with in your photos. They can add personality and context to your images. When thinking about poses for photo shoots outdoors, consider what props would be appropriate for your location. If you are in a park, you could use a ball, a book, or a picnic basket. If you are at the beach, you could use a seashell, a beach ball, or a surfboard. The key is to choose props that complement your outfit and the overall theme of the photo. When using props, don’t just hold them awkwardly. Interact with them in a natural way. Read the book, throw the ball, or eat the picnic lunch. This will make your photos look more authentic and engaging.
Relaxing Your Body and Mind
Do you ever feel tense or nervous when you are getting your photo taken? This is perfectly normal. But it can show in your photos. The key is to relax your body and mind. Before the photo shoot, take a few deep breaths. This will help to calm your nerves. During the photo shoot, try to focus on something positive. Think about a happy memory or a funny joke. This will help you to relax your facial muscles. You can also try shaking out your limbs. This will release any tension in your body. Remember, the goal is to be yourself. Don’t try to be someone you are not. Just relax and have fun. The more relaxed you are, the more natural and beautiful your photos will be.
Outdoor Posing Ideas by Location
The location of your photo shoot can inspire different poses for photo shoots outdoors. Each place has its own unique vibe. Use this to your advantage. If you are at the beach, try walking along the shoreline. Collect seashells. Build a sandcastle. If you are in a forest, lean against a tree. Look up at the sky. Explore the trails. If you are in a city, pose in front of a colorful mural. Sit on a bench. Walk across a crosswalk. The possibilities are endless. The key is to be creative and have fun. Think about what makes each location special. Then, use that to inspire your poses. Remember, the best photos tell a story. Use your poses to tell the story of your location.
- At the beach, walk along the water’s edge.
- In a forest, lean against a tall tree.
- In a city, pose in front of street art.
- In a park, sit on a grassy hill.
- On a mountain, look out at the view.
When choosing a location, think about the lighting. The best light is usually in the morning or late afternoon. This is when the sun is lower in the sky. The light is softer and more flattering. Avoid taking photos in the middle of the day. This is when the sun is the brightest. The light can be harsh and create unflattering shadows. If you have to take photos in bright sunlight, find some shade. Stand under a tree or next to a building. This will help to soften the light. Also, pay attention to the background. Make sure there are no distracting elements. A clean background will help to keep the focus on you. Remember, the goal is to create a beautiful and natural-looking photo. With a little bit of planning and practice, you can take amazing photos outside.
Fun Fact or Stat: Some photographers choose locations based on the “rule of thirds,” a composition technique that makes photos more visually appealing.
Beach Poses for Sunny Days
Do you love spending time at the beach? The beach is a great place to take photos. The sand, the sea, and the sky create a beautiful backdrop. When taking photos at the beach, try walking along the shoreline. Collect seashells. Build a sandcastle. Splash in the waves. These activities will make your photos look more natural and spontaneous. You can also try sitting on a beach towel. Lean back and relax. Look out at the ocean. These poses will capture the relaxed and carefree vibe of the beach. Remember to wear sunscreen and sunglasses. The sun can be strong at the beach. You want to protect your skin and eyes. Most importantly, have fun. The beach is a place to relax and enjoy yourself. Let that shine through in your photos.
Forest Poses Surrounded by Nature
Do you enjoy exploring the woods? Forests are magical places. They are full of trees, plants, and wildlife. When taking photos in a forest, try leaning against a tree. Look up at the sky. Explore the trails. These activities will help you to connect with nature. You can also try sitting on a log. Read a book. Listen to the birds. These poses will capture the peaceful and serene vibe of the forest. Remember to wear comfortable shoes. You will be doing a lot of walking. Also, be aware of your surroundings. Watch out for poison ivy and other hazards. Most importantly, respect the forest. Leave no trace of your visit. Take only photos, leave only footprints.
City Poses with Urban Backdrops
Do you like the hustle and bustle of the city? Cities are exciting places. They are full of buildings, people, and activity. When taking photos in a city, try posing in front of a colorful mural. Sit on a bench. Walk across a crosswalk. These activities will help you to capture the energy of the city. You can also try posing near a famous landmark. This will give your photos a sense of place. Remember to be aware of your surroundings. Watch out for cars and pedestrians. Also, be respectful of the city. Don’t litter or vandalize property. Most importantly, have fun. The city is a place to explore and discover. Let that shine through in your photos.
Adding Movement to Your Outdoor Poses

Adding movement to your photos can make them more dynamic. It can also make them more interesting. Instead of standing still, try walking, running, or jumping. When thinking about poses for photo shoots outdoors, consider the environment. If you are at the beach, run along the shoreline. Jump over the waves. If you are in a park, swing on a swing set. Throw a Frisbee. If you are in a city, walk across a crosswalk. Dance in the street. The possibilities are endless. The key is to be creative and have fun. Don’t be afraid to try new things. You might be surprised at what you discover. Remember, the best photos tell a story. Use your movements to tell the story of your photo.
- Walk towards the camera with a smile.
- Jump in the air for a fun action shot.
- Spin around to create a sense of movement.
- Dance in place to show your personality.
- Run through a field of flowers.
When adding movement to your photos, pay attention to your clothes. Wear clothes that are comfortable and easy to move in. Avoid wearing clothes that are too tight or restrictive. Also, consider the weather. If it is windy, wear clothes that will not blow around too much. If it is sunny, wear sunscreen and sunglasses. Most importantly, be safe. Don’t do anything that could put you in danger. Be aware of your surroundings. Watch out for obstacles and other hazards. Remember, the goal is to create a fun and memorable photo. With a little bit of planning and practice, you can take amazing photos with movement.
Fun Fact or Stat: Photos with movement are often more engaging because they capture a sense of energy and spontaneity.
Walking and Running Poses
Do you enjoy walking or running? Walking and running are great ways to add movement to your photos. When taking walking photos, try walking towards the camera. Smile and wave. This will create a friendly and inviting image. You can also try walking away from the camera. Look back over your shoulder. This will create a sense of mystery and intrigue. When taking running photos, try running towards the camera. Jump in the air. Make a silly face. This will create a fun and energetic image. You can also try running alongside a road. This will give your photos a sense of speed and motion. Remember to wear comfortable shoes. You will be doing a lot of walking and running. Also, be aware of your surroundings. Watch out for cars and pedestrians. Most importantly, have fun. Walking and running are great ways to get exercise and enjoy the outdoors. Let that shine through in your photos.
Jumping and Leaping Poses
Do you like to jump and leap? Jumping and leaping are great ways to add excitement to your photos. When taking jumping photos, try jumping in the air. Spread your arms and legs. Make a silly face. This will create a fun and energetic image. You can also try jumping over an obstacle. This will give your photos a sense of accomplishment. When taking leaping photos, try leaping across a gap. Stretch out your body. Look graceful and athletic. This will create a dramatic and eye-catching image. Remember to be careful when jumping and leaping. Make sure you have a safe landing area. Also, be aware of your surroundings. Watch out for obstacles and other hazards. Most importantly, have fun. Jumping and leaping are great ways to express your energy and enthusiasm. Let that shine through in your photos.
Spinning and Twirling Poses
Do you like to spin and twirl? Spinning and twirling are great ways to add movement and grace to your photos. When taking spinning photos, try spinning in a circle. Keep your arms outstretched. Let your hair fly. This will create a sense of movement and freedom. You can also try spinning with a friend. Hold hands and spin around. This will create a fun and playful image. When taking twirling photos, try twirling in place. Lift your arms above your head. Smile and laugh. This will create a joyful and celebratory image. Remember to be careful when spinning and twirling. Make sure you have enough space to move around. Also, be aware of your surroundings. Watch out for obstacles and other hazards. Most importantly, have fun. Spinning and twirling are great ways to express your creativity and joy. Let that shine through in your photos.
Using Angles to Create Interesting Photos
The angle at which you take a photo can make a big difference. It can change the way the subject looks. It can also change the mood of the photo. When thinking about poses for photo shoots outdoors, consider the angle. Try taking photos from above. This can make the subject look smaller and more vulnerable. It can also create a sense of distance. Try taking photos from below. This can make the subject look larger and more powerful. It can also create a sense of awe. Try taking photos from the side. This can create a sense of intimacy and connection. The key is to experiment and see what works best. Don’t be afraid to try new things. You might be surprised at what you discover. Remember, the best photos tell a story. Use your angles to tell the story of your photo.
| Angle | Effect | Best For | Example |
|---|---|---|---|
| Above | Smaller, vulnerable | Landscapes, small objects | Photo of a child lying in a field of flowers |
| Below | Larger, powerful | Buildings, tall trees | Photo of a skyscraper from the ground |
| Side | Intimate, connected | Portraits, close-ups | Photo of two friends laughing together |
| Eye-level | Neutral, realistic | Documentary, everyday scenes | Photo of people walking down a street |
- Shoot from a low angle to make the subject look taller.
- Shoot from a high angle to show the environment.
- Tilt the camera for a dynamic effect.
- Use leading lines to draw the eye.
- Frame the subject with natural elements.
When using angles, pay attention to the light. The angle of the light can affect the way the subject looks. If the light is coming from above, it can create shadows under the eyes and chin. This can make the subject look older. If the light is coming from below, it can create a spooky or dramatic effect. If the light is coming from the side, it can highlight the subject’s features. The key is to use the light to your advantage. Experiment with different angles and lighting conditions. See what works best for your subject. Remember, the goal is to create a beautiful and interesting photo. With a little bit of practice, you can master the art of using angles.
Fun Fact or Stat: The Dutch angle, tilting the camera to one side, is often used in movies to create a sense of unease or disorientation.
High-Angle Shots for a Different Perspective
Have you ever tried taking a photo from a high angle? It can give you a completely different perspective. When you shoot from above, you can see the subject in a new way. You can also capture more of the environment. High-angle shots are great for showing patterns and textures. They can also be used to create a sense of distance. When taking high-angle shots, make sure you have a safe place to stand. Use a ladder, a balcony, or a hill. Be careful not to fall. Also, pay attention to the composition. Make sure the subject is well-placed in the frame. Remember, the goal is to create a visually interesting and compelling photo. With a little bit of practice, you can master the art of high-angle shots.
Low-Angle Shots for a Dramatic Effect
Do you want to add drama to your photos? Try shooting from a low angle. Low-angle shots can make the subject look larger and more powerful. They can also create a sense of awe and wonder. Low-angle shots are great for photographing buildings, trees, and people. When taking low-angle shots, get down on the ground. Use a wide-angle lens to capture more of the scene. Be careful not to get dirt or grass on your camera. Also, pay attention to the lighting. The sun can be harsh when shooting from below. Use a reflector to bounce light onto the subject. Remember, the goal is to create a dramatic and eye-catching photo. With a little bit of practice, you can master the art of low-angle shots.
Eye-Level Shots for a Personal Connection
Do you want to create a personal connection with your viewers? Try shooting at eye level. Eye-level shots can make the subject feel more relatable. They can also create a sense of intimacy and connection. Eye-level shots are great for photographing people, animals, and everyday scenes. When taking eye-level shots, position yourself at the same height as the subject. Use a normal lens to capture a natural perspective. Be careful not to block the light. Also, pay attention to the background. Make sure it is not distracting. Remember, the goal is to create a photo that feels authentic and genuine. With a little bit of practice, you can master the art of eye-level shots.
Summary
Learning poses for photo shoots outdoors can greatly improve your photos. Remember to use natural light to your advantage. Find the golden hour for soft, warm light. Practice different poses in front of a mirror. This will help you feel more comfortable and confident. Use props to add interest to your photos. Consider the location and let it inspire your poses. Add movement to create dynamic shots. Experiment with different angles to create unique perspectives. Most importantly, relax and have fun. Let your personality shine through in your photos.
With these tips, you will be able to take amazing photos outside. Practice regularly. Don’t be afraid to try new things. The more you experiment, the better you will become. Remember, the best photos are the ones that capture your personality and tell a story. So go out there and start posing. You might be surprised at what you can create.
Conclusion
Taking great photos outside is fun. It takes practice to find good poses for photo shoots outdoors. Try different things and see what works for you. Use the tips you learned here. You will be taking amazing photos in no time. So grab your camera and head outside. The world is waiting to be photographed. Have fun and be creative.
Frequently Asked Questions
Question No 1: What is the best time of day for outdoor photo shoots?
Answer: The best time is often during the “golden hours.” These are the hours shortly after sunrise and before sunset. The light is soft and warm. It makes skin look great. Avoid midday sun. It can create harsh shadows. If you must shoot then, find shade. Consider the weather for ideal poses for photo shoots outdoors. Overcast days offer soft, even lighting.
Question No 2: What are some easy poses for beginners?
Answer: Start with simple poses. Stand tall with your shoulders back. Put one foot slightly in front of the other. Bend your arms a little. Look at the camera and smile. Try leaning against a tree. Sit on a rock. Walk along a path. These are all easy and natural poses. Practice in front of a mirror. This will help you feel more comfortable. Remember to relax your body and mind. Poses for photo shoots outdoors should look natural.
Question No 3: How can I make my smile look more natural in photos?
Answer: Don’t say “cheese.” That can make your smile look forced. Think about something that makes you happy. This could be a funny joke or a favorite memory. Let that feeling shine through in your smile. Relax your face. Tense muscles can make your smile look stiff. Take a deep breath and let your face relax. The best smile is the one that comes from the heart. Practicing poses for photo shoots outdoors also improves your smile.
Question No 4: What should I wear for an outdoor photo shoot?
Answer: Wear clothes that are comfortable and flattering. Choose colors that complement your skin tone. Avoid wearing clothes that are too tight or restrictive. Consider the location and the weather. If you are at the beach, wear a swimsuit or a sundress. If you are in a forest, wear comfortable walking shoes. Accessorize with jewelry, hats, or scarves. Poses for photo shoots outdoors look better with the right outfit. Express your personal style.
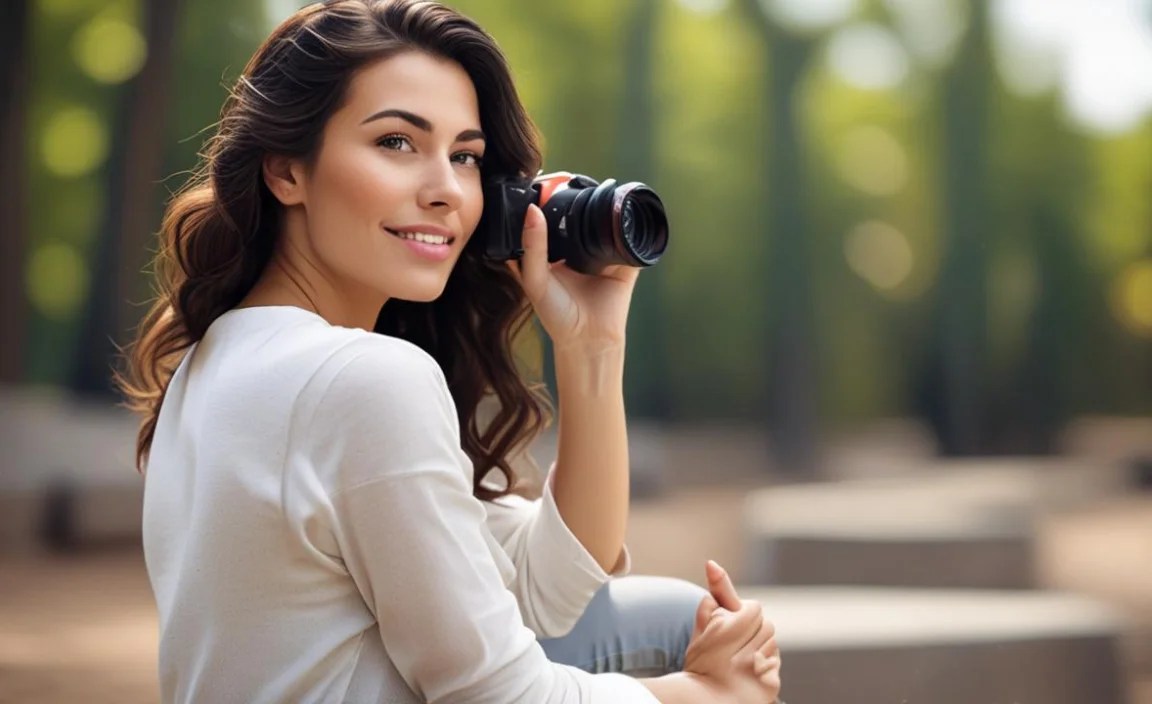
Question No 5: How can I use props to enhance my photos?
Answer: Props can add personality and context to your photos. Choose props that are appropriate for your location. If you are in a park, use a ball, a book, or a picnic basket. If you are at the beach, use a seashell, a beach ball, or a surfboard. Interact with the props in a natural way. Read the book, throw the ball, or eat the picnic lunch. Posing with props makes poses for photo shoots outdoors more interesting.
Question No 6: How important is the background in outdoor photos?
Answer: The background is very important. It can make or break your photo. Choose a background that is not distracting. A clean background will help to keep the focus on you. Avoid backgrounds that are too busy or cluttered. Pay attention to the colors in the background. Make sure they complement your outfit. Use the background to tell a story. The location helps set the scene. Consider the background when planning poses for photo shoots outdoors. A good background enhances the subject.
