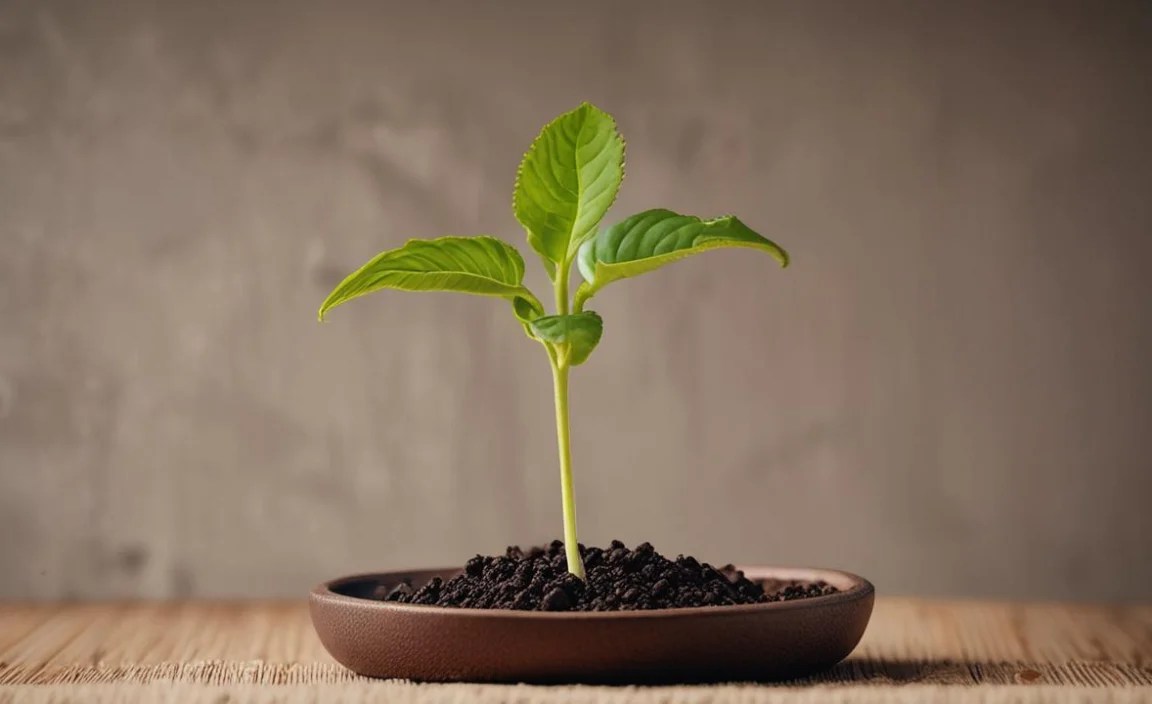
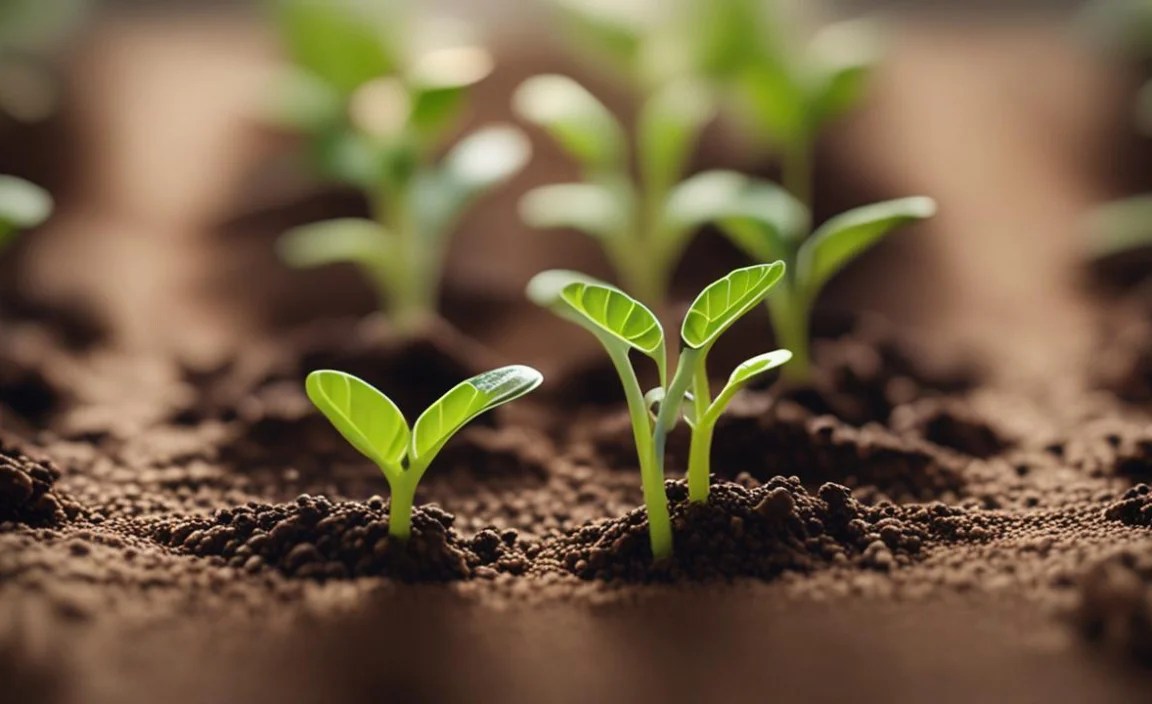
Have you ever planted a seed and waited for it to grow? It can be a fun and exciting experience. But sometimes, seeds don’t sprout. Why does this happen? There are different ways to help seeds grow. These are called seed germination techniques.
Seeds need the right conditions to come alive. Think of them as tiny sleeping babies. They need warmth, water, and air to wake up and grow. Let’s learn about how to help them!
Some seeds are picky and need extra help. Learning about seed germination techniques can make a big difference. You can help more seeds grow into healthy plants. Let’s explore some cool methods!
Key Takeaways
- Seed germination techniques help seeds sprout and grow into healthy plants.
- Providing the right amount of water is crucial for successful germination.
- Maintaining a consistent and warm temperature helps seeds germinate faster.
- Scarification and stratification are advanced methods for specific seed types.
- Proper soil preparation and planting depth ensure optimal germination rates.
Understanding Seed Germination Techniques
Seed germination techniques are all about giving seeds the best start. Seeds need certain things to wake up and grow. These include water, oxygen, and the right temperature. When a seed gets these things, it starts to sprout. This is called germination. Different seeds like different conditions. Some seeds need light to germinate. Others need darkness. Some seeds have a hard outer shell. This shell needs to be broken before the seed can sprout. This is where different seed germination techniques come in handy. By understanding these techniques, you can help more seeds grow into strong, healthy plants. This means more flowers, vegetables, and trees for everyone! Learning these methods is like unlocking a secret code to nature’s wonders. It lets you become a better gardener and helps you grow amazing things.
- Water is essential for seed germination.
- Oxygen helps the seed respire and grow.
- Temperature affects the speed of germination.
- Light can be important for some seeds.
- Soil provides nutrients for the young plant.
- Proper planting depth helps germination.
Imagine you are a seed. You are buried in the ground. You feel the cool, moist soil around you. You are waiting for the right moment to sprout. What do you need to start growing? You need water to soften your outer shell. You need oxygen to breathe. You need warmth to wake up. When all these things come together, you will start to grow. Seed germination techniques help provide these things. They ensure that you, the seed, have the best chance to become a strong, healthy plant. These techniques are important for farmers, gardeners, and anyone who wants to grow plants from seeds. By using these methods, we can help more plants grow and make our world greener and more beautiful.
Fun Fact or Stat: Did you know that some seeds can stay alive but dormant for hundreds of years, waiting for the right conditions to germinate?
What is Seed Dormancy?
Have you ever wondered why some seeds don’t sprout right away? This is often because of seed dormancy. Seed dormancy is like a seed taking a long nap. It’s a natural way for seeds to survive tough conditions. For example, a seed might be dormant during the winter. It waits until the spring when the weather is warmer and there is more rain. Some seeds have a hard outer coating. This coating prevents water and oxygen from getting to the seed. Other seeds need a period of cold weather before they will sprout. Understanding seed dormancy is important. It helps us use the right seed germination techniques. We can help seeds wake up from their nap and start to grow.
Why is Scarification Important?
Scarification is a special seed germination technique. It helps seeds with a hard outer shell. Imagine the seed is wearing a suit of armor. The armor protects the seed, but it also keeps water and air out. Scarification is like giving the seed a little scratch on its armor. This scratch lets water and air get inside. There are different ways to scarify seeds. You can rub them with sandpaper. You can soak them in hot water. Or you can even use a knife to make a small cut. Scarification is important because it helps these tough seeds sprout. Without it, they might stay dormant for a very long time. This technique helps us grow plants that might otherwise be difficult to cultivate.
How Does Stratification Help?
Stratification is another important seed germination technique. It involves exposing seeds to cold and moist conditions. Think of it as giving the seeds a mini-winter. Many seeds from cold climates need this cold period to sprout. The cold helps break down chemicals inside the seed. These chemicals prevent the seed from germinating too early. To stratify seeds, you can put them in a plastic bag with moist sand. Then, you put the bag in the refrigerator for a few weeks. After the cold period, the seeds are ready to plant. Stratification helps these seeds sprout when the weather is right. It’s like telling the seed that spring is coming. This technique is essential for growing many types of trees and shrubs.
Choosing the Right Soil for Germination

The right soil is like a cozy bed for your seeds. It gives them the support and nutrients they need to grow. When choosing soil, think about what the seed needs. Some seeds like light, airy soil. This helps them get plenty of oxygen. Other seeds like soil that holds more water. This keeps them moist during germination. A good soil mix should have a balance of both. You can buy special seed-starting mixes at the store. Or you can make your own mix. A simple mix includes peat moss, vermiculite, and perlite. These ingredients help the soil drain well and hold moisture. Using the right soil is a key seed germination technique. It gives your seeds the best chance to sprout and grow into healthy plants. It’s like setting the stage for a successful garden.
- Use a well-draining soil mix.
- Avoid heavy clay soils for germination.
- Seed-starting mixes are often a good choice.
- Ensure the soil is free from diseases.
- Provide essential nutrients for growth.
- Check the pH level of the soil.
Imagine you are a tiny seed nestled in the soil. What kind of soil would you like? Would you want dry, hard soil that is difficult to push through? Or would you prefer soft, moist soil that is easy to grow in? The answer is clear. Seeds need soil that is just right. It should be loose enough to allow the roots to grow easily. It should also hold enough water to keep the seed moist. Choosing the right soil is an important part of seed germination techniques. It helps the seed get the water, oxygen, and nutrients it needs. When you choose the right soil, you are giving your seeds the best possible start in life. This leads to stronger, healthier plants that will thrive in your garden.
Fun Fact or Stat: Different plants prefer different soil pH levels; some like acidic soil, while others prefer alkaline soil!
What is a Seed-Starting Mix?
A seed-starting mix is a special type of soil. It is designed for starting seeds indoors. It is usually lighter and fluffier than regular potting soil. This makes it easier for tiny roots to grow. Seed-starting mixes are also sterile. This means they don’t contain any harmful bacteria or fungi. These can hurt the seeds and prevent them from germinating. Most seed-starting mixes contain peat moss, vermiculite, and perlite. Peat moss helps hold moisture. Vermiculite helps with drainage. Perlite also helps with drainage and aeration. Using a seed-starting mix is a great seed germination technique. It gives your seeds a clean and healthy environment to grow in. This increases your chances of success when starting seeds indoors.
How Does Soil pH Affect Germination?
Soil pH is a measure of how acidic or alkaline the soil is. Most plants prefer a slightly acidic to neutral pH. This means a pH of around 6.0 to 7.0. If the soil pH is too high or too low, it can affect germination. For example, if the soil is too acidic, it can prevent the seeds from absorbing nutrients. If the soil is too alkaline, it can also cause problems. You can test the soil pH with a soil testing kit. If the pH is not right, you can adjust it. Lime can be added to raise the pH. Sulfur can be added to lower the pH. Maintaining the correct soil pH is an important seed germination technique. It helps ensure that your seeds can get the nutrients they need to grow.
Why is Drainage Important?
Drainage is how well water flows through the soil. Good drainage is essential for seed germination. If the soil doesn’t drain well, it can become waterlogged. Waterlogged soil can suffocate the seeds. Seeds need oxygen to germinate. If the soil is full of water, there is no room for oxygen. To improve drainage, you can add perlite or vermiculite to the soil. You can also make sure that your pots have drainage holes. This allows excess water to escape. Proper drainage is a vital seed germination technique. It helps prevent seeds from rotting and ensures they get the oxygen they need to sprout.
Watering Techniques for Seed Germination

Water is like a drink of life for seeds. They need water to wake up and start growing. But too much water can be harmful. It can cause the seeds to rot. The key is to keep the soil moist, but not soggy. A good way to water seeds is to use a spray bottle. This gently moistens the soil without disturbing the seeds. You can also use a watering can with a fine rose. Water the soil slowly and evenly. Check the soil moisture every day. If the soil feels dry, water it lightly. If it feels wet, wait a day or two before watering again. Proper watering is a crucial seed germination technique. It helps ensure that your seeds get the right amount of moisture to sprout and grow.
- Use a spray bottle for gentle watering.
- Water the soil evenly and slowly.
- Check soil moisture daily.
- Avoid overwatering to prevent rotting.
- Use lukewarm water for watering.
- Water early in the morning.
Imagine you are a thirsty seed in the ground. You are waiting for a refreshing drink of water. But instead of a gentle rain, you get a flood. The water overwhelms you, and you can’t breathe. This is what happens when seeds are overwatered. They need just the right amount of water to thrive. Underwatering is also bad. If the soil is too dry, the seed won’t be able to sprout. Finding the right balance is key. Watering techniques are important seed germination techniques. They help you provide the perfect amount of water for your seeds. This ensures they have the best chance to grow into healthy plants. Think of it as giving your seeds a spa day – not too much, not too little, but just right!
Fun Fact or Stat: Seeds can absorb up to 50% of their weight in water during the germination process!
How Often Should You Water Seeds?
The frequency of watering depends on several things. These include the type of seed, the soil, and the weather. In general, you should water seeds when the top inch of soil feels dry. Check the soil every day. If it feels dry, water it lightly. If it feels moist, wait a day or two. During hot weather, you may need to water more often. During cool weather, you may need to water less often. It’s important to pay attention to your seeds and adjust your watering schedule as needed. Consistent moisture is a key seed germination technique. It helps ensure that your seeds don’t dry out or get waterlogged.
What Type of Water is Best?
The best type of water for seed germination is clean, lukewarm water. Avoid using water that is too hot or too cold. Hot water can damage the seeds. Cold water can shock them. Tap water is usually fine to use. However, if your tap water is very hard, it may be better to use filtered water. Hard water contains a lot of minerals. These minerals can sometimes interfere with germination. Rainwater is also a good option. It is naturally soft and free of chemicals. Using the right type of water is a simple but effective seed germination technique. It helps ensure that your seeds get the moisture they need without any harmful additives.
How Can You Prevent Overwatering?
Overwatering is a common mistake when starting seeds. It can lead to seed rot and damping off. Damping off is a fungal disease that kills young seedlings. To prevent overwatering, make sure your pots have drainage holes. This allows excess water to escape. Also, avoid watering too frequently. Let the top inch of soil dry out before watering again. You can also use a well-draining soil mix. This will help prevent the soil from becoming waterlogged. Another helpful seed germination technique is to water early in the morning. This gives the soil time to dry out during the day. By taking these precautions, you can protect your seeds from the dangers of overwatering.
Temperature Control for Optimal Germination
Temperature is like a cozy blanket for seeds. It helps them wake up and start growing. Different seeds like different temperatures. Some seeds like it warm, around 70-80°F (21-27°C). Others prefer it cooler, around 60-70°F (15-21°C). You can find out the ideal temperature for your seeds by reading the seed packet. To control the temperature, you can use a heat mat. A heat mat is a special mat that warms the soil. You can also put your seeds in a warm room. Avoid putting them in direct sunlight, as this can overheat them. Maintaining the right temperature is a crucial seed germination technique. It helps ensure that your seeds germinate quickly and evenly.
- Maintain a consistent temperature.
- Use a heat mat for warmth.
- Avoid direct sunlight during germination.
- Check seed packet for ideal temperature.
- Use a thermometer to monitor soil temperature.
- Provide proper ventilation.
Imagine you are a seed snuggled in the soil. It’s a cold and dreary day. You are waiting for the sun to warm you up. But the sun never comes. You stay cold and dormant. This is what happens when seeds don’t get enough warmth. They need the right temperature to start growing. Temperature control is an important part of seed germination techniques. It helps you provide the perfect environment for your seeds. When the temperature is just right, the seeds wake up and start to sprout. They send out roots and shoots, reaching for the sun. Providing the right temperature is like giving your seeds a warm hug, encouraging them to grow strong and healthy.
Fun Fact or Stat: Some seeds germinate best with fluctuating temperatures, mimicking natural day and night cycles!
How Does Temperature Affect Germination Speed?
Temperature has a big impact on how quickly seeds germinate. Warmer temperatures generally speed up germination. Cooler temperatures slow it down. This is because temperature affects the chemical reactions inside the seed. These reactions are necessary for germination. At warmer temperatures, these reactions happen faster. At cooler temperatures, they happen slower. This is why it’s important to provide the ideal temperature for your seeds. This will help them germinate as quickly as possible. Faster germination means you’ll see seedlings sooner. This is a rewarding experience for any gardener. Understanding this seed germination technique is key to a successful garden.
What is a Heat Mat and How Does it Help?
A heat mat is a special tool for starting seeds indoors. It is a flat, waterproof mat that provides gentle warmth. You place your seed trays or pots on the heat mat. The heat mat warms the soil from below. This helps to maintain a consistent temperature. Heat mats are especially useful in cool climates. They can help to speed up germination and improve success rates. They are also helpful for seeds that require warm temperatures to germinate. Using a heat mat is a simple and effective seed germination technique. It can make a big difference in your seed starting success.
How Can You Cool Down Seeds If They Get Too Hot?
Sometimes, seeds can get too hot, especially if they are in direct sunlight. Overheating can damage the seeds and prevent them from germinating. If you notice that your seeds are getting too hot, there are several things you can do. First, move them to a cooler location. Avoid direct sunlight. You can also provide shade with a cloth or screen. Another seed germination technique is to use a fan to circulate the air. This will help to cool down the soil. You can also water the soil lightly. This will help to lower the temperature. By taking these steps, you can protect your seeds from overheating and ensure they have the best chance to germinate.
Light Requirements for Seed Germination

Light is like sunshine for seeds. Some seeds need light to germinate. Others need darkness. You can find out if your seeds need light by reading the seed packet. Seeds that need light are often very small. They should be sown on the surface of the soil. Do not cover them with soil. Seeds that need darkness are often larger. They should be covered with soil. If you are starting seeds indoors, you can use grow lights. Grow lights provide artificial light that helps seeds germinate. Place the grow lights a few inches above the soil. Keep them on for 12-16 hours per day. Understanding the light requirements is an important seed germination technique. It helps ensure that your seeds get the right amount of light to sprout and grow.
- Some seeds need light to germinate.
- Other seeds need darkness.
- Check seed packet for light requirements.
- Use grow lights for indoor seed starting.
- Provide 12-16 hours of light per day.
- Adjust light based on seed type.
Imagine you are a seed buried in the ground. Some seeds want to feel the warmth of the sun. These seeds need light to wake up and grow. Others want to sleep in the dark. These seeds need darkness to sprout. Giving seeds what they need is important. Light requirements are a key part of seed germination techniques. Knowing whether your seeds need light or darkness is like having a secret code. You can unlock the seed’s potential. You can help it grow into a strong, healthy plant. It’s like giving the seed the perfect environment to thrive.
Fun Fact or Stat: Lettuce seeds actually germinate better in darkness than in light!
How Do Grow Lights Help?
Grow lights are special lights designed for plants. They provide the right spectrum of light for photosynthesis. Photosynthesis is how plants make their own food. Grow lights are especially useful for starting seeds indoors. They can help to supplement natural light. This is especially important during the winter months. Grow lights can also help to provide consistent light. This can lead to faster and more even germination. Using grow lights is a great seed germination technique. It helps ensure that your seeds get the light they need to grow strong and healthy.
What Happens If Seeds Get Too Much Light?
While some seeds need light to germinate, too much light can be harmful. It can cause the seeds to dry out. It can also inhibit germination. If you notice that your seeds are getting too much light, there are several things you can do. First, move them to a shadier location. You can also use a shade cloth to reduce the amount of light. Another seed germination technique is to water the soil more frequently. This will help to keep the seeds moist. By taking these steps, you can protect your seeds from the dangers of too much light.
How Can You Provide Darkness for Seeds That Need It?
Some seeds need complete darkness to germinate. This can be a challenge when starting seeds indoors. There are several ways to provide darkness for these seeds. First, you can cover the seed trays with a dark cloth or plastic. This will block out the light. You can also put the seed trays in a dark room or closet. Another seed germination technique is to use a seed-starting tray with a lid. The lid will help to block out the light and keep the soil moist. By using these methods, you can ensure that your seeds get the darkness they need to germinate.
Planting Depth and Spacing for Germination
Planting depth and spacing are like giving seeds their own personal space. Planting depth is how deep you plant the seeds in the soil. Spacing is how far apart you plant the seeds. Different seeds need different planting depths and spacing. You can find out the ideal planting depth and spacing by reading the seed packet. In general, small seeds should be planted shallowly. Large seeds can be planted deeper. Proper planting depth and spacing are important seed germination techniques. They help ensure that your seeds have enough room to grow. They also help prevent overcrowding, which can lead to disease.
| Seed Type | Planting Depth | Spacing |
|---|---|---|
| Lettuce | 1/4 inch | 6 inches |
| Tomatoes | 1/2 inch | 24 inches |
| Radishes | 1/2 inch | 2 inches |
| Beans | 1 inch | 4 inches |
- Plant seeds at the correct depth.
- Space seeds properly to avoid overcrowding.
- Check seed packet for planting instructions.
- Use a ruler to measure planting depth.
- Thin seedlings if they are too close.
- Consider the mature size of the plant.
Imagine you are a seed trying to grow. If you are planted too deep, it will be hard to reach the surface. You might run out of energy before you get there. If you are planted too shallow, you might dry out too quickly. You need to be planted just right. Spacing also matters. If you are too close to other seeds, you will have to compete for resources. You might not get enough sunlight, water, or nutrients. This is why planting depth and spacing are key seed germination techniques. They help you give each seed the best chance to thrive. They help ensure that your garden is full of healthy, happy plants.
Fun Fact or Stat: Planting seeds too deep is one of the most common reasons for germination failure!
Why Is Planting Depth Important?
Planting depth is crucial for successful germination. If a seed is planted too deep, it may not have enough energy to reach the surface. The seedling may exhaust its resources before it can access sunlight and air. On the other hand, if a seed is planted too shallow, it may dry out quickly. The soil surface tends to dry out faster than the soil below. The ideal planting depth allows the seed to access moisture while still being close enough to the surface to receive sunlight. Following the recommended planting depth is a simple but effective seed germination technique.
How Does Spacing Affect Plant Growth?
Spacing affects how much room each plant has to grow. If plants are too close together, they will compete for resources. They will compete for sunlight, water, and nutrients. This can lead to stunted growth and lower yields. Proper spacing allows each plant to develop to its full potential. It ensures that each plant has enough room to spread its roots and leaves. Adequate spacing also improves air circulation. This can help to prevent diseases. Paying attention to spacing is an important seed germination technique.
What is Thinning and Why Is It Necessary?
Thinning is the process of removing some seedlings from a crowded area. It is often necessary when seeds are sown too thickly. Thinning gives the remaining seedlings more room to grow. It reduces competition for resources. To thin seedlings, simply snip off the unwanted plants at the soil line. Be careful not to disturb the roots of the remaining plants. Thinning is an important seed germination technique. It helps to ensure that your plants have enough room to thrive. It can also improve the overall health and productivity of your garden.
Summary
Seed germination techniques are essential for successful gardening. Seeds need the right conditions to sprout and grow. These conditions include water, oxygen, temperature, and light. Different seeds have different needs. Some seeds need light to germinate, while others need darkness. Some seeds need warmth, while others need cold. By understanding these needs, you can help your seeds germinate more successfully. Soil type, watering methods, and planting depth also play a role. Giving seeds the proper start is a crucial step toward a thriving garden.
Techniques like scarification and stratification can help with stubborn seeds. Proper soil preparation ensures that seeds have the nutrients they need. Temperature control and appropriate watering prevent issues like rot or drying out. By mastering these seed germination techniques, anyone can increase their chances of growing healthy, vibrant plants. With a little knowledge and care, you can transform a tiny seed into a flourishing plant.
Conclusion
Starting seeds can be fun and rewarding. You can grow beautiful flowers and tasty vegetables. Remember that each seed is different. They have unique needs. Learn about seed germination techniques. You can provide the perfect conditions for your seeds. This will help them grow into healthy plants. Happy gardening!
Frequently Asked Questions
Question No 1: What are the most important factors for seed germination?
Answer: The most important factors for seed germination are water, oxygen, temperature, and light. Seeds need water to soften their outer shell and start the germination process. They need oxygen to breathe and produce energy. The right temperature helps speed up germination. Some seeds need light, while others need darkness. These factors all work together to help seeds sprout and grow. Understanding these needs is the first step in mastering seed germination techniques. By providing the right conditions, you can increase your chances of success.
Question No 2: How do I know if my seeds are still good?
Answer: You can test seed viability with a simple germination test. Place a few seeds on a damp paper towel. Roll up the towel and put it in a plastic bag. Keep the towel moist and warm. After a few days, check to see if the seeds have sprouted. If most of the seeds have sprouted, they are still good. If very few or none have sprouted, the seeds may be too old to germinate. You can also check the seed packet for an expiration date. Using fresh seeds is an important part of seed germination techniques. It helps ensure that you are starting with viable seeds.
Question No 3: What is damping off, and how can I prevent it?
Answer: Damping off is a fungal disease that affects young seedlings. It causes them to rot and die. Damping off is caused by overwatering and poor air circulation. To prevent damping off, use a well-draining soil mix. Avoid overwatering, and provide good air circulation. You can also use a fungicide to protect your seedlings. Starting with sterile soil and clean containers can also help. These practices are all part of effective seed germination techniques. They help protect your seedlings from disease.
Question No 4: Can I use regular potting soil for seed starting?
Answer: It’s generally best to use a seed-starting mix instead of regular potting soil. Seed-starting mixes are lighter and fluffier than potting soil. This makes it easier for tiny roots to grow. They are also sterile, which means they don’t contain any harmful bacteria or fungi. Potting soil can be too heavy for delicate seedlings. It can also contain diseases that can harm the seeds. Using a seed-starting mix is a simple seed germination technique. It gives your seeds a better chance of success.
Question No 5: How deep should I plant my seeds?
Answer: The planting depth depends on the type of seed. Small seeds should be planted shallowly. Large seeds can be planted deeper. A good rule of thumb is to plant seeds about two to three times their width. You can also check the seed packet for specific planting instructions. Planting at the correct depth is crucial. It ensures that the seed has access to moisture and can reach the surface. Proper planting depth is a key element of successful seed germination techniques.
Question No 6: What should I do after my seeds have germinated?
Answer: Once your seeds have germinated, provide them with plenty of light. If you are using grow lights, keep them on for 12-16 hours per day. Water the seedlings regularly, but avoid overwatering. Thin the seedlings if they are too close together. Once the seedlings have developed a few sets of true leaves, you can transplant them into larger pots or into the garden. Continue to provide them with water, light, and nutrients. These steps are essential for nurturing your seedlings after germination. They are important for continued growth and health. These steps build upon the initial seed germination techniques.
