Do you want your house to look lived-in, even when you’re away? Do you want to save energy and money? You can set digital timer outdoor lights to help. Timers make it easy to control your lights. They turn on and off automatically.
Imagine you’re on vacation. Your outdoor lights turn on at dusk. They turn off at dawn. This makes your home safer. It also makes it look like someone is home. Digital timers are a smart choice.
Timers are not just for security. They also save energy. You won’t waste electricity by leaving lights on all night. It’s good for the planet. It’s good for your wallet, too.
Key Takeaways
- Using a digital timer is an easy way to control outdoor lights.
- Set digital timer outdoor lights to save energy and money.
- Timers can make your home look lived-in, even when you are away.
- You can choose from different types of outdoor light timers.
- Timers improve home security by deterring potential intruders.
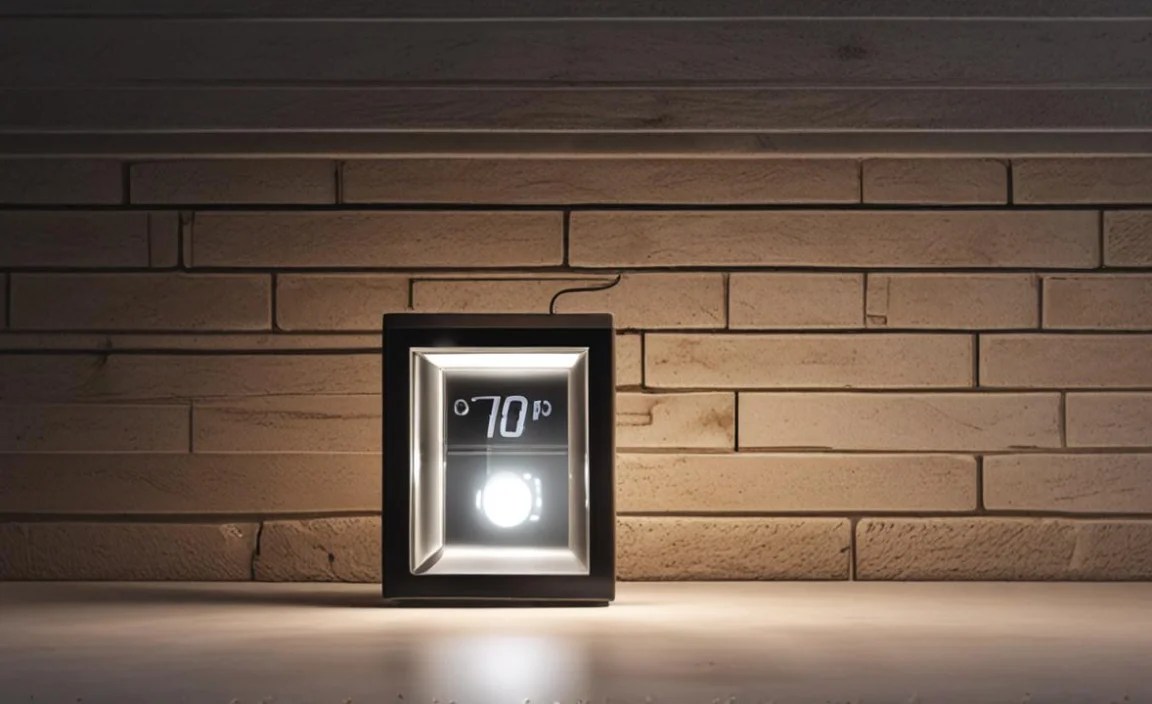
How to Set Digital Timer Outdoor Lights

Setting a digital timer for outdoor lights is easier than you might think. First, you need to choose the right timer. There are many different types. Some plug directly into an outlet. Others are installed in your electrical panel. Digital timers are usually more accurate than mechanical ones. They allow you to set precise on and off times. Read the instructions that come with your timer. This will help you understand how to program it. Most digital timers have buttons to set the time and date. You can also set the on and off times. Some timers have special features. These features include sunrise and sunset settings. Once you have programmed your timer, plug it into the outlet. Then, plug your outdoor lights into the timer. Test the timer to make sure it works correctly. Setting a timer is a simple way to add convenience and security to your home.
- Choose the right digital timer for your outdoor lights.
- Read the instructions carefully before setting the timer.
- Set the current time and date on the digital timer.
- Program the on and off times for your outdoor lights.
- Test the timer to ensure it is working correctly.
After you have set your digital timer for outdoor lights, you can enjoy the benefits. You’ll have peace of mind knowing your lights will turn on and off automatically. This can help deter burglars and make your home safer. You’ll also save money on your electricity bill. Timers prevent you from accidentally leaving your lights on all night. Many digital timers have battery backups. This means they will continue to work even during a power outage. Some timers can also be controlled remotely using a smartphone app. This gives you even more control over your outdoor lights. Make sure the timer you choose is rated for outdoor use. This will protect it from the weather and ensure it lasts for many years. With a little effort, you can set a digital timer and enjoy a safer, more energy-efficient home.
Fun Fact or Stat: Did you know that using a timer for your outdoor lights can save you up to 33% on your lighting energy costs?
Why Use a Digital Timer?
Why should you use a digital timer instead of a regular one? Digital timers are more accurate. They use a digital clock to keep time. This means they are less likely to drift or lose time. Mechanical timers can be off by several minutes each day. This can cause your lights to turn on or off at the wrong time. Digital timers are also easier to program. They have buttons and a display screen. This makes it easy to set the on and off times. Some digital timers have advanced features. These features include multiple programs and random settings. A random setting can make your lights turn on and off at different times each day. This makes it look like someone is home, even when you are away. Digital timers are a great way to add convenience and security to your home.
Choosing the Right Timer
Choosing the right timer is important. You need to consider several factors. First, think about the type of lights you want to control. Some timers are designed for low-voltage lights. Others are designed for high-voltage lights. Make sure the timer you choose is compatible with your lights. Second, consider the location of your lights. If your lights are outdoors, you need a timer that is rated for outdoor use. This means it is waterproof and can withstand extreme temperatures. Third, think about the features you need. Do you want a timer with multiple programs? Do you want a timer with a random setting? Do you want a timer that can be controlled remotely? Choose a timer that meets your needs and budget. Setting a timer is a simple way to improve your home.
Troubleshooting Timer Issues
What do you do if your digital timer stops working? First, check the batteries. Some digital timers have battery backups. If the batteries are dead, the timer will not work. Replace the batteries with fresh ones. Second, check the wiring. Make sure the timer is properly connected to the outlet and the lights. If the wiring is loose, tighten the connections. Third, check the programming. Make sure the timer is programmed correctly. If the on and off times are not set correctly, the lights will not turn on and off at the right time. If you have tried all of these things and the timer still does not work, you may need to replace it. Timers are relatively inexpensive. It is often easier to replace a broken timer than to repair it. Remember to set digital timer outdoor lights for safety.
Different Types of Outdoor Light Timers

There are several different types of outdoor light timers available. Each type has its own advantages and disadvantages. Mechanical timers are simple and inexpensive. They use a dial to set the on and off times. Digital timers are more accurate and offer more features. They use a digital display and buttons to set the time. Photocell timers turn lights on automatically when it gets dark. They turn them off automatically when it gets light. Smart timers can be controlled remotely using a smartphone app. They offer the most flexibility and control. Consider your needs and budget when choosing a timer. Do you need a simple timer for basic on and off control? Or do you want a more advanced timer with smart features? Setting a timer can make your life easier.
- Mechanical timers are simple and affordable.
- Digital timers offer more accuracy and features.
- Photocell timers turn lights on and off based on light levels.
- Smart timers can be controlled remotely with a smartphone.
- Consider your needs and budget when choosing a timer.
- Make sure the timer is rated for outdoor use.
When choosing an outdoor light timer, consider the wattage of your lights. The timer needs to be able to handle the total wattage of all the lights you are connecting to it. If you overload the timer, it could overheat and fail. Also, consider the environment where you will be using the timer. If you live in a very cold or very hot climate, you need a timer that can withstand extreme temperatures. Some timers are designed to be weatherproof. This means they can withstand rain, snow, and other harsh weather conditions. Setting a timer can help you save energy. It also helps improve the security of your home. No matter what type of timer you choose, make sure to read the instructions carefully. This will help you set it up correctly and avoid any problems.
Fun Fact or Stat: Smart timers can learn your habits and automatically adjust your lighting schedule to match your routine!
Mechanical Timers: Simple and Reliable
Mechanical timers are the simplest type of outdoor light timer. They use a rotating dial to set the on and off times. To set the timer, you simply push down the pins or levers on the dial. Each pin or lever represents a certain amount of time. When the dial rotates to a pin or lever that is pushed down, the lights turn on. When the dial rotates to a pin or lever that is not pushed down, the lights turn off. Mechanical timers are easy to use and relatively inexpensive. They are a good choice if you need a simple timer for basic on and off control. However, they are not as accurate as digital timers. They can also be difficult to set precisely. Setting the timer correctly is very important for optimal performance.
Photocell Timers: Light-Sensitive Control
Photocell timers use a light sensor to detect when it is getting dark. When the sensor detects that the light level has dropped below a certain point, the timer turns the lights on. When the sensor detects that the light level has risen above a certain point, the timer turns the lights off. Photocell timers are a good choice if you want your lights to turn on automatically at dusk and turn off automatically at dawn. They are also a good choice if you want to save energy. They ensure that your lights are only on when they are needed. However, photocell timers can be affected by ambient light. If there is a lot of light pollution in your area, the timer may not work correctly. Setting a timer with a photocell is different. It is more automatic and needs less programming.
Smart Timers: Advanced Control at Your Fingertips
Smart timers are the most advanced type of outdoor light timer. They can be controlled remotely using a smartphone app. This allows you to turn your lights on and off from anywhere in the world. You can also set custom schedules and create different lighting scenes. Some smart timers can even be integrated with other smart home devices. This allows you to control your lights with your voice using a virtual assistant like Alexa or Google Assistant. Smart timers offer the most flexibility and control. However, they are also the most expensive type of timer. They require a Wi-Fi connection to work. Setting digital timer outdoor lights can be made easy with smart features. Smart timers are a convenient option.
Benefits of Using a Digital Timer for Outdoor Lights

Using a digital timer for outdoor lights offers many benefits. One of the biggest benefits is energy savings. You can set your lights to turn on only when needed. This prevents you from wasting electricity by leaving them on all night. Timers also improve home security. They make it look like someone is home, even when you are away. This can deter burglars and other criminals. Timers also add convenience to your life. You don’t have to remember to turn your lights on and off every day. The timer does it for you automatically. Setting a timer is a simple way to make your home safer, more energy-efficient, and more convenient. With a timer, you can control your outdoor lights easily.
- Save energy by only using lights when needed.
- Improve home security by deterring potential intruders.
- Add convenience by automating your lighting schedule.
- Reduce your carbon footprint by using less electricity.
- Extend the lifespan of your outdoor lights.
Another benefit of using a digital timer is that it can help extend the lifespan of your outdoor lights. By only using your lights when needed, you can reduce the amount of wear and tear on them. This can help them last longer and save you money on replacement costs. Digital timers are also easy to set up and use. Most timers come with simple instructions that guide you through the process. You can usually set the timer in just a few minutes. Many digital timers also have a battery backup. This means that the timer will continue to work even if there is a power outage. This ensures that your lights will always turn on and off as scheduled. Setting a digital timer outdoor lights is a smart choice.
Fun Fact or Stat: Homes with timed outdoor lights are 30% less likely to be burglarized!
Energy Savings with Timers
How much energy can you save by using a digital timer? The amount of energy you save will depend on how often you use your outdoor lights. It also depends on the type of lights you are using. However, in general, you can expect to save a significant amount of energy. Some studies have shown that using a timer can reduce your lighting energy consumption by up to 33%. This can add up to a significant amount of money over time. In addition to saving money, you will also be helping the environment. By using less electricity, you will be reducing your carbon footprint. Setting a timer is a simple way to make a positive impact on the environment. It is a win-win situation for you and the planet. Set digital timer outdoor lights for a greener lifestyle.
Enhanced Home Security
How can a digital timer enhance your home security? Timers make it look like someone is home, even when you are away. This can deter burglars and other criminals. Most burglars are looking for easy targets. They are more likely to target homes that appear to be unoccupied. By setting your outdoor lights to turn on and off automatically, you can make your home look lived-in. This can make it a less attractive target for burglars. In addition to deterring burglars, timers can also help prevent other types of crime. For example, they can help prevent vandalism and theft. Setting a timer is a simple and effective way to improve your home security. Remember to set digital timer outdoor lights when you’re away.
Convenience and Automation
How can a digital timer add convenience to your life? Timers automate your lighting schedule. You don’t have to remember to turn your lights on and off every day. The timer does it for you automatically. This can be especially helpful if you have a busy lifestyle. It can also be helpful if you travel frequently. With a timer, you can be sure that your lights will always turn on and off as scheduled. This can give you peace of mind knowing that your home is safe and secure. Setting a timer is a simple way to make your life easier and more convenient. You can set digital timer outdoor lights for convenience.
Choosing the Right Digital Timer for Your Needs
Choosing the right digital timer is important. You need to consider your specific needs and requirements. First, think about the type of lights you want to control. Some timers are designed for low-voltage lights. Others are designed for high-voltage lights. Make sure the timer you choose is compatible with your lights. Second, consider the location of your lights. If your lights are outdoors, you need a timer that is rated for outdoor use. This means it is waterproof and can withstand extreme temperatures. Third, think about the features you need. Do you want a timer with multiple programs? Do you want a timer with a random setting? Do you want a timer that can be controlled remotely? Choose a timer that meets your needs and budget. Setting a timer can be easy if you choose the right one.
- Consider the type of lights you want to control.
- Choose a timer rated for outdoor use if needed.
- Think about the features you need.
- Read reviews before purchasing a timer.
- Compare prices from different retailers.
- Check the timer’s warranty.
Before you buy a digital timer, read reviews from other customers. This can help you get an idea of the timer’s quality and reliability. It can also help you identify any potential problems. Compare prices from different retailers. You may be able to find a better deal online or at a local store. Make sure the timer has a warranty. This will protect you if the timer breaks down or malfunctions. Setting a timer correctly is important. It is easy to do with the right timer. With a little research, you can find the perfect timer for your needs. Consider a digital timer to set outdoor lights.
Fun Fact or Stat: Digital timers with sunrise/sunset settings automatically adjust to changing daylight hours throughout the year!
Compatibility with Different Lights
Is the digital timer compatible with your lights? This is an important question to ask before you buy a timer. Some timers are designed for specific types of lights. For example, some timers are designed for LED lights. Others are designed for incandescent lights. Make sure the timer you choose is compatible with the type of lights you want to control. If you are not sure, check the timer’s specifications or ask a salesperson. Using the wrong timer can damage your lights or create a fire hazard. Setting a timer correctly is important for safety. Always check compatibility before you set digital timer outdoor lights.
Weather Resistance and Durability
If you are using a digital timer outdoors, it needs to be weather-resistant. This means it can withstand rain, snow, and other harsh weather conditions. Look for a timer that is specifically designed for outdoor use. These timers are usually made from durable materials. They are also sealed to protect them from moisture. Avoid using indoor timers outdoors. They are not designed to withstand the elements. They can quickly break down or become damaged. Setting a timer that is not weather-resistant can be dangerous. Ensure the timer is durable enough to handle the elements. Set digital timer outdoor lights with a weather-resistant timer.
Advanced Features and Customization
Do you want a digital timer with advanced features? Some timers offer a variety of advanced features. These features can make it easier to control your lights. For example, some timers have multiple programs. This allows you to set different schedules for different days of the week. Some timers have a random setting. This makes your lights turn on and off at random times. This can help deter burglars. Some timers can be controlled remotely. This allows you to turn your lights on and off from anywhere in the world. Setting a timer with advanced features can be more convenient. It also gives you more control over your lights. Choose a timer that has the features you need. Set digital timer outdoor lights for your convenience.
How to Install an Outdoor Light Timer

Installing an outdoor light timer is a relatively simple process. However, it is important to follow the instructions carefully. This will ensure that the timer is installed correctly and safely. First, turn off the power to the circuit that controls your outdoor lights. This is important to prevent electric shock. Second, remove the existing light fixture or switch. Third, connect the wires from the timer to the wires from the circuit. Make sure to match the colors of the wires. Black to black, white to white, and green to green. Fourth, mount the timer to the wall or post. Fifth, turn the power back on to the circuit. Sixth, test the timer to make sure it is working correctly. Setting a timer up properly is important for safety and function.
- Turn off the power to the circuit.
- Remove the existing light fixture or switch.
- Connect the wires from the timer to the circuit wires.
- Mount the timer to the wall or post.
- Turn the power back on and test the timer.
If you are not comfortable working with electricity, hire a qualified electrician. An electrician can install the timer for you safely and correctly. Make sure the timer is installed in a weatherproof enclosure. This will protect it from the elements. Choose a location for the timer that is easily accessible. You need to be able to reach it to set the time and adjust the settings. Setting a timer is a simple task. But make sure it is installed properly. If you are replacing an existing timer, take a picture of the wiring before you disconnect it. This will help you remember how to connect the new timer. Setting digital timer outdoor lights requires careful installation.
Fun Fact or Stat: Properly installed outdoor light timers can increase your home’s resale value!
Safety Precautions During Installation
What safety precautions should you take when installing an outdoor light timer? The most important precaution is to turn off the power to the circuit. This will prevent electric shock. Use a non-contact voltage tester to confirm that the power is off. Wear rubber gloves and safety glasses. This will protect you from electric shock and flying debris. If you are working on a ladder, make sure it is stable and secure. Have someone hold the ladder for you. If you are not comfortable working with electricity, hire a qualified electrician. Setting a timer is not worth risking your safety. Always prioritize safety when working with electricity. Remember to set digital timer outdoor lights safely.
Wiring the Timer Correctly
How do you wire a digital timer correctly? The first step is to identify the wires. Most circuits have three wires: black, white, and green. The black wire is the hot wire. It carries the electricity from the power source. The white wire is the neutral wire. It returns the electricity to the power source. The green wire is the ground wire. It provides a safe path for electricity to flow in case of a fault. Connect the black wire from the timer to the black wire from the circuit. Connect the white wire from the timer to the white wire from the circuit. Connect the green wire from the timer to the green wire from the circuit. Use wire connectors to secure the connections. Setting a timer requires proper wiring. Always double-check your connections. Set digital timer outdoor lights with correct wiring.
Testing the Timer After Installation
After you have installed the digital timer, test it to make sure it is working correctly. Turn on the power to the circuit. Set the timer to turn the lights on and off at specific times. Observe the lights to make sure they turn on and off as scheduled. If the lights do not turn on or off, check the wiring. Make sure the wires are connected correctly. Also, check the settings on the timer. Make sure the time and date are correct. If you are still having problems, consult the timer’s instructions or contact a qualified electrician. Setting a timer is easy. Testing the timer ensures it functions correctly. Set digital timer outdoor lights and test them properly.
Troubleshooting Common Issues with Outdoor Light Timers
Even with careful installation and setting, you might encounter issues with your outdoor light timer. One common problem is that the lights do not turn on or off at the scheduled times. This could be due to a power outage, incorrect settings, or a faulty timer. Another common problem is that the timer stops working altogether. This could be due to a dead battery, a blown fuse, or a damaged timer. Check the timer’s batteries. Replace them if they are dead. Check the fuse or circuit breaker. Replace it if it is blown. If you are still having problems, consult the timer’s instructions or contact a qualified electrician. Setting a timer can sometimes be tricky. Troubleshooting can help fix any issues. Set digital timer outdoor lights and troubleshoot any problems.
| Issue | Possible Cause | Solution |
|---|---|---|
| Lights don’t turn on/off | Power outage, wrong settings, faulty timer | Check power, adjust settings, replace timer |
| Timer stops working | Dead battery, blown fuse, damaged timer | Replace battery, replace fuse, replace timer |
| Lights flicker | Loose wiring, incompatible lights, faulty timer | Tighten wiring, use compatible lights, replace timer |
| Timer resets frequently | Power surges, low battery, faulty timer | Use surge protector, replace battery, replace timer |
Sometimes, the lights may flicker. This could be due to loose wiring, incompatible lights, or a faulty timer. Tighten the wiring connections. Make sure you are using compatible lights. If the problem persists, replace the timer. Another common issue is that the timer resets frequently. This could be due to power surges, a low battery, or a faulty timer. Use a surge protector to protect the timer from power surges. Replace the battery. If the problem continues, replace the timer. Setting a timer can be easy if you know how to troubleshoot it. You can set digital timer outdoor lights and fix common issues.
Fun Fact or Stat: Many digital timers have a built-in surge protection feature to prevent damage from power surges!
Lights Not Turning On or Off
What should you do if your outdoor lights are not turning on or off at the scheduled times? First, check the power supply. Make sure the timer is plugged in and receiving power. Check the batteries. Replace them if they are dead. Second, check the settings on the timer. Make sure the time and date are correct. Make sure the on and off times are set correctly. Third, check the lights themselves. Make sure the bulbs are not burned out. Make sure the lights are properly connected to the timer. If you have checked all of these things and the lights are still not working, the timer may be faulty. You may need to replace it. Setting a timer can be frustrating when things go wrong. Set digital timer outdoor lights and troubleshoot if needed.
Timer Stops Working Completely
What should you do if your digital timer stops working completely? First, check the power supply. Make sure the timer is plugged in and receiving power. Check the batteries. Replace them if they are dead. Second, check the fuse or circuit breaker. Replace it if it is blown. Third, check the timer itself. Look for any signs of damage. If the timer is damaged, you may need to replace it. Sometimes a timer will stop working because it has overheated. Let the timer cool down for a few minutes before trying to use it again. Setting a timer is easier than fixing it. But sometimes you need to troubleshoot. Set digital timer outdoor lights and fix it if it stops working.
Flickering Lights and Other Electrical Issues
What should you do if your outdoor lights are flickering or experiencing other electrical issues? First, turn off the power to the circuit. This will prevent electric shock. Second, check the wiring connections. Make sure the wires are securely connected to the timer and the lights. Loose wiring can cause flickering lights. Third, check the bulbs. Make sure the bulbs are the correct wattage for the timer and the lights. Using the wrong wattage can cause flickering lights. Fourth, check the timer itself. The timer might be faulty. You may need to replace it. Setting a timer doesn’t mean you’re an electrician. Call one if you need help. Set digital timer outdoor lights with professional help if needed.
Summary
Setting a digital timer for your outdoor lights is a smart way to save energy, improve security, and add convenience to your life. There are many different types of timers available. You can choose the one that best meets your needs and budget. Digital timers are more accurate and offer more features than mechanical timers. Photocell timers turn lights on and off based on light levels. Smart timers can be controlled remotely using a smartphone app. Whichever timer you choose, make sure to follow the instructions carefully. This will ensure that it is installed correctly and safely.
With a little effort, you can set digital timer outdoor lights. You will enjoy the benefits of a safer, more energy-efficient, and more convenient home. Remember to take safety precautions when installing the timer. Also, troubleshoot any common issues that may arise. By following these tips, you can get the most out of your outdoor light timer.
Conclusion
Using a digital timer for outdoor lights is a simple and effective way to improve your home. It helps you save energy and enhance security. You can also add convenience to your daily life. Choose the right timer for your needs and follow the instructions carefully. This ensures proper installation and operation. Enjoy the benefits of automated lighting. Set digital timer outdoor lights and enjoy the peace of mind.
Frequently Asked Questions
Question No 1: How do I choose the right digital timer for my outdoor lights?
Answer: Choosing the right digital timer depends on your specific needs. Consider the type of lights you want to control. Some timers are designed for low-voltage lights. Others are designed for high-voltage lights. Make sure the timer is compatible with your lights. Also, consider the location of your lights. If they are outdoors, you need a timer rated for outdoor use. This means it is waterproof and can withstand extreme temperatures. Think about the features you need, like multiple programs or a random setting. Read reviews and compare prices before making a decision. Setting a timer is easier with the right choice.
Question No 2: Can I use an indoor timer for my outdoor lights?
Answer: No, you should not use an indoor timer for your outdoor lights. Indoor timers are not designed to withstand the elements. They are not waterproof and cannot handle extreme temperatures. Using an indoor timer outdoors can be dangerous. It can create a fire hazard or cause the timer to fail. Always use a timer that is specifically designed for outdoor use. These timers are made from durable materials and are sealed to protect them from moisture. Using the correct timer ensures safety. Setting a timer for outdoor use requires a special device.
Question No 3: How do I set the on and off times on my digital timer?
Answer: Setting the on and off times on your digital timer is usually a simple process. Most timers have buttons and a display screen. This allows you to easily set the time and date. Consult the instructions that come with your timer. The instructions will guide you through the process step by step. Some timers have special features. These features include sunrise and sunset settings. These settings automatically adjust the on and off times based on the time of year. Understanding the instructions helps when you set digital timer outdoor lights.
Question No 4: What should I do if my outdoor lights are not turning on or off at the scheduled times?
Answer: If your outdoor lights are not turning on or off at the scheduled times, there are several things you can check. First, make sure the timer is plugged in and receiving power. Second, check the batteries. Replace them if they are dead. Third, check the settings on the timer. Make sure the time and date are correct. Make sure the on and off times are set correctly. Fourth, check the lights themselves. Make sure the bulbs are not burned out. If you have checked all of these things and the lights are still not working, the timer may be faulty. If it is still faulty, you will need to replace it. Check everything before you set digital timer outdoor lights.
Question No 5: How can I save energy by using a digital timer for my outdoor lights?
Answer: You can save energy by using a digital timer to control your outdoor lights. Set the timer to turn the lights on only when needed. This prevents you from wasting electricity by leaving them on all night. For example, you can set the timer to turn the lights on at dusk and turn them off at dawn. You can also set the timer to turn the lights on only when you are away from home. By using a timer, you can significantly reduce your lighting energy consumption. You can reduce your carbon footprint. Remember to set digital timer outdoor lights for energy savings.
Question No 6: Can a digital timer improve my home security?
Answer: Yes, a digital timer can improve your home security. Timers make it look like someone is home, even when you are away. This can deter burglars and other criminals. Burglars are more likely to target homes that appear to be unoccupied. By setting your outdoor lights to turn on and off automatically, you can make your home look lived-in. This can make it a less attractive target for burglars. It is a simple way to improve your home’s safety. So, set digital timer outdoor lights to make your home safer from burglars.
