Have you ever seen a cool rock? Did you pick it up and keep it? Maybe you even painted it! Some people make amazing art with stones. This is called stone art for gardens. It can make your yard look super cool.
Stone art for gardens can be big or small. You can use it to make your garden special. Let’s learn more about it!
Key Takeaways
- Stone art for gardens adds beauty and fun to any outdoor space.
- You can create stone art yourself or buy it from artists.
- Different types of stones can create unique garden art pieces.
- Stone art is durable and can withstand different weather conditions.
- Adding stone art to your garden is an easy way to personalize it.

Cool Stone Art for Gardens
Have you ever thought about using stones to decorate your garden? Stone art for gardens is a fun way to add personality. You can create many different things with stones. Think about making a stone tower. Or you could paint rocks to look like animals. Maybe you want to build a small stone bridge. These are all examples of stone art for gardens. It is a great way to be creative outside. Stone art makes your garden unique and interesting. People will love to see what you have made. It is also a fun project to do with your family. You can collect stones together and plan your art. Then, you can work together to create something beautiful. Stone art is a great way to enjoy nature and art at the same time. Your garden will become a special place with your own stone creations.
- Paint stones to look like ladybugs.
- Build a mini stone tower.
- Create a stone path.
- Make a rock garden.
- Stack stones to make sculptures.
Stone art for gardens is not just about making things look pretty. It is also about using natural materials. Stones are a natural resource. When you use them, you are connecting with nature. You can find stones in your backyard. Or you can collect them on a nature walk. Each stone is different. Some are smooth, and some are rough. Some are big, and some are small. This makes each piece of stone art unique. You can also use different colors of stones. Some stones are gray, and some are brown. Some even have colorful patterns. When you combine different stones, you create interesting textures and designs. Stone art can also be a learning experience. You can learn about different types of rocks. You can also learn about the environment. It is a fun and educational hobby. Your garden will be a beautiful and interesting place to explore.
Fun Fact or Stat: Did you know that the oldest known stone art dates back over 40,000 years? People have been using stones to create art for a very long time!
What Kind of Stones Should I Use?
Choosing the right stones is key to creating great stone art. Do you have a favorite kind of stone? Different stones have different looks and feels. Smooth river stones are good for painting. Rougher stones can add texture to your art. You can use big stones to make sculptures. Small stones are good for mosaics. Think about what you want to create. Then, choose the stones that will work best. Also, think about the colors of the stones. Do you want all the stones to be the same color? Or do you want to mix different colors? You can find stones in many places. Your backyard, a local park, or even a craft store. Make sure you have permission to collect stones from public places. Have fun experimenting with different types of stones. You will be surprised at what you can create.
How Can I Protect My Stone Art?
You want your stone art to last a long time. So, how can you protect it? One way is to use a sealant. A sealant is a special liquid. You put it on the stones to protect them from the weather. This will help the colors stay bright. It will also prevent the stones from cracking. You can find sealant at a hardware store. Make sure to follow the instructions carefully. Another way to protect your stone art is to place it in a sheltered spot. For example, you could put it under a tree. Or you could put it on a covered porch. This will help protect it from the sun and rain. You should also check your stone art regularly. If you see any cracks or damage, fix it right away. This will prevent the damage from getting worse. Taking care of your stone art will help it stay beautiful for many years.
Where Should I Put My Stone Art?
Where you put your stone art is very important. The right spot can make your art look even better. Think about the size of your art. A big stone sculpture might need a lot of space. A small painted rock can go almost anywhere. Consider the colors of your art. Do they match the colors of your garden? If not, you might want to put them somewhere else. Think about the light in your garden. Some spots are sunny, and some are shady. Some stone art looks better in the sun. Other stone art looks better in the shade. You can also use stone art to highlight certain areas of your garden. For example, you could put a stone path leading to your favorite flowers. Or you could put a stone sculpture near your pond. Experiment with different locations. See what looks best to you. Your stone art will add beauty and interest to your garden.
Fun Fact or Stat: Some artists create massive stone sculptures that weigh several tons! These sculptures can take years to complete.

Making Stone Animals for Your Garden
Do you like animals? You can make stone animals for your garden. This is a fun and easy way to create stone art for gardens. First, find some stones that look like animals. A round stone could be a turtle. A long stone could be a snake. Use your imagination! Then, paint the stones to look like the animals. You can use acrylic paint. This type of paint is good for outdoor use. Add details like eyes, noses, and spots. You can also use other materials. For example, you could use twigs for legs. Or you could use leaves for ears. Once the paint is dry, you can put your stone animals in your garden. Place them among the plants and flowers. They will look like they are hiding in the garden. Your friends and family will love to see your stone animals. It is a fun and creative way to decorate your garden.
- Paint ladybugs on small stones.
- Make a stone turtle with a round stone.
- Create a stone snake with a long stone.
- Paint a stone cat or dog.
- Add googly eyes to your stone animals.
- Use twigs for animal legs.
Making stone animals is a great way to connect with nature. You are using natural materials to create something new. You are also learning about animals. You can research different animals. Then, you can try to recreate them with stones. This is a fun and educational activity. Stone art animals can also add a touch of whimsy to your garden. Whimsy means something that is playful or unusual. Your stone animals will make people smile. They will also add a sense of fun to your garden. You can even create a whole stone animal family. Imagine a stone bear with her stone cubs. Or a stone bird with her stone chicks. Your garden will become a magical place with your stone art animals.
Fun Fact or Stat: The Nazca Lines in Peru are giant animal figures drawn on the ground using stones. Some of these figures are over 1,200 feet long!
What Kind of Paint Should I Use?
Choosing the right paint is very important. You want the paint to last a long time. You also want the paint to look good. Acrylic paint is a good choice for stone art. It is waterproof and durable. This means it can withstand the weather. It also comes in many different colors. You can find acrylic paint at a craft store. Make sure to buy paint that is designed for outdoor use. This will help it last longer. Before you start painting, clean the stones. Use soap and water to remove any dirt or grime. This will help the paint stick to the stones better. Let the stones dry completely before you start painting. You can also use a primer. A primer is a special paint that you put on before the main paint. It helps the paint stick even better. Have fun experimenting with different colors and techniques. Your stone art will look amazing.
How Can I Make My Stone Animals Look Realistic?
Do you want your stone animals to look realistic? There are a few things you can do. First, study real animals. Look at pictures of them. Pay attention to their shapes and colors. Notice the details, like their eyes, noses, and fur. Then, try to recreate these details on your stones. Use different colors of paint to create shading and highlights. This will make your animals look more three-dimensional. You can also use different textures to create a more realistic look. For example, you could use a rough brush to create fur. Or you could use a sponge to create spots. Don’t be afraid to experiment. The more you practice, the better you will get. Your stone animals will look so realistic that people will think they are real.
What Other Materials Can I Use?
Paint is not the only material you can use for stone art. You can also use other materials to add details and texture. Twigs can be used for legs or antlers. Leaves can be used for ears or wings. Small stones can be used for eyes or noses. You can also use glue to attach these materials to the stones. Make sure to use a waterproof glue. This will help the materials stay in place, even in the rain. You can also use yarn or string to add texture. Wrap the yarn around the stones to create fur or feathers. You can also use beads or sequins to add sparkle. Let your imagination run wild. There are no limits to what you can create. Your stone art will be unique and beautiful.
Fun Fact or Stat: Some artists use power tools to carve intricate designs into stones. This requires a lot of skill and practice.

Painting Stone Flowers for Your Garden
Flowers are beautiful. You can make stone flowers for your garden. This is a fun and easy way to add color. Find some flat, round stones. These will be the petals of your flowers. Then, paint the stones with bright colors. You can use different colors for each petal. Or you can use different shades of the same color. Add details like veins and spots. You can also paint a small stone yellow. This will be the center of the flower. Once the paint is dry, glue the petals around the center stone. You can also use a green stick for the stem. Glue the flower to the top of the stick. Now you have a stone flower! Put your stone flowers in your garden. They will add a touch of beauty to your outdoor space. Stone art for gardens is so much fun!
- Paint colorful petals on flat stones.
- Glue the petals around a yellow center stone.
- Use a green stick for the stem.
- Create different types of flowers.
- Add details like veins and spots.
- Arrange your stone flowers in a flower bed.
Making stone flowers is a great way to brighten up your garden. You can create flowers that bloom all year round. Unlike real flowers, stone flowers will never wilt. They will always look beautiful, no matter the weather. You can also customize your stone flowers. Choose your favorite colors and designs. You can even create flowers that don’t exist in nature. Imagine a blue rose or a purple daisy. Your stone flowers will be unique and special. Stone art flowers also make great gifts. You can give them to your friends and family. They will appreciate your thoughtfulness and creativity. Your stone flowers will bring joy to everyone who sees them.
Fun Fact or Stat: The world’s largest flower, the Rafflesia, can grow up to 3 feet in diameter!
What Kind of Stone Shapes Work Best?
Choosing the right stone shapes is important for making stone flowers. Flat, round stones work best for petals. These stones are easy to paint and glue. You can also use oval-shaped stones. These can be used for longer, more pointed petals. Small, round stones work well for the center of the flower. You can also use irregular-shaped stones. These can add texture and interest to your flowers. Look for stones with interesting patterns or colors. These can make your flowers even more unique. Experiment with different stone shapes. See what works best for you. Your stone art flowers will be beautiful, no matter what shapes you use.
How Can I Make My Stone Flowers Look More Realistic?
Do you want your stone flowers to look more realistic? There are a few things you can do. First, study real flowers. Look at pictures of them. Pay attention to their shapes and colors. Notice the details, like the veins in the petals. Then, try to recreate these details on your stones. Use different shades of paint to create depth and dimension. You can also use a fine brush to paint delicate lines. Add highlights and shadows to make the petals look more three-dimensional. You can also use different textures to create a more realistic look. For example, you could use a sponge to create a rough texture on the petals. Or you could use a toothpick to create small dots. Your stone flowers will look so realistic that people will think they are real.
How Can I Display My Stone Flowers?
There are many ways to display your stone flowers. You can put them in a flower bed. Arrange them among your real flowers. This will add a touch of whimsy to your garden. You can also put them in a pot. Fill the pot with soil or gravel. Then, arrange your stone flowers in the pot. This will create a beautiful centerpiece. You can also hang your stone flowers on the wall. Use wire or string to attach them to a hook. This will create a unique and eye-catching display. You can also give your stone flowers as gifts. Wrap them in tissue paper and tie them with a ribbon. Your friends and family will love your handmade gifts. Your stone art flowers will brighten up any space.
Fun Fact or Stat: The ancient art of flower arranging, called Ikebana, originated in Japan in the 6th century.

Creating Stone Mosaics for Garden Paths
Do you want to make your garden path special? You can create a stone mosaic. A mosaic is a picture made of small pieces. You can use small stones to make a mosaic. First, gather your stones. You will need lots of small stones. Different colors and shapes will make your mosaic more interesting. Then, plan your design. You can draw your design on paper first. Or you can just start placing the stones. Use cement or glue to hold the stones in place. Press the stones firmly into the cement. Let the cement dry completely. Now you have a beautiful stone mosaic path. Your garden will look amazing. Stone art for gardens can be so rewarding!
- Gather small stones of different colors.
- Plan your mosaic design.
- Use cement or glue to hold the stones.
- Press the stones firmly into the cement.
- Let the cement dry completely.
- Create patterns and pictures with the stones.
Creating a stone mosaic path is a great way to add art to your garden. A mosaic path is not only beautiful but also durable. It will last for many years. You can create any design you want. You can make a simple pattern. Or you can create a complex picture. You can even add other materials to your mosaic. For example, you could use broken tiles or glass. This will add color and texture to your mosaic. Stone art mosaics are also a great way to recycle. You can use broken stones or tiles that you find around your house. This will give them a new life. Your mosaic path will be a unique and special addition to your garden.
Fun Fact or Stat: Ancient Roman mosaics are some of the most famous examples of this art form. They can be found in museums all over the world.
Where Can I Find Small Stones?
Finding small stones for your mosaic is important. You need a lot of stones. And you need them in different colors and shapes. You can find stones in many places. Your backyard is a good place to start. Look around your garden and see what you can find. You can also go to a local park or beach. Collect stones from the ground or the shoreline. Make sure you have permission to collect stones from public places. You can also buy small stones at a craft store. These stones are usually pre-sorted by color and size. This can save you time and effort. No matter where you find your stones, make sure to clean them before you use them. Wash them with soap and water to remove any dirt or grime. Your mosaic will look much better with clean stones.
What Kind of Cement or Glue Should I Use?
Choosing the right cement or glue is important. You want something that will hold the stones in place. And you want something that will last a long time. For outdoor mosaics, you need to use a waterproof cement or glue. This will prevent the stones from coming loose in the rain. You can find waterproof cement or glue at a hardware store. Look for products that are specifically designed for mosaics. Follow the instructions carefully when using cement or glue. Wear gloves to protect your hands. And work in a well-ventilated area. Let the cement or glue dry completely before you walk on your mosaic. Your mosaic will be strong and durable for many years.
How Can I Make My Mosaic More Durable?
You want your mosaic to last a long time. So, how can you make it more durable? First, make sure you have a solid foundation. Prepare the ground before you start laying the stones. Remove any loose soil or rocks. Then, pour a layer of concrete. This will provide a stable base for your mosaic. Second, use a strong cement or glue. As mentioned before, waterproof cement or glue is best for outdoor mosaics. Third, press the stones firmly into the cement. This will help them stay in place. Fourth, seal your mosaic after it is finished. Use a sealant that is designed for stone. This will protect the stones from the weather. Finally, avoid walking on your mosaic too much. This will help prevent the stones from cracking or coming loose. Taking these steps will help your mosaic last for many years.
Fun Fact or Stat: Some mosaics are made with tiny pieces of glass called tesserae. These mosaics can be incredibly detailed and colorful.
Stone Garden Markers: A Creative Touch
Do you have trouble remembering what you planted? Stone art for gardens can help! You can make stone garden markers. These are small stones that you label with the names of your plants. Find some smooth, flat stones. Then, use a permanent marker to write the names of your plants on the stones. You can also paint the stones with colorful designs. This will make them even more attractive. Place the stone markers next to your plants. Now you will always know what you planted. And your garden will look more organized. This is a fun and easy way to add a creative touch to your garden. Stone art markers are also very useful.
- Find smooth, flat stones.
- Use a permanent marker to write plant names.
- Paint the stones with colorful designs.
- Place the markers next to your plants.
- Use different colors for different types of plants.
- Make markers for herbs, vegetables, and flowers.
Stone garden markers are a great way to personalize your garden. You can choose any design you want. You can paint the stones with your favorite colors. You can also add drawings or symbols. For example, you could draw a picture of a tomato next to your tomato plants. Or you could draw a picture of a flower next to your flower plants. Stone art markers are also a great way to get kids involved in gardening. They can help you find the stones. They can also help you paint and label them. This is a fun and educational activity for the whole family. Your garden will be a beautiful and organized place with your stone markers.
Fun Fact or Stat: The oldest known garden markers were made from wood and clay. They date back to ancient Egypt.
What Kind of Markers Work Best?
Choosing the right marker is important. You want something that will last a long time. And you want something that will be easy to read. A permanent marker is a good choice for stone garden markers. These markers are waterproof and fade-resistant. This means they will last even in the rain and sun. You can find permanent markers at a craft store or office supply store. Make sure to choose a marker with a fine tip. This will make it easier to write small letters and details. You can also use paint pens. These pens are filled with paint instead of ink. They are also waterproof and fade-resistant. Paint pens come in many different colors. This allows you to create colorful and eye-catching markers. No matter what kind of marker you use, make sure to test it on a scrap stone first. This will help you make sure that the marker works well and that the ink or paint doesn’t bleed.
How Can I Protect My Stone Markers?
You want your stone markers to last a long time. So, how can you protect them? One way is to seal them with a sealant. A sealant is a clear liquid that you apply to the stones. It protects them from the weather and from fading. You can find sealant at a hardware store or craft store. Follow the instructions carefully when applying sealant. Make sure to apply it in a well-ventilated area. Let the sealant dry completely before you put the markers in your garden. Another way to protect your stone markers is to place them in a sheltered spot. For example, you could put them under a tree or next to a fence. This will help protect them from the sun and rain. You can also bring your stone markers inside during the winter. This will prevent them from being damaged by the cold and snow. Taking these steps will help your stone markers last for many years.
What Other Designs Can I Use?
You don’t have to just write plant names on your stone markers. You can also use other designs. You can draw pictures of the plants. For example, you could draw a picture of a tomato next to your tomato plants. Or you could draw a picture of a flower next to your flower plants. You can also use symbols. For example, you could use a sun symbol to mark plants that need a lot of sunlight. Or you could use a water drop symbol to mark plants that need a lot of water. You can also use different colors to mark different types of plants. For example, you could use green for herbs, red for vegetables, and blue for flowers. Let your imagination run wild. There are no limits to what you can create. Your stone art markers will be unique and beautiful.
Fun Fact or Stat: In the past, people used to write on stones with chalk or charcoal. These markings would often fade away quickly.
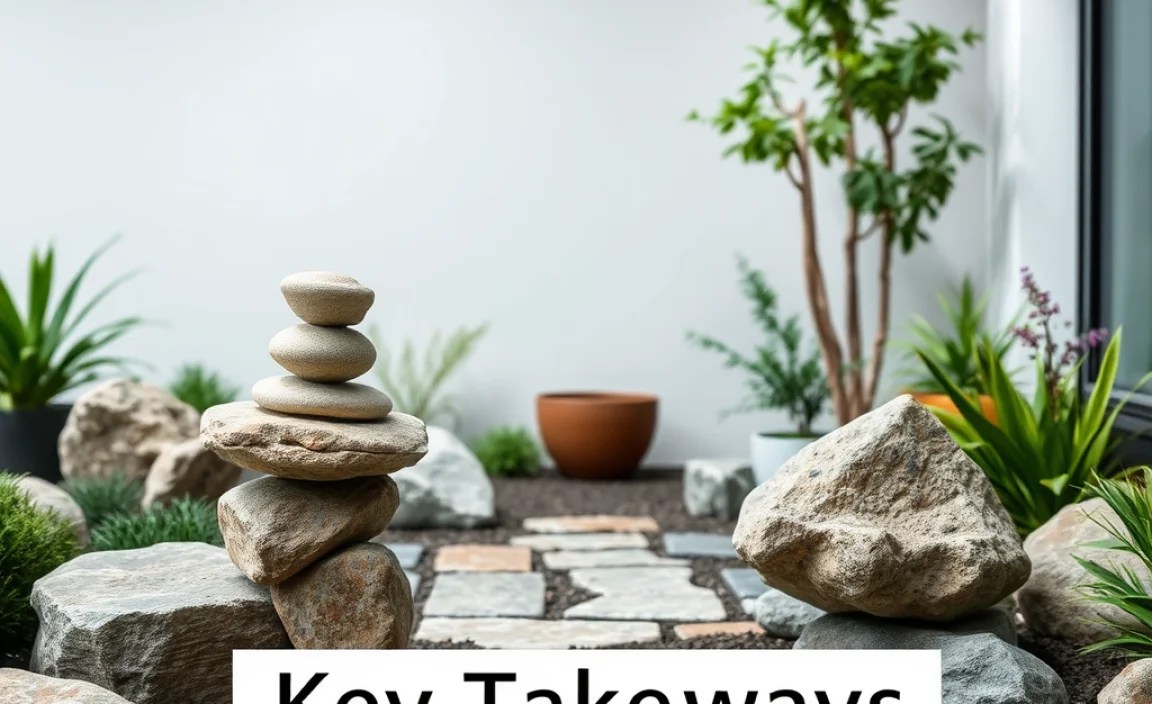
Stacking Stones: Simple Garden Sculptures
Have you ever tried stacking stones? It’s a fun and easy way to create stone art for gardens. Find some flat stones. Try to find stones of different sizes. Then, start stacking them. Place the largest stone on the bottom. Then, place smaller stones on top. Try to balance the stones. See how high you can stack them. You can create simple towers or more complex sculptures. These stone stacks will add a touch of whimsy to your garden. Stone art sculptures are also very calming to look at.
- Find flat stones of different sizes.
- Place the largest stone on the bottom.
- Balance smaller stones on top.
- Create simple towers or complex sculptures.
- Try different stacking techniques.
- Add stone stacks to your garden.
Stacking stones is a great way to connect with nature. You are using natural materials to create something new. You are also learning about balance and gravity. It takes skill and patience to stack stones. But the results are worth it. Stone stacks are beautiful and calming to look at. They can also be a symbol of peace and harmony. Stone art sculptures are also a great conversation starter. People will be curious about how you created them. Your garden will be a unique and special place with your stone stacks.
Fun Fact or Stat: Stone stacking is an ancient art form that has been practiced by cultures all over the world.
What Kind of Stones Are Best for Stacking?
Choosing the right stones is important for stacking. You want stones that are flat and stable. This will make it easier to balance them. Flat river stones are a good choice. They are smooth and easy to stack. You can also use slate stones. These stones are thin and flat. They are also very durable. Avoid using round or irregular-shaped stones. These stones are more difficult to balance. They are also more likely to fall over. Look for stones with a rough surface. This will help them grip each other. Experiment with different types of stones. See what works best for you. Your stone art stacks will be beautiful, no matter what stones you use.
How Can I Make My Stone Stacks More Stable?
You want your stone stacks to be stable. So, how can you make them more stable? First, choose a flat and level surface. This will provide a solid foundation for your stack. Second, use the largest stone as the base. This will give your stack a wider base of support. Third, try to center each stone over the stone below it. This will help distribute the weight evenly. Fourth, use small stones to wedge between the larger stones. This will help stabilize the stack. Fifth, be patient. Stone stacking takes time and practice. Don’t get discouraged if your stacks fall over. Just keep trying. With a little practice, you will be able to create stable and beautiful stone stacks.
Where Should I Place My Stone Stacks in the Garden?
Where you place your stone stacks is important. You want to put them in a place where they will be seen and appreciated. You also want to put them in a place where they will be safe and stable. A rock garden is a good place to put stone stacks. The rocks will provide a natural setting for your stacks. You can also put stone stacks near a pond or stream. The water will add a calming element to the scene. Avoid placing stone stacks in high-traffic areas. This will prevent them from being knocked over. Choose a spot that is sheltered from the wind. This will help prevent them from being blown over. Your stone art stacks will add beauty and interest to any location.
Fun Fact or Stat: Some stone stackers can create towers that are over 20 feet tall! These towers require incredible skill and balance.
Summary
Stone art for gardens is a fantastic way to bring creativity and nature together. You can make stone animals, paint stone flowers, create mosaic paths, and even stack stones to make sculptures. Using stones, you can add beauty and personality to your outdoor space. Remember to choose the right stones, use waterproof materials, and protect your art from the weather. Stone art is not only fun but also a great way to connect with nature and express your creativity. So, go outside and start creating your own unique stone art for gardens!
Conclusion
Stone art for gardens is a fun and easy way to add beauty to your yard. You can paint stones, stack them, or create mosaics. Use your imagination and create something special. Stone art lets you connect with nature and express yourself.
Frequently Asked Questions
Question No 1: What kind of stones are best for painting?
Answer: Smooth, flat stones work best for painting. River stones are a great choice because they are usually smooth and easy to hold. You can find them in various sizes, making them perfect for different projects. Before you start painting, wash the stones with soap and water to remove any dirt or grime. This will help the paint stick better. Remember to let the stones dry completely before you start painting. This will ensure that the paint doesn’t smudge or run. With the right stones, your stone art for gardens will look amazing!
Question No 2: What kind of paint should I use for stone art?
Answer: Acrylic paint is the best choice for stone art. It is waterproof and durable, which means it can withstand different weather conditions. Acrylic paint also comes in a wide variety of colors, so you can create any design you want. You can find acrylic paint at most craft stores. Make sure to buy paint that is designed for outdoor use. This will help your art last longer. Before you start painting, you might want to apply a primer to the stones. A primer is a special paint that helps the acrylic paint stick better. This will make your stone art even more durable.
Question No 3: How can I protect my stone art from the weather?
Answer: To protect your stone art for gardens from the weather, you should use a sealant. A sealant is a clear liquid that you apply to the painted stones. It creates a protective layer that prevents the paint from fading or peeling. You can find sealant at most hardware stores. Make sure to choose a sealant that is designed for outdoor use. Follow the instructions on the sealant carefully. You will usually need to apply several coats of sealant. Let each coat dry completely before applying the next one. This will ensure that your stone art stays beautiful for many years.
Question No 4: Where can I find inspiration for my stone art?
Answer: You can find inspiration for your stone art everywhere! Look at nature around you. What animals, plants, or patterns do you see? You can also look online for ideas. There are many websites and social media pages that showcase beautiful stone art. Visit local gardens and parks to see how they use stones in their landscaping. Don’t be afraid to experiment and try new things. The most important thing is to have fun and let your creativity flow. Your stone art for gardens will be unique and special because it comes from your own imagination.
Question No 5: Can I involve my kids in creating stone art?
Answer: Yes, absolutely! Creating stone art for gardens is a great activity to do with kids. They can help you find stones, wash them, and paint them. It’s a fun way to spend time together and encourage their creativity. Make sure to supervise them closely, especially when using paint or sealant. You can let them choose their own designs and colors. This will help them feel ownership of the project. Stone art for gardens is a wonderful way to teach kids about nature and art at the same time. They will be so proud of their creations!
Question No 6: What are some easy stone art ideas for beginners?
Answer: There are many easy stone art for gardens ideas for beginners. Painting ladybugs or other simple insects on small stones is a great start. You can also paint simple flower designs or geometric patterns. Stacking stones to create small towers is another easy and fun project. You can even write inspirational words or phrases on the stones. Don’t worry about being perfect. The most important thing is to have fun and experiment. As you gain more experience, you can try more complex designs. Stone art for gardens is a journey of creativity, so enjoy the process!
