Do you love seeing pretty lights outside? Imagine your yard sparkling every night. But who wants to plug and unplug them all the time? What if there was an easy way to control your lights? A timer box outdoor lights can help you do just that. It makes your life easier and your yard brighter.
These boxes are super useful. They turn your outdoor lights on and off automatically. This can save you time and energy. Plus, it can make your home look safer. Let’s find out more about these cool devices.
Key Takeaways
- Timer box outdoor lights offer convenience and energy savings by automating your lighting.
- Installing a timer box can enhance your home’s security by making it appear occupied.
- Consider weather resistance and ease of programming when choosing a timer box.
- Regularly check your timer box to ensure it’s working correctly and adjust settings as needed.
- Using a timer box can extend the lifespan of your outdoor lights by preventing overuse.
What Is a Timer Box for Outdoor Lights?

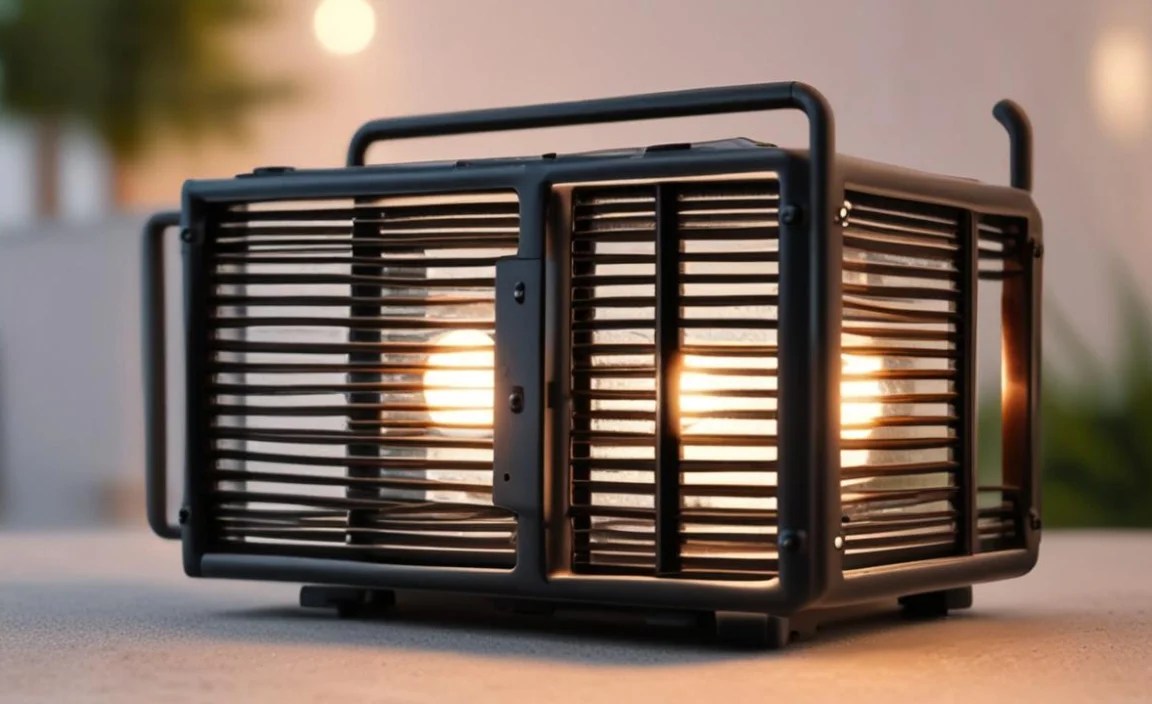
A timer box for outdoor lights is a special box. It controls when your lights turn on and off. Think of it like a little brain for your lights. It follows a schedule you set. You can tell it to turn on the lights at sunset. Then, it can turn them off at sunrise. This is great for holiday lights. It also works for garden lights and security lights. A timer box makes everything automatic. You don’t have to remember to do it yourself. This saves you time and energy. It also helps your lights last longer. You are not using them more than you need to. These boxes are usually weatherproof. So, they can handle rain, snow, and sunshine. They are a smart way to manage your outdoor lighting.
- Timer boxes automate outdoor lighting.
- They save time and energy.
- Timer boxes can improve home security.
- They are usually weatherproof.
- You can set different schedules.
Imagine you have a lot of outdoor lights. You use them for parties and holidays. But plugging them in every night is a chore. A timer box solves this problem. You set it once, and it does the rest. Some timer boxes even have special features. They can adjust the lights based on the weather. Or, they can dim the lights at certain times. This makes your yard look beautiful without any effort. Plus, you save money on your electricity bill. A timer box is a simple way to make your life easier and your home brighter. It is a great tool for anyone who loves outdoor lights.
Fun Fact or Stat: Did you know that using a timer for your outdoor lights can save you up to 30% on your electricity bill?
Why Use a Timer Box?
Have you ever forgotten to turn off your outdoor lights? Maybe you left them on all night by accident. This wastes energy and money. A timer box can prevent this. It turns your lights off automatically. You can set it to turn them on only when you need them. This is especially useful when you’re on vacation. It makes your home look occupied. This can help scare away burglars. Plus, you don’t have to ask a neighbor to turn your lights on and off. A timer box is a simple and effective way to manage your outdoor lighting. It gives you peace of mind and saves you money.
What Types of Lights Work with a Timer?
Do you have string lights in your backyard? Or maybe spotlights shining on your house? Good news! A timer box can work with many types of outdoor lights. It works with LED lights, which are very energy-efficient. It also works with incandescent lights, which are the older style. You can use it for holiday lights, garden lights, and security lights. The key is to make sure the timer box is rated for the type of lights you’re using. Check the label on the box to be sure. This will help you avoid any problems and keep your lights shining bright.
How Does a Timer Box Save Energy?
Imagine you’re brushing your teeth. You turn off the water while you brush. This saves water, right? A timer box does the same thing for your lights. It turns them off when you don’t need them. This saves energy. When lights are on all night, they use a lot of electricity. A timer box makes sure they’re only on when it’s dark. This can save you money on your electricity bill. Plus, it’s good for the environment. Using less energy helps reduce pollution. So, a timer box is a smart choice for your wallet and the planet.
Choosing the Right Timer Box for Outdoor Lights

Picking the right timer box for outdoor lights can seem tricky. But it’s not too hard if you know what to look for. First, think about where you’ll put the box. Is it in a place that gets a lot of rain? If so, you need a weatherproof box. Look for one that says “outdoor rated.” Next, consider how many lights you want to control. Some boxes can handle more lights than others. Check the maximum wattage (power) the box can handle. Also, think about how easy it is to program. Some boxes have simple buttons and a screen. Others use an app on your phone. Choose one that you find easy to use. A good timer box will last a long time and make your life easier.
- Consider the weather rating of the box.
- Check the maximum wattage it can handle.
- Think about how easy it is to program.
- Decide if you want a digital or mechanical timer.
- Read reviews from other users.
Let’s say you have a big garden with lots of lights. You want to control them all with one timer box. You’ll need a box that can handle a lot of power. Check the wattage of each light. Add them all up. Make sure the timer box can handle that total. Also, think about how you want to program the timer. Do you want to set it once and forget it? Or do you want to change the settings often? If you like to change things, an app-controlled timer might be best. This lets you adjust the settings from your phone. Choosing the right timer box will make your outdoor lights shine just the way you want.
Fun Fact or Stat: Digital timer boxes are more precise than mechanical ones, with accuracy to the minute!
Weatherproof Features to Look For
Imagine a big rainstorm. The rain is pouring down. Your timer box is outside in the storm. You want to make sure it’s safe. Look for a timer box that is “weatherproof.” This means it can handle rain, snow, and sun. Check for a box with a tight seal. This keeps water out. Also, look for a box made of strong plastic. This will protect it from damage. Some boxes even have a cover to protect the buttons. A weatherproof timer box will last longer. It will also keep your lights working properly, no matter the weather.
Digital vs. Mechanical Timers
Have you ever seen a clock with hands? That’s like a mechanical timer. It has a dial that you turn to set the time. Digital timers are different. They have buttons and a screen. You can set the time very precisely. Mechanical timers are simple and easy to use. But they might not be as accurate. Digital timers can do more things. They can have different settings for different days. They can also adjust for daylight saving time. Think about what’s important to you. Do you want simple or precise? This will help you choose the right timer.
Maximum Wattage and Load Capacity
Imagine you’re carrying a lot of books. You can only carry so many before it gets too heavy. A timer box is the same way. It can only handle so much power. This is called wattage. Each light bulb uses a certain amount of watts. Add up the watts of all the lights you want to control. Make sure the timer box can handle that total. If you use too many watts, the timer box could break. Or it could be dangerous. Always check the maximum wattage before you plug in your lights. This will keep you safe and your lights shining bright.
Installing Your Outdoor Light Timer Box
Installing your outdoor light timer box might sound hard. But it’s usually pretty simple. First, turn off the power to the lights. This is very important for safety. Find a good spot for the timer box. It should be close to an outlet. Make sure the spot is protected from the weather. Follow the instructions that came with the timer box. Usually, you’ll need to plug the box into the outlet. Then, plug your lights into the timer box. Some timer boxes need to be mounted to a wall. Use screws to attach it securely. Once everything is plugged in, turn the power back on. Set the timer according to the instructions. Now your lights should turn on and off automatically.
| Step | Description |
|---|---|
| 1 | Turn off the power to the outdoor lights. |
| 2 | Choose a suitable location for the timer box. |
| 3 | Mount the timer box if necessary. |
| 4 | Plug the timer box into the outlet. |
| 5 | Plug the lights into the timer box. |
| 6 | Turn the power back on and set the timer. |
Let’s say you’re installing a timer box for your holiday lights. You want them to turn on every evening at 6 pm. And you want them to turn off at 6 am. First, find an outlet near your lights. Make sure it’s an outdoor outlet. Plug the timer box into the outlet. Then, plug your holiday lights into the timer box. Use the buttons on the timer box to set the on and off times. Test the timer to make sure it’s working correctly. If the lights don’t turn on at 6 pm, check the settings. Make sure everything is plugged in tightly. With a little patience, you’ll have your holiday lights shining bright on schedule.
Fun Fact or Stat: Most outdoor timer boxes are designed to be installed in under 30 minutes!
Safety Precautions During Installation
Imagine you’re riding your bike. You wear a helmet to stay safe, right? Installing a timer box also requires safety. Always turn off the power first. This prevents electric shock. Wear gloves to protect your hands. If you’re not sure how to install the box, ask for help. An electrician can do it for you. Never work with electricity if you’re wet. Water and electricity don’t mix. Following these safety tips will keep you safe during installation.
Step-by-Step Installation Guide
Do you like following recipes when you cook? Installing a timer box is like following a recipe. First, gather your tools. You’ll need a screwdriver and maybe some screws. Then, read the instructions that came with the timer box. Turn off the power to the outlet. Find a good spot for the timer box. Mount it to the wall if needed. Plug the timer box into the outlet. Plug your lights into the timer box. Turn the power back on. Set the timer. Test it to make sure it works. Following these steps will make installation easy.
Troubleshooting Common Installation Issues
Sometimes things don’t go as planned. Maybe the lights don’t turn on. Or maybe the timer doesn’t work. Don’t worry! There are ways to fix it. First, check the power. Make sure the outlet is working. Check the timer settings. Make sure they’re correct. Make sure the lights are plugged in tightly. If the timer still doesn’t work, try resetting it. Some timers have a reset button. If all else fails, call an electrician. They can help you figure out what’s wrong.
Programming Your Outdoor Light Timer Box

Programming your outdoor light timer box is like teaching it a schedule. You tell it when to turn the lights on and off. Most timer boxes have buttons or a screen. Some even have an app for your phone. To start, find the “set” button. Press it to enter programming mode. Then, use the buttons to set the current time. Next, set the “on” time. This is when you want the lights to turn on. Then, set the “off” time. This is when you want the lights to turn off. Some timers let you set different schedules for different days. This is useful if you want the lights to stay on later on weekends. Once you’ve set the schedule, press the “set” button again to save it. Now your lights will follow the schedule you set.
- Find the “set” button on the timer box.
- Set the current time accurately.
- Program the “on” and “off” times.
- Consider setting different schedules for different days.
- Save the schedule after programming.
- Test the timer to ensure it works correctly.
Let’s say you want your garden lights to turn on at sunset. And you want them to turn off at 11 pm. First, find out what time sunset is. You can check it online or on a weather app. Then, press the “set” button on your timer box. Use the buttons to set the current time. Next, set the “on” time to the sunset time. Set the “off” time to 11 pm. Save the schedule. Now your garden lights will turn on automatically at sunset. They’ll turn off at 11 pm, saving you energy and making your yard look beautiful.
Fun Fact or Stat: Some advanced timer boxes automatically adjust to sunrise and sunset times based on your location!
Setting On and Off Times
Imagine you’re planning a party. You need to set a time for it to start and end. Setting on and off times for your timer box is similar. The “on” time is when you want the lights to turn on. The “off” time is when you want them to turn off. Use the buttons on the timer box to set these times. Be precise. A few minutes can make a difference. Test the settings to make sure they work. This will ensure your lights turn on and off exactly when you want them to.
Using Multiple Schedules
Do you have different routines on weekdays and weekends? Your lights can too! Some timer boxes let you set multiple schedules. You can have one schedule for weekdays. And another schedule for weekends. This is great if you want the lights to stay on later on weekends. Or if you want them to turn on earlier on weekdays. Check your timer box’s instructions to learn how to set multiple schedules. This will give you more control over your outdoor lighting.
Daylight Saving Time Adjustments
Have you ever heard of daylight saving time? It’s when we move the clocks forward in the spring. And back in the fall. This can mess up your timer box’s schedule. Some timer boxes automatically adjust for daylight saving time. Check if yours has this feature. If not, you’ll need to adjust the settings manually. Remember to move the “on” and “off” times forward or backward by one hour. This will keep your lights on schedule, even with daylight saving time.
Maintaining Your Outdoor Light Timer Box
Taking care of your outdoor light timer box is important. It helps it last longer and work better. First, check the box regularly. Look for any signs of damage. Check for cracks or loose wires. Make sure the box is clean. Wipe it down with a damp cloth. Don’t use harsh chemicals. Check the timer settings. Make sure they’re still correct. Sometimes the settings can change accidentally. If you have a battery-powered timer, check the battery. Replace it if it’s low. By taking good care of your timer box, you’ll keep your outdoor lights shining bright for years to come.
- Regularly check the timer box for damage.
- Clean the box with a damp cloth.
- Verify the timer settings are correct.
- Replace the battery if it’s low (for battery-powered timers).
- Protect the box from extreme weather if possible.
Imagine you’re taking care of a plant. You water it, give it sunlight, and protect it from frost. Maintaining your timer box is similar. You need to check it regularly, clean it, and protect it from the weather. If you live in a place with harsh winters, consider covering the timer box with a plastic bag. This will protect it from snow and ice. If you live in a place with hot summers, try to keep the timer box in the shade. This will prevent it from overheating. With a little care, your timer box will stay in good shape for a long time.
Fun Fact or Stat: A well-maintained timer box can last for 5-10 years!
Checking for Damage and Wear
Imagine you’re inspecting your bike. You look for flat tires and loose chains. Checking your timer box is similar. Look for cracks in the plastic. Check for loose wires. Make sure the cover is secure. If you see any damage, fix it right away. Replace the box if necessary. This will prevent further problems and keep your lights working safely.
Cleaning and Weather Protection
Do you ever wash your car? Cleaning your timer box is just as important. Dirt and grime can build up over time. This can make the box less efficient. Wipe it down with a damp cloth. Use a mild soap if needed. Protect the box from the weather. Cover it with a plastic bag during heavy rain or snow. This will keep it working properly for years to come.
Replacing Batteries and Fuses
Some timer boxes use batteries. These batteries power the timer. Over time, the batteries will run out. When this happens, the timer will stop working. Replace the batteries with new ones. Make sure you use the correct type of battery. Some timer boxes also have fuses. A fuse protects the timer from power surges. If the timer stops working, check the fuse. Replace it if it’s blown. Replacing batteries and fuses will keep your timer box running smoothly.
Troubleshooting Common Timer Box Issues
Sometimes your timer box might not work perfectly. The lights might not turn on or off at the right time. Or the timer box itself might stop working. Don’t worry! There are usually simple solutions. First, check the power. Make sure the timer box is plugged in. Check the outlet to see if it’s working. Next, check the timer settings. Make sure the on and off times are correct. Make sure the timer is set to the right day. If the lights still don’t work, check the light bulbs. Make sure they’re not burned out. If the timer box itself isn’t working, try resetting it. Some timer boxes have a reset button. If all else fails, call an electrician. They can help you diagnose the problem and fix it.
- Check the power supply to the timer box.
- Verify the timer settings are accurate.
- Ensure the light bulbs are working.
- Try resetting the timer box.
- Consult an electrician if the problem persists.
Imagine you’re baking a cake. You follow the recipe carefully. But the cake doesn’t rise. What do you do? You check the ingredients. You make sure the oven is set to the right temperature. You troubleshoot the problem. Troubleshooting your timer box is similar. You check the power, the settings, and the light bulbs. You try resetting the timer. With a little detective work, you can usually solve the problem and get your lights working again.
Fun Fact or Stat: Over 80% of timer box issues can be resolved with simple troubleshooting steps!
Lights Not Turning On or Off
Have you ever set an alarm clock? And it didn’t go off? It’s frustrating! It’s the same when your lights don’t turn on or off. First, check the power. Is the timer box plugged in? Is the outlet working? Then, check the settings. Are the on and off times correct? Is the timer set to the right day? If everything looks right, try resetting the timer. If the lights still don’t work, there might be a problem with the light bulbs or the wiring. Call an electrician if you’re not sure how to fix it.
Timer Not Keeping Time
Imagine your watch is running slow. You’d want to fix it, right? It’s the same with your timer box. If it’s not keeping time, it won’t turn the lights on and off correctly. First, check the battery. If it’s low, replace it. Then, check the settings. Make sure the time is set correctly. If the timer is still not keeping time, there might be a problem with the internal clock. You might need to replace the timer box.
Resetting the Timer Box
Sometimes your computer freezes. You need to restart it to get it working again. Resetting your timer box is similar. It can fix minor problems and get the timer working properly. Look for a reset button on the timer box. Press it with a pen or a paperclip. This will reset the timer to its default settings. Then, you’ll need to reprogram the timer with your desired settings. Resetting the timer can often solve simple issues and get your lights back on schedule.
Benefits of Using Outdoor Light Timers
Using outdoor light timers has lots of good things about it. They save you time. You don’t have to turn your lights on and off every day. They save you money. You don’t waste energy by leaving the lights on too long. Timers also make your home safer. They make it look like someone is home, even when you’re away. This can scare away burglars. Plus, timers are easy to use. You set them once, and they do the rest. They’re a simple way to make your life easier and your home more secure. Using timers for your outdoor lights is a smart choice.
- Save time by automating your lighting schedule.
- Reduce energy consumption and lower electricity bills.
- Enhance home security by simulating occupancy.
- Extend the lifespan of your outdoor lights.
- Add convenience to your daily routine.
Let’s say you’re going on vacation. You’re worried about your home being empty. Using a timer for your outdoor lights can help. You can set the lights to turn on every evening. This makes it look like someone is home. Burglars are less likely to break into a home that looks occupied. Plus, you don’t have to ask a neighbor to turn your lights on and off. A timer gives you peace of mind while you’re away. It’s a simple and effective way to protect your home.
Fun Fact or Stat: Homes with automated lighting systems are 30% less likely to be burglarized!
Energy Savings and Cost Reduction
Imagine you’re turning off the lights when you leave a room. This saves energy, right? A timer box does the same thing for your outdoor lights. It turns them off when you don’t need them. This saves energy and money. You’ll see a difference on your electricity bill. Plus, using less energy is good for the environment. It helps reduce pollution and protect our planet. So, using a timer is a win-win for your wallet and the Earth.
Enhanced Home Security
Have you ever seen a house with all the lights off at night? It looks empty, right? This can attract burglars. A timer box can prevent this. It turns your lights on automatically. This makes it look like someone is home. Burglars are less likely to target a home that looks occupied. Using a timer is a simple way to enhance your home security and protect your family.
Convenience and Automation
Do you like doing chores? Probably not! A timer box can make your life easier. It automates your outdoor lighting. You don’t have to remember to turn the lights on and off. The timer does it for you. This frees up your time to do other things. You can relax, play games, or spend time with your family. A timer adds convenience to your life and makes your home more enjoyable.
Summary
A timer box outdoor lights is a great tool. It helps you control your outdoor lights easily. It saves energy and money. It also makes your home safer. You can choose from different types of timer boxes. Some are simple and mechanical. Others are digital and have more features. Installing a timer box is usually easy. You just need to follow the instructions. Programming the timer is also simple. You set the on and off times. Then, the timer does the rest. Taking care of your timer box is important. You need to check it regularly and clean it. This will help it last longer. Using a timer box is a smart choice for your outdoor lighting.
Conclusion
A timer box outdoor lights is a useful device. It makes controlling your lights easy and automatic. You can save energy and money. You can also improve your home’s security. Choose the right timer box for your needs. Install it carefully and program it correctly. With a little effort, you can enjoy the benefits of automated outdoor lighting. These boxes give you convenience, savings, and peace of mind.
Frequently Asked Questions
Question No 1: What is a timer box for outdoor lights?
Answer: A timer box for outdoor lights is a device that automatically turns your outdoor lights on and off based on a schedule you set. It’s like a little clock that controls your lights. You can set it to turn the lights on at sunset and off at sunrise, or any other time you choose. This is great for saving energy and making your home look occupied when you’re away. Timer boxes are usually weatherproof, so they can handle rain, snow, and sunshine.
Question No 2: How does a timer box save energy?
Answer: A timer box saves energy by turning your lights off when you don’t need them. When you leave your lights on all night, they use a lot of electricity. A timer box makes sure they’re only on when it’s dark. This can save you money on your electricity bill. Plus, it’s good for the environment. Using less energy helps reduce pollution. A timer box is an easy way to be more energy-efficient.
Question No 3: Can I use a timer box with any type of outdoor lights?
Answer: Yes, you can use a timer box with most types of outdoor lights. This includes LED lights, incandescent lights, and even holiday lights. The key is to make sure the timer box is rated for the type of lights you’re using. Check the label on the box to see what types of lights it can handle. Also, make sure the timer box can handle the total wattage of all the lights you’re plugging in. This will help you avoid any problems and keep your lights shining bright.
Question No 4: How do I install a timer box for outdoor lights?
Answer: Installing a timer box is usually pretty simple. First, turn off the power to the lights. This is very important for safety. Find a good spot for the timer box. It should be close to an outlet. Make sure the spot is protected from the weather. Follow the instructions that came with the timer box. Usually, you’ll need to plug the box into the outlet. Then, plug your lights into the timer box. Some timer boxes need to be mounted to a wall. Use screws to attach it securely. Once everything is plugged in, turn the power back on and set the timer.
Question No 5: How do I program a timer box for outdoor lights?
Answer: Programming a timer box is like teaching it a schedule. You tell it when to turn the lights on and off. Most timer boxes have buttons or a screen. Some even have an app for your phone. To start, find the “set” button. Press it to enter programming mode. Then, use the buttons to set the current time. Next, set the “on” time. This is when you want the lights to turn on. Then, set the “off” time. This is when you want the lights to turn off. Save the schedule, and you’re done!
Question No 6: What if my lights don’t turn on or off at the right time?
Answer: If your lights aren’t turning on or off at the right time, don’t worry! There are a few things you can check. First, make sure the timer box is plugged in and the outlet is working. Then, double-check the timer settings. Make sure the on and off times are correct. Also, make sure the timer is set to the right day. If everything looks right, try resetting the timer box. If the lights still don’t work, there might be a problem with the light bulbs or the wiring. In that case, it’s best to call an electrician for help.
